How To Fix High Discharge Temperature

Many homeowners experience frustrating issues with their air conditioning systems, especially during the hottest months. One common problem is a high discharge temperature. This means the air coming out of your outdoor AC unit (the condenser) is excessively hot. This not only makes your home less comfortable, but also puts a strain on your system, potentially leading to bigger, more expensive problems down the road.
Before you call a professional, there are several steps you can take to diagnose and potentially fix the issue yourself. This guide will walk you through those steps in a safe and methodical way.
Understanding Discharge Temperature
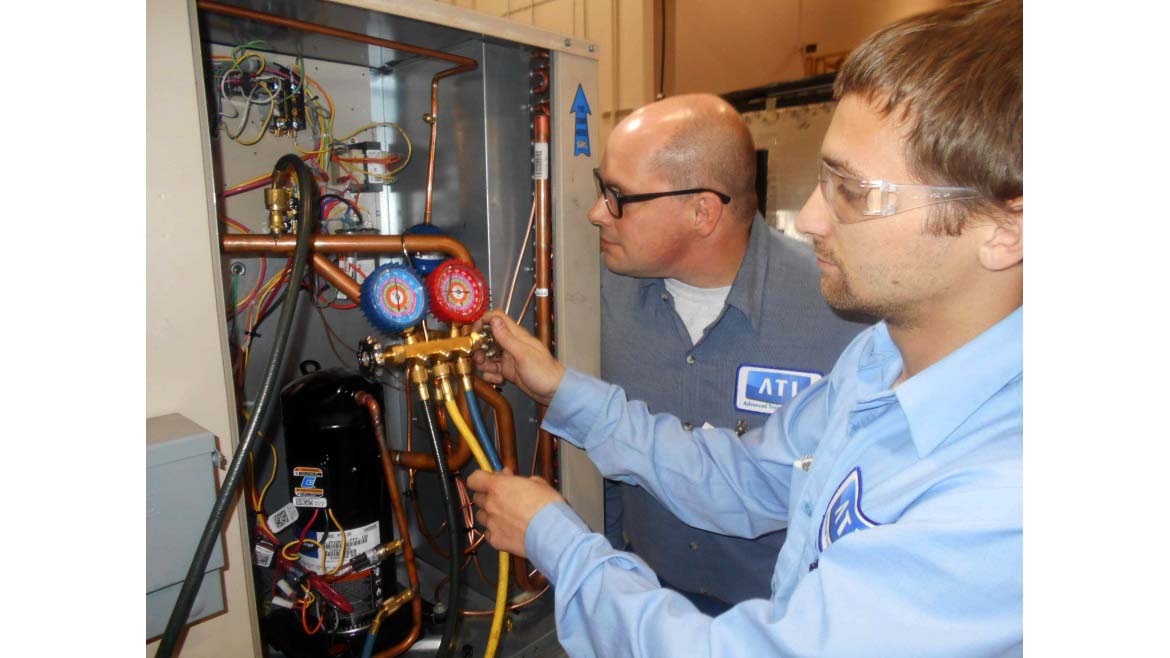
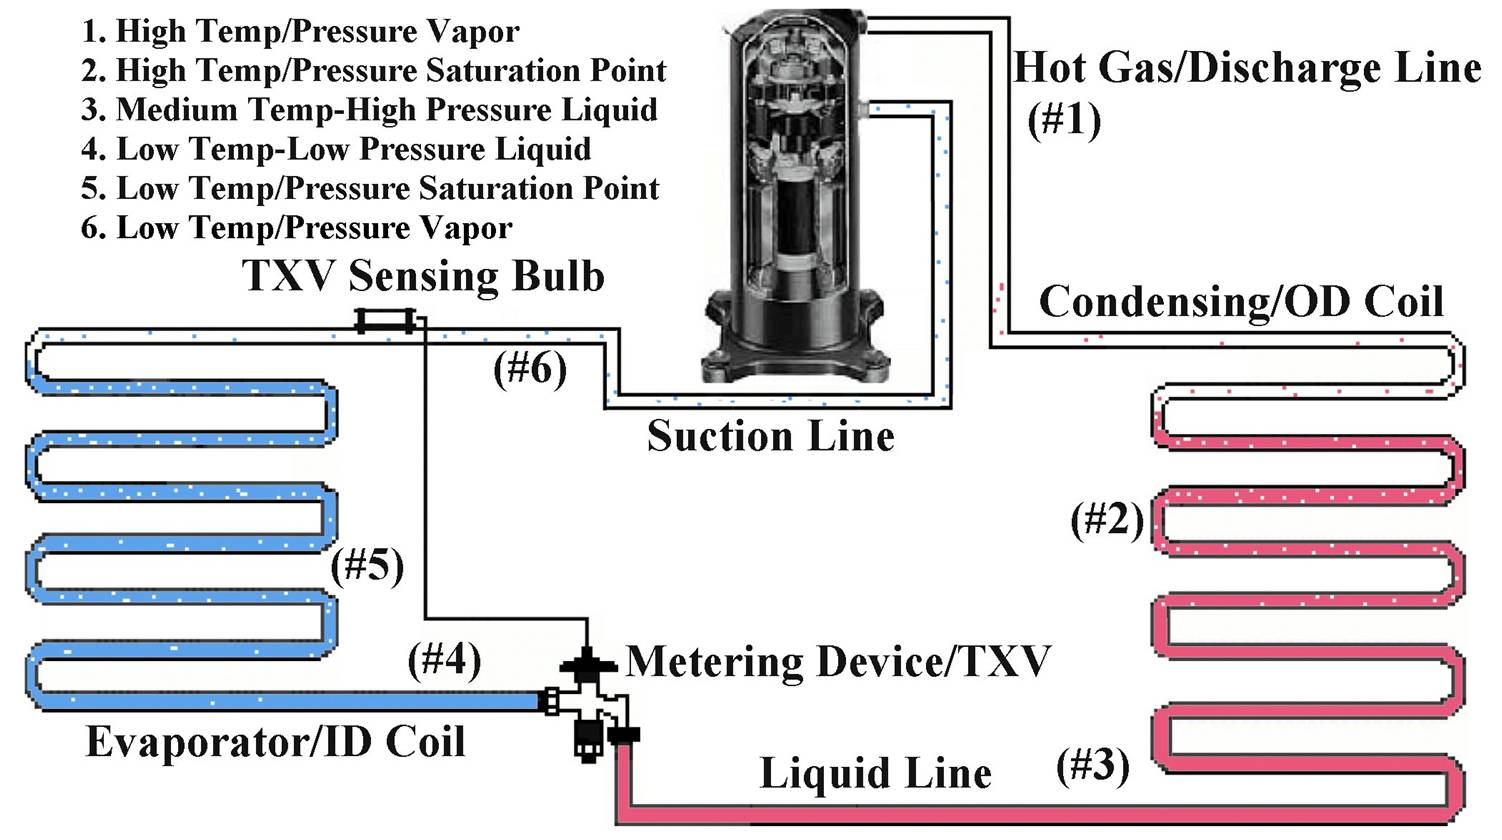
First, it's important to understand what discharge temperature actually is. It's the temperature of the refrigerant gas after it has been compressed by the compressor in your outdoor unit. This process normally generates heat, but excessively high temperatures indicate that the system isn't functioning efficiently and that something is amiss.
Why is high discharge temperature a problem?
- Reduced Cooling Capacity: Your AC won't cool your home as effectively.
- Increased Energy Consumption: The system has to work harder to achieve the same cooling, leading to higher energy bills.
- Compressor Overheating: This can significantly shorten the lifespan of your compressor, the most expensive component of your AC system.
- System Damage: Prolonged high discharge temperatures can lead to other component failures and costly repairs.
Step-by-Step Troubleshooting Guide
Let's get started with troubleshooting your AC unit. Always remember to turn off the power to your AC unit at the breaker box before performing any of these steps. Safety first!
Step 1: Check the Air Filter
This is the easiest and often most overlooked cause of many AC problems, including high discharge temperature. A dirty air filter restricts airflow to the indoor unit (the evaporator coil), which in turn can cause the refrigerant to overheat.
How to check and replace your air filter:
- Locate the air filter. It's usually found in a slot on your indoor unit or where the return air duct connects to the unit.
- Remove the filter.
- Inspect the filter. If it's visibly dirty, clogged with dust, or debris, it needs to be replaced.
- Replace the filter with a new one of the same size and type. Note the direction of the airflow arrow on the filter and install it correctly.
Frequency: Change your air filter every 1-3 months, or more often if you have pets or allergies.
Step 2: Clean the Outdoor Condenser Coil
The outdoor condenser coil is responsible for releasing heat from the refrigerant. If it's covered in dirt, leaves, grass clippings, or other debris, it won't be able to do its job effectively, leading to high discharge temperature.
How to clean the condenser coil:
- Turn off the power to the AC unit at the breaker box.
- Remove any large debris (leaves, twigs, etc.) by hand.
- Use a garden hose with a gentle spray nozzle to wash the coil from the inside out. This will help to push the dirt out of the fins. Avoid using a high-pressure washer, as this can damage the delicate fins.
- Be careful not to bend the fins while cleaning. If they are bent, you can use a fin comb (available at most hardware stores) to straighten them.
- Allow the coil to dry completely before turning the power back on.
Frequency: Clean the condenser coil at least once a year, or more often if you live in a dusty or grassy area.
Step 3: Check for Obstructed Airflow Around the Outdoor Unit
Make sure there is adequate space around the outdoor unit for proper airflow. Obstructions like bushes, fences, or piled-up snow can restrict airflow and cause the unit to overheat.
What to look for:
- Bushes or shrubs growing too close to the unit. Trim them back to allow at least 2-3 feet of clearance.
- Fences or walls that are too close to the unit. The unit should have at least 2-3 feet of clearance on all sides.
- Piled-up snow or debris around the unit in winter. Clear away any obstructions to ensure proper airflow.
Step 4: Inspect the Condenser Fan
The condenser fan draws air across the condenser coil to help release heat. If the fan isn't working properly, it can cause the refrigerant to overheat.
How to check the condenser fan:
- Turn off the power to the AC unit at the breaker box.
- Visually inspect the fan blades for damage. Are any blades broken, bent, or missing?
- Make sure the fan blades are free of debris. Remove any leaves, twigs, or other obstructions.
- Try to spin the fan blades by hand. They should spin freely. If they are stiff or difficult to turn, the fan motor may be failing.
If the fan blades are damaged or the fan motor seems to be failing, you'll need to call a professional for repair.
Step 5: Check the Supply and Return Vents
Ensure that your supply and return vents are not blocked by furniture, rugs, or other objects. Blocked vents can restrict airflow throughout your home, causing the AC system to work harder and potentially leading to high discharge temperature.
What to do:
- Walk through your home and check all of your supply and return vents.
- Make sure that no furniture, rugs, or other objects are blocking the vents.
- Rearrange furniture as needed to ensure that air can flow freely to and from the vents.
Step 6: Check for Leaks in the Ductwork
Leaky ductwork can cause a significant loss of cooled air, forcing your AC system to work harder and potentially leading to high discharge temperature. While you may not be able to find every leak, you can visually inspect the accessible ductwork for obvious signs of damage or leaks.
How to check for duct leaks:
- Inspect the visible ductwork in your attic, basement, or crawl space.
- Look for gaps, holes, or tears in the ductwork.
- Check the seams where the ductwork sections are joined together. Are they properly sealed?
- If you find any leaks, you can try to seal them with duct tape (the metallic kind, not regular tape) or mastic sealant.
For extensive ductwork leaks or inaccessible areas, it's best to call a professional for duct sealing.
When to Call a Professional
While the above steps can address many common causes of high discharge temperature, some issues require professional expertise. Here's when you should call a qualified HVAC technician:
- Refrigerant Leaks: If you suspect a refrigerant leak (e.g., you notice ice forming on the refrigerant lines, hear a hissing sound, or the unit is not cooling effectively even after performing the above steps), do not attempt to fix it yourself. Refrigerant is harmful to the environment and requires specialized equipment and training to handle properly.
- Compressor Problems: The compressor is the heart of your AC system. If you suspect a compressor problem (e.g., the compressor is making unusual noises, the unit is not cooling at all, or you've already tried the above steps and the problem persists), call a professional immediately. Compressor repairs are complex and expensive.
- Electrical Issues: If you suspect an electrical problem (e.g., the breaker keeps tripping, you smell burning, or the unit is not turning on), do not attempt to fix it yourself. Electrical work can be dangerous and should only be performed by a qualified electrician or HVAC technician.
- Fan Motor Problems: If the condenser fan motor appears faulty, especially if it's stiff or making noise, it is best to have it replaced by a professional.
- You've tried all the DIY steps and the problem persists: If you've followed all the troubleshooting steps outlined above and your AC unit is still experiencing high discharge temperature, it's time to call in the experts. There may be a more complex underlying issue that requires specialized tools and knowledge to diagnose and repair.
Preventative Maintenance
The best way to avoid high discharge temperature and other AC problems is to perform regular preventative maintenance. Here are some tips:
- Schedule annual maintenance: Have a qualified HVAC technician inspect and service your AC system at least once a year. This will help to identify and address potential problems before they become major issues.
- Change your air filter regularly: As mentioned earlier, a clean air filter is essential for proper AC operation.
- Clean the condenser coil regularly: Keep the outdoor condenser coil free of dirt and debris.
- Keep the area around the outdoor unit clear: Ensure that there is adequate space around the outdoor unit for proper airflow.
By following these tips, you can help to keep your AC system running efficiently and avoid costly repairs.
Disclaimer: This article provides general troubleshooting advice. Always consult a qualified HVAC technician for any complex or potentially dangerous repairs. The homeowner assumes responsibility for any repairs they choose to undertake themselves.