How To Frame Around Hvac Ducts

Many homeowners encounter a frustrating issue when trying to finish basements, remodel, or even just organize storage spaces: exposed HVAC ducts. These metal behemoths, while essential for heating and cooling, often run right through the middle of where you want to build a wall or ceiling, presenting a significant obstacle. The challenge lies in framing around them effectively, ensuring proper airflow, code compliance, and a finished aesthetic. This article provides a step-by-step guide to safely and effectively frame around HVAC ducts.
Understanding the Problem: Obstruction and Airflow
The core problem is simple: ducts are in the way. But the implications are more complex. Framing *directly against* or *crushing* a duct can severely restrict airflow, leading to:
- Reduced heating/cooling efficiency: Your system has to work harder, increasing energy bills.
- Uneven temperatures: Some rooms get too hot or cold, while others remain comfortable.
- Potential system damage: Overworked components can fail prematurely.
- Condensation issues: Restricted airflow can lead to condensation build-up within the duct, fostering mold growth.
- Noise issues: Restricted airflow often results in increased noise as the system works harder to push air.
Furthermore, you need to consider code compliance. Many local building codes have specific requirements for clearances around HVAC equipment and ducts, ensuring accessibility for maintenance and preventing fire hazards. Ignoring these codes can lead to fines and mandatory rework.
Step 1: Careful Planning and Assessment
Before you even pick up a stud, meticulous planning is essential. This involves:
1.1. Measuring and Sketching:
Precisely measure the dimensions of the duct(s) you need to frame around. Note the height, width, and length of the section you'll be working with. Create a sketch of the area, including the location of the duct(s) and any existing walls or framing. This sketch will be your roadmap.
Consider the overall design. Do you want a soffit (a dropped ceiling section) that completely encloses the duct? Or are you building a framed wall that needs to accommodate it? The design will dictate the framing method.
1.2. Identifying Duct Type and Material:
Determine what type of duct you're dealing with. Common types include:
- Sheet metal ducts: Rigid and typically rectangular or round.
- Flexible ducts: Made of a flexible material (often with a wire helix) and used for shorter runs or connecting to diffusers.
- Fiberglass ducts: Insulated and often used for supply ducts.
Also, note the duct material. Is it galvanized steel? Aluminum? The material will inform whether you need to be extra careful when working around it to prevent damage.
1.3. Checking for Leaks and Insulation:
Inspect the ductwork for any existing leaks, especially at seams and joints. Use your hand to feel for air escaping while the system is running. If you find leaks, you'll want to address them *before* framing. Common fixes include using foil tape (rated for HVAC use) or duct sealant.
Assess the insulation of the duct. Is it adequately insulated? Insulating ducts, especially in unconditioned spaces, is crucial for preventing condensation and maximizing energy efficiency. You might need to add or replace insulation.
1.4. Code Compliance Research:
This is a critical step. Contact your local building department or consult your local building codes online. Specifically, research the required clearances around HVAC ducts and equipment. These clearances typically specify the minimum distance that combustible materials (like wood framing) must be from the duct.
Failure to comply with these codes can lead to major headaches down the line.
Step 2: Gathering Materials and Tools
Once you have a plan, gather the necessary materials and tools. You'll typically need:
- Lumber: 2x4s are standard for framing, but the specific dimensions may vary depending on your design and local codes.
- Fasteners: Screws are generally preferred over nails for framing, as they provide a stronger and more secure connection. Use screws specifically designed for wood framing.
- Safety glasses: Protect your eyes from flying debris.
- Dust mask: Protect your lungs from dust and particles.
- Gloves: Protect your hands.
- Measuring tape: For accurate measurements.
- Level: To ensure your framing is straight and plumb.
- Square: To ensure your corners are square.
- Saw: Circular saw or hand saw for cutting lumber.
- Drill/Driver: For driving screws.
- Stud finder: To locate existing studs in adjacent walls (if applicable).
- Pencil: For marking measurements.
- Shims: For leveling and aligning framing members.
- Foil tape or duct sealant: For sealing any leaks you find.
- Insulation (optional): If you need to add or replace insulation around the duct.
Step 3: Building the Frame
Now, it's time to build the frame. The specific steps will depend on whether you're building a soffit or framing a wall. Here's a general guide:
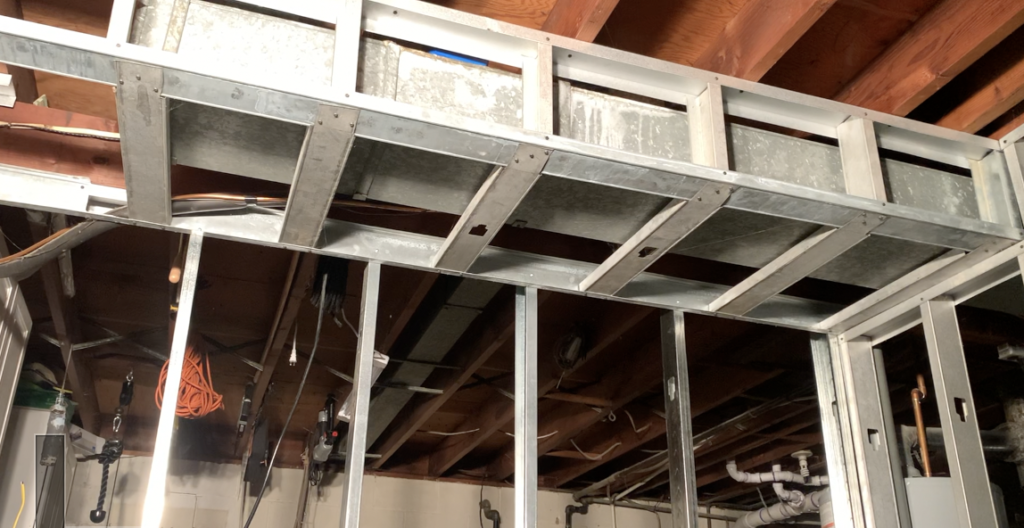
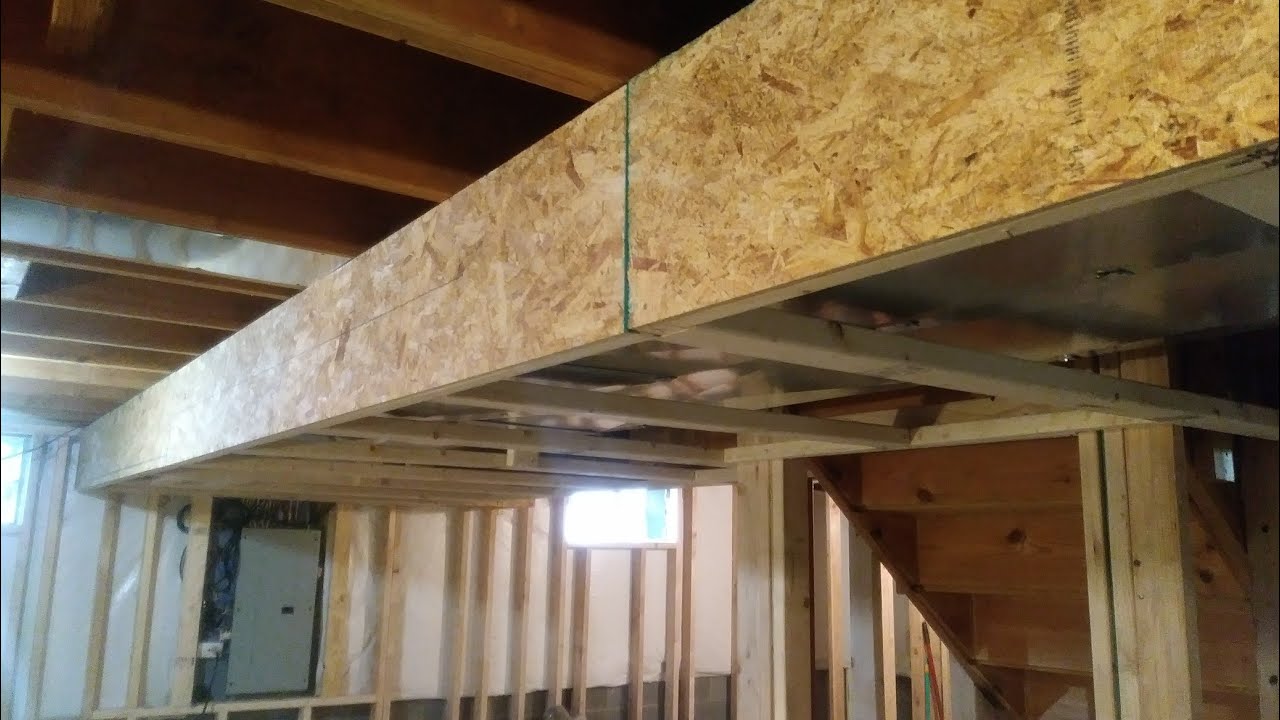
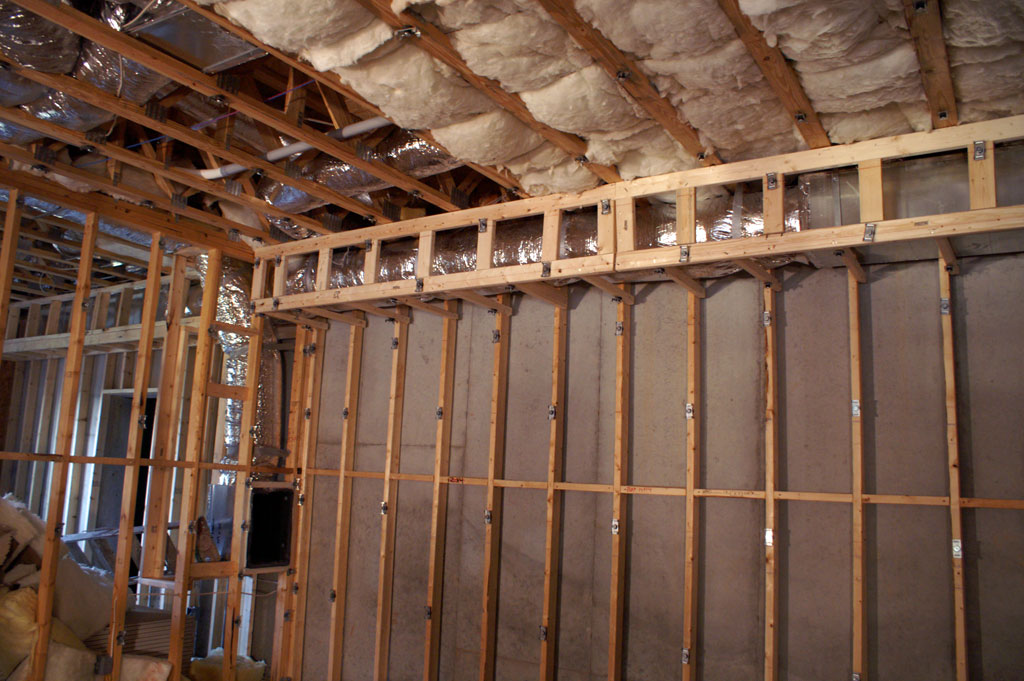
3.1. Soffit Framing:
A soffit typically involves building a "box" around the duct.
- Establish the Height: Determine the desired height of the soffit. Remember to consider the duct's dimensions *plus* any required clearances.
- Attach Ledger Boards: Attach ledger boards (horizontal pieces of lumber) to the existing ceiling joists and walls. These ledger boards will support the bottom of the soffit frame. Use a stud finder to locate the joists and secure the ledger boards with screws. Ensure the ledger boards are level.
- Build the Frame: Cut lumber to create the vertical and horizontal framing members for the soffit. The vertical members (studs) will connect the ledger boards on the ceiling to the ledger boards on the walls. Space the studs according to your local building codes (typically 16" or 24" on center).
- Attach the Frame: Secure the frame to the ledger boards using screws. Ensure the frame is square and level.
- Add Blocking: Add horizontal "blocking" between the studs for added support and stability.
- (Optional) Insulate: Insulate the inside of the soffit frame to prevent condensation and improve energy efficiency.
3.2. Wall Framing:
Framing a wall around a duct requires careful planning to avoid obstructing airflow.
- Build the Wall Frame: Construct the wall frame as you normally would, with top and bottom plates and studs spaced according to code.
- Account for the Duct: When you reach the section where the duct passes through the wall, you'll need to create a "header" above the duct to support the wall. The header is a horizontal beam that spans the opening.
- Header Construction: The size of the header depends on the span of the opening and the load it needs to support. Consult your local building codes or a structural engineer for guidance on header sizing.
- Install Jack Studs: Install "jack studs" (shorter studs) on either side of the opening to support the header.
- Attach the Header: Secure the header to the jack studs using screws.
- Frame Around the Duct: Frame around the duct, ensuring there's adequate clearance on all sides. You may need to use shims to create a perfectly level and plumb frame.
Step 4: Addressing Airflow and Insulation
Once the frame is built, it's crucial to ensure proper airflow and insulation.
4.1. Maintaining Clearances:
Double-check that you've maintained the required clearances around the duct. There should be no contact between the duct and the framing members. This is essential for preventing fire hazards and ensuring proper airflow.
4.2. Sealing Gaps:
Seal any gaps between the framing and the duct with foil tape or duct sealant. This will prevent air leakage and improve energy efficiency.
4.3. Insulation:
Ensure the duct is adequately insulated, especially in unconditioned spaces. Use fiberglass insulation, mineral wool insulation, or spray foam insulation. The type of insulation you choose will depend on your local climate and building codes. Wrap the insulation tightly around the duct and secure it with tape or wire.
Step 5: Finishing Touches
After the frame is built and the duct is insulated, you can add finishing touches to improve the appearance of the project.
- Drywall or Paneling: Cover the frame with drywall or paneling to create a finished surface.
- Paint or Stain: Paint or stain the drywall or paneling to match the surrounding decor.
- Trim: Add trim around the edges of the frame to create a more polished look.
When to Call a Professional
While many homeowners can successfully frame around HVAC ducts using the above steps, there are certain situations where it's best to call a professional HVAC technician or contractor:
- Duct Modification: If you need to modify the ductwork itself (e.g., cut, move, or resize a duct), it's *always* best to hire a professional. This requires specialized tools and knowledge and can impact the performance of your entire HVAC system.
- Complex Framing: If the framing project is particularly complex or involves multiple ducts, it may be wise to seek professional assistance.
- Suspected Asbestos: If you suspect that the ductwork contains asbestos (common in older homes), *do not* disturb it. Contact a qualified asbestos abatement contractor immediately.
- Structural Concerns: If you're unsure about the structural integrity of the existing framing or need help determining the proper header size, consult a structural engineer or experienced contractor.
- Code Violations: If you're unsure about the local building codes or are concerned that your framing project may violate them, contact your local building department or a qualified contractor.
Safety First: Always prioritize safety when working around HVAC ducts. Turn off the power to the HVAC system before starting any work. Wear safety glasses, a dust mask, and gloves. If you're unsure about any aspect of the project, don't hesitate to seek professional help.
Framing around HVAC ducts can seem daunting, but with careful planning, attention to detail, and a focus on safety, it's a manageable DIY project. By following these steps, you can create a finished space that is both functional and aesthetically pleasing.