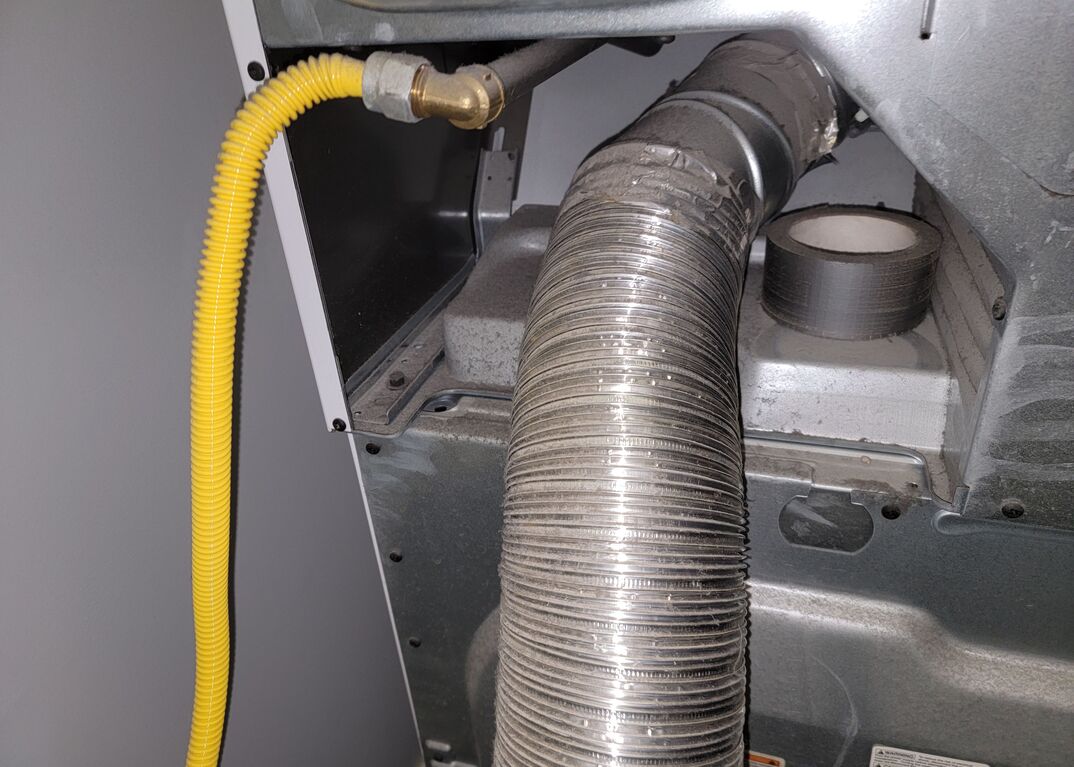
How To Install A Dryer Gas Line

One of the most frustrating household appliance failures is a malfunctioning dryer. You load in your wet clothes, press start, and… nothing. Or worse, it runs but leaves your clothes damp and wrinkled. While many dryer issues require professional attention, some common problems can be safely diagnosed and addressed by homeowners. This guide will walk you through some basic troubleshooting steps and explain when it's time to call in the experts, particularly when dealing with a gas dryer's gas line.
Understanding Dryer Issues
Before diving into troubleshooting, it's helpful to understand the common culprits behind dryer malfunctions. These can range from simple issues like a tripped breaker to more complex problems involving heating elements or gas valves.
Common Dryer Problems:
- Dryer won't turn on: No power, blown fuse, or faulty door switch.
- Dryer runs, but no heat: Heating element failure (electric dryers), gas valve issue (gas dryers), or clogged vent.
- Clothes take too long to dry: Clogged vent, incorrect settings, or a failing heating element/gas valve.
- Dryer is noisy: Worn drum rollers, a loose belt, or foreign objects in the drum.
- Burning smell: Lint buildup in the vent or around the heating element/gas burner. Immediately discontinue use and investigate.
Safety First!
Safety is paramount when troubleshooting any appliance, especially those involving electricity or gas. Before starting any work, take these precautions:
- Disconnect the power: Unplug the dryer from the electrical outlet. For gas dryers, you also need to shut off the gas supply valve.
- Wear appropriate safety gear: Wear safety glasses to protect your eyes from debris and work gloves to protect your hands.
- Work in a well-ventilated area: Especially important when dealing with gas appliances.
- Never bypass safety devices: These are there to protect you and your appliance.
- If unsure, call a professional: Don't attempt repairs beyond your skill level.
Troubleshooting: Step-by-Step Guide
Follow these steps in order to diagnose and potentially fix your dryer problem. Remember to always prioritize safety.
Step 1: Check the Power Supply
The first and simplest step is to ensure the dryer is receiving power.
- Check the outlet: Plug a different appliance into the dryer's outlet to confirm it's working.
- Check the circuit breaker: Locate the circuit breaker that controls the dryer (refer to your electrical panel directory). If the breaker is tripped, reset it. If it trips again immediately, there's a short circuit, and you'll need to call an electrician.
- Check the power cord: Inspect the dryer's power cord for any damage or fraying. If you find any, replace the cord (this is a relatively simple repair, but always disconnect the power first).
- Check the fuse (if applicable): Some dryers have a fuse on the control panel or near the motor. Use a multimeter to test the fuse for continuity. Replace it if it's blown.
Step 2: Check the Dryer Settings
Sometimes, the issue is as simple as an incorrect setting.
- Ensure the dryer is set to a drying cycle: Some settings are for fluffing or air drying and don't use heat.
- Check the timer or digital display: Make sure the timer is set correctly or the digital display isn't showing an error code. Refer to your dryer's manual for a list of error codes and their meanings.
- Check the door switch: The dryer won't start if the door switch isn't properly engaged. Open and close the door firmly to ensure the switch is making contact. You can test the switch with a multimeter (after disconnecting power, of course) to see if it has continuity when the door is closed. If not, replace the switch.
Step 3: Inspect and Clean the Lint Trap
A clogged lint trap is a common cause of drying problems and can also be a fire hazard. Clean it before every load.
- Remove the lint trap: It's usually located inside the dryer door or on top of the dryer.
- Clean the lint screen: Remove all lint and debris from the screen. You can use your fingers, a vacuum cleaner, or a brush.
- Wash the lint screen occasionally: Wash the screen with soap and water to remove any buildup of fabric softener, which can reduce airflow. Ensure the screen is completely dry before replacing it.
Step 4: Check the Dryer Vent
A clogged dryer vent is another major cause of drying problems and a significant fire hazard. Clean the vent at least once a year, or more frequently if you dry large loads.
- Disconnect the dryer vent from the dryer and the wall: Use a screwdriver to loosen the clamps holding the vent in place.
- Inspect the vent hose: Look for any kinks, bends, or crushing that could restrict airflow. Replace any damaged vent hose. Ideally, use rigid metal ducting instead of flexible plastic or foil ducting, as it's less likely to accumulate lint and is more fire-resistant.
- Clean the vent hose: Use a dryer vent cleaning kit (available at most hardware stores) to remove lint from the vent hose. Follow the instructions on the kit.
- Clean the vent opening in the wall: Use the dryer vent cleaning kit or a vacuum cleaner with a hose attachment to remove lint from the vent opening in the wall.
- Reattach the dryer vent: Securely reattach the vent hose to the dryer and the wall using clamps. Make sure there are no gaps or leaks.
Step 5: Basic Parts Replacement (Electric Dryers - Use Extreme Caution and Only If Comfortable)
If the above steps haven't resolved the issue, you may need to replace a faulty part. This section applies primarily to electric dryers. Do not attempt these repairs on gas dryers unless you are a qualified technician.
- Heating Element: If the dryer runs but produces no heat, the heating element may be faulty. Disconnect the power! Accessing the heating element typically requires removing the back panel of the dryer. Use a multimeter to test the heating element for continuity. If it has no continuity, replace it with a new one.
- Thermal Fuse: The thermal fuse is a safety device that protects the dryer from overheating. If it blows, the dryer won't heat. Disconnect the power! The thermal fuse is usually located near the heating element or on the blower housing. Use a multimeter to test the thermal fuse for continuity. If it has no continuity, replace it with a new one. Address the underlying cause of the overheating (usually a clogged vent) before replacing the fuse, or it will likely blow again.
Gas Dryer Specifics: When to Call a Professional Immediately
Working with gas appliances is inherently dangerous. If you suspect a gas leak or are uncomfortable working with gas lines, call a qualified HVAC technician or gas company immediately.
NEVER DIY these on a gas dryer:
- Gas valve replacement: The gas valve controls the flow of gas to the burner. Replacing it requires specialized knowledge and tools.
- Burner assembly repair: The burner assembly is where the gas is ignited. Repairing it involves working with potentially dangerous components.
- Pilot light issues (if applicable): Many newer dryers don't have pilot lights, but if yours does, and it's not lighting or staying lit, call a professional.
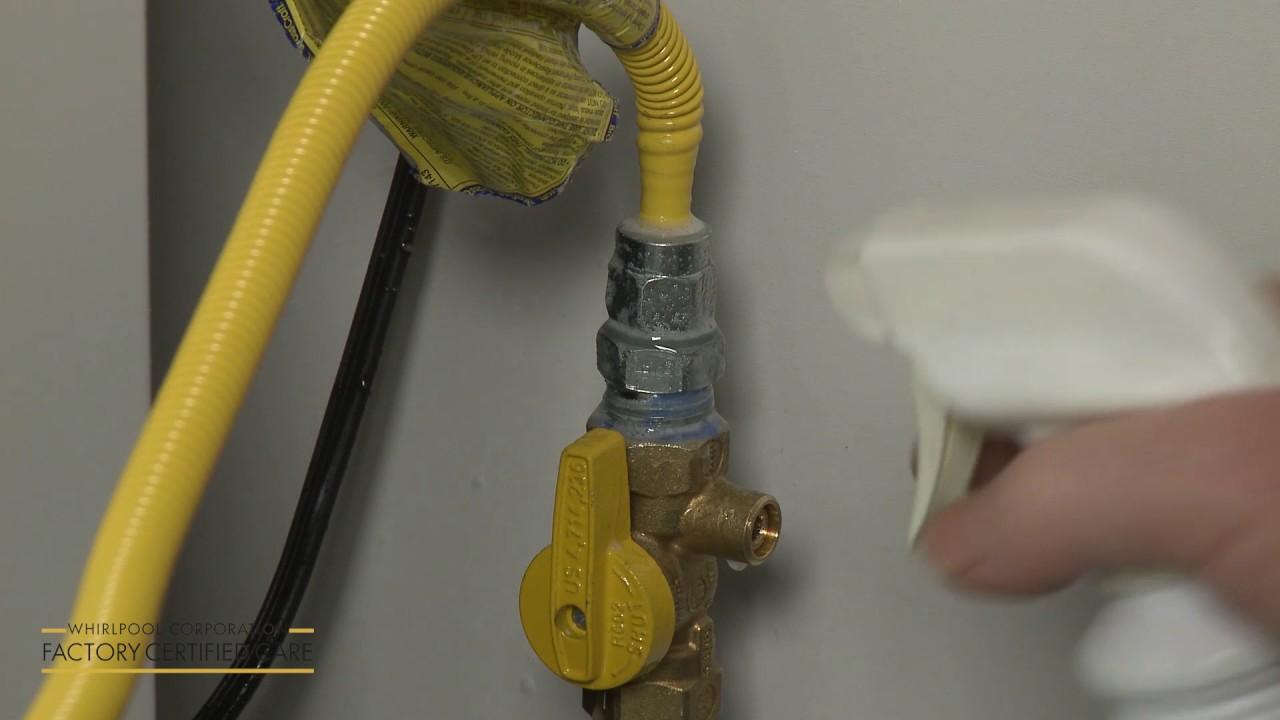
- Any work on the gas line itself: Including installation, repair, or modification.
Gas Line Installation: A Professional's Job
Installing a gas line for a dryer is not a DIY project for most homeowners. It requires knowledge of local codes, gas fitting techniques, and safety procedures. Improper installation can lead to gas leaks, explosions, and carbon monoxide poisoning.
Here's why it's crucial to hire a professional for gas line installation:
- Expertise in gas fitting: Professionals are trained in properly sealing gas lines, using appropriate fittings, and pressure testing the system to ensure there are no leaks.
- Knowledge of local codes: Gas line installations must comply with local building codes, which vary by jurisdiction. Professionals are familiar with these codes and can ensure the installation is up to standard.
- Proper tools and equipment: Gas line installation requires specialized tools, such as pipe threaders, gas leak detectors, and pressure gauges.
- Safety: Professionals are trained to work safely with gas and can take precautions to prevent gas leaks, explosions, and carbon monoxide poisoning.
- Permits and inspections: Gas line installations often require permits and inspections by local authorities. Professionals can handle the permitting process and ensure the installation passes inspection.
What to Expect from a Professional Gas Line Installation:
- Assessment: The professional will assess your existing gas system and determine the best location for the new gas line.
- Permitting: The professional will obtain any necessary permits from local authorities.
- Installation: The professional will install the new gas line, using appropriate materials and techniques.
- Pressure testing: The professional will pressure test the gas line to ensure there are no leaks.
- Connection: The professional will connect the gas line to the dryer, ensuring a proper and safe connection.
- Inspection: The professional will arrange for an inspection by local authorities to ensure the installation complies with codes.
Preventative Maintenance
The best way to avoid dryer problems is to perform regular preventative maintenance. This includes:
- Cleaning the lint trap before every load.
- Cleaning the dryer vent at least once a year.
- Inspecting the dryer vent hose for damage and replacing it as needed.
- Checking the dryer for unusual noises or vibrations.
- Having a qualified technician inspect your gas dryer annually (if applicable).
Conclusion
Troubleshooting a dryer can be a straightforward process, and many common issues can be resolved with simple DIY fixes. However, it's crucial to prioritize safety and know your limits. When dealing with electricity, gas, or complex repairs, always call a qualified professional. By following these guidelines, you can keep your dryer running efficiently and safely for years to come, and most importantly, understand when professional help is absolutely necessary, especially concerning the critical safety aspect of a gas line installation.


:max_bytes(150000):strip_icc()/how-to-hook-up-dryer-vent-1824608-01-c9f04212e11f4dad96959db41a9be7fe.jpg)
:max_bytes(150000):strip_icc()/gas-valve-prep-56a4a28b5f9b58b7d0d7eee3.jpg)