How To Install A Prv Valve
Many homeowners encounter frustrating water pressure issues, ranging from weak showers to appliances not functioning correctly. Often, the culprit behind these problems is a malfunctioning or absent Pressure Reducing Valve (PRV). This valve is essential for regulating the incoming water pressure from the municipal supply to a safe and usable level for your home's plumbing system. Understanding how to diagnose and potentially install a PRV can save you money and prevent costly damage.
The Case of the Unruly Pressure: Is a PRV the Answer?
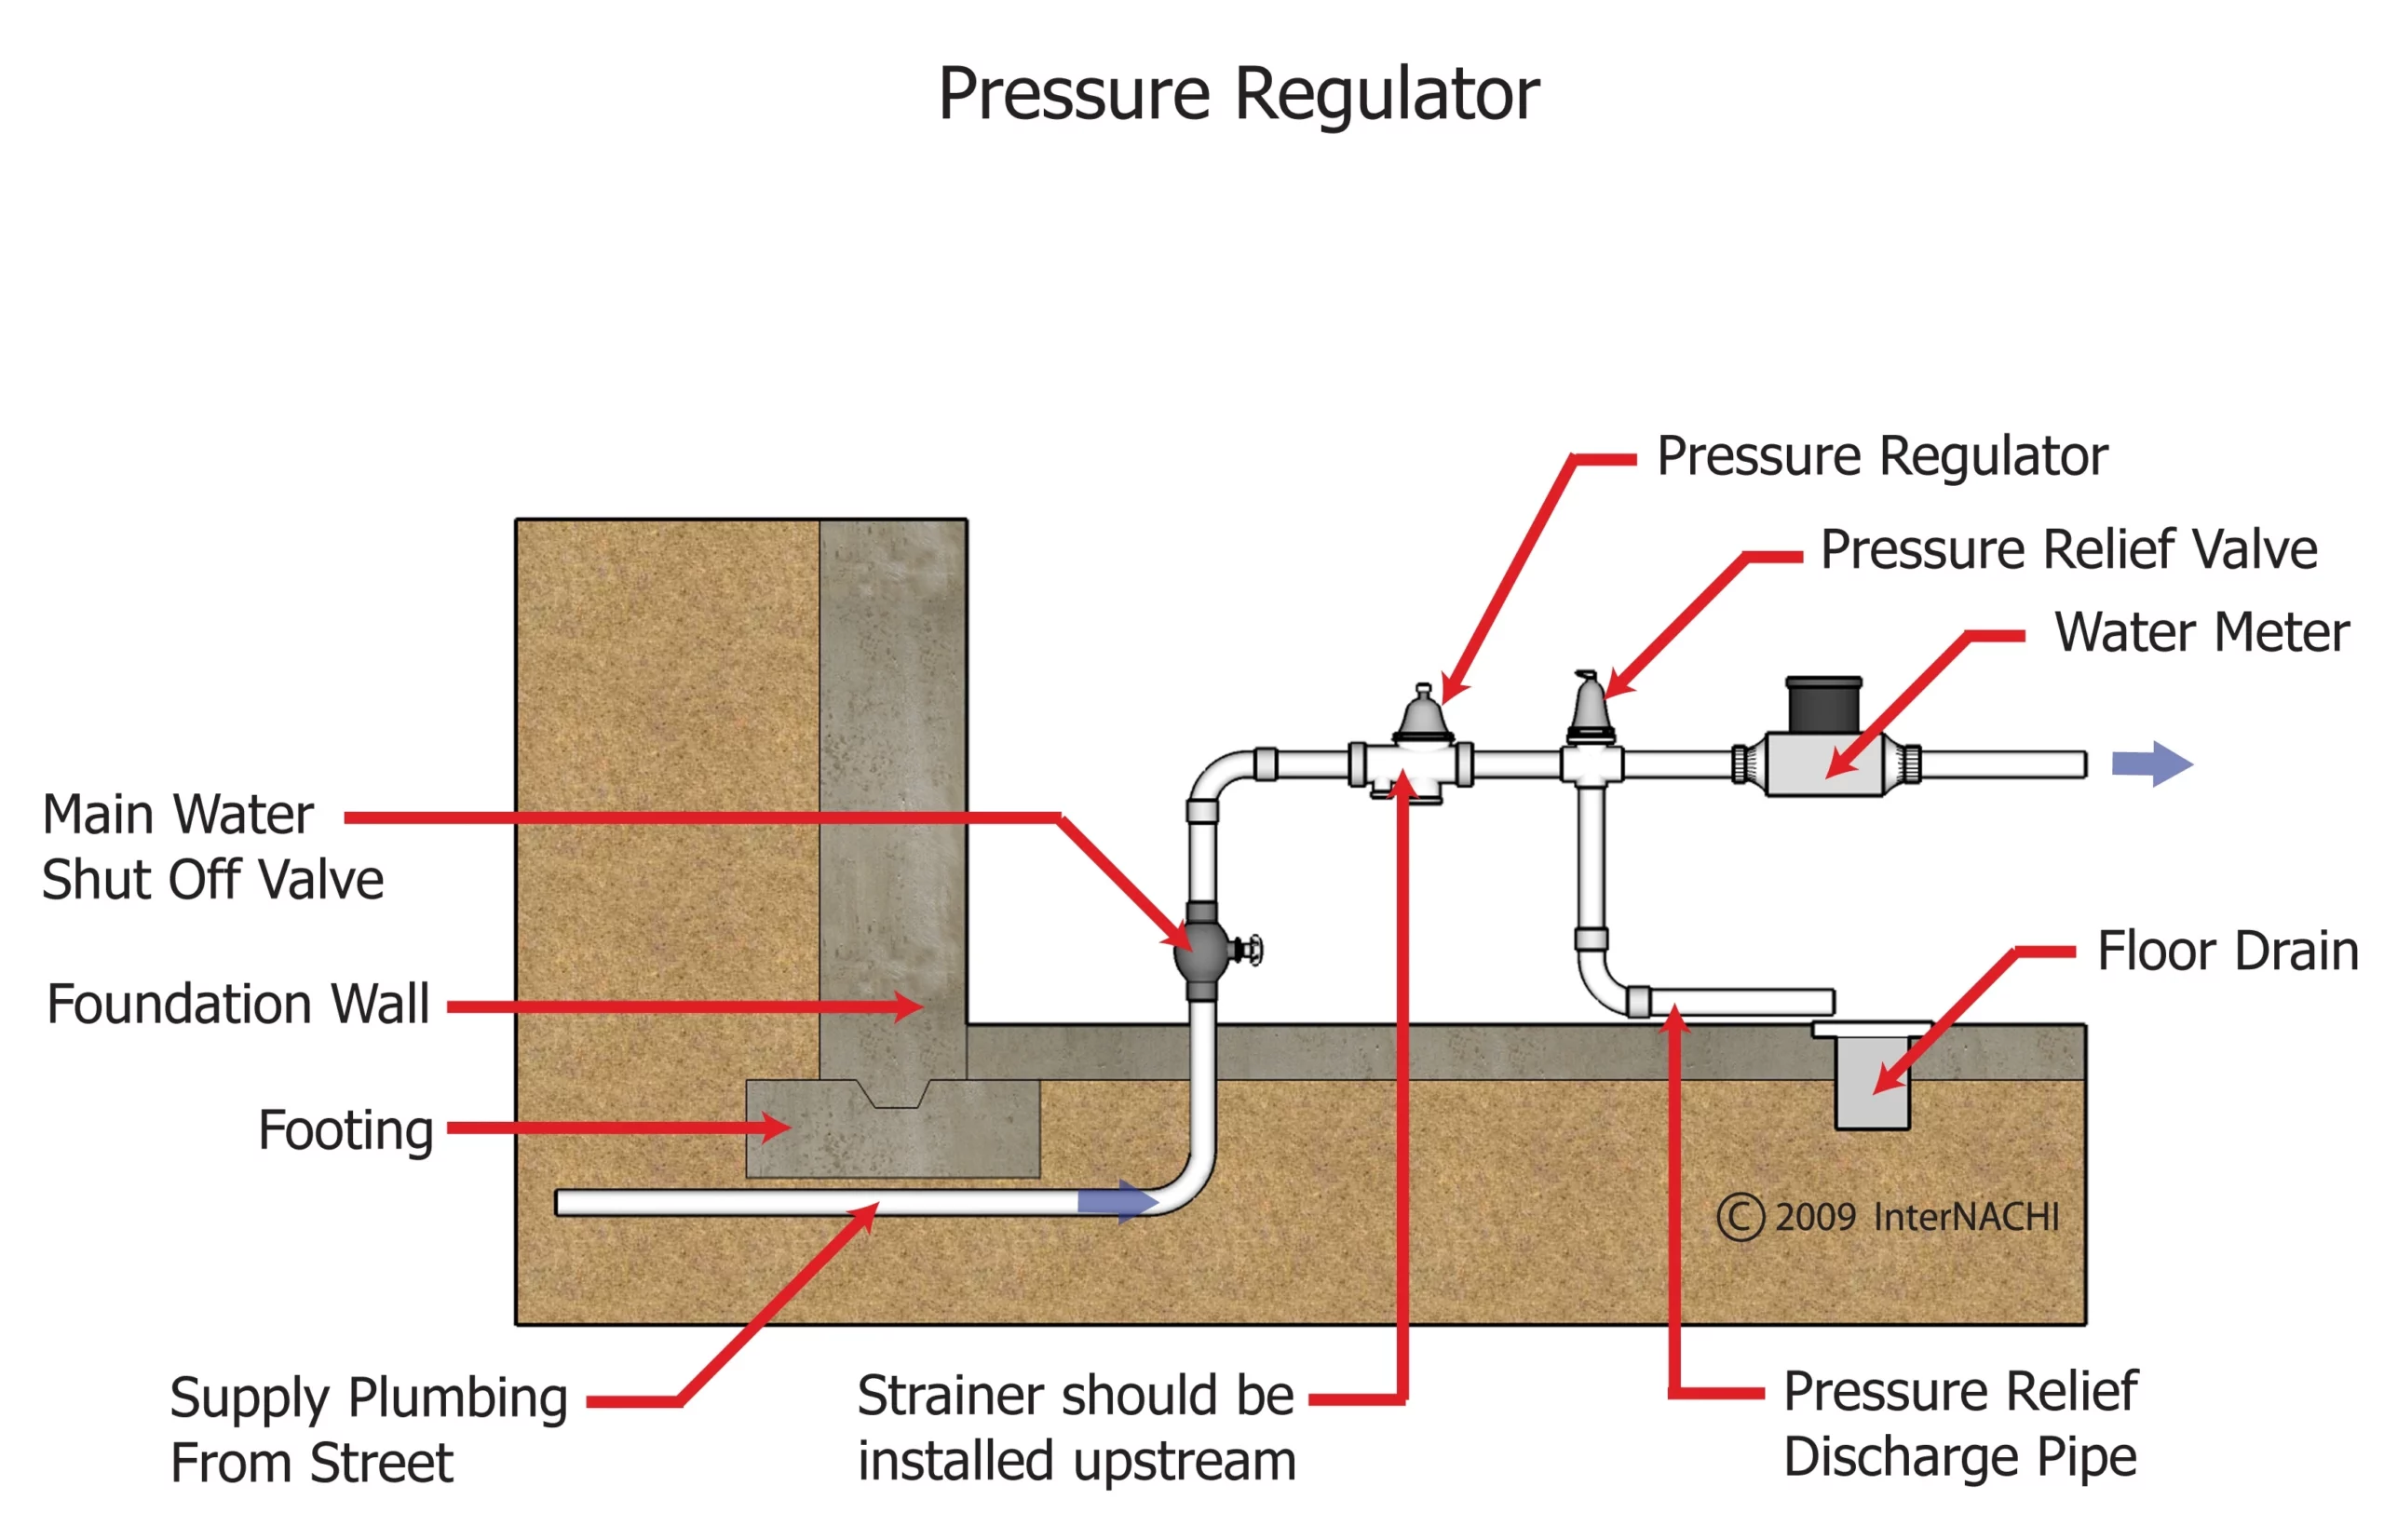
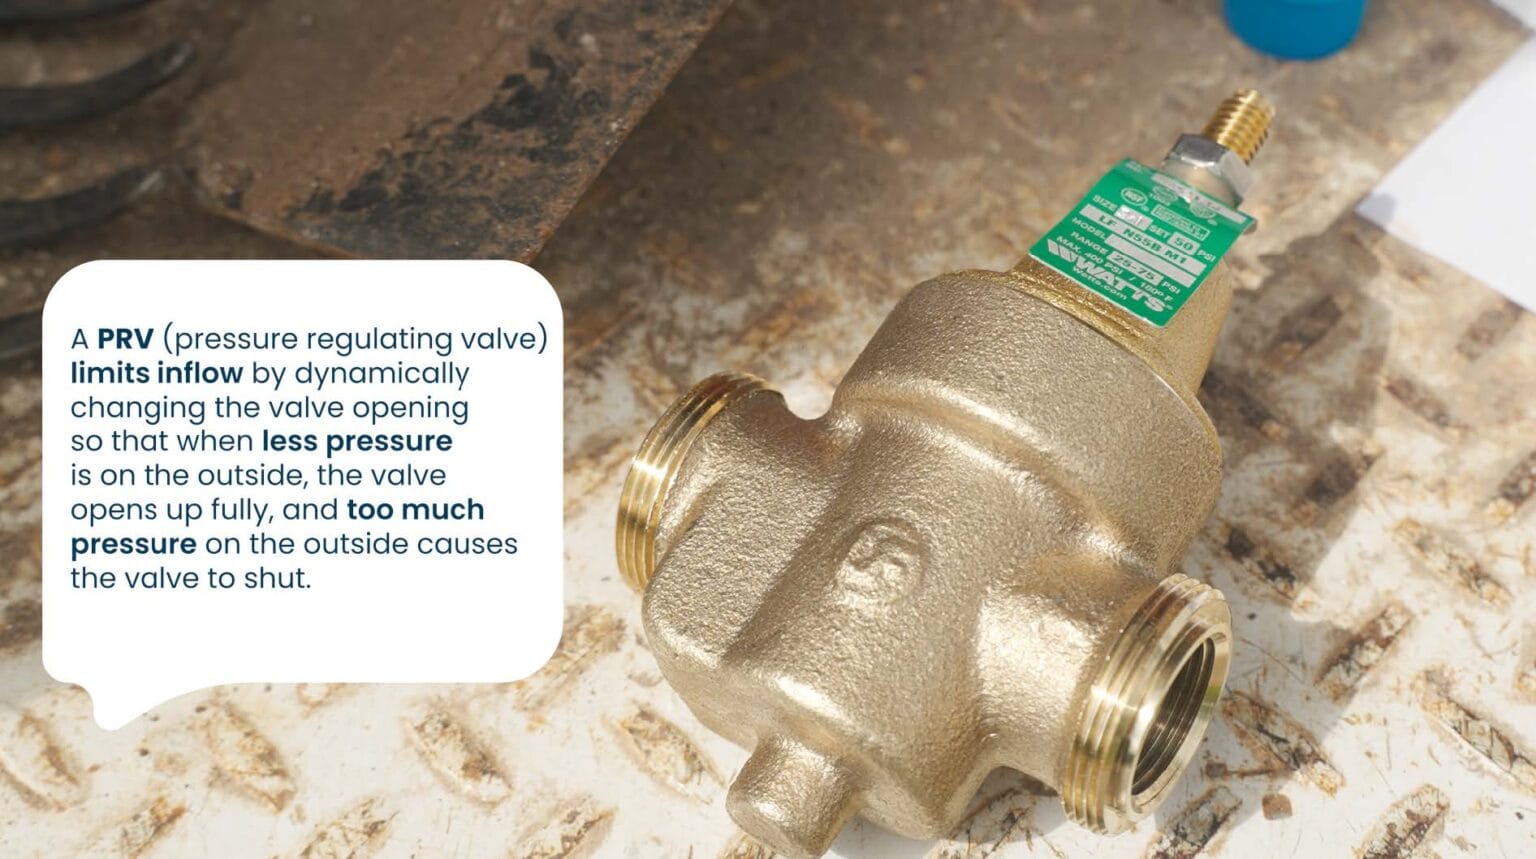
Before diving into installation, let's determine if a PRV is indeed the solution. First, understand what a PRV does. It automatically reduces the high pressure from the city water main to a pressure that's safe for your home's pipes and fixtures, typically between 40 and 80 PSI. Excessive water pressure can lead to burst pipes, leaky faucets, and premature appliance failure.
Step 1: Identifying the Symptoms
Do any of these scenarios sound familiar?
- Loud banging or hammering pipes (water hammer) when faucets are turned on or off.
- Spraying or sputtering faucets, indicating inconsistent pressure.
- Leaking faucets or toilets, even after repairs.
- Appliances (washing machine, dishwasher) malfunctioning due to high pressure.
- Consistently high water bills, possibly due to unnoticed leaks caused by high pressure.
If you're experiencing one or more of these issues, high water pressure could be the problem. But, it's not always that simple. Rule out other possibilities first.
Step 2: Measuring Your Water Pressure
This is a crucial step. You'll need a water pressure gauge, readily available at any hardware store. It screws onto a standard hose bib (outdoor faucet). Here's how to measure:
- Turn off all water-using appliances and faucets inside the house.
- Locate a hose bib, preferably one closest to where the main water line enters your house.
- Screw the water pressure gauge onto the hose bib. Make sure it's snug but not overly tight.
- Turn the hose bib on fully.
- Read the pressure on the gauge.
What does the gauge reading mean?
- Below 40 PSI: Pressure is too low. A PRV isn't the problem; investigate other causes like a partially closed main shut-off valve or issues with the municipal water supply.
- Between 40 and 80 PSI: This is generally considered safe. A PRV may not be necessary unless you have specific appliances that require lower pressure.
- Above 80 PSI: Pressure is too high. A PRV is likely needed, or if you already have one, it's malfunctioning and needs replacement or adjustment. Anything above 80 PSI is putting undue stress on your plumbing.
Step 3: Locating Your Existing PRV (If Any)
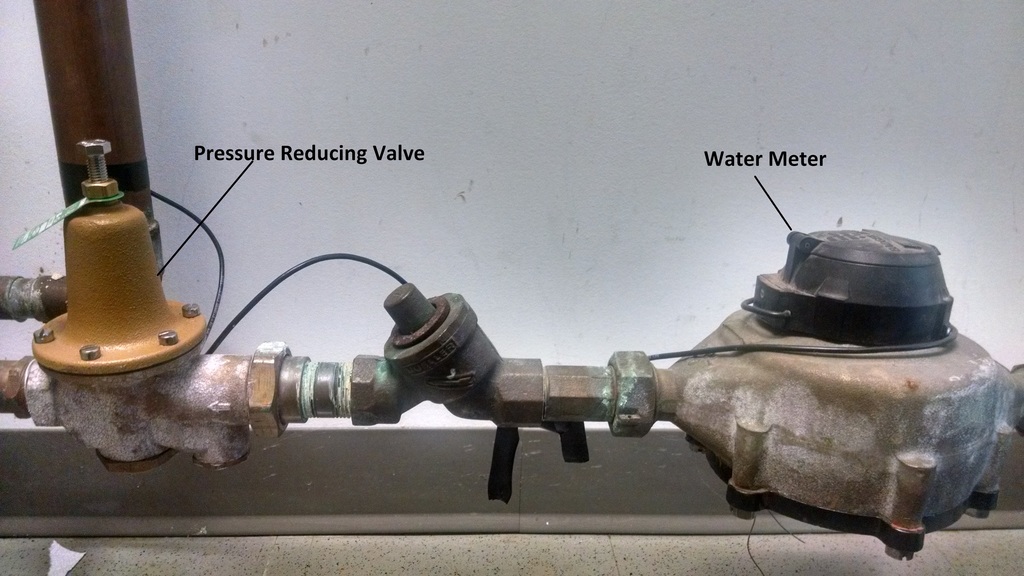
If your home was built within the last few decades, it's likely to have a PRV already installed. Locate it where the main water line enters your house, typically near the water meter. Look for a bell-shaped valve, usually made of brass or bronze. If you find one, proceed to Step 4. If you don't find one, skip to the "Installing a New PRV" section.
Step 4: Checking and Adjusting an Existing PRV
Sometimes, a PRV simply needs adjustment. Most PRVs have an adjustment screw on top. Here's how to adjust it:
- Loosen the locknut on the adjustment screw.
- Using a wrench or screwdriver, turn the adjustment screw clockwise to increase the pressure and counterclockwise to decrease the pressure. Make small adjustments (1/4 turn at a time) and recheck the pressure at the hose bib after each adjustment.
- Retighten the locknut to secure the adjustment.
Important: Observe the pressure gauge while making adjustments. If the pressure doesn't change or if the valve is leaking, it's likely malfunctioning and needs replacement.
Installing a New PRV: A Step-by-Step Guide
If you've determined that you need a PRV and don't already have one, or if your existing PRV is beyond repair, here's how to install a new one. This project requires basic plumbing skills. If you're uncomfortable working with plumbing, hire a qualified plumber.
Tools and Materials You'll Need:
- New PRV (ensure it's the correct size for your pipe)
- Two shut-off valves (ball valves are recommended)
- Pipe cutter (for copper or PVC, depending on your plumbing)
- Pipe wrench (two are helpful)
- Adjustable wrench
- Soldering torch, flux, and solder (for copper pipe) or PVC primer and cement (for PVC pipe)
- Pipe thread sealant (Teflon tape or pipe dope)
- Measuring tape
- Safety glasses
- Gloves
- Bucket and rags
Step 1: Safety First! Turn Off the Water Supply
Locate your main water shut-off valve (usually near the water meter) and turn it off completely. Open a faucet at the lowest point in your house to drain the pipes. This will minimize water spillage during the installation process.
Step 2: Cut the Main Water Line
Measure and mark the section of the main water line where you'll be installing the PRV. Allow enough space for the PRV, two shut-off valves (one before and one after the PRV), and any necessary fittings. Use your pipe cutter to carefully cut the pipe at the marked locations. Have a bucket and rags ready to catch any remaining water in the pipes.
Step 3: Install Shut-Off Valves
Before installing the PRV, install shut-off valves on both sides of the section you cut. This will allow you to isolate the PRV for future maintenance or repairs without shutting off the water to your entire house. The process depends on your pipe material:
For Copper Pipe:
- Clean the ends of the copper pipe with sandpaper or emery cloth.
- Apply flux to the cleaned pipe ends and the inside of the shut-off valve fittings.
- Slide the shut-off valves onto the pipe ends.
- Heat the fittings with a soldering torch until the solder melts and flows into the joints.
- Allow the joints to cool completely before moving on.
For PVC Pipe:
- Clean the ends of the PVC pipe and the inside of the shut-off valve fittings with PVC primer.
- Apply PVC cement to the primed pipe ends and fittings.
- Quickly slide the shut-off valves onto the pipe ends and hold them in place for a few seconds until the cement sets.
Step 4: Install the PRV
Wrap Teflon tape or apply pipe dope to the threads of the PRV fittings and the shut-off valve fittings. Screw the PRV into the shut-off valves, ensuring that the flow direction arrow on the PRV body points in the direction of water flow into your house. Use two pipe wrenches – one to hold the shut-off valve and the other to tighten the PRV. Do not overtighten!
Step 5: Turn the Water On Slowly
Slowly open the main water shut-off valve. Check for leaks at all the joints. If you find any leaks, tighten the connections slightly. If the leak persists, turn off the water again and inspect the joint for imperfections. You may need to redo the joint.
Step 6: Adjust the PRV to the Desired Pressure
As described in Step 4 of the "Checking and Adjusting an Existing PRV" section, adjust the PRV to your desired pressure (typically between 40 and 80 PSI) using the adjustment screw on top of the valve. Monitor the pressure gauge at the hose bib while making adjustments.
When to Call a Professional
While this guide provides a comprehensive overview of PRV installation, certain situations warrant professional help:
- You're uncomfortable working with plumbing or soldering.
- You encounter corroded or damaged pipes that are difficult to work with.
- You're unsure about local plumbing codes and regulations. Improper installation can lead to code violations and safety hazards.
- You continue to experience water pressure problems after installing the PRV. This could indicate other underlying plumbing issues.
- You live in an apartment or condominium. Altering the plumbing in these types of dwellings usually requires approval from the building management and must be performed by licensed professionals.
Attempting a DIY installation beyond your skill level can result in water damage, costly repairs, and potential safety hazards. When in doubt, it's always best to consult a qualified plumber.
By following these steps and exercising caution, you can potentially diagnose and install a PRV yourself, saving money and ensuring safe water pressure throughout your home. Remember to prioritize safety and seek professional assistance when needed.