How To Install A Thermocouple

Is your furnace or gas appliance failing to ignite consistently, or shutting down shortly after starting? A faulty thermocouple might be the culprit. This small, inexpensive part is a safety device that prevents gas from flowing when the pilot light isn't lit. Replacing it is often a straightforward DIY project, potentially saving you a service call. However, working with gas can be dangerous. If you are uncomfortable at any point, please call a qualified HVAC professional.
Is it Really the Thermocouple? Troubleshooting Before You Begin
Before diving in, confirm the thermocouple is the likely problem. Here are some common symptoms of a failing thermocouple:
- The pilot light lights but goes out as soon as you release the pilot button.
- The furnace or appliance fails to ignite at all.
- The furnace or appliance ignites but shuts off after a short period (usually within minutes).
However, these symptoms can also be caused by other issues. Consider these possibilities before replacing the thermocouple:
- Dirty pilot orifice: A clogged orifice can prevent a strong, stable flame from reaching the thermocouple. Clean the orifice using a thin wire or compressed air.
- Weak pilot flame: If the pilot flame is too small or weak, it may not heat the thermocouple sufficiently. Check the gas pressure and the regulator.
- Faulty gas valve: A malfunctioning gas valve might not be opening fully or consistently. Call a professional for this repair, as it involves gas line components.
- Drafts: Strong drafts can extinguish the pilot light or blow the flame away from the thermocouple.
- Loose or corroded connections: Check the wiring connections to the gas valve and control board. Clean and tighten any loose connections.
Once you've ruled out these other possibilities, proceed with replacing the thermocouple.
Tools and Materials You'll Need
Gather these supplies before you start:
- New thermocouple (ensure it's the correct type and length for your appliance).
- Adjustable wrench or appropriate sized open-end wrench.
- Screwdrivers (both flathead and Phillips head).
- Wire brush or emery cloth.
- Vacuum cleaner or compressed air.
- Safety glasses.
- Gloves.
- Multi-meter (optional, for testing voltage - see troubleshooting below).
Step-by-Step Thermocouple Replacement Guide
Safety First! Before beginning any work, turn off the gas supply to the appliance at the shut-off valve. This is usually located near the appliance. Allow the appliance to cool down completely.
- Access the Thermocouple: Remove the access panel or cover to expose the pilot light assembly. This usually involves unscrewing a few screws. Consult your appliance's owner's manual for specific instructions.
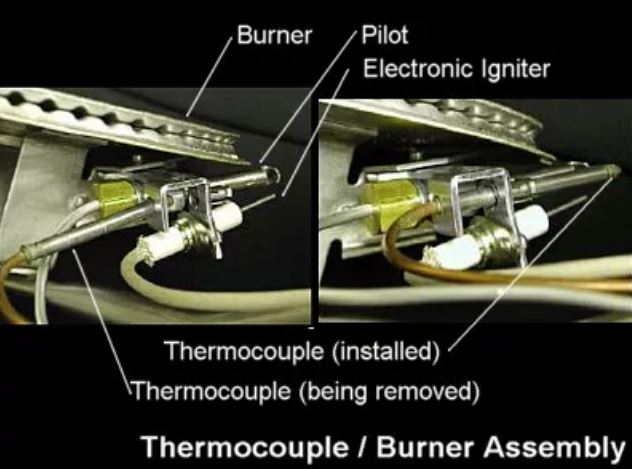
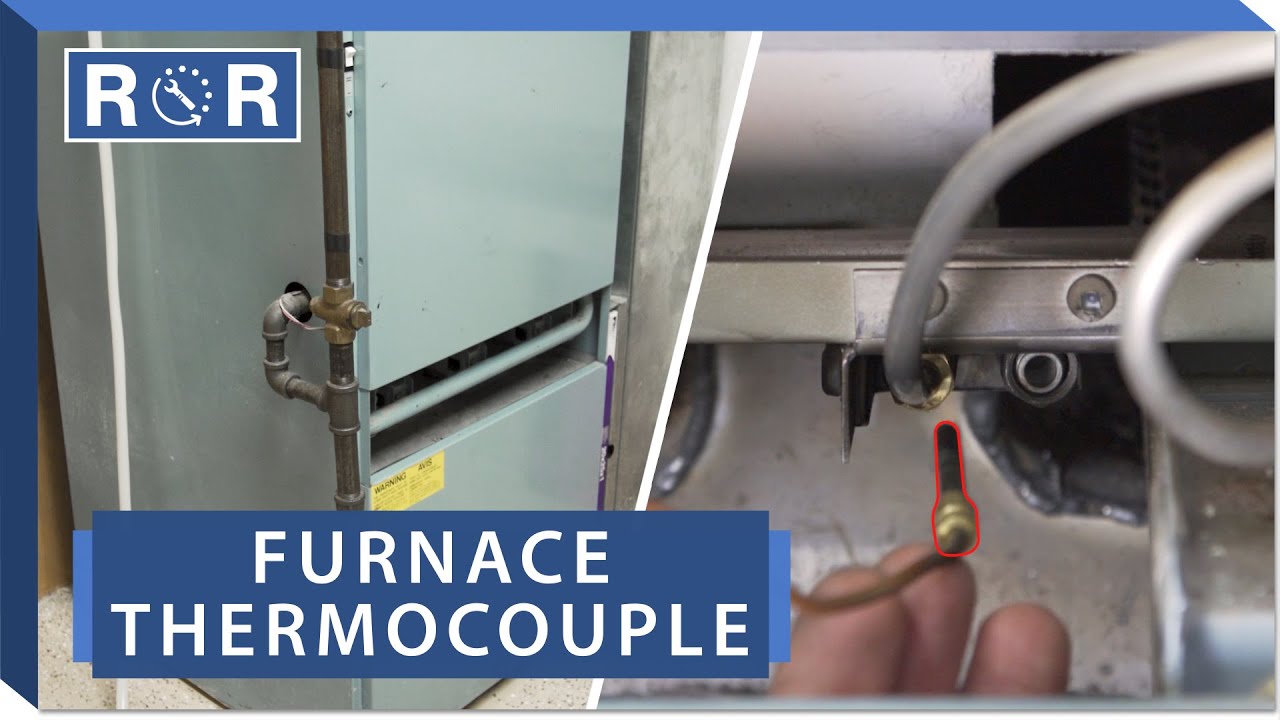
- Locate the Thermocouple: The thermocouple is a thin, copper or brass rod that sits directly in the pilot flame. It's connected to the gas valve with a threaded fitting.
- Disconnect the Old Thermocouple: Use an adjustable wrench or appropriately sized open-end wrench to loosen the nut connecting the thermocouple to the gas valve. Be gentle; overtightening or forcing it can damage the gas valve.
- Remove the Old Thermocouple: Carefully unscrew the nut completely and detach the thermocouple from the gas valve.
- Clean the Pilot Assembly: Use a wire brush or emery cloth to clean any corrosion or debris from the pilot light assembly, especially the area where the thermocouple sits. Vacuum or use compressed air to remove any loose particles.
- Install the New Thermocouple: Insert the new thermocouple into the pilot assembly, ensuring the tip is positioned directly in the path of the pilot flame.
- Connect the New Thermocouple: Carefully screw the nut connecting the thermocouple to the gas valve. Tighten it snugly with the wrench, but avoid overtightening. The connection should be secure but not excessively tight.
- Reassemble the Appliance: Replace the access panel or cover, securing it with the screws you removed earlier.
- Relight the Pilot Light: Follow the appliance's instructions for relighting the pilot light. This usually involves pressing and holding the pilot button while simultaneously lighting the pilot flame. Hold the pilot button for the recommended time (usually 20-30 seconds) to allow the thermocouple to heat up.
- Test the Repair: Once the pilot light is lit and stable, release the pilot button. The pilot light should remain lit. If it goes out, double-check your connections and ensure the thermocouple is positioned correctly in the flame. If it still fails, the gas valve may be faulty. Call a qualified technician.
- Check for Gas Leaks: After relighting the pilot, use a soapy water solution to check for gas leaks around the thermocouple connection and the gas valve. If you see bubbles forming, immediately turn off the gas supply and tighten the connection or call a professional.
Testing the Thermocouple (Optional - Requires a Multimeter)
If you have a multimeter, you can test the thermocouple's output voltage to confirm it's functioning correctly.
- Set your multimeter to measure millivolts (mV DC).
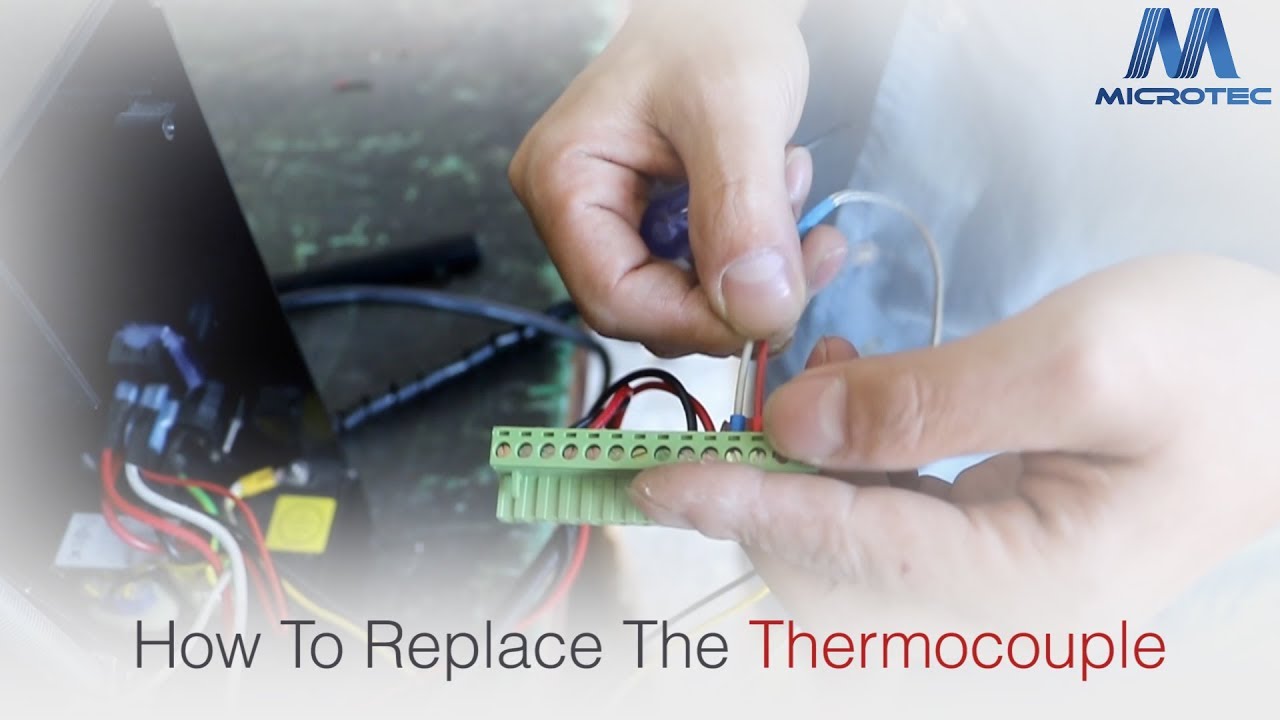
- Connect the multimeter leads to the thermocouple wires.
- Light the pilot light and allow the thermocouple to heat up for a few minutes.
- A healthy thermocouple should produce a voltage reading of around 25-30 mV. A significantly lower reading indicates a faulty thermocouple.
Common Problems and Solutions
Even with careful installation, you might encounter some issues:
- Pilot light won't stay lit after replacing the thermocouple: Double-check all connections, ensure the thermocouple is positioned correctly in the flame, and that the flame is strong and stable. If the problem persists, the gas valve may be faulty.
- New thermocouple doesn't seem to be working: Ensure you purchased the correct type of thermocouple for your appliance. Inspect the new thermocouple for any visible damage.
- Difficulty loosening the old thermocouple: Apply penetrating oil to the nut and let it sit for a few minutes before attempting to loosen it again. Be careful not to damage the gas valve.
- Stripped threads on the gas valve: If the threads on the gas valve are stripped, you may need to replace the entire gas valve. This is a job best left to a professional.
When to Call a Professional
While replacing a thermocouple is often a DIY-friendly task, certain situations warrant professional help:
- If you are uncomfortable working with gas lines.
- If you suspect a gas leak.
- If you are unable to relight the pilot light after replacing the thermocouple.
- If you suspect a problem with the gas valve or other gas line components.
- If you have tried replacing the thermocouple and the problem persists.
- If you smell gas.
Cost of Professional Thermocouple Replacement
If you decide to call a professional, expect to pay for a service call, the cost of the thermocouple, and labor. The total cost can range from $100 to $250, depending on your location and the complexity of the job. While DIY saves money, remember the importance of safety and proper installation when dealing with gas appliances.
Preventive Maintenance
To extend the life of your thermocouple and prevent future problems, consider these tips:
- Schedule regular maintenance for your furnace or gas appliance.
- Keep the area around the appliance clean and free of debris.
- Inspect the pilot light regularly for a strong, stable flame.
- If you notice any signs of corrosion or damage to the thermocouple, replace it promptly.
By following these steps, you can confidently tackle a thermocouple replacement and keep your gas appliances running safely and efficiently. Remember, safety is paramount. When in doubt, always consult a qualified HVAC technician.