How To Install A Toilet Closet Flange

A wobbly toilet. It's more than just annoying; it's a sign of potential problems lurking beneath the surface. Often, this instability stems from a failing or improperly installed toilet closet flange. This crucial piece connects your toilet to the drain line in your floor and, when compromised, can lead to leaks, water damage, and unpleasant odors. This article will guide you through diagnosing and, in many cases, fixing the issue yourself.
Diagnosing the Wobble: Identifying the Problem with your Toilet Flange
Before you grab any tools, let's pinpoint the source of the wobble. A systematic approach will save you time and frustration.
Step 1: The Visual Inspection (No Tools Required!)
This is where your keen eye comes into play. Get down on your hands and knees and carefully examine the base of your toilet where it meets the floor.
- Check for Cracks: Look for any visible cracks in the porcelain of the toilet base itself. While not directly related to the flange, a cracked toilet can mimic a wobble.
- Inspect the Caulking: Is the caulking around the base of the toilet intact? If it's crumbling, missing, or water-stained, it's a sign that water may be leaking from underneath. This doesn't always mean the flange is bad, but it's a contributing factor to consider.
- Observe the Flange: If possible, peek under the base of the toilet. Can you see the flange? Is it made of plastic or metal? Is it cracked, broken, or rusted? Note its condition.
- Look for Water Stains: Check the flooring around the toilet, especially near the base. Water stains, discoloration, or mold are clear indicators of a leak.
Step 2: The Wobble Test (No Tools Required!)
Gently rock the toilet back and forth and side to side. Pay attention to the following:
- How Much Does it Move? A slight wiggle is normal, but excessive movement (more than ¼ inch) indicates a problem.
- Where is the Movement Coming From? Is the entire toilet rocking, or does it seem like the wobble is isolated to one side?
- Can You Hear Any Sounds? Listen for creaking, groaning, or water trickling sounds as you rock the toilet. These sounds can provide clues about the source of the problem.
Step 3: The Bolt Inspection (Basic Tools Required: Wrench)
Most toilets are secured to the flange with bolts hidden under decorative caps. Carefully pry off these caps. You may need a flathead screwdriver to gently lift them.
- Check the Bolt Tightness: Using a wrench (usually an adjustable wrench works), try to tighten the bolts. Be careful not to overtighten them, as this can crack the porcelain. If the bolts are loose, tightening them might solve the wobble.
- Inspect the Bolts for Rust: Are the bolts heavily rusted or corroded? If so, they may be weakened and unable to properly secure the toilet.
- Check the Flange Slots: Look at the slots in the flange where the bolts are inserted. Are they broken, cracked, or stripped? This is a common problem, especially with plastic flanges.
DIY Action Plan: Steps to Installing a New Toilet Flange
Based on your diagnosis, you can now determine the best course of action. If the flange is severely damaged (cracked, broken, or rusted beyond repair), or if the bolts are stripped, it's time to replace the flange. Proceed with caution and remember to shut off the water supply to the toilet before starting! Also, wear safety glasses and gloves throughout this process.
Tools and Materials You'll Need:
- New toilet closet flange (choose the right type and size for your plumbing)
- Wax ring (or waxless alternative)
- New toilet bolts and washers
- Putty knife or scraper
- Adjustable wrench
- Screwdriver (Phillips and flathead)
- Hacksaw or PVC cutter (if you need to cut the drain pipe)
- Drill with appropriate bits (for securing the flange to the floor)
- Caulking gun and bathroom-grade caulk
- Gloves
- Safety glasses
- Bucket and sponges
- Old towels or rags
Step 1: Turn Off the Water and Remove the Toilet
Important: Before you do anything else, turn off the water supply to the toilet at the shut-off valve located near the floor behind the toilet.
- Flush the toilet to remove as much water as possible.
- Use a sponge to remove any remaining water from the bowl and tank.
- Disconnect the water supply line from the toilet tank.
- Remove the bolt caps and loosen the bolts securing the toilet to the flange. If the bolts are rusted, you may need penetrating oil to loosen them.
- Carefully rock the toilet to break the seal of the wax ring.
- Lift the toilet straight up and away from the flange. This is best done with two people, as toilets can be heavy.
- Place the toilet on its side on old towels or rags to protect it and your floor.
Step 2: Remove the Old Flange
- Scrape Away Old Wax: Use a putty knife or scraper to remove all traces of the old wax ring from both the flange and the toilet. This is a crucial step for creating a good seal with the new wax ring.
- Assess the Existing Flange: Take a closer look at the old flange. What type is it (plastic, metal, etc.)? How is it connected to the drain pipe (glued, screwed, etc.)? This will determine the removal method.
- Remove the Flange:
- For Plastic Flanges Glued to PVC Pipe: If the flange is glued to the drain pipe, you may need to cut the pipe below the flange using a hacksaw or PVC cutter. Be careful not to cut too deep and damage the pipe. You can then use a special fitting to connect the new flange.
- For Metal Flanges Screwed to the Floor: If the flange is screwed to the floor, simply remove the screws. If the screws are rusted, you may need penetrating oil.
- Clean the Area: Thoroughly clean the area around the drain pipe to remove any debris or old adhesive. A clean surface is essential for proper installation.
Step 3: Install the New Flange
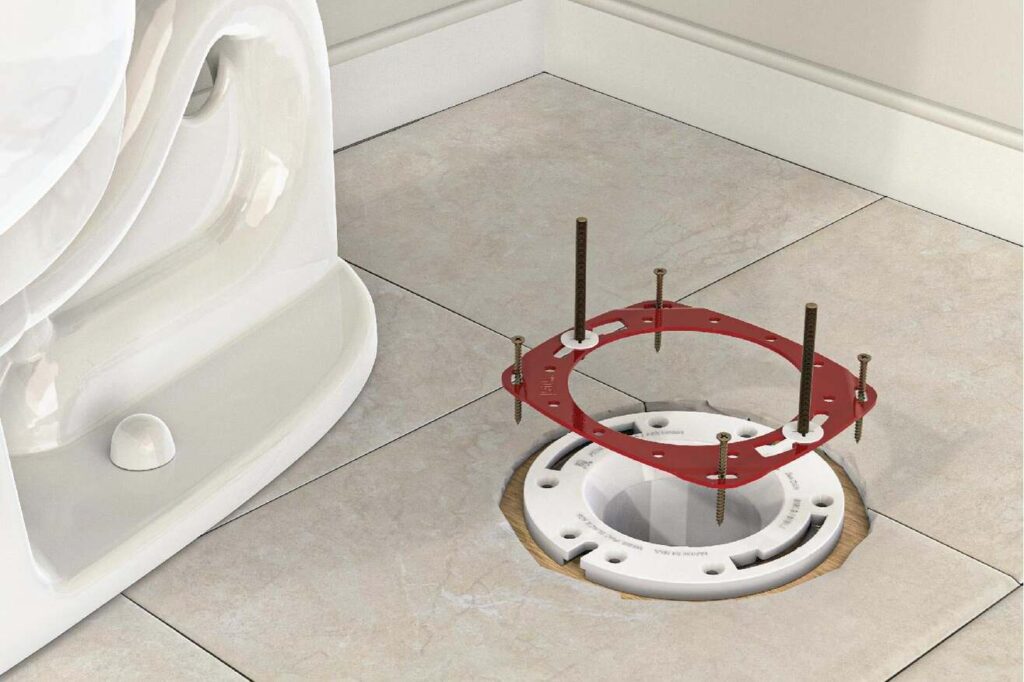
- Dry Fit the Flange: Before applying any adhesive or sealant, dry fit the new flange to ensure it fits properly over the drain pipe. Make sure the flange is level and that the bolt slots are aligned correctly.
- Connect the Flange to the Drain Pipe:
- For PVC Flanges: Apply PVC primer and cement to both the inside of the flange and the outside of the drain pipe. Quickly slide the flange onto the pipe and hold it in place until the cement sets.
- For Metal Flanges (if applicable): Align the flange with the drain pipe.
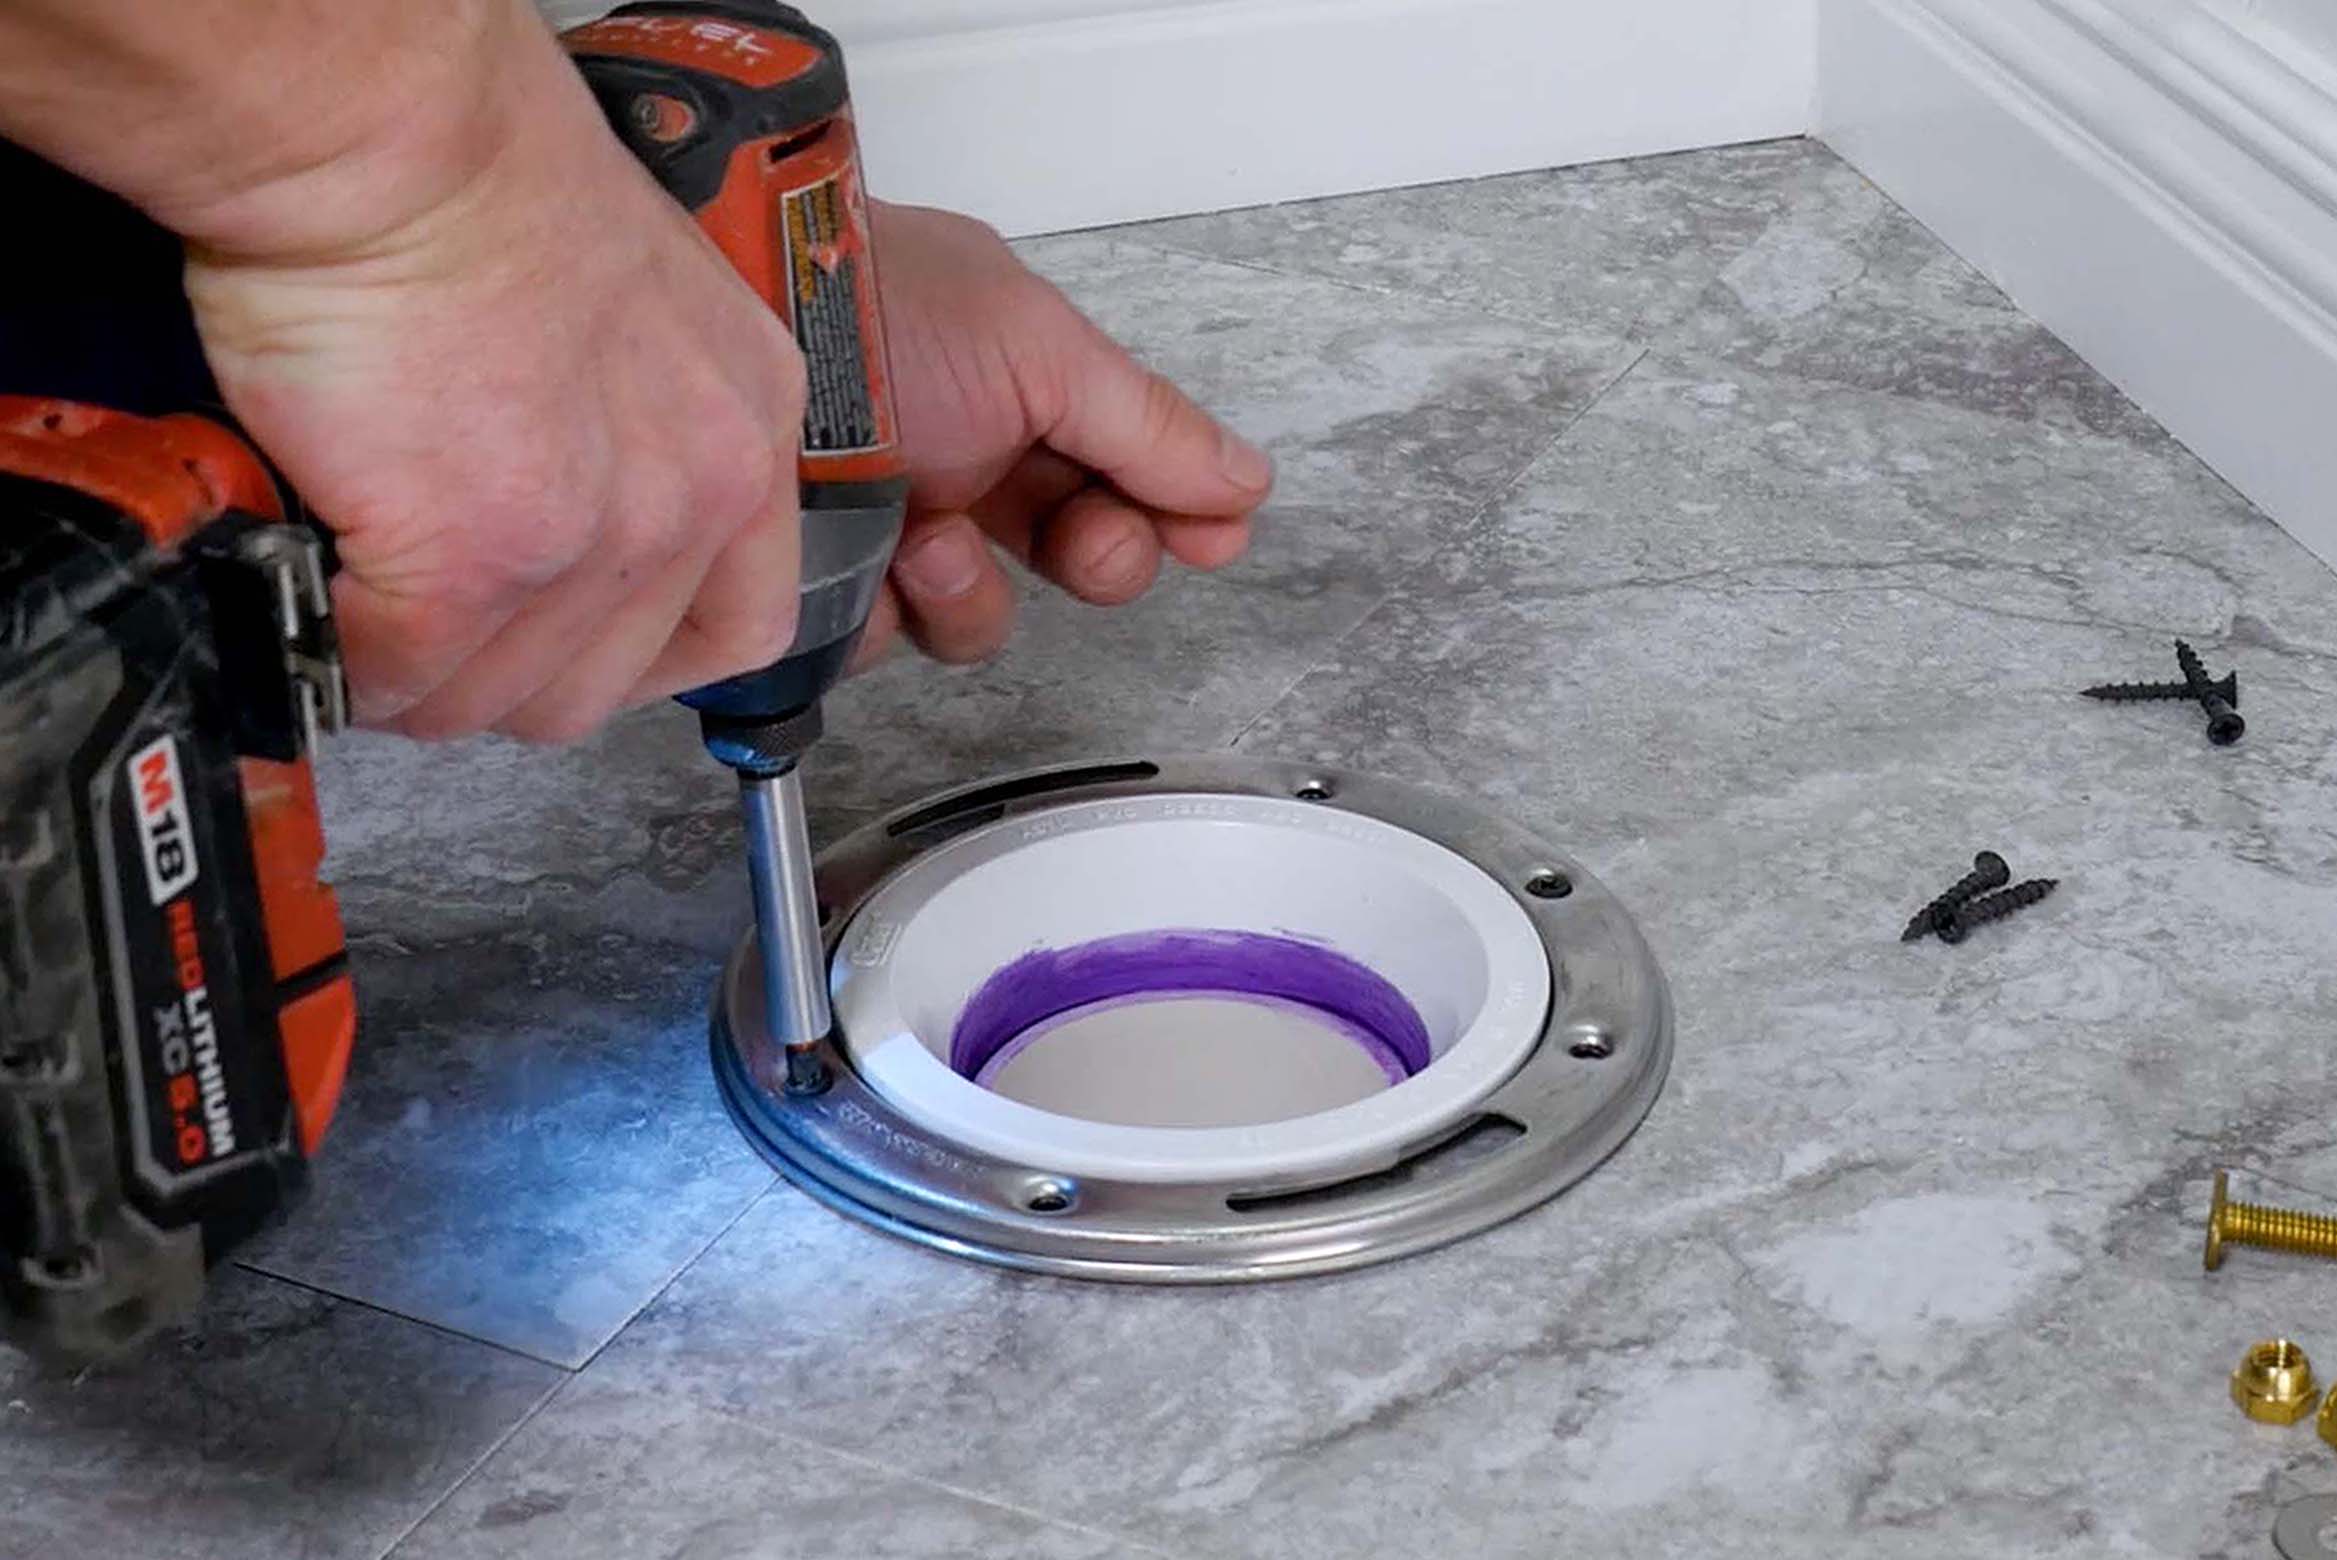
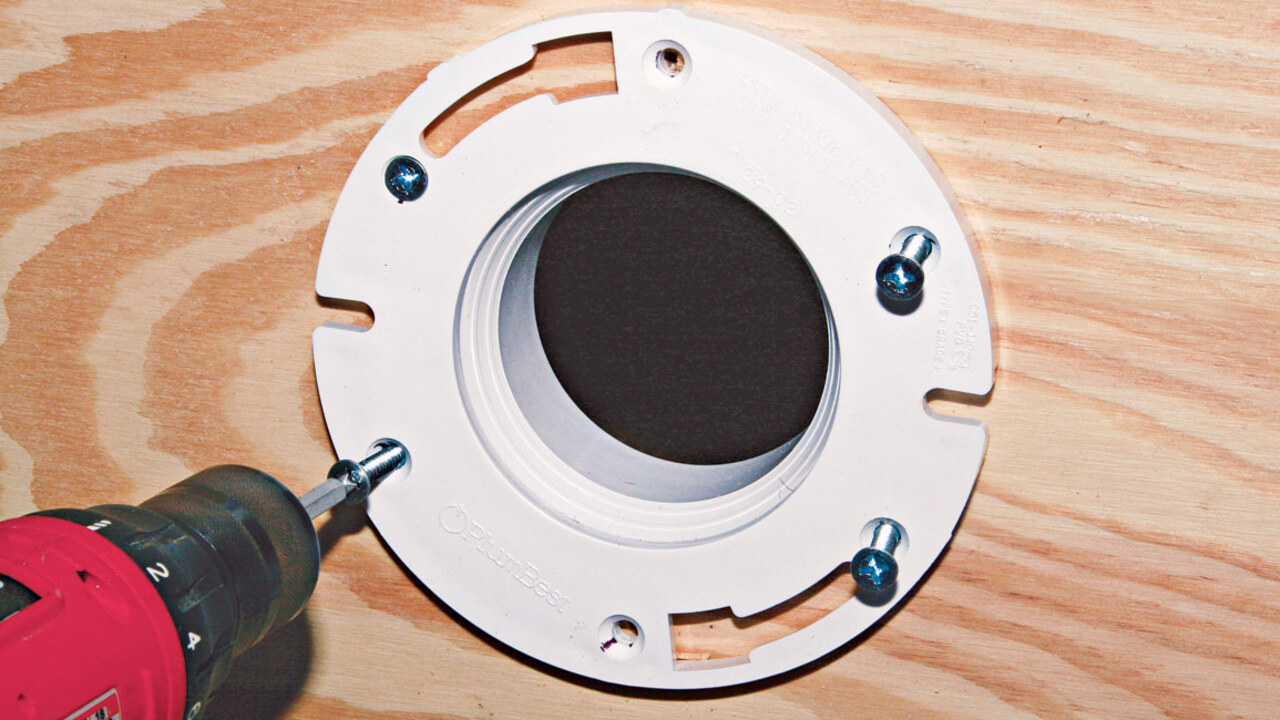
- Secure the Flange to the Floor: Use screws to secure the flange to the floor. Make sure to use screws that are long enough to penetrate the subfloor but not so long that they could damage pipes or wiring. If you're screwing into concrete, you'll need to use masonry screws and pre-drill pilot holes.
- Ensure Leveling: Double-check that the flange is level. If not, use shims to level it before securing it to the floor. A level flange is critical for proper toilet installation and preventing leaks.
Step 4: Install the Wax Ring and Reinstall the Toilet
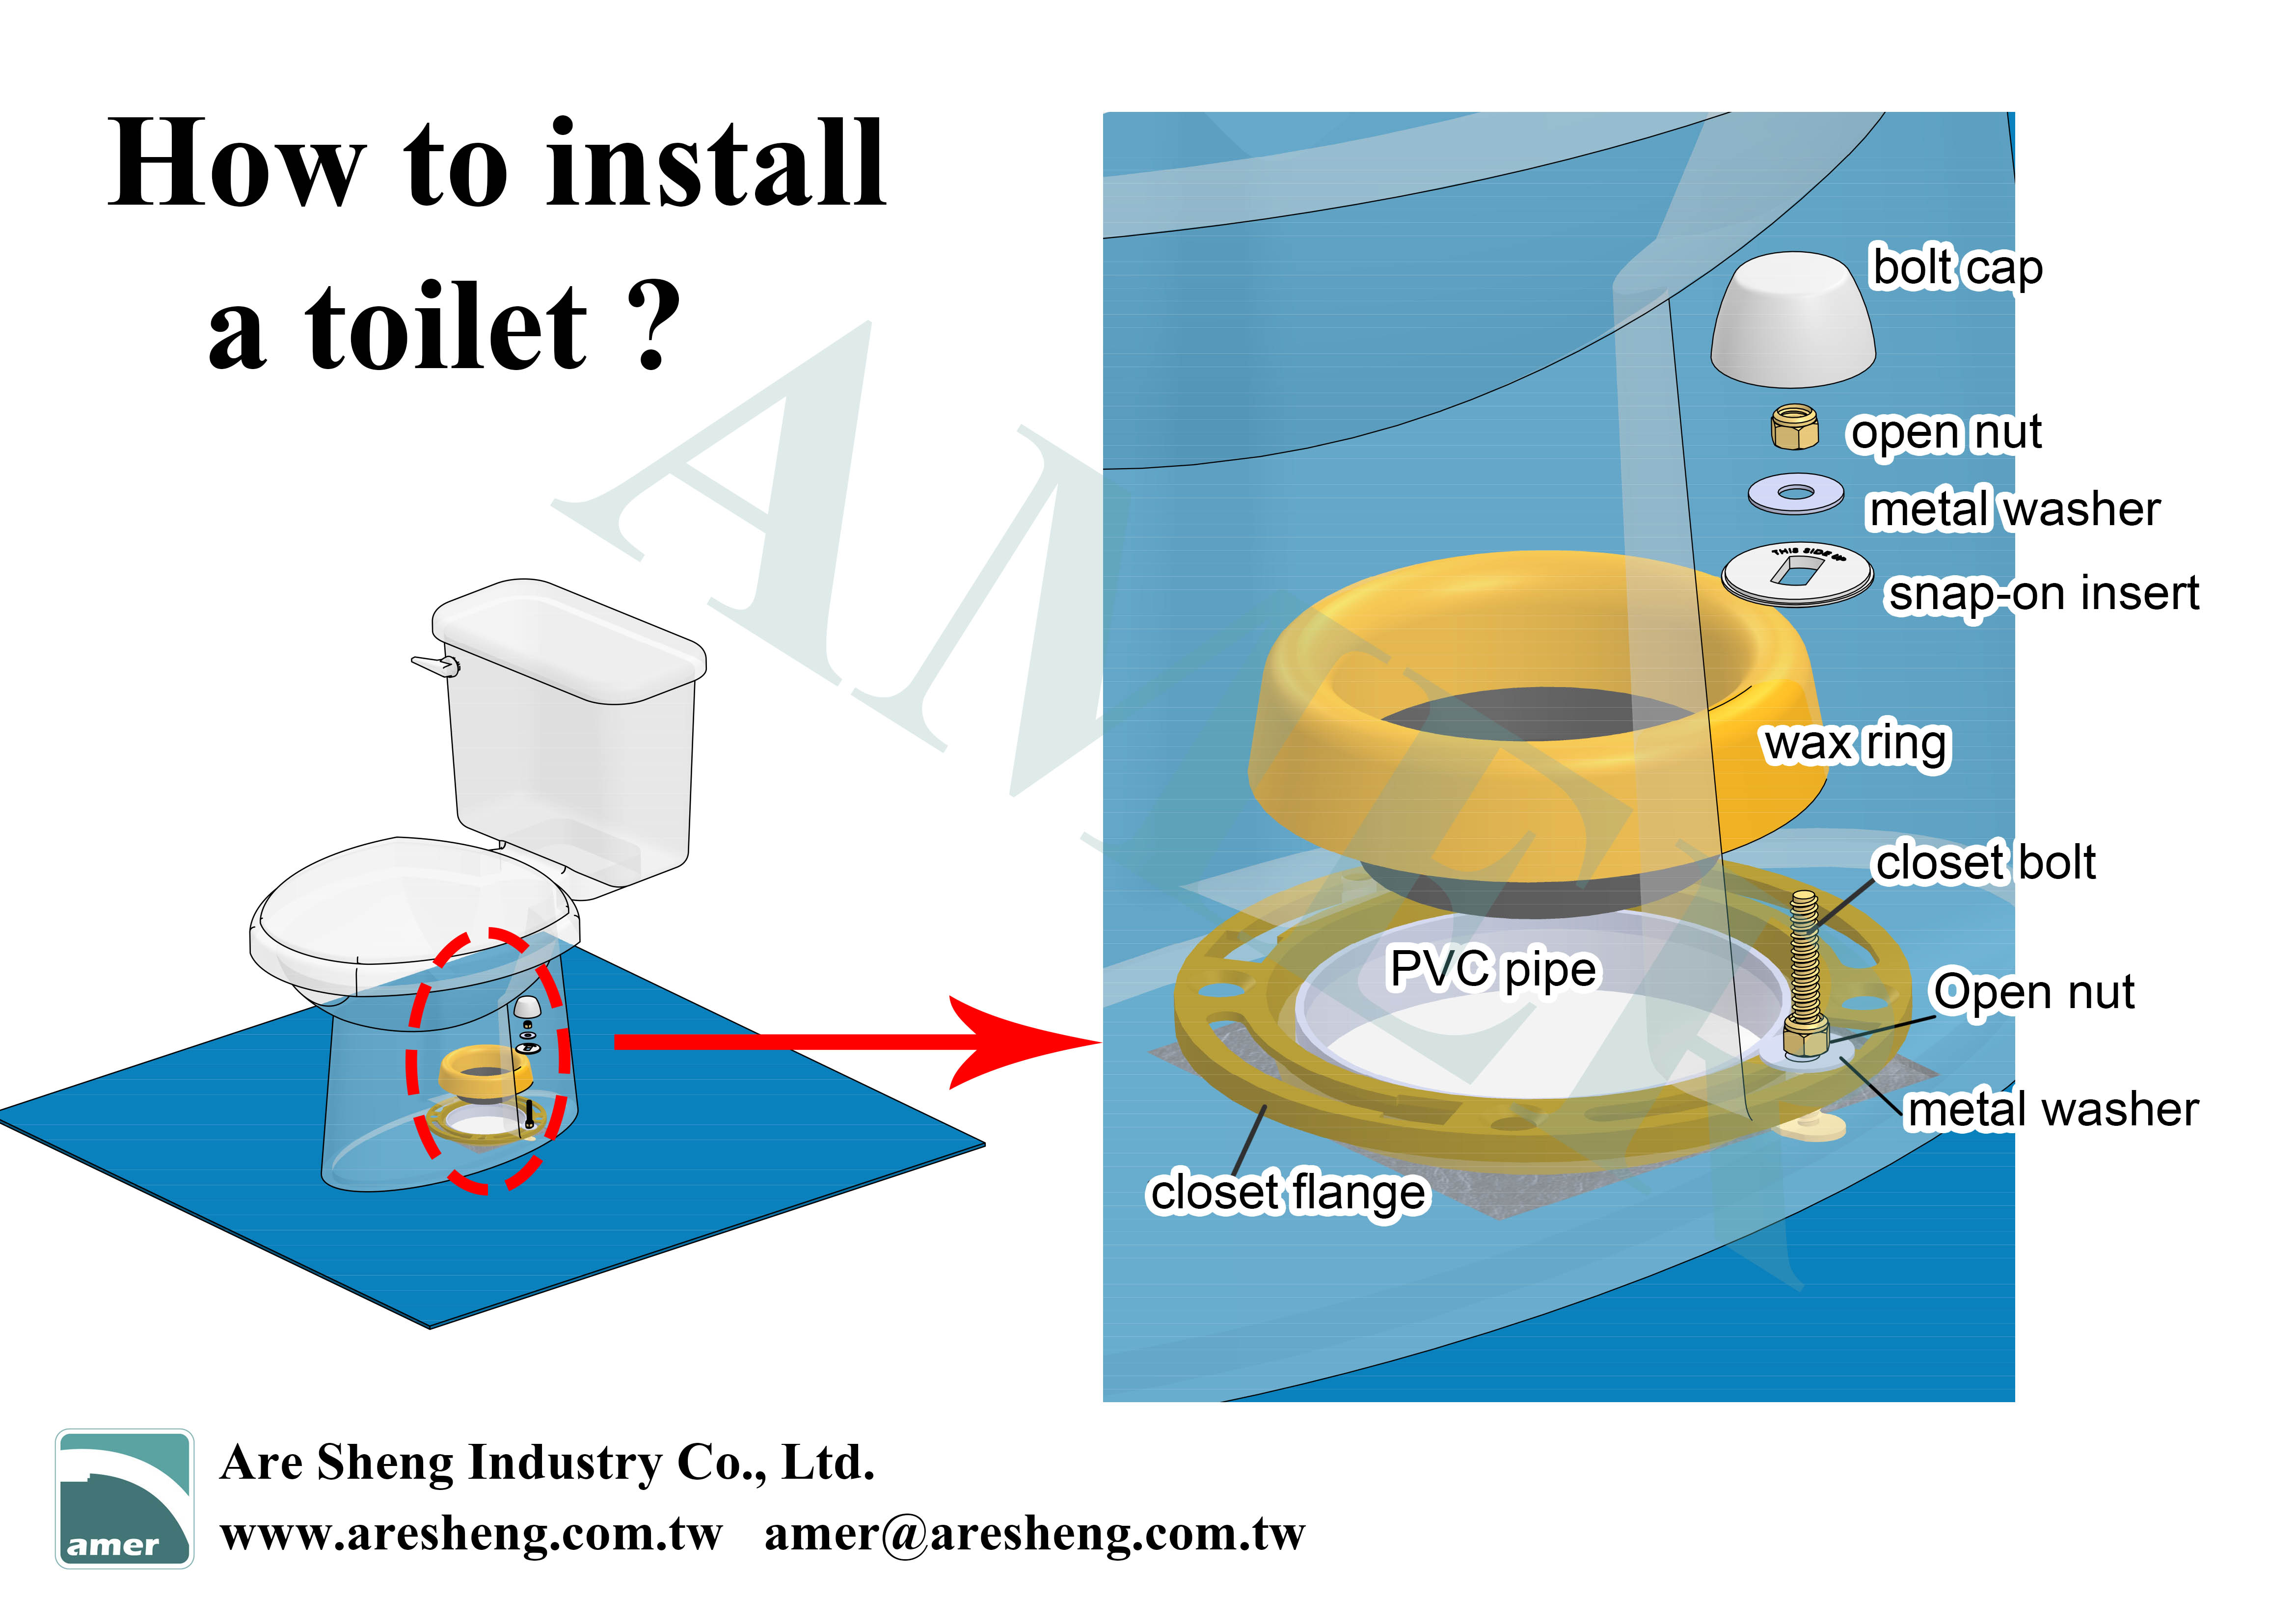
- Install the Wax Ring: Place the new wax ring (or waxless alternative) on the bottom of the toilet, around the outlet hole. Make sure the wax ring is centered and securely attached. Some prefer to place the wax ring on the flange itself. Either method is acceptable, but ensure a good seal.
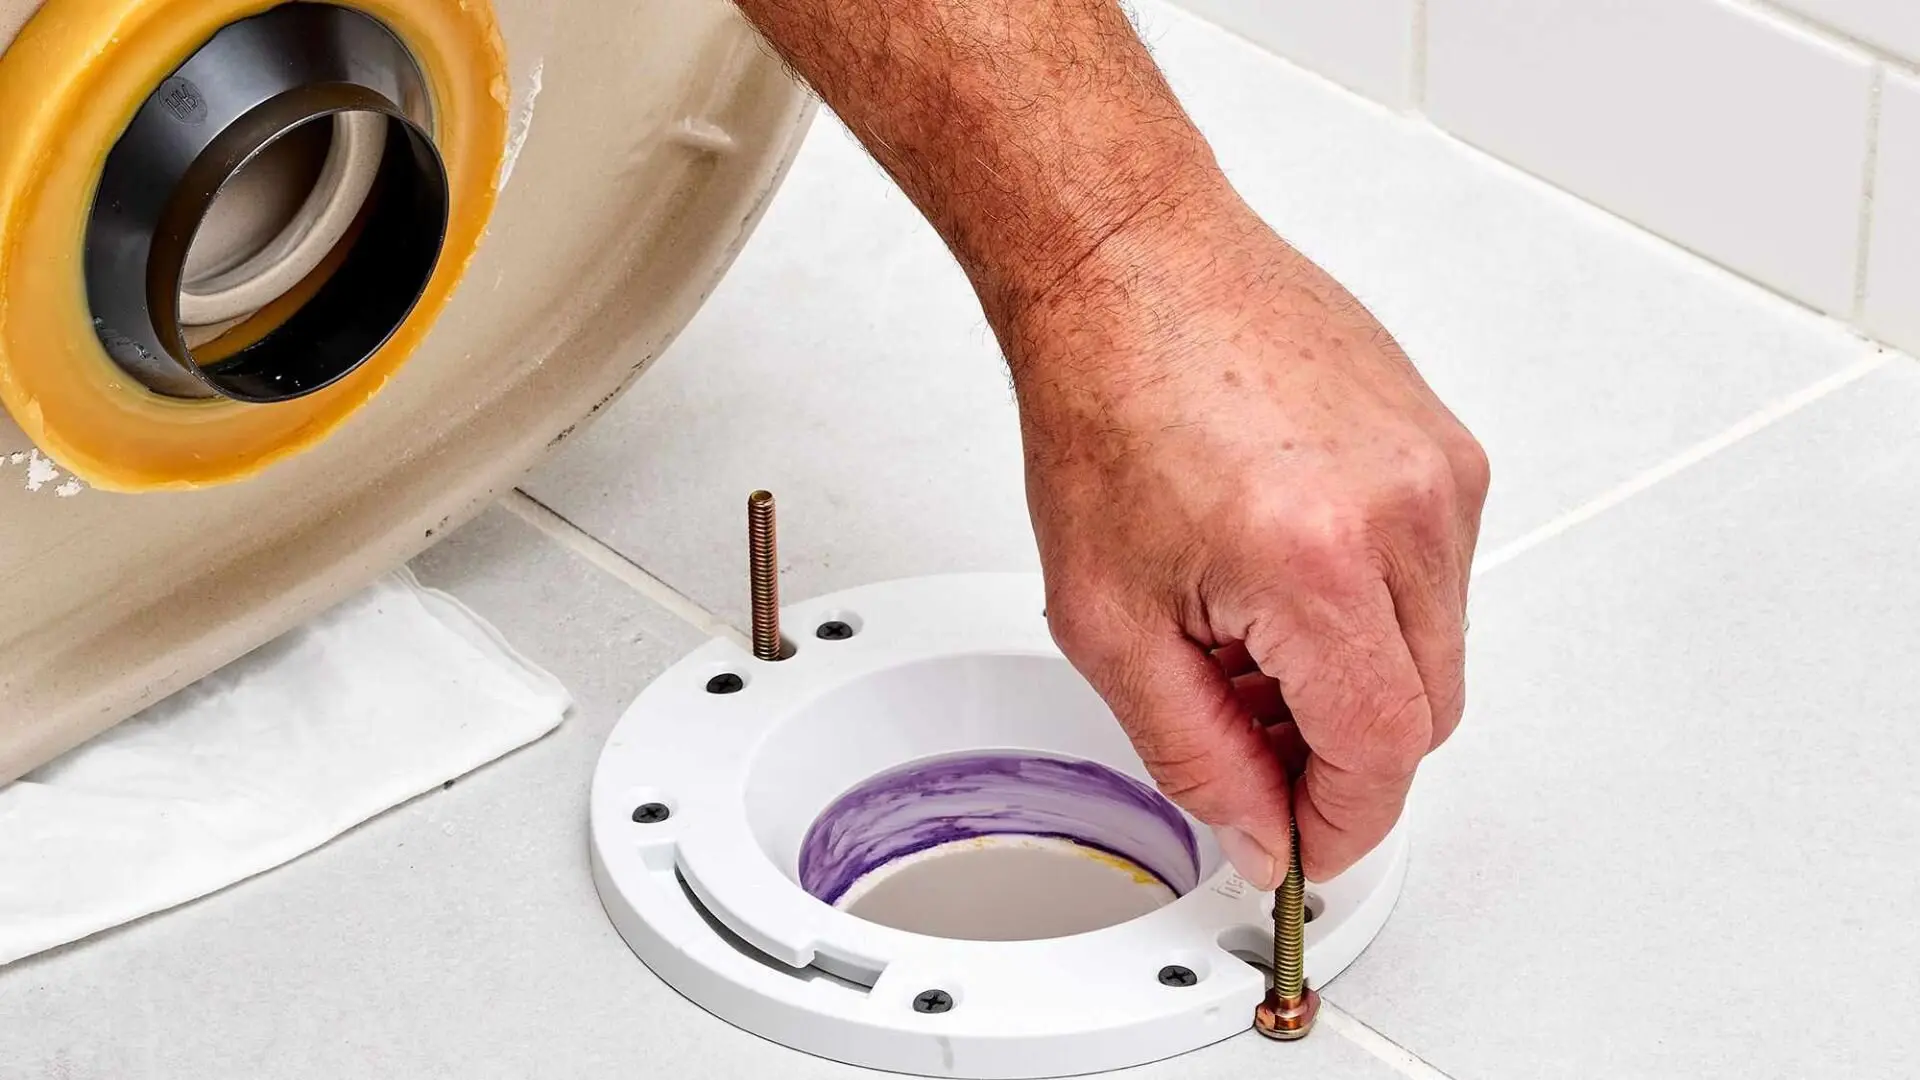
- Position the Toilet: Carefully lift the toilet and position it over the flange, aligning the bolt holes in the toilet base with the bolt slots in the flange.
- Lower the Toilet: Gently lower the toilet onto the flange, pressing down firmly to compress the wax ring and create a tight seal.
- Install the Bolts and Washers: Insert the new toilet bolts and washers through the bolt holes in the toilet base and into the slots in the flange. Tighten the bolts evenly, alternating between sides, until the toilet is snug against the floor. Do not overtighten! Overtightening can crack the porcelain.
- Trim Excess Bolt Length: If the bolts are too long, use a hacksaw to trim off the excess length.
- Install the Bolt Caps: Snap the bolt caps over the bolts to conceal them.
Step 5: Connect the Water Supply and Caulk
- Connect the Water Supply Line: Reconnect the water supply line to the toilet tank. Turn the water supply back on slowly and check for leaks at the connection.
- Caulk Around the Base: Apply a bead of bathroom-grade caulk around the base of the toilet where it meets the floor. This will help to seal the toilet and prevent water from seeping underneath. Leave a small gap at the back of the toilet to allow for any potential leaks to be detected.
- Test Flush: Flush the toilet several times to ensure it is working properly and that there are no leaks.
When to Call a Professional Plumber
While many toilet flange issues can be addressed with DIY skills, there are situations where calling a professional plumber is the best course of action. Consider professional help if:
- You're uncomfortable working with plumbing: If you're not confident in your DIY abilities, it's always better to err on the side of caution.
- The drain pipe is damaged: If the drain pipe itself is cracked, broken, or corroded, it needs to be repaired or replaced by a professional.
- You encounter hidden plumbing problems: Once you remove the toilet, you might discover other plumbing issues, such as leaky pipes or damaged subflooring.
- You're dealing with lead pipes: If you suspect that your plumbing contains lead pipes, don't attempt to work on them yourself. Lead pipes require specialized handling and disposal procedures.
- You can't properly seal the new flange: If you've tried multiple times to install the new flange and you're still experiencing leaks, it's time to call a plumber. Improperly sealed flanges can lead to significant water damage.
Replacing a toilet flange can be a rewarding DIY project. By following these steps and using common sense, you can often fix a wobbly toilet and prevent potential plumbing problems. However, don't hesitate to call a professional when needed. Your safety and the integrity of your plumbing system are paramount.