How To Install A Toilet Drain

Installing a toilet drain, while seemingly straightforward, requires careful planning and precise execution to prevent leaks, blockages, and costly repairs down the line. This guide provides a comprehensive overview of the process, catering to homeowners undertaking DIY projects, HVAC technicians seeking a refresher, and facility managers overseeing plumbing installations in larger buildings.
Planning and Preparation
Before diving into the installation, thorough planning is crucial. This involves assessing the existing plumbing, selecting the appropriate materials, and ensuring compliance with local building codes.
1. Assessing Existing Plumbing
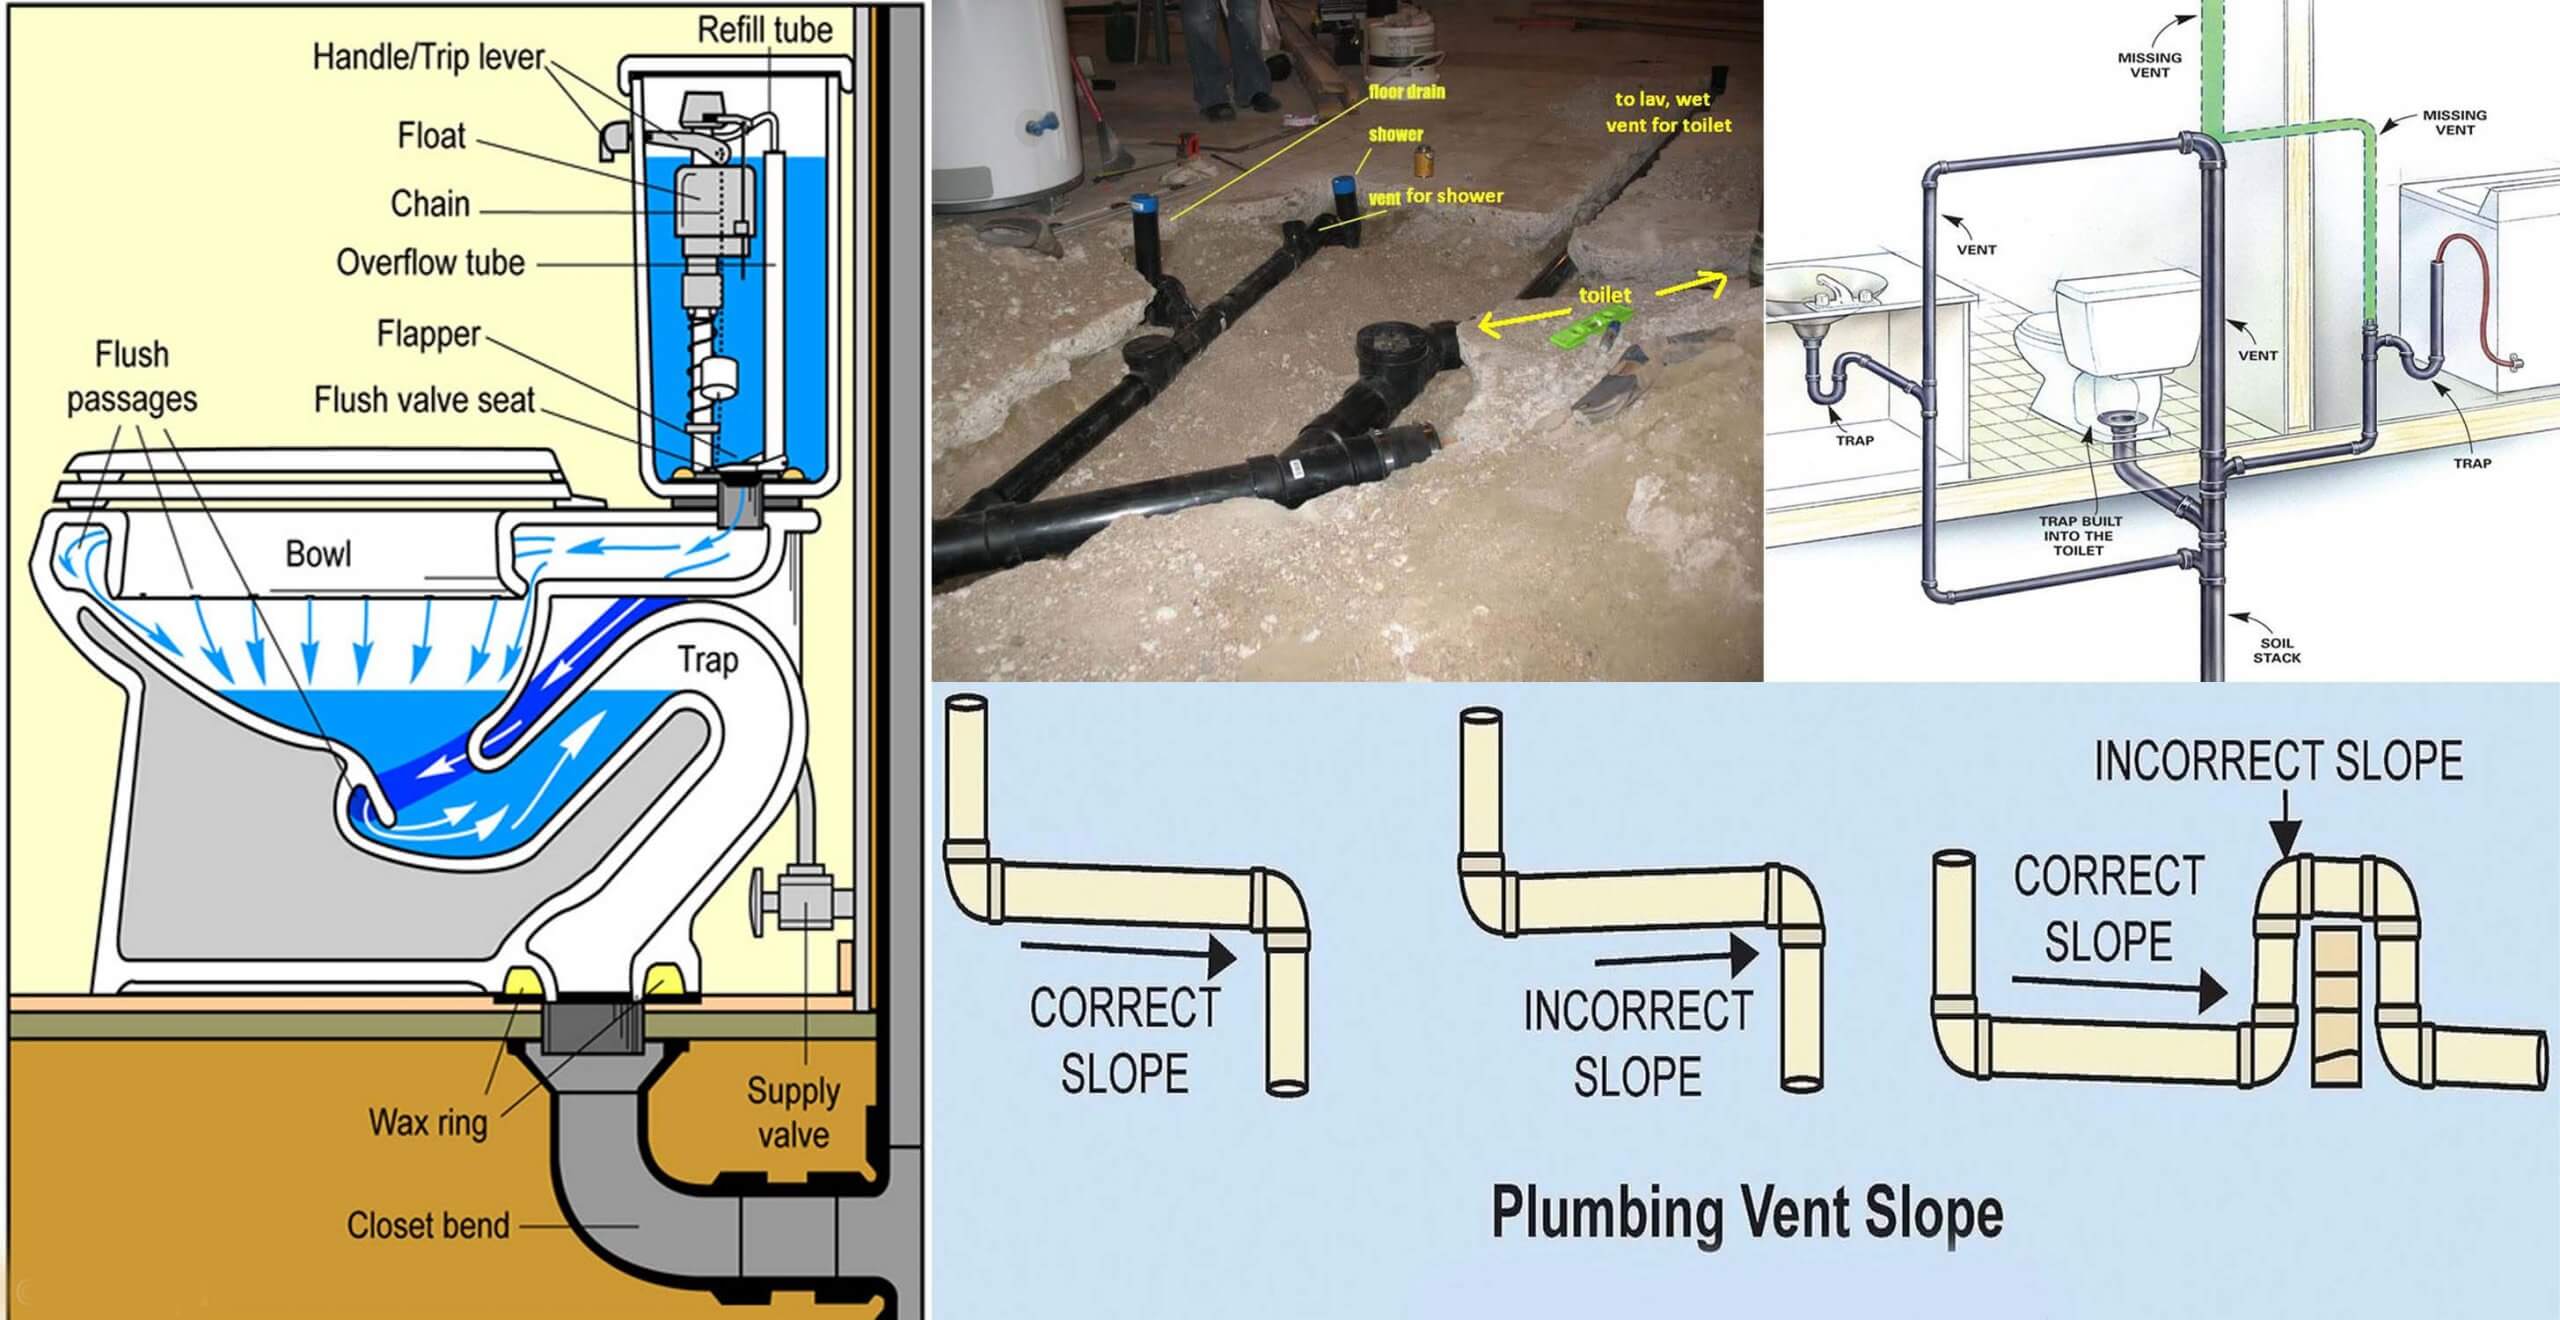
Start by identifying the location of the main drain line. This is typically a 3- or 4-inch diameter pipe made of PVC, cast iron, or ABS. Determine the distance from the proposed toilet location to the main drain line and the available slope. A minimum slope of ¼ inch per foot is required to ensure proper drainage. Inspect the existing drain line for any signs of damage, corrosion, or blockages. If the existing drain line is compromised, repairs or replacement may be necessary.
2. Selecting the Right Materials
The choice of materials depends on the existing plumbing system and local building codes. Common materials include:
- PVC (Polyvinyl Chloride): A cost-effective and durable option suitable for most residential applications. It is lightweight, easy to cut and join, and resistant to corrosion.
- ABS (Acrylonitrile Butadiene Styrene): Another common plastic pipe material, similar to PVC in terms of cost and ease of installation. However, ABS is more susceptible to UV degradation and may not be permitted in all areas.
- Cast Iron: A traditional material known for its durability and sound-dampening properties. Cast iron is more expensive and difficult to work with than plastic pipes but offers superior resistance to high temperatures and chemicals.
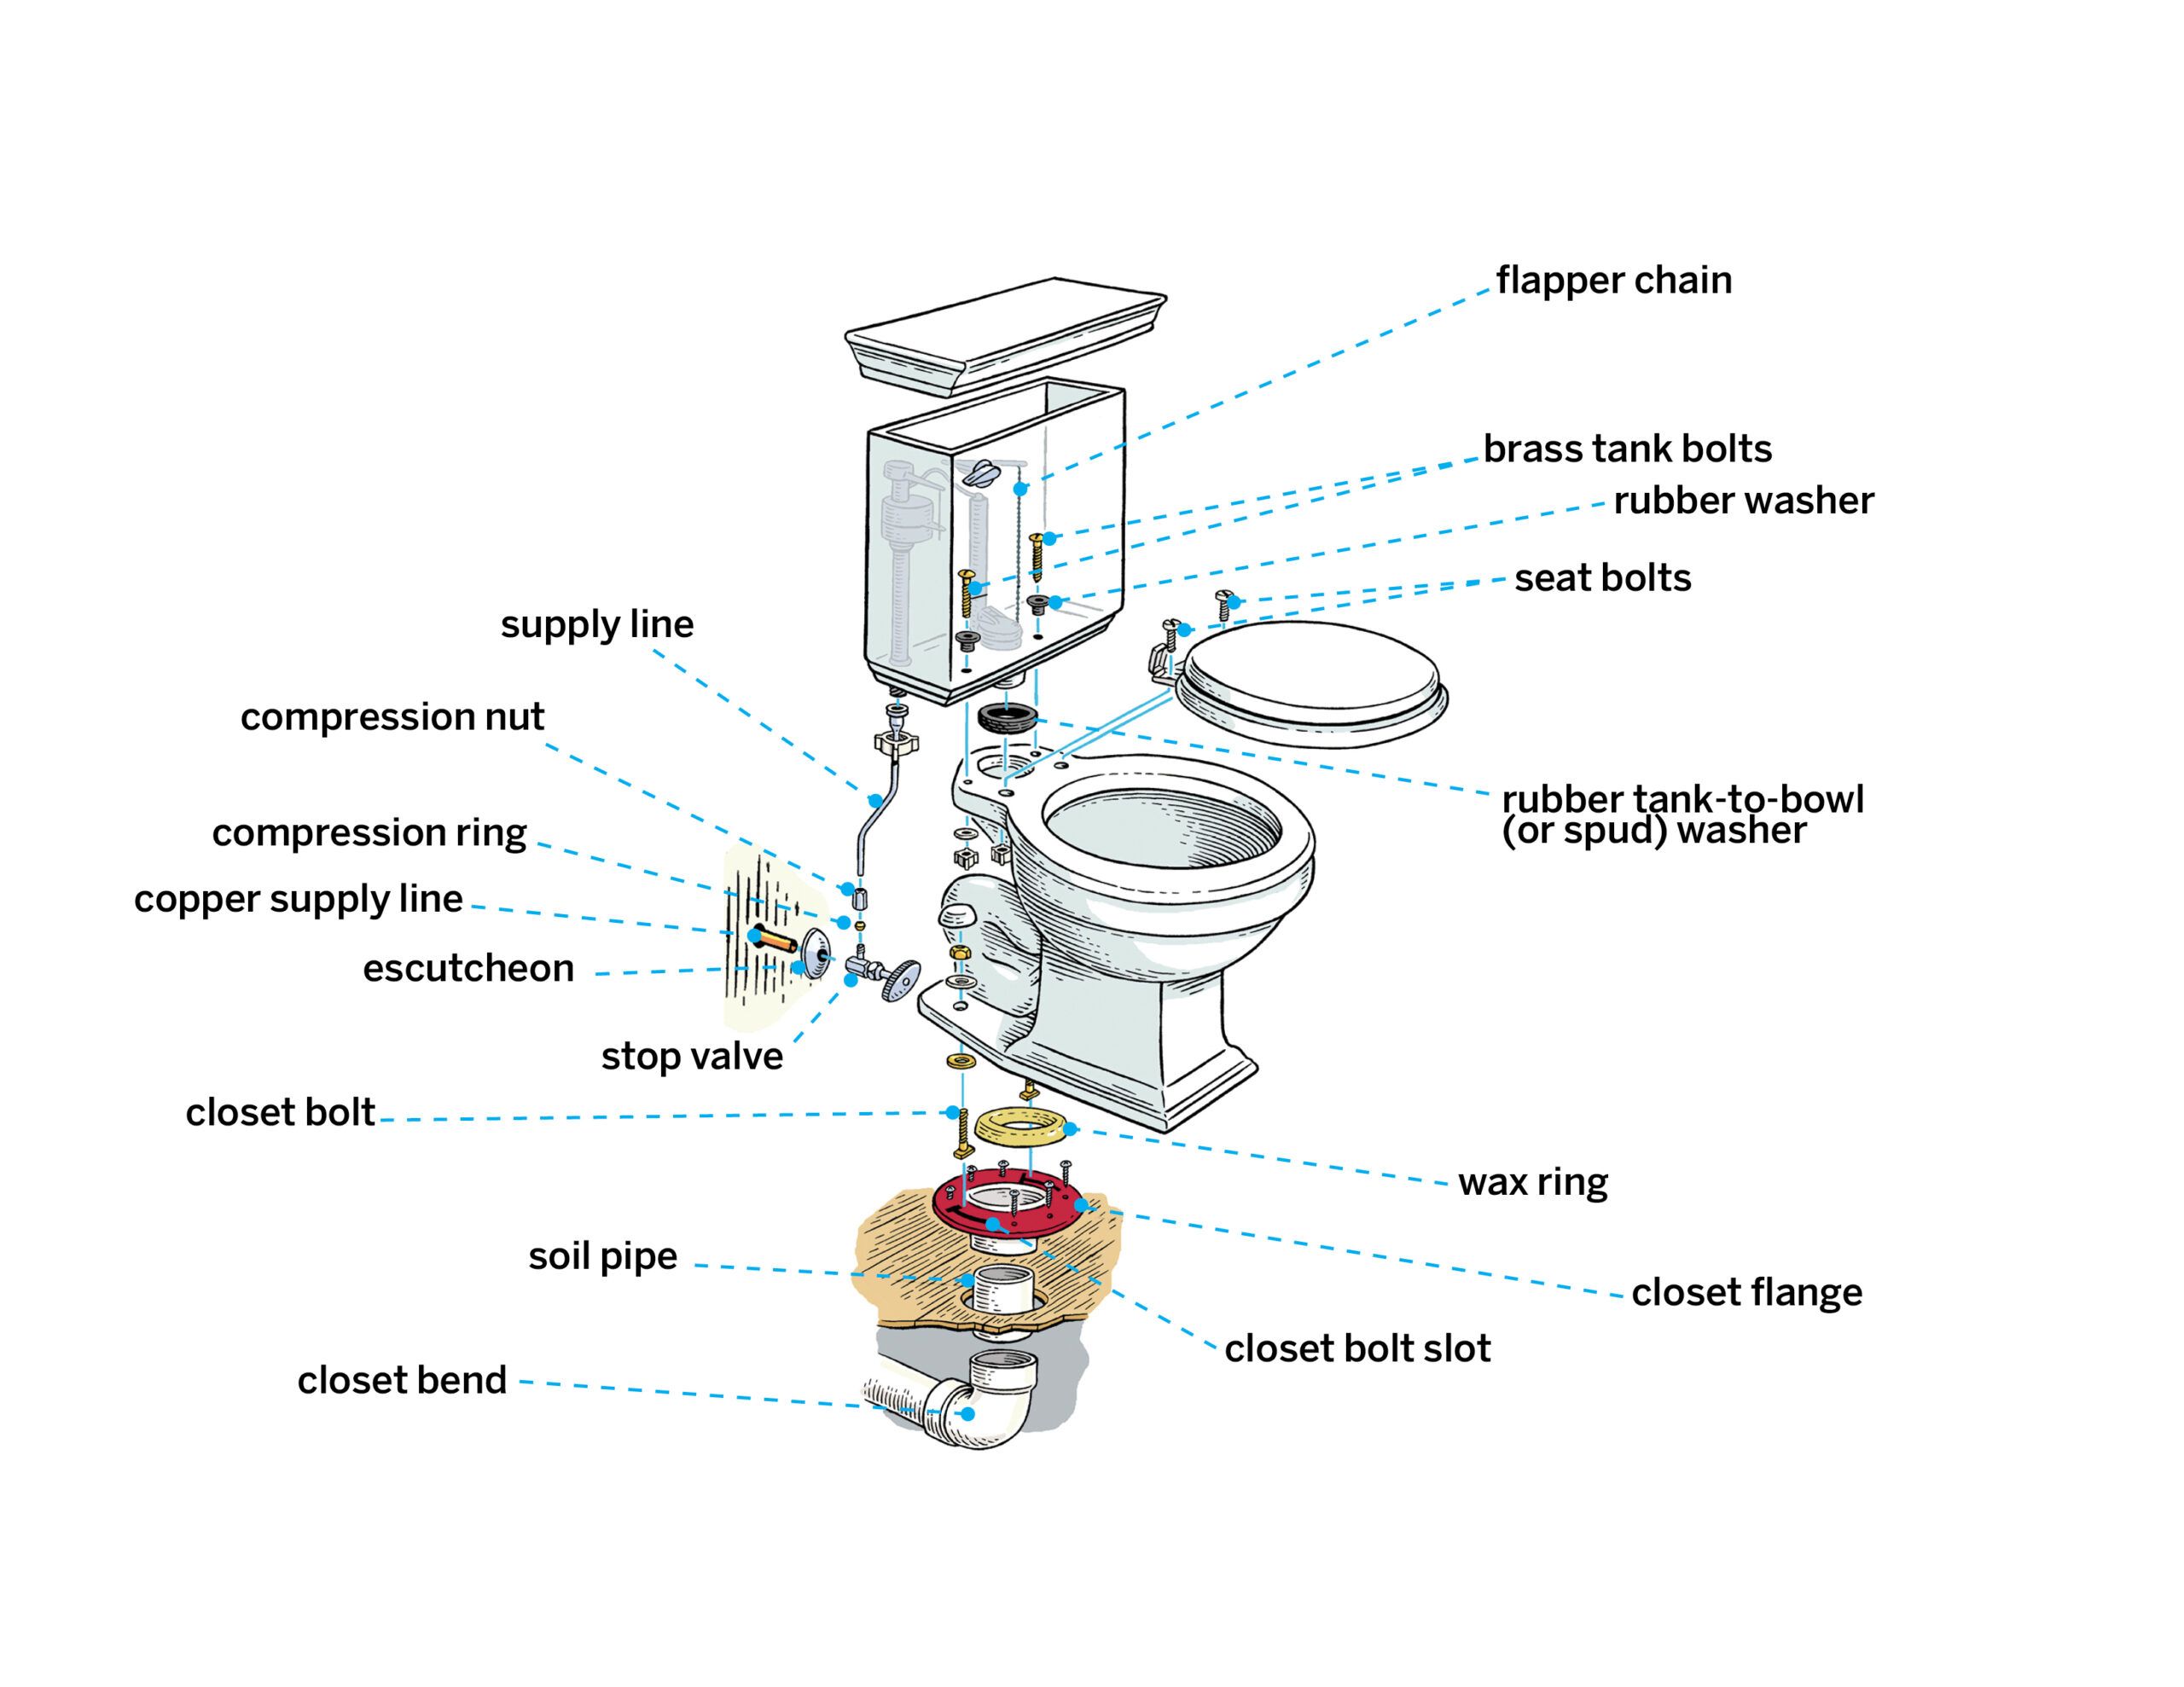
In addition to the drain pipe, you'll need a toilet flange, which connects the toilet to the drain. Flanges come in various materials, including PVC, ABS, and metal. Choose a flange that is compatible with the drain pipe material and the toilet model. Other essential materials include pipe cement, primer, Teflon tape, and closet bolts.
3. Ensuring Code Compliance
Local building codes dictate the specific requirements for plumbing installations, including pipe size, slope, and materials. Consult with your local building department or a qualified plumber to ensure that your installation complies with all applicable codes. This is crucial to avoid costly rework and potential fines.
Installation Process
With the planning and preparation complete, you can proceed with the installation. The following steps outline the process for installing a toilet drain using PVC pipe.
1. Cutting and Preparing the Drain Pipe
Measure the distance from the proposed toilet location to the main drain line. Cut the PVC pipe to the required length using a PVC pipe cutter or a saw. Ensure the cut is square and free of burrs. Use a deburring tool or sandpaper to smooth the edges of the pipe. Clean the pipe and fittings with a PVC primer before applying PVC cement. The primer prepares the surface of the pipe for bonding with the cement.
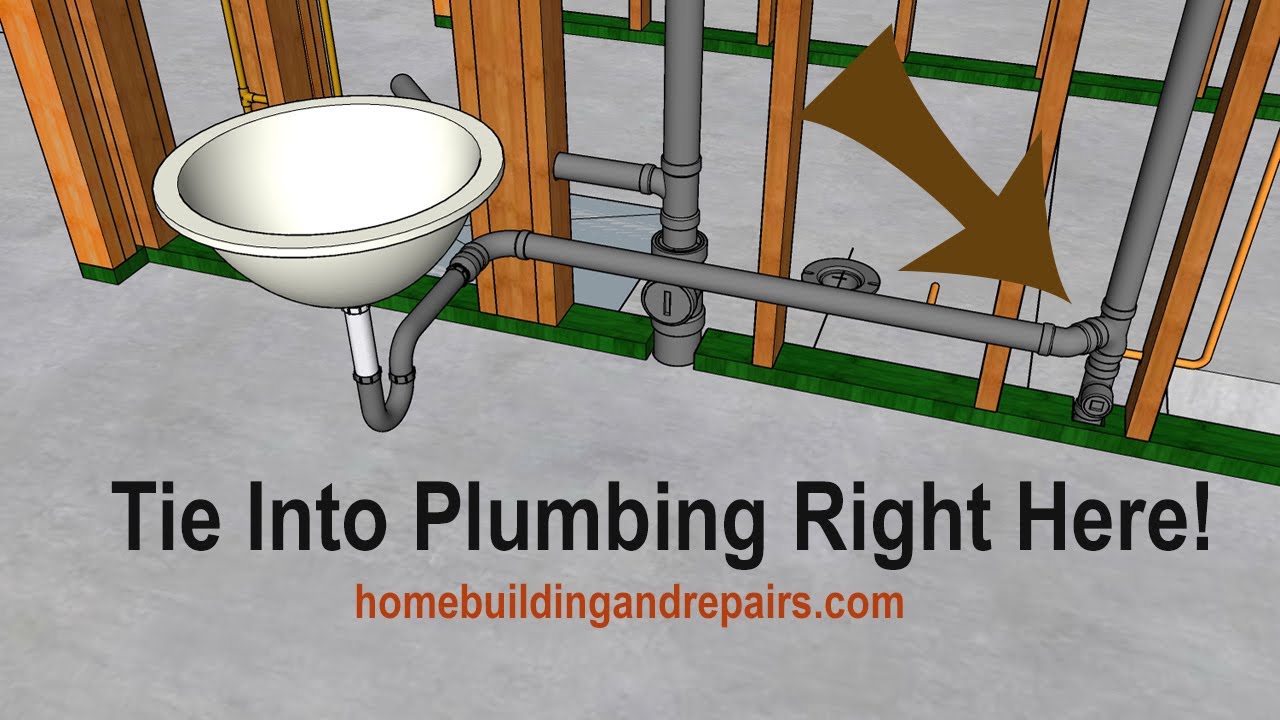
2. Connecting the Drain Pipe to the Main Drain Line
Depending on the configuration of the existing drain line, you may need to use a wye fitting or a sanitary tee to connect the new drain pipe. Apply PVC primer to the inside of the fitting and the outside of the drain pipe. Then, apply PVC cement to both surfaces and quickly insert the pipe into the fitting. Rotate the pipe slightly to ensure even distribution of the cement. Hold the pipe in place for a few seconds until the cement sets.
3. Installing the Toilet Flange
Position the toilet flange on the finished floor, directly above the drain pipe. Ensure the flange is level and aligned with the toilet's mounting holes. Secure the flange to the floor using screws or nails. Some flanges have a built-in test cap that can be used to pressure test the drain line. If your flange does not have a test cap, you can purchase one separately.
4. Connecting the Toilet to the Flange
Install the closet bolts into the slots on the toilet flange. These bolts will secure the toilet to the flange. Place a wax ring on the bottom of the toilet, around the drain opening. Carefully lower the toilet onto the flange, aligning the bolt holes with the closet bolts. Press down firmly on the toilet to compress the wax ring and create a watertight seal. Install the washers and nuts onto the closet bolts and tighten them evenly. Avoid overtightening, which can crack the toilet bowl.
5. Testing the Drain Line
After the toilet is installed, test the drain line for leaks. Flush the toilet several times and inspect the connections for any signs of water leakage. If leaks are detected, tighten the connections or replace the faulty components.
Alternative Installation Methods
While the above steps outline the most common method for installing a toilet drain, there are alternative approaches that may be necessary depending on the specific circumstances.
1. Using a No-Hub Coupling
If the existing drain line is made of cast iron, you may need to use a no-hub coupling to connect the new drain pipe. A no-hub coupling consists of a rubber sleeve and two stainless steel clamps. The rubber sleeve is placed over the ends of the pipes to be joined, and the clamps are tightened to create a watertight seal. No-hub couplings are particularly useful for joining dissimilar materials, such as PVC and cast iron.
2. Installing a Floor-Mounted Toilet with a Rear Outlet
In some cases, a floor-mounted toilet with a rear outlet may be the preferred option. These toilets have a drain opening in the back of the bowl, rather than the bottom. This can simplify the installation process, especially in situations where the drain line is located behind the toilet.
3. Dealing with Concrete Floors
Installing a toilet drain in a concrete floor requires special considerations. You may need to use a core drill to create an opening for the drain pipe. Alternatively, you can build a raised platform to conceal the drain pipe above the concrete floor.
Troubleshooting Common Problems
Even with careful planning and execution, problems can arise during the installation process. Here are some common issues and how to address them.
1. Leaks at the Flange Connection
Leaks at the flange connection are often caused by a faulty wax ring or improperly tightened closet bolts. Replace the wax ring and ensure the closet bolts are tightened evenly. Avoid overtightening, which can crack the toilet bowl.
2. Blockages in the Drain Line
Blockages in the drain line can be caused by debris, roots, or mineral buildup. Use a plumber's snake or auger to clear the blockage. In severe cases, you may need to hire a professional plumber to jet the drain line.
3. Improper Slope
Insufficient slope can lead to slow drainage and frequent clogs. Ensure the drain pipe has a minimum slope of ¼ inch per foot. If the slope is inadequate, you may need to adjust the height of the drain pipe or the toilet flange.
Cost Considerations
The cost of installing a toilet drain varies depending on the complexity of the project, the materials used, and whether you hire a professional plumber. A DIY installation can cost between $50 and $200 for materials. Hiring a professional plumber can cost between $300 and $800, depending on the scope of the work.
Maintenance Tips
To ensure the longevity and proper functioning of your toilet drain, follow these maintenance tips:
- Avoid flushing non-flushable items, such as feminine hygiene products, diapers, and paper towels.
- Use a toilet plunger to clear minor clogs.
- Periodically clean the toilet bowl and drain with a toilet bowl cleaner.
- Inspect the drain line for leaks or damage.
By following these guidelines, homeowners, HVAC technicians, and facility managers can successfully install and maintain toilet drains, ensuring proper sanitation and preventing costly plumbing problems.