How To Install A Whole House Generator

Imagine this: a summer storm rolls through, the lights flicker, and then – darkness. Your refrigerator stops humming, your AC gives up, and your internet vanishes. A whole house generator can prevent this scenario, providing backup power to your essential appliances and keeping your home comfortable during outages. Installing one is a significant project, but understanding the process can empower you to make informed decisions and potentially handle some preliminary steps yourself. This guide outlines the key steps involved, offering DIY tips where appropriate, and highlighting when to call in the pros.
Understanding the Basics: What You Need to Know
Before diving into the installation process, it's crucial to understand the core components and concepts:
- Generator Size: Determined by your power needs. Overestimating is better than underestimating. A professional electrician can help calculate your specific requirements.
- Fuel Source: Typically natural gas or propane. Natural gas is generally cheaper but requires a connection to a gas line. Propane offers more flexibility but requires a storage tank.
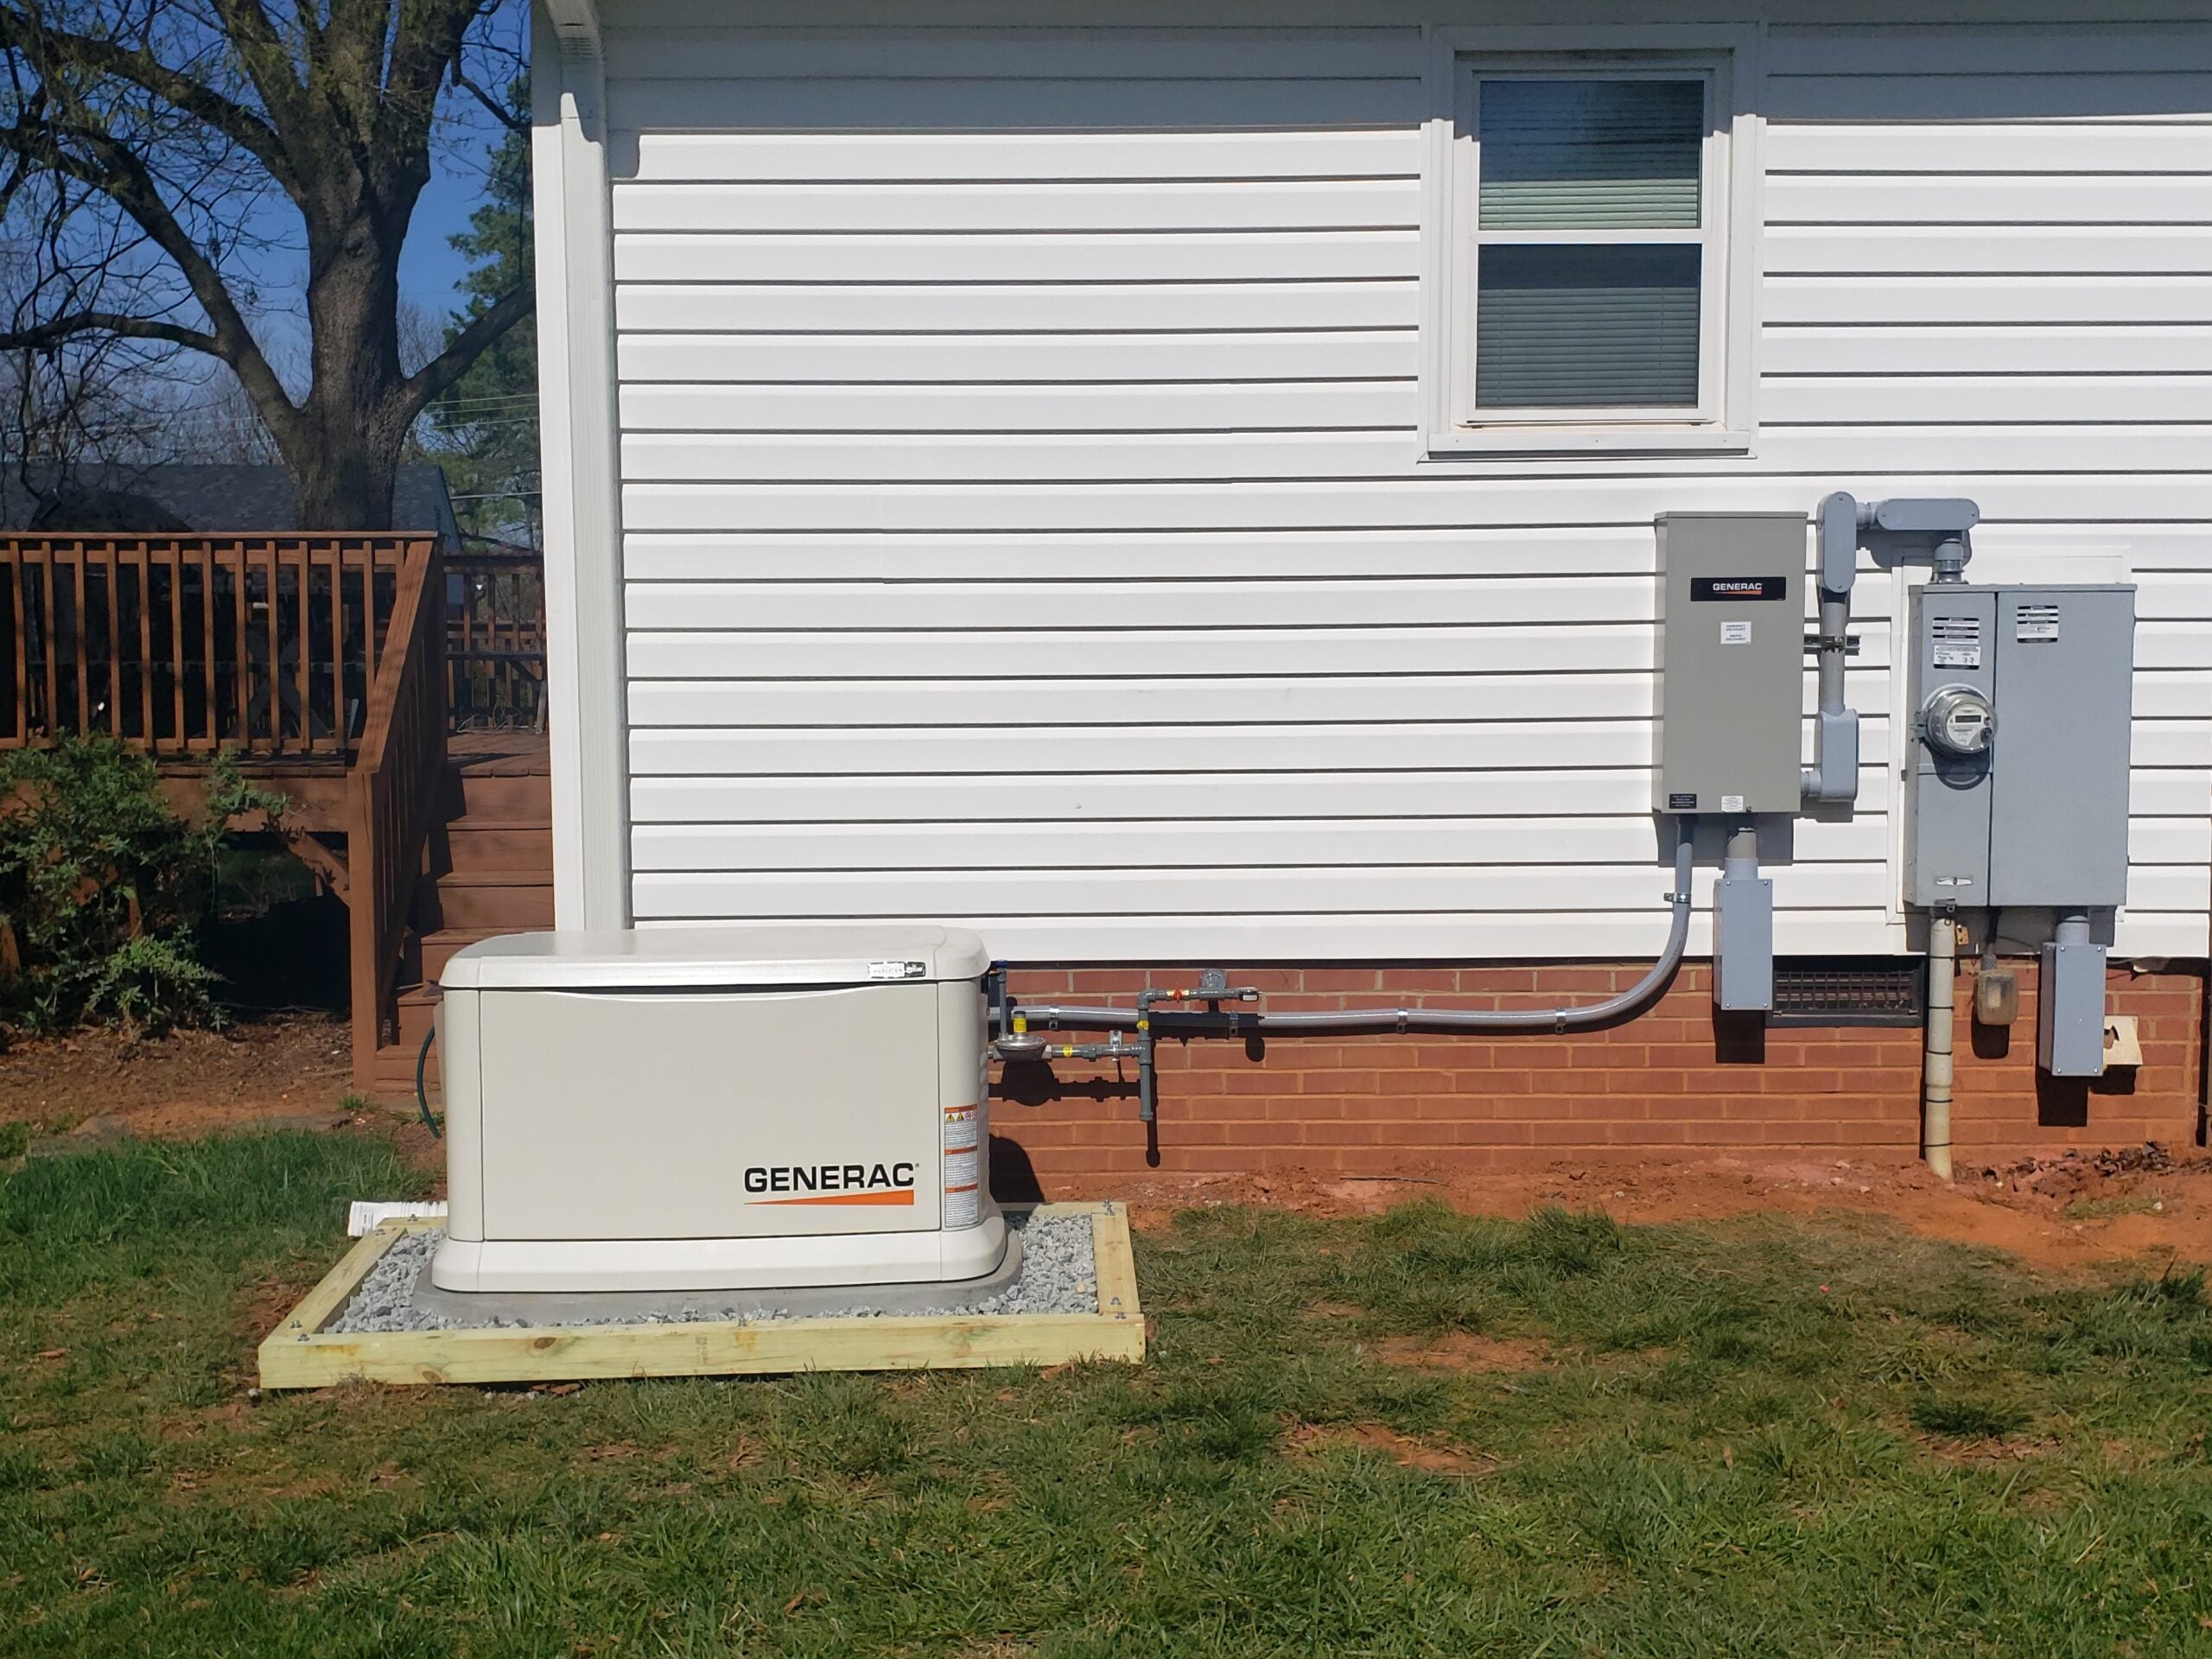
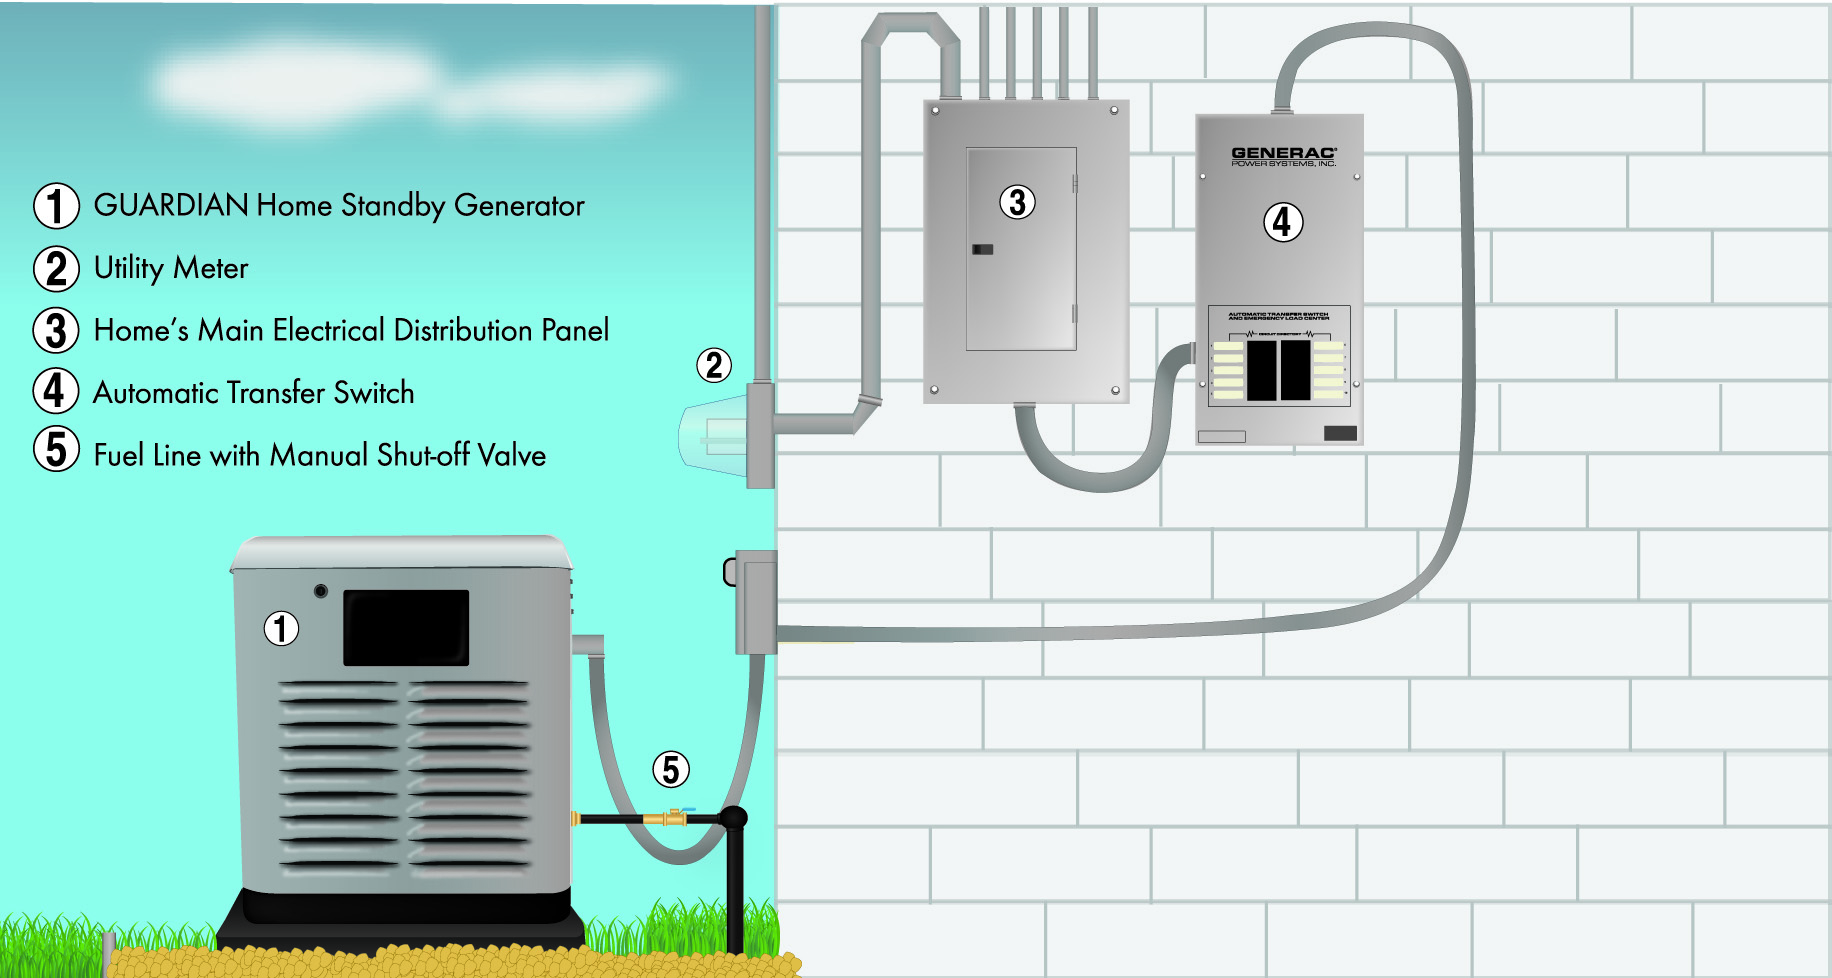
- Automatic Transfer Switch (ATS): This crucial device automatically switches your home's power source from the utility grid to the generator when it detects an outage. It also prevents backfeeding power into the grid, which is dangerous and illegal.
- Permits: Most jurisdictions require permits for generator installation, especially for gas line connections and electrical work. Always check with your local authorities before starting any work.
Step-by-Step Installation Guide
1. Planning and Preparation (DIY Feasibility: Mostly DIY with Professional Consultation)
This is where you lay the groundwork for a successful installation. Skipping steps here can lead to significant problems later.
- Determine Your Power Needs: Create a list of appliances you want to power during an outage. Note their wattage. Use an online wattage calculator or consult with an electrician to determine the total wattage.
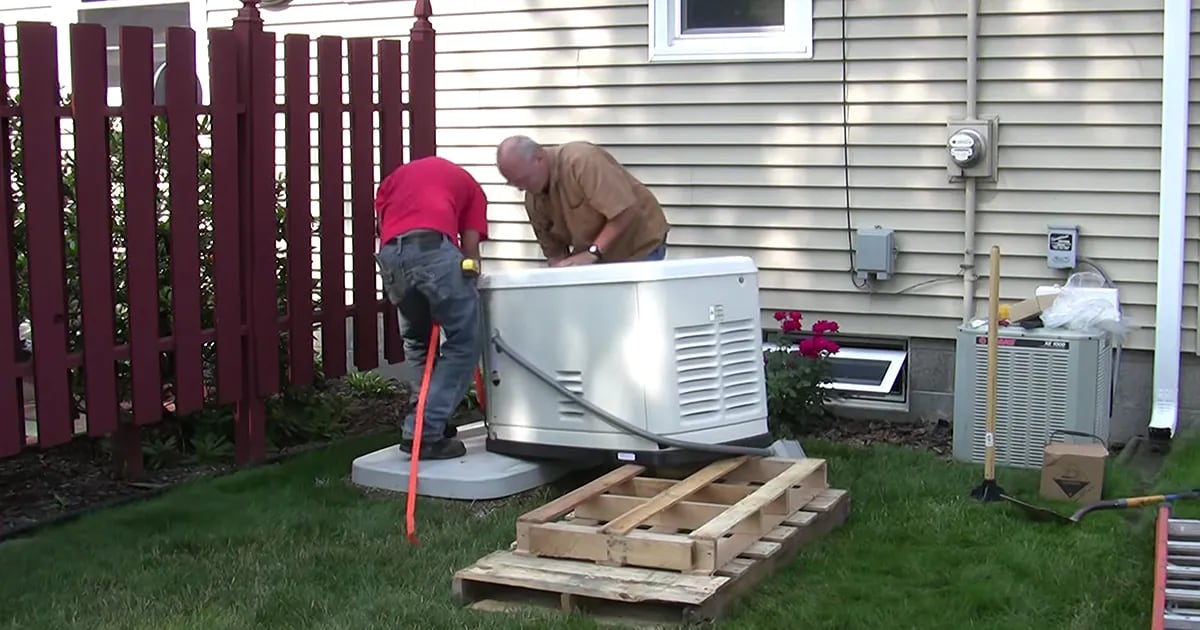
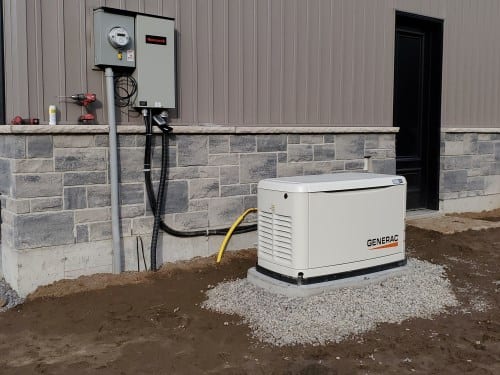
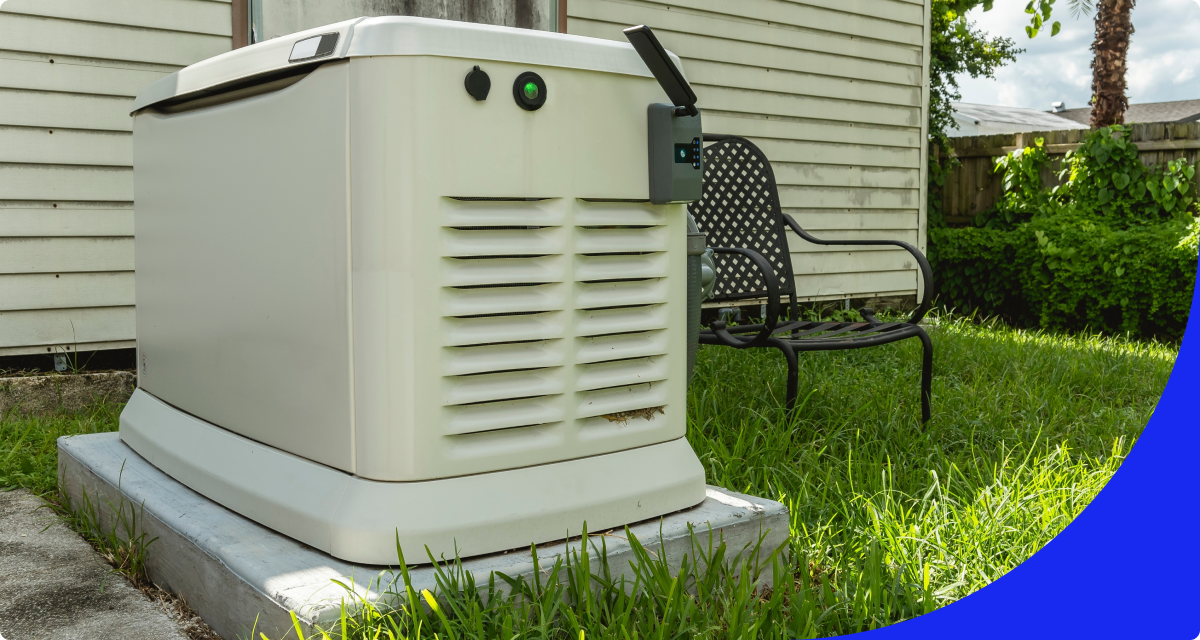
- Choose a Location: The generator needs a level, stable surface, adequate ventilation, and protection from the elements (rain, snow). It should be at least 5 feet away from any windows or doors and comply with local codes. Common locations include concrete pads, gravel beds, or specialized generator enclosures.
- Obtain Necessary Permits: Contact your local building department or city hall to understand the permitting requirements. The electrician or gas company often handles this, but it's good to be aware.
- Prepare the Site: Clear the area, level the ground, and construct a suitable base for the generator. This might involve pouring a concrete pad or creating a gravel bed. This is something you can often DIY.
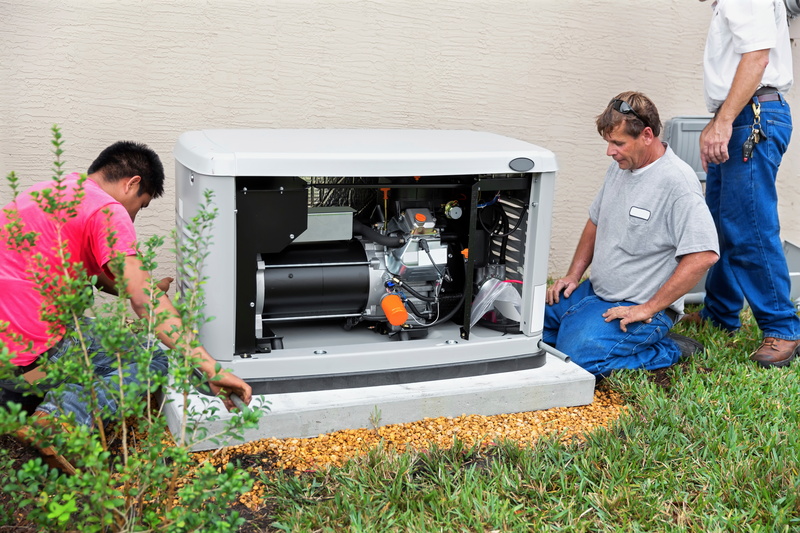
2. Electrical Connections (DIY Feasibility: *NEVER DIY. PROFESSIONAL ONLY*)
This is where you connect the generator to your home's electrical system. This step is extremely dangerous and must be performed by a licensed electrician. Incorrect wiring can cause electrocution, fire, and damage to your appliances.
- Install the Automatic Transfer Switch (ATS): The electrician will typically mount the ATS near your main electrical panel and wire it into the panel. This involves disconnecting existing circuits and connecting them to the ATS.
- Connect the Generator to the ATS: The electrician will run conduit and wiring from the generator to the ATS. This connection carries the power from the generator to your home.
- Grounding: Proper grounding is essential for safety. The electrician will ensure the generator and ATS are properly grounded according to code.
3. Fuel Source Connection (DIY Feasibility: *LIMITED DIY. PROFESSIONAL REQUIRED FOR GAS LINE CONNECTIONS*)
Connecting the generator to its fuel source (natural gas or propane) requires specialized skills and knowledge. Gas line connections MUST be performed by a licensed and qualified gas fitter or plumber. Incorrect gas connections can lead to gas leaks, explosions, and carbon monoxide poisoning.
Natural Gas
- Consult with a Gas Company/Plumber: They will assess your existing gas line and determine if it's adequate to supply the generator. Upgrading the gas line may be necessary.
- Install a Gas Shut-Off Valve: A manual shut-off valve is required near the generator for safety.
- Connect the Generator to the Gas Line: The gas fitter will connect the generator to the gas line using appropriate fittings and piping, ensuring a leak-proof connection.
- Leak Testing: After the connection, the gas fitter will perform a leak test to ensure there are no gas leaks.
Propane
- Propane Tank Installation: A propane tank will need to be installed and filled by a licensed propane company. Ensure the tank is properly sized for your generator's fuel consumption.
- Connect the Generator to the Propane Tank: The propane company will connect the generator to the propane tank using appropriate fittings and piping.
- Leak Testing: After the connection, the propane company will perform a leak test to ensure there are no gas leaks.
DIY Tip (Limited): You might be able to prepare the trench for the gas line (if required) by digging to the required depth and width. However, never handle the gas line installation itself. Always consult with and hire a professional.
4. Testing and Startup (DIY Feasibility: Mostly DIY with Professional Guidance)
Once the electrical and fuel connections are complete, it's time to test the generator. This step ensures everything is working correctly and identifies any potential issues.
- Initial Startup: Follow the manufacturer's instructions for starting the generator for the first time. Typically, this involves checking oil levels, coolant levels (if applicable), and battery voltage.
- Automatic Transfer Test: Simulate a power outage by turning off the main breaker to your house. The generator should automatically start within a few seconds, and the ATS should switch your home's power source to the generator.
- Load Testing: Turn on various appliances to test the generator's capacity. Monitor the voltage and frequency to ensure they remain stable.
- Monitor for Alarms: Check for any alarms or error codes on the generator's control panel. Consult the manufacturer's manual for troubleshooting information.
- Schedule a Professional Inspection: Even if everything seems to be working correctly, it's a good idea to have a licensed electrician and gas fitter inspect the installation to ensure it complies with all codes and regulations.
DIY Tip: Familiarize yourself with the generator's control panel and operating instructions. Learn how to manually start and stop the generator, and understand the meaning of different alarms and error codes.
Troubleshooting Common Issues
Even with a professional installation, occasional issues can arise. Here are some common problems and basic troubleshooting steps:
- Generator Won't Start:
- Check Fuel Supply: Ensure the gas line is turned on or the propane tank is full.
- Check Battery: The generator relies on a battery to start. Check the battery voltage and charge it if necessary. (DIY Possible)
- Check Oil Level: Low oil levels can prevent the generator from starting. Add oil as needed. (DIY Possible)
- Check Spark Plug: A faulty spark plug can prevent ignition. Replace the spark plug if necessary. (DIY Possible)
- Check Air Filter: A clogged air filter can restrict airflow and prevent the generator from starting. Clean or replace the air filter. (DIY Possible)
- Call a Professional: If you've checked all of the above and the generator still won't start, it's time to call a qualified technician. There may be a more complex problem, such as a faulty starter motor or fuel pump.
- Generator Runs but Doesn't Produce Power:
- Check Circuit Breakers: Ensure all circuit breakers on the generator are turned on. (DIY Possible)
- Check Voltage Regulator: The voltage regulator controls the generator's output voltage. A faulty voltage regulator can prevent the generator from producing power. (Professional Only)
- Check Brushes: The brushes transfer electricity from the rotor to the stator. Worn or damaged brushes can prevent the generator from producing power. (Professional Only)
- Generator Shuts Down Unexpectedly:
- Overload: The generator may be overloaded. Reduce the number of appliances running on the generator.
- Overheating: The generator may be overheating due to poor ventilation. Ensure the generator has adequate ventilation.
- Low Oil Pressure: Low oil pressure can cause the generator to shut down. Check the oil level and add oil as needed. (DIY Possible)
- High Temperature Shutdown: Most modern generators have a high-temperature shut down to protect the engine. Check the generator for air restrictions that could be causing the engine to overheat.
- Automatic Transfer Switch Not Working:
- Check Circuit Breakers: Ensure the circuit breaker for the ATS is turned on. (DIY Possible)
- Check Power Supply: The ATS requires a power supply to operate. Ensure the ATS is receiving power. (Professional Only)
- Check Settings: The ATS may have settings that need to be adjusted. Consult the manufacturer's manual. (Professional Only)
Important Safety Note: Before performing any troubleshooting, always disconnect the generator from the power source and allow it to cool down. Wear appropriate safety gear, such as gloves and eye protection.
Maintenance Tips
Regular maintenance is essential for ensuring your generator operates reliably when you need it most. Here are some key maintenance tasks:
- Oil Changes: Change the oil according to the manufacturer's recommendations. (DIY Possible)
- Air Filter Cleaning/Replacement: Clean or replace the air filter regularly. (DIY Possible)
- Spark Plug Replacement: Replace the spark plug periodically. (DIY Possible)
- Battery Maintenance: Check the battery voltage and charge it as needed. Consider using a battery maintainer to keep the battery fully charged. (DIY Possible)
- Exercise the Generator: Run the generator for a short period each month to keep the engine lubricated and prevent fuel from deteriorating.
- Professional Inspection: Schedule a professional inspection annually to ensure the generator is in good working order.
When to Call a Professional
While some troubleshooting and maintenance tasks can be performed by homeowners, certain situations require the expertise of a qualified professional. Always call a licensed electrician, gas fitter, or generator technician if:
- You are not comfortable working with electricity or gas.
- You suspect a gas leak.
- You are experiencing complex electrical or mechanical problems.
- You need to repair or replace major components.
- You are unsure how to perform a task safely.
By understanding the installation process, performing regular maintenance, and knowing when to call a professional, you can ensure your whole house generator provides reliable backup power for years to come. Remember, safety is paramount, so always prioritize professional assistance when dealing with electricity, gas, or complex repairs. This will help keep your home safe and your generator running smoothly. Enjoy the peace of mind knowing you're prepared for the next power outage!