How To Install Air Conditioner Capacitor

The capacitor is a crucial component in your air conditioning system, responsible for providing the electrical surge needed to start the motors that power the compressor and fan. When a capacitor fails, your AC unit may struggle to start, hum loudly, or fail altogether. Replacing a capacitor is a relatively straightforward repair, but it requires careful attention to safety and proper procedures. This guide provides detailed instructions for homeowners, HVAC technicians, and facility managers on how to install an air conditioner capacitor safely and effectively.
Safety First: Disconnecting Power and Discharge
Before commencing any work on your AC unit's electrical components, safety is paramount. Incorrectly handling electrical components can lead to severe injury or even death. Follow these steps meticulously:
- Turn off the power: Locate the disconnect switch near your outdoor AC unit. This is typically a small, metal box with a handle or pull-out switch. Turn the switch to the "off" position or pull out the disconnect entirely. If there's a fuse panel near the unit, remove the fuse.
- Double-check the power: Use a non-contact voltage tester to verify that the power is indeed off at the AC unit. Place the tester near the wires and components you'll be working with. If the tester indicates voltage, double-check the disconnect switch or fuse panel.
- Discharge the capacitor: Even with the power off, the capacitor can store a dangerous electrical charge. You must discharge it before touching it. Use a resistor discharge tool – a screwdriver with an insulated handle and a resistor wired between the blade and a clip. If you don’t have a resistor discharge tool you can carefully use a well insulated screw driver to short across the terminals.
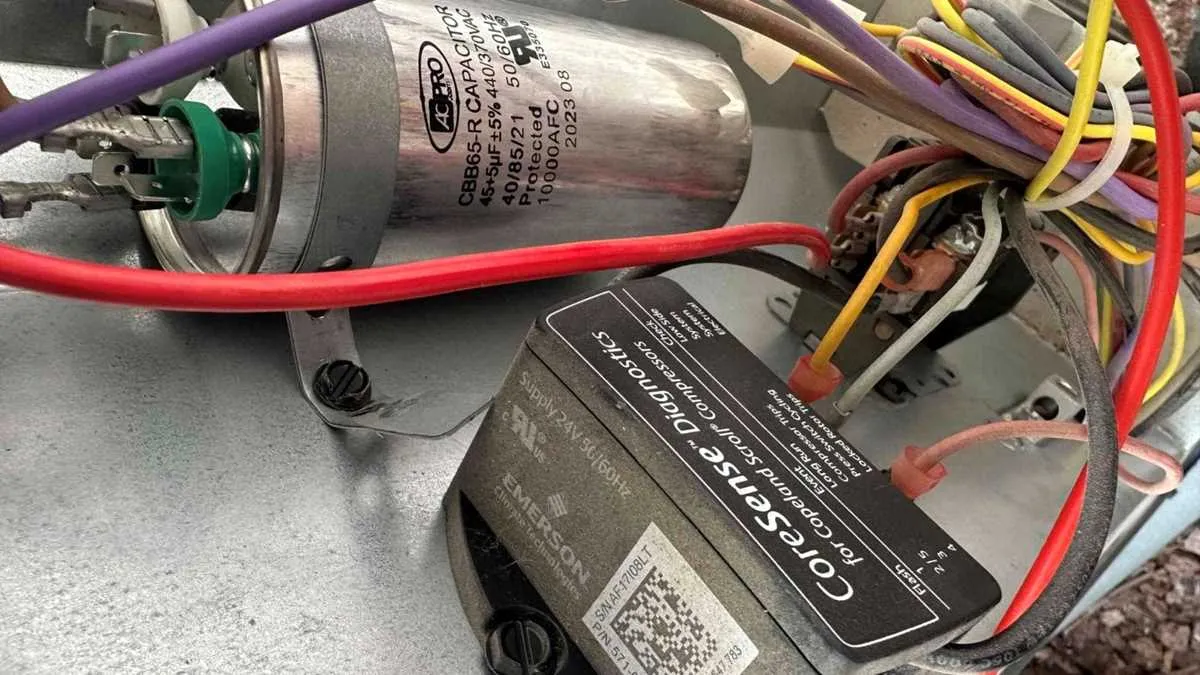
- Locate the capacitor: It's usually inside the control panel of the outdoor AC unit, a cylindrical metal component.
- Discharge procedure: Carefully touch one probe of the discharge tool to one terminal of the capacitor and the other probe to another terminal. Hold it there for at least 5-10 seconds to allow the capacitor to fully discharge. Repeat the process on all terminals.
- Verify discharge: After discharging, use your non-contact voltage tester again to confirm that there is no voltage present on the capacitor terminals.
Warning: Never attempt to discharge a capacitor with a screwdriver or any other metal object without proper insulation and a resistor. This can cause a dangerous short circuit and potentially damage the capacitor or injure yourself.
Identifying the Correct Replacement Capacitor
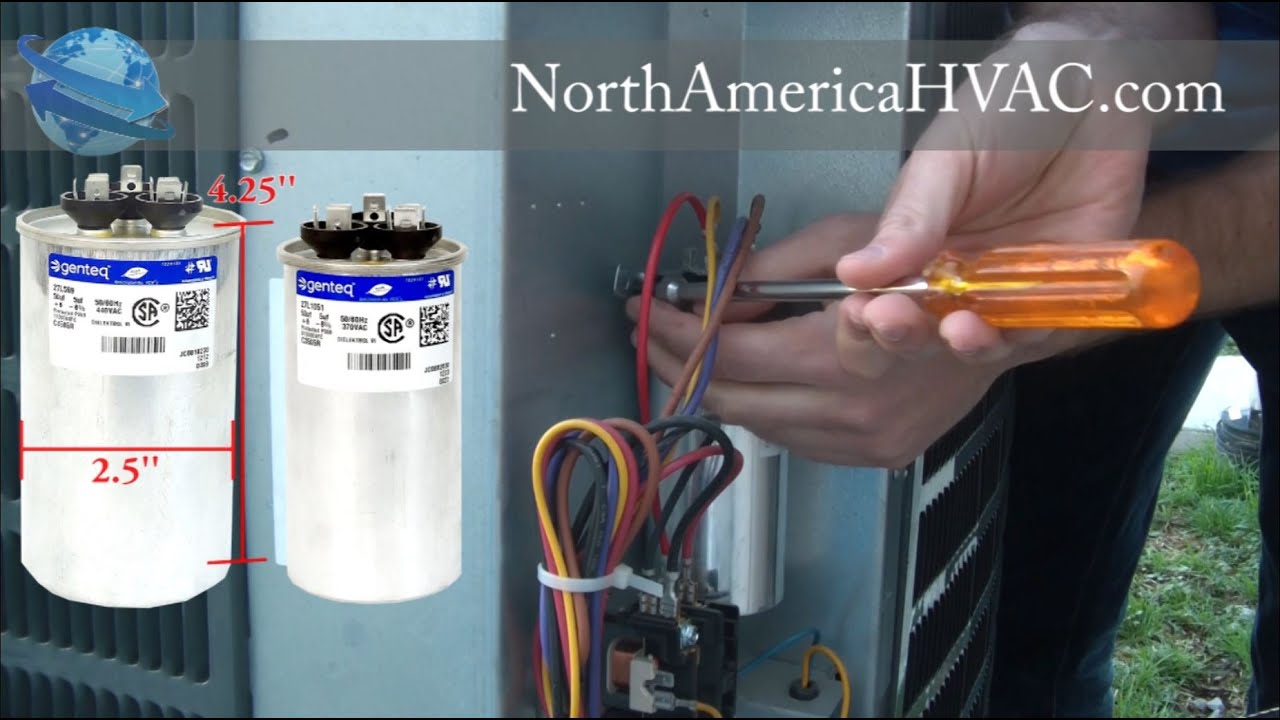
Selecting the correct replacement capacitor is crucial for ensuring proper AC unit function and preventing damage. The capacitor's specifications are printed directly on its label. Here's what you need to know:
- Microfarads (µF or MFD): This indicates the capacitor's electrical storage capacity. The replacement capacitor must have the same microfarad rating as the original. A slight deviation (e.g., +/- 5%) may be acceptable, but consult with an HVAC professional if you're unsure.
- Voltage (V): This indicates the maximum voltage the capacitor can handle. The replacement capacitor's voltage rating must be equal to or higher than the original. Never use a capacitor with a lower voltage rating.
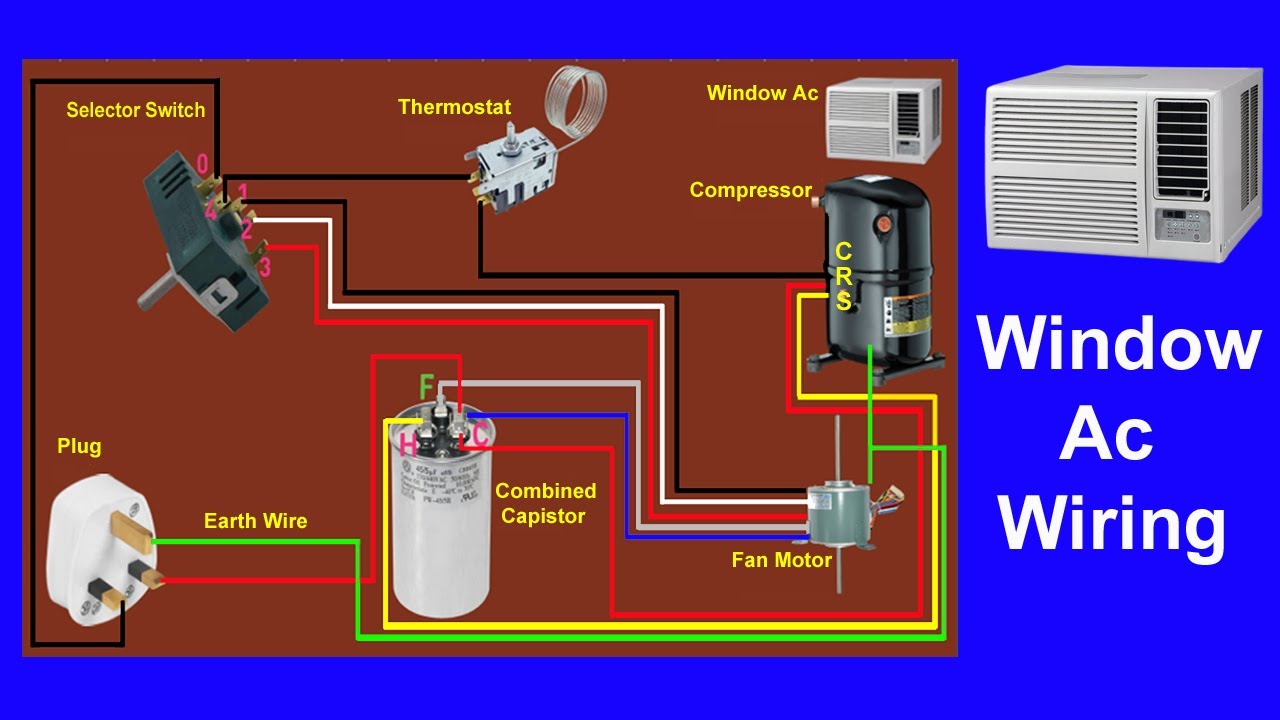
- Type (Dual or Single): Dual capacitors have three terminals (C, FAN, and HERM), and they serve both the compressor and fan motor. Single capacitors have two terminals. Ensure the replacement matches the original type.
Example: If your original capacitor is labeled "45+5 µF 370V," you need a dual capacitor with a 45 µF rating for the compressor, a 5 µF rating for the fan, and a voltage rating of at least 370V. Using a 45+5 µF 440V capacitor would be acceptable, as long as the microfarad ratings are correct.
Before purchasing a replacement capacitor, take a picture of the old capacitor’s wiring configuration. This will be very helpful when you install the new capacitor. If you are unsure of which capacitor to purchase, take the old one to your local HVAC supply store and have them match it for you.
Removing the Old Capacitor
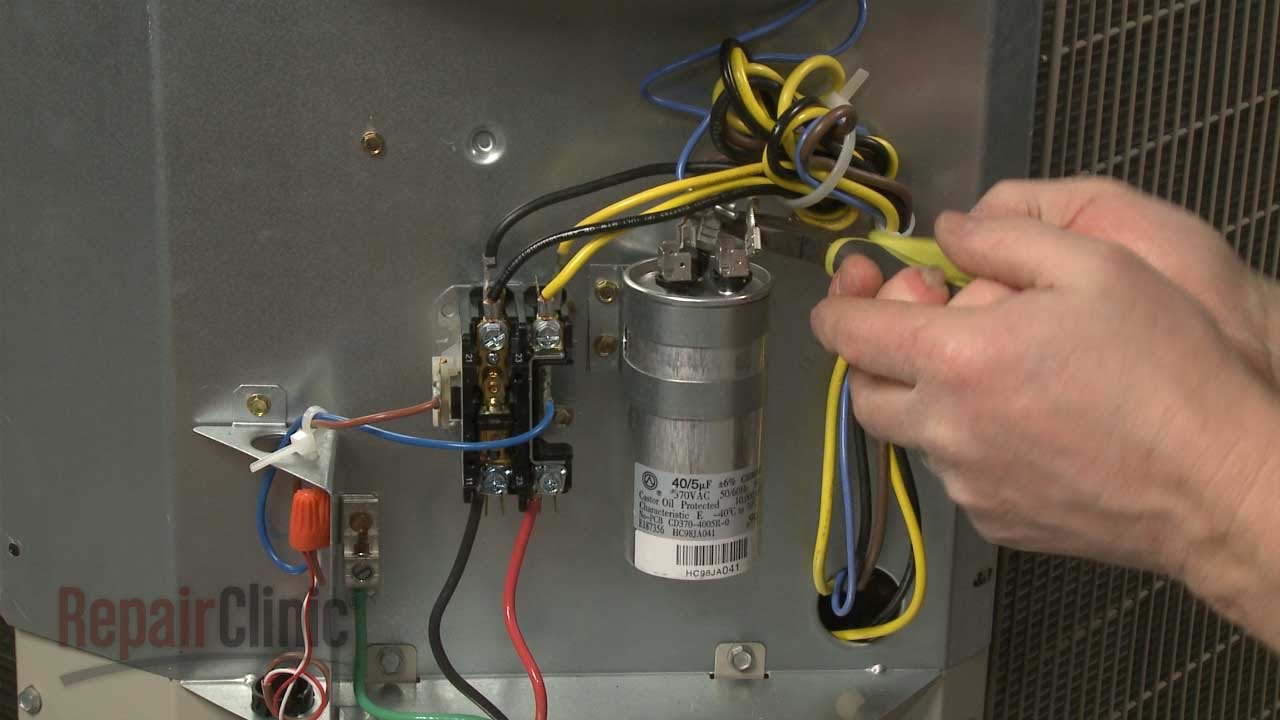
- Document the wiring: Before disconnecting any wires, take a clear picture of the existing wiring configuration. This is crucial for ensuring you reconnect the wires correctly to the new capacitor. You can also label each wire with masking tape and a marker, noting which terminal it connects to (C, FAN, HERM for dual capacitors, or simply the two terminals for single capacitors).
- Disconnect the wires: Use pliers with insulated handles to carefully disconnect the wires from the capacitor terminals. Pull straight off the terminal, do not twist. The terminals can break easily.
- Remove the capacitor: The capacitor is typically held in place by a metal strap or clamp. Loosen the screw or clip holding the strap and carefully remove the old capacitor.
Installing the New Capacitor
- Install the new capacitor: Place the new capacitor in the same position as the old one and secure it with the metal strap or clamp. Ensure it's held firmly in place.
- Reconnect the wires: Refer to the picture or labels you created earlier and reconnect the wires to the corresponding terminals on the new capacitor. Ensure each wire is securely attached. Loose connections can cause problems.
Reassembling and Testing
- Replace the control panel cover: Carefully replace the control panel cover on the AC unit and secure it with the screws.
- Restore power: Turn the disconnect switch back to the "on" position or reinsert the fuse in the fuse panel.
- Test the AC unit: Turn on your thermostat and set it to cool. Observe the AC unit to ensure it starts properly and is cooling effectively. Listen for any unusual noises.
Troubleshooting
- AC unit still won't start: Double-check the wiring connections, the capacitor rating, and the power supply. There may be other issues, such as a faulty compressor or motor, requiring professional assistance.
- AC unit hums but doesn't start: This could indicate a problem with the compressor or a wiring issue. Consult with an HVAC technician.
- AC unit trips the circuit breaker: This could indicate a short circuit in the wiring or a problem with the compressor. Consult with an HVAC technician.
Cost Considerations
The cost of a replacement capacitor typically ranges from $20 to $100, depending on the size and type. A homeowner can typically replace a capacitor in under an hour, saving on labor costs. Hiring a professional HVAC technician to replace the capacitor can cost between $150 and $300, including the part and labor. It's essential to weigh the cost savings of doing it yourself against the risk of improper installation or electrical shock.
Preventative Maintenance
Regular maintenance can help extend the lifespan of your AC unit and prevent capacitor failures. Here are some tips:
- Clean the outdoor unit: Remove any debris, leaves, or grass clippings from around the outdoor unit. This ensures proper airflow and prevents overheating.
- Clean the evaporator coil: A dirty evaporator coil can cause the AC unit to work harder and can reduce its efficiency.
- Change the air filter: A dirty air filter restricts airflow and can cause the AC unit to overheat. Change the air filter every one to three months, depending on usage.
- Schedule professional maintenance: Have your AC unit professionally inspected and serviced at least once a year. A qualified HVAC technician can identify and address potential problems before they become major issues.
Conclusion
Replacing an air conditioner capacitor is a manageable task for homeowners and facility managers with basic electrical knowledge and the proper tools. By following these steps carefully, prioritizing safety, and selecting the correct replacement capacitor, you can restore your AC unit to proper working order and save on costly repair bills. However, if you are uncomfortable working with electricity or unsure about any aspect of the process, it is always best to consult with a qualified HVAC technician. Regular maintenance and prompt attention to any signs of capacitor failure can help extend the life of your AC system and ensure efficient cooling for years to come.