How To Install Air Ducts In Attic
Installing air ducts in an attic can significantly improve the efficiency of your HVAC system, ensuring consistent temperatures throughout your home or building. Whether you’re a homeowner looking to upgrade, an HVAC technician working on a new installation, or a facility manager overseeing a large property, this guide provides a comprehensive overview of the process.
Planning and Preparation
Assessing Your Needs
Before you begin, carefully assess the heating and cooling requirements of your space. Consider factors such as square footage, insulation levels, climate, and the number of occupants. Proper sizing is crucial for efficient operation. Use load calculation software or consult with an HVAC professional to determine the appropriate duct size and airflow (measured in cubic feet per minute, or CFM) for each room or zone.
For example, a poorly insulated attic will require larger ducts than a well-insulated one to compensate for heat loss in the winter and heat gain in the summer. Similarly, a multi-story building might benefit from a zoned HVAC system with separate duct runs for each floor, allowing for independent temperature control.
Choosing the Right Materials
Select duct materials based on your budget, space constraints, and climate conditions. Common options include:
- Flexible Duct: Lightweight and easy to install, suitable for short runs and connecting to registers. Look for insulated flexible duct with a high R-value (thermal resistance) to minimize energy loss.
- Sheet Metal Duct: Durable and airtight, ideal for main trunk lines and long runs. Requires specialized tools and skills for fabrication and installation.
- Fiberglass Duct Board: Provides insulation and sound absorption. Can be fabricated into custom shapes but is more susceptible to moisture damage.
Ensure all materials meet local building codes and ASHRAE (American Society of Heating, Refrigerating and Air-Conditioning Engineers) standards. Consider using duct sealant and foil tape specifically designed for HVAC systems to ensure airtight connections. Avoid using standard duct tape, as it tends to dry out and lose its adhesion over time.
Gathering Tools and Equipment
You'll need a variety of tools to complete the installation. Essential items include:
- Duct knife or snips
- Measuring tape
- Utility knife
- Screwdriver or drill
- Foil tape
- Duct sealant
- Gloves and safety glasses
- Ladder or scaffolding
- Work light
For sheet metal ductwork, you'll also need specialized tools such as a crimper, seamer, and rivet gun.
Installation Process
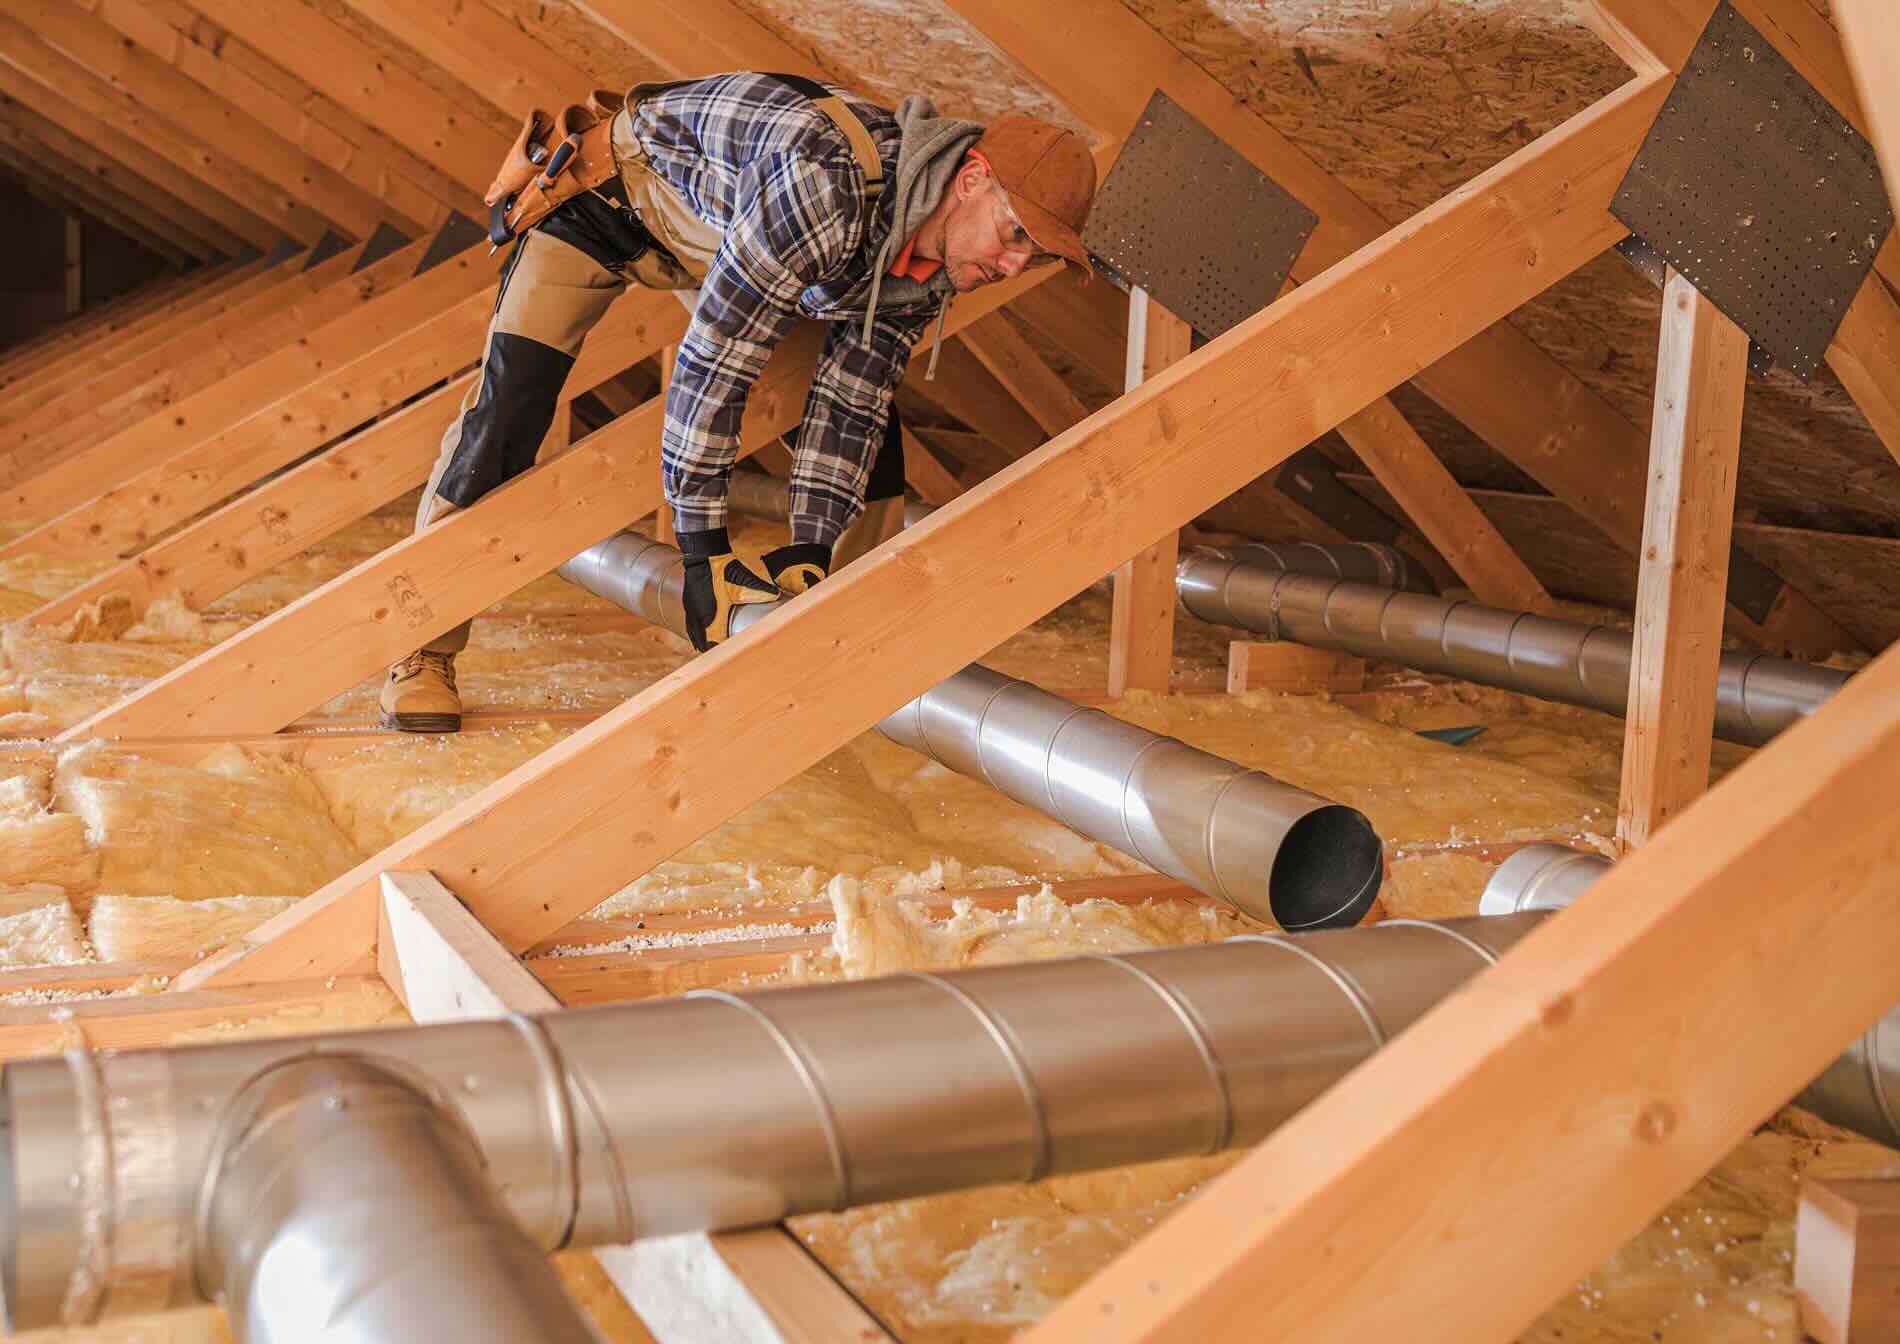
Safety First
Prioritize safety throughout the installation process. Wear appropriate personal protective equipment (PPE), including gloves, safety glasses, and a dust mask. Ensure the work area is well-ventilated. Disconnect power to any electrical circuits in the attic before starting work.
Laying Out the Ductwork
Follow your ductwork layout plan to mark the locations of supply and return registers, as well as the main trunk lines and branch ducts. Use a measuring tape and level to ensure accurate placement. Consider the location of existing obstacles such as pipes, wiring, and structural members.
Example: "In a typical residential attic installation, the main trunk line might run down the center of the attic, with branch ducts extending to each room. Pay close attention to the static pressure requirements of your HVAC unit; properly sized ducts help maintain ideal static pressure."
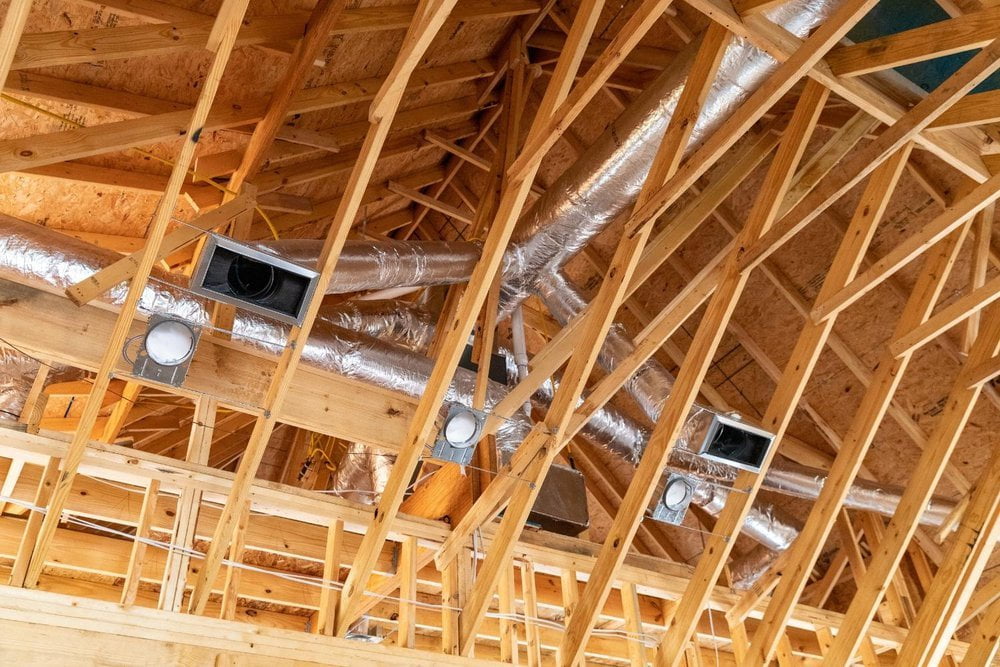
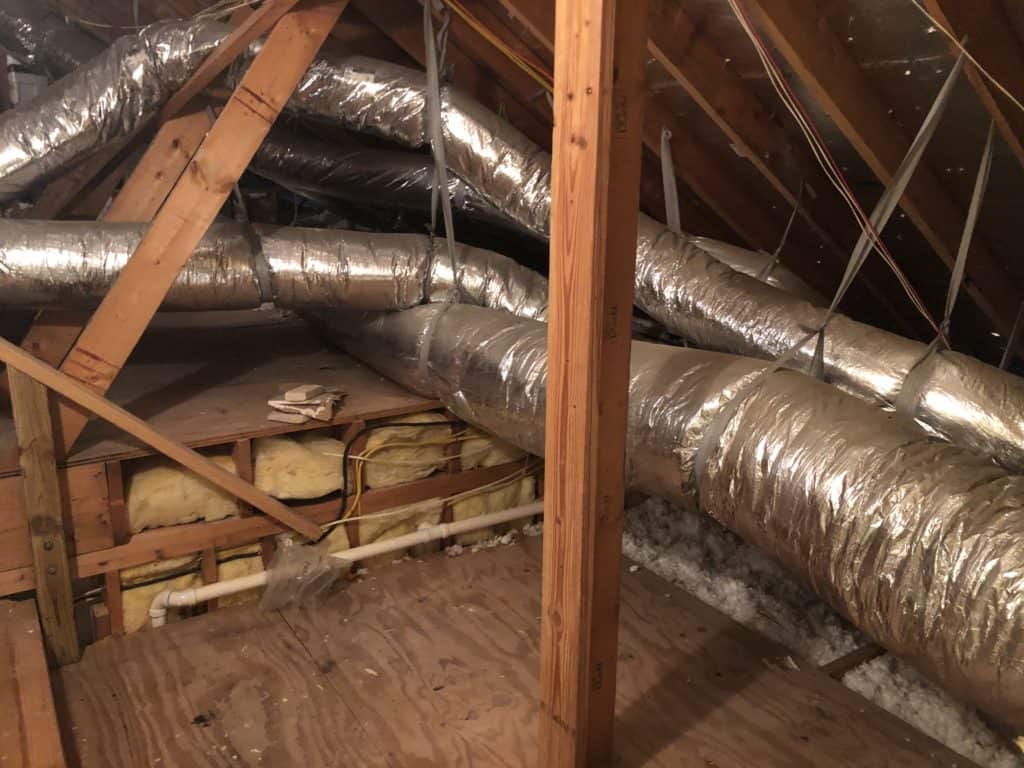
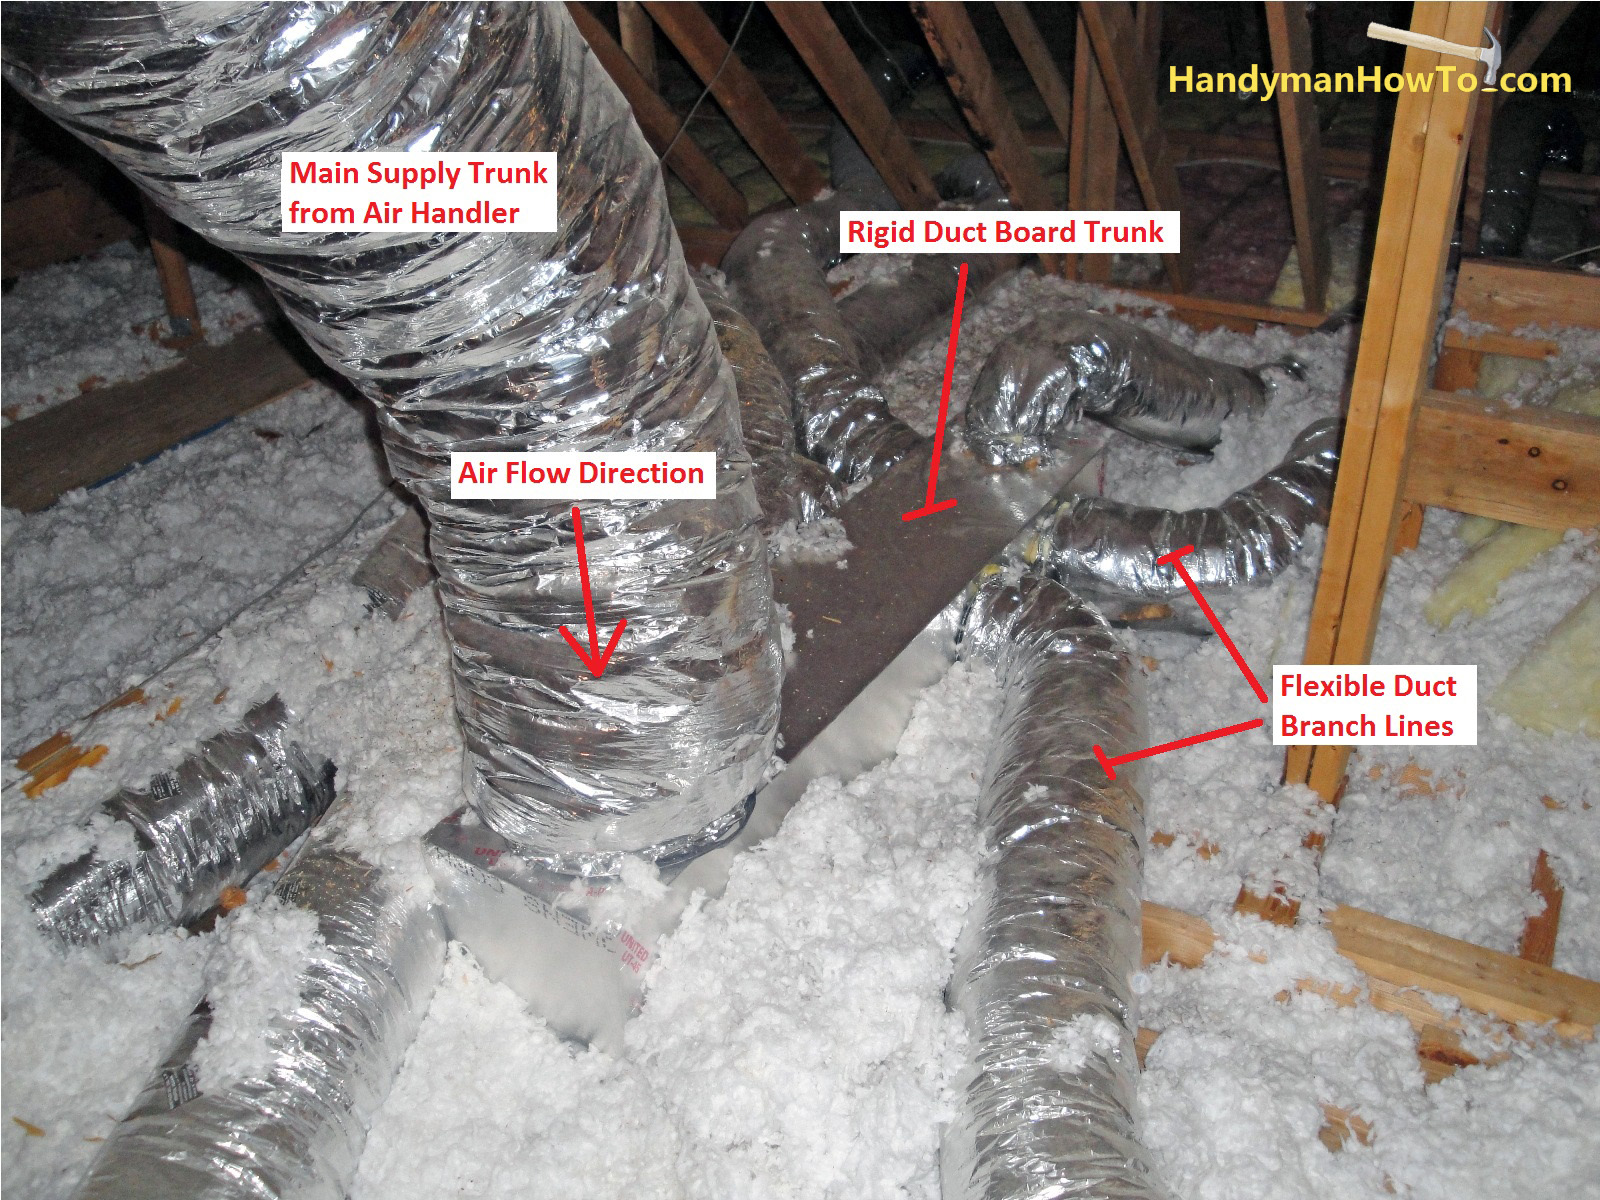
Installing the Main Trunk Line
Begin by installing the main trunk line, which is the largest duct that connects directly to the air handler. Secure the duct to the rafters or joists using straps or hangers. Ensure the duct is properly supported to prevent sagging or damage. Use duct sealant and foil tape to seal all seams and connections.
When working with sheet metal duct, use a crimper to create a male end on one section of duct and a seamer to join it to the female end of the next section. Secure the connection with rivets or screws.
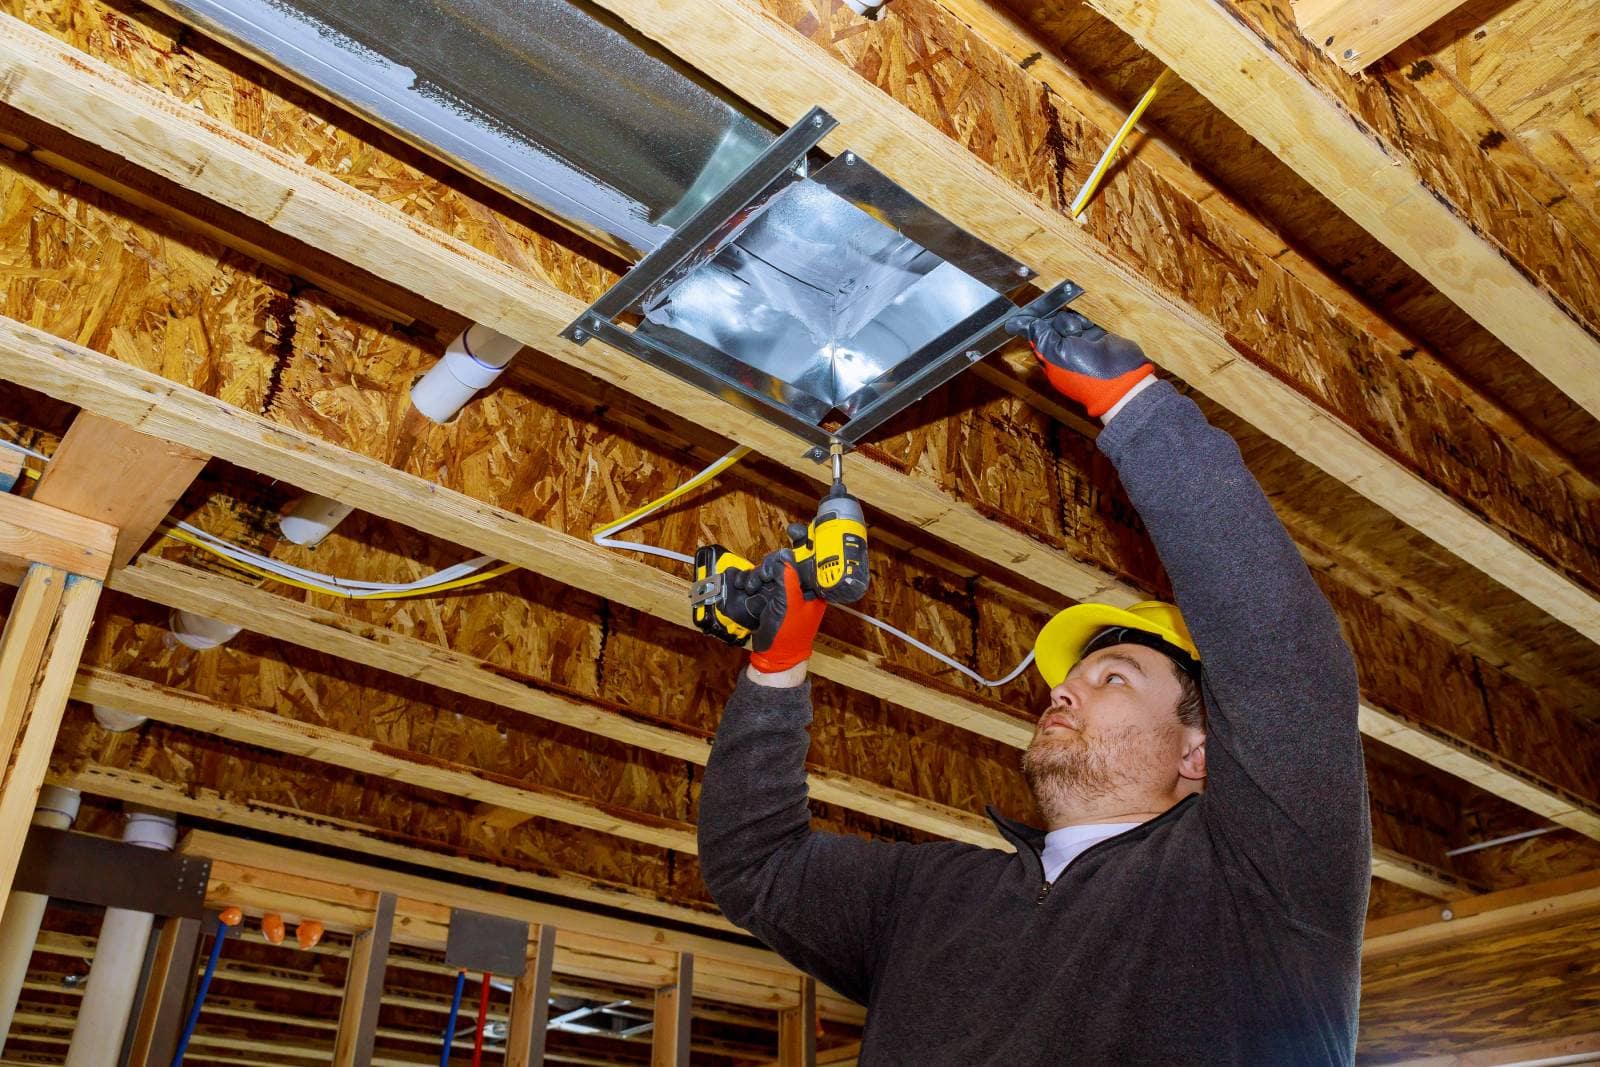
Installing Branch Ducts
Connect the branch ducts to the main trunk line using takeoffs. These are fittings that allow you to transition from the larger trunk line to the smaller branch ducts. Secure the takeoffs to the trunk line with screws or rivets and seal the connections with duct sealant and foil tape.
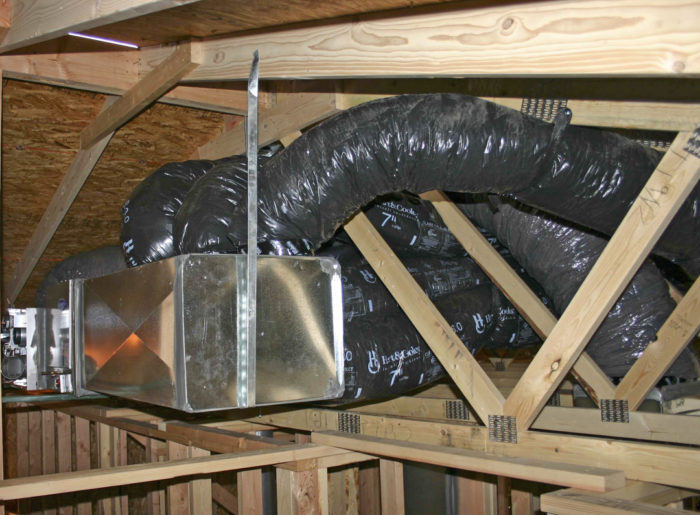
Run the branch ducts to the supply and return registers. Use flexible duct to make the final connections, allowing for easy adjustment and alignment. Secure the flexible duct to the registers with clamps or zip ties.
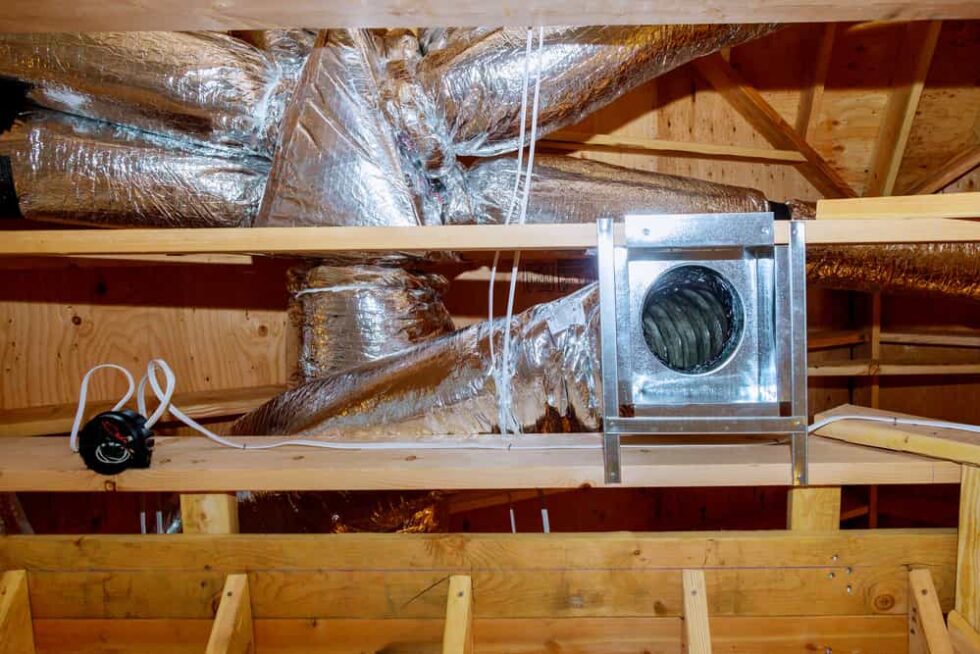
Insulating the Ductwork
Insulating the ductwork is crucial for preventing energy loss and condensation. Wrap the ducts with fiberglass insulation or use pre-insulated ducts. Secure the insulation with foil tape or wrap. Pay particular attention to joints and seams, ensuring they are completely sealed. The R-value of your insulation will directly impact system efficiency. Higher R-values translate to less heat loss/gain.
In colder climates, consider using vapor barrier insulation to prevent condensation from forming on the outside of the ducts. In warmer climates, ensure the insulation is resistant to mold and mildew.
Sealing and Testing
After installing the ductwork, thoroughly inspect all seams and connections for leaks. Use duct sealant and foil tape to seal any gaps or cracks. Conduct a duct leakage test to verify the airtightness of the system. This test involves pressurizing the ductwork and measuring the amount of air that leaks out. Consult with an HVAC professional for assistance with duct leakage testing.
Even small leaks can significantly reduce the efficiency of your HVAC system. According to the EPA (Environmental Protection Agency), a typical home can lose 20-30% of its conditioned air through leaky ducts.
Final Steps and Considerations
Balancing the System
After installation, balance the system to ensure proper airflow to each room. This involves adjusting the dampers in the ducts to regulate the amount of air delivered to each register. Use an anemometer to measure the airflow at each register and make adjustments as needed.
Balancing the system can improve comfort and energy efficiency. A properly balanced system will provide consistent temperatures throughout the building and prevent hot or cold spots.
Inspections and Permits
Check with your local building department to determine if permits are required for ductwork installation. Schedule an inspection to ensure the installation meets all applicable codes and standards. A properly installed duct system can add significant value to a property.
Maintenance
Regularly inspect your ductwork for leaks, damage, and debris. Clean the ducts every few years to remove dust, pollen, and other contaminants. Consider hiring a professional duct cleaning service to ensure thorough cleaning.
Preventative maintenance helps to prolong the lifespan of your HVAC system and improve indoor air quality. Clogged or dirty ducts can reduce airflow, increase energy consumption, and contribute to health problems.
Cost Considerations
The cost of installing air ducts in an attic varies depending on the size of the project, the materials used, and the labor rates in your area. Flexible ductwork is generally less expensive than sheet metal ductwork. Hiring a professional HVAC contractor will add to the cost but can ensure a proper and efficient installation.
The average lifespan of ductwork is 15-20 years, but with proper maintenance, it can last much longer. Consider the long-term cost savings associated with energy-efficient ductwork when making your decision.
Example Cost Breakdown
- Flexible duct (per foot): $2 - $5
- Sheet metal duct (per foot): $5 - $10
- Insulation (per roll): $50 - $100
- Duct sealant (per can): $10 - $20
- Labor (per hour): $75 - $150
Investing in a high-quality duct system can pay for itself over time through reduced energy bills and improved comfort. Always obtain multiple quotes from different contractors before making a decision.
Conclusion
Installing air ducts in an attic requires careful planning, proper materials, and attention to detail. By following these steps, you can ensure a safe, efficient, and long-lasting installation. Remember to consult with qualified HVAC professionals when needed. Proper ductwork installation improves your HVAC system's performance, energy efficiency and overall air quality.