How To Install Hard Start Kit On Ac Unit

The summer heat is beating down, and suddenly, your air conditioner sputters, struggles to start, and leaves you sweltering. This is a common problem, and often, the culprit is a failing compressor – the heart of your AC unit. While a completely dead compressor requires a professional replacement, sometimes the problem is simply difficulty getting started. A hard start kit can often be a simple, cost-effective solution. This article will guide you through the process of installing one, but remember: always prioritize safety. If you're uncomfortable working with electricity, call a qualified HVAC technician.
Is a Hard Start Kit the Right Solution?
Before we dive into the installation, let's make sure a hard start kit is actually appropriate. Hard start kits provide an extra jolt of power to the compressor motor during startup. They are most effective when:
- Your AC unit is older (5+ years) and struggling to start.
- You notice flickering lights when the AC kicks on, indicating a significant power draw.
- The compressor hums but doesn't start reliably.
- You've already checked other common issues like a dirty air filter or clogged condenser coils.
However, a hard start kit won't fix serious problems like a completely failed compressor, refrigerant leaks, or electrical issues. If your AC is making loud, grinding noises or isn't cooling at all, it's best to call a professional.
Safety First! Essential Precautions
Working with electricity can be dangerous. Before you begin any work on your AC unit, follow these crucial safety steps:
- Turn off the power: Locate the circuit breaker that controls your AC unit and flip it to the OFF position. Double-check that the power is off using a non-contact voltage tester.
- Wear appropriate safety gear: Safety glasses and insulated gloves are a must.
- Work in dry conditions: Never work on electrical components when they are wet or damp.
- Understand the wiring: If you're unsure about any aspect of the wiring diagram, consult a qualified electrician or HVAC technician.
Tools and Materials You'll Need
Gather these tools and materials before you start:
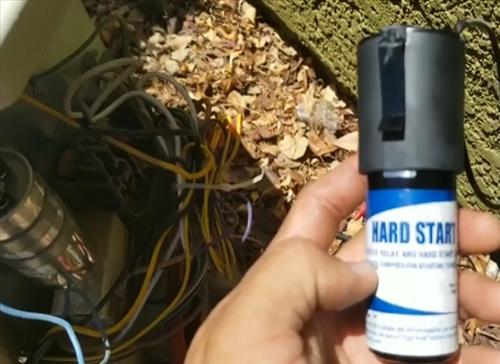
- Hard Start Kit: Purchase a kit that's compatible with your AC unit's horsepower (HP). The specifications should be listed on your AC unit's nameplate.
- Screwdrivers: A Phillips head and a flathead screwdriver.
- Wire Strippers/Crimpers: For stripping the insulation from wires and crimping connectors.
- Wire Connectors (Wire Nuts): To safely connect wires.
- Non-Contact Voltage Tester: To verify the power is off. This is absolutely essential!
- Pliers: For general gripping and manipulation.
- Multimeter (Optional): Helpful for testing voltage and continuity.
- Wiring Diagram: A diagram of your AC unit's wiring (often found inside the access panel).
Step-by-Step Installation Guide
Now that you've gathered your supplies and taken the necessary safety precautions, let's get started:
Step 1: Locate the Compressor
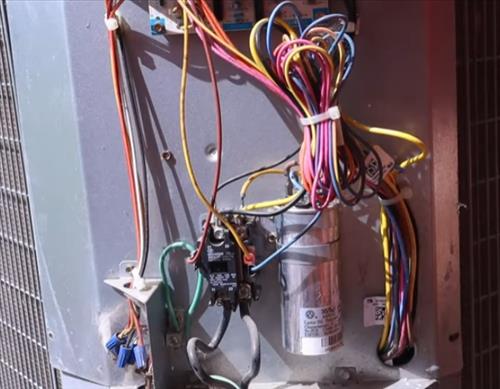
The compressor is a large, black, cylindrical component located inside the outdoor unit of your AC system. You'll need to remove the access panel to reach it.
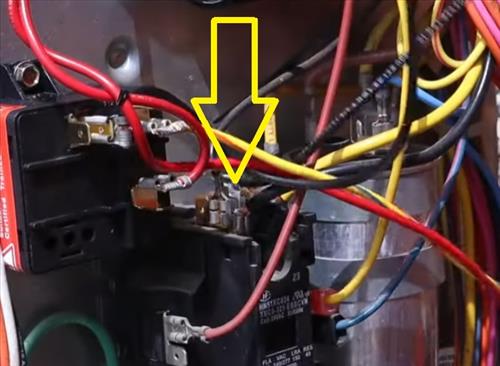
Step 2: Identify the Compressor Terminals
The compressor has three terminals labeled C (Common), S (Start), and R (Run). These terminals are usually covered by a plastic cap. Carefully remove the cap to expose the terminals.
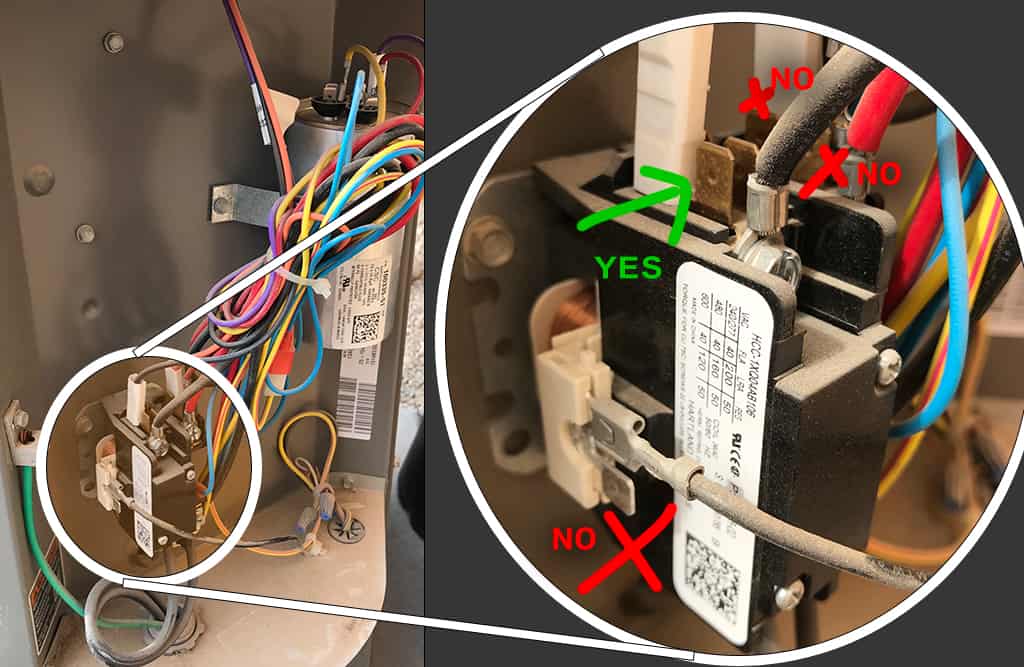
Step 3: Understand the Wiring Diagram (Crucial!)
Before disconnecting any wires, carefully study the wiring diagram located inside the access panel. Take a picture of the existing wiring with your phone for reference. Pay close attention to which wires connect to which terminals on the compressor, capacitor, and contactor.
Step 4: Disconnect the Existing Wires
Using your pliers, carefully disconnect the wires from the C, S, and R terminals. Label each wire with a piece of masking tape and a marker to indicate which terminal it was connected to (C, S, or R). This is extremely important to ensure you reconnect everything correctly.
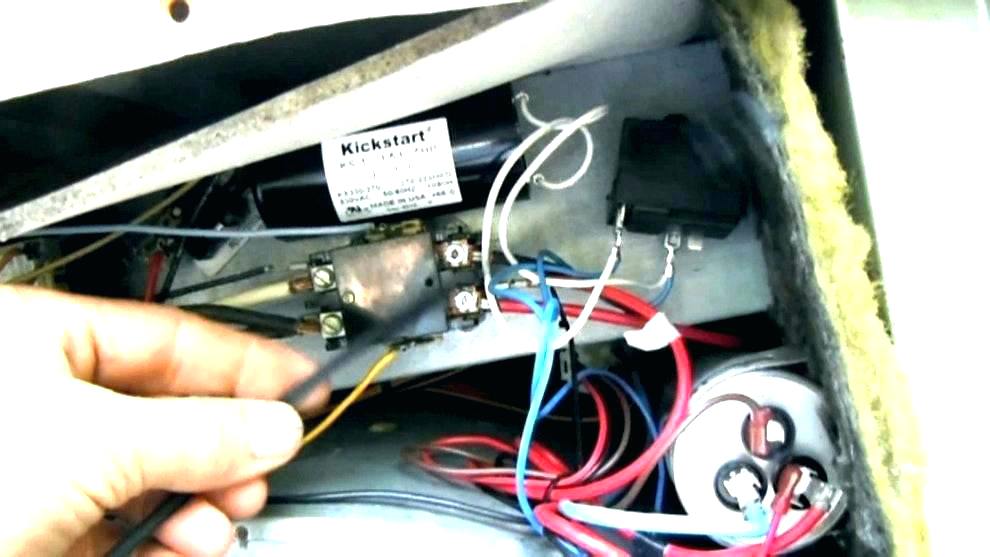
Step 5: Connect the Hard Start Kit
Refer to the wiring diagram included with your hard start kit. The kit will typically have three wires that need to be connected to the compressor terminals:
- Connect the wire labeled "C" from the hard start kit to the "C" terminal on the compressor. Secure the connection with a wire nut.
- Connect the wire labeled "S" from the hard start kit to the "S" terminal on the compressor. Secure the connection with a wire nut.
- Connect the wire labeled "R" from the hard start kit to the "R" terminal on the compressor. Secure the connection with a wire nut.
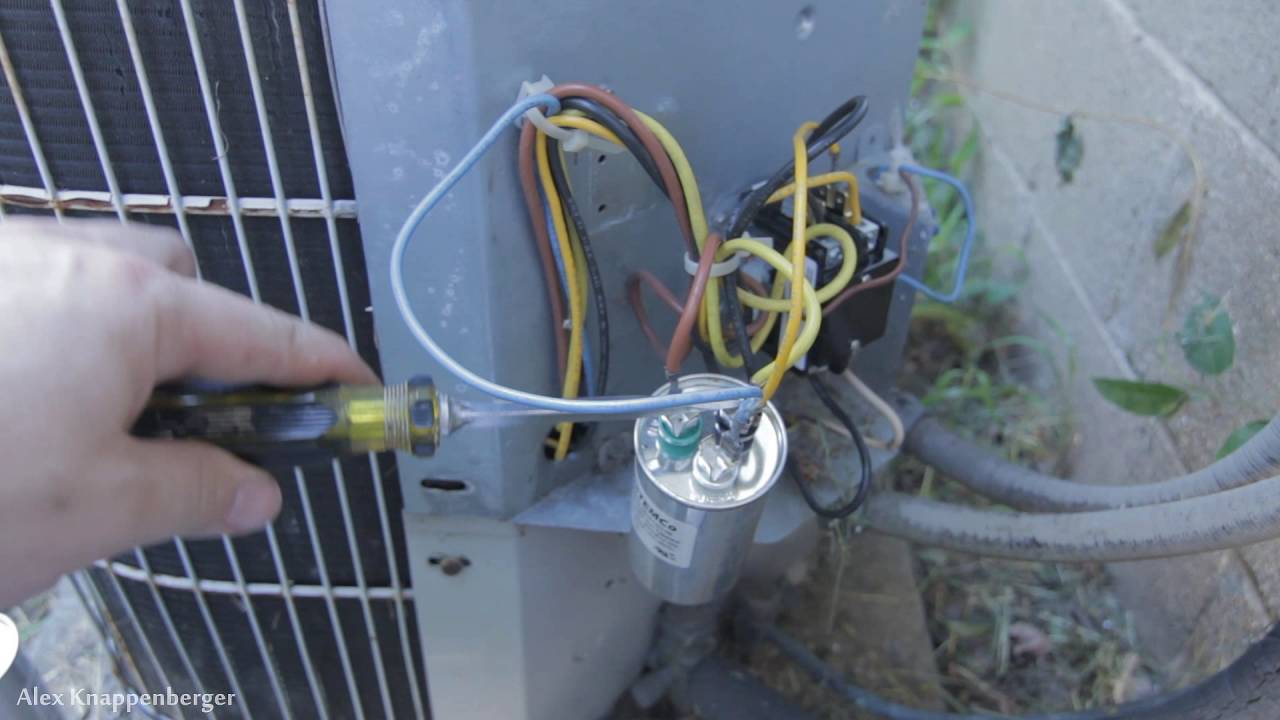
Some hard start kits may also require you to connect wires to the existing capacitor. The capacitor is a cylindrical component near the compressor. Follow the instructions provided with your specific hard start kit carefully.
Step 6: Secure the Hard Start Kit
Find a secure location inside the AC unit to mount the hard start kit. Use zip ties or other suitable fasteners to keep it from vibrating or contacting other components.
Step 7: Reconnect the Original Wires
Using the labels you created in Step 4, reconnect the original wires to the compressor terminals. Make sure each wire is connected to the correct terminal. Use wire nuts to secure the connections.
Step 8: Double-Check Your Work
Before restoring power, carefully inspect all wiring connections. Ensure that all wires are securely connected and that there are no loose strands. Make sure the hard start kit is securely mounted and that it's not interfering with any other components.
Step 9: Restore Power
Replace the access panel on your AC unit. Go back to the circuit breaker and flip it to the ON position.
Step 10: Test the AC Unit
Turn on your AC unit and observe its performance. The compressor should start smoothly and quickly. Listen for any unusual noises or vibrations. If the AC unit still struggles to start or if you notice any problems, turn off the power immediately and consult a qualified HVAC technician.
Troubleshooting After Installation
Even with careful installation, problems can sometimes arise. Here are a few common issues and how to address them:
- AC unit still won't start: Double-check all wiring connections to ensure they are secure. Verify that the hard start kit is compatible with your AC unit's horsepower. If the problem persists, there may be a more serious issue with the compressor or another component.
- AC unit starts but cycles on and off rapidly: This could indicate a problem with the refrigerant charge or a faulty capacitor. Contact a qualified HVAC technician for assistance.
- Burning smell: If you smell burning, turn off the power immediately and call a professional. This could indicate an electrical short or other serious problem.
When to Call a Professional
While a hard start kit installation can be a DIY project for some homeowners, there are situations where it's best to call a qualified HVAC technician:
- You're uncomfortable working with electricity: Your safety is paramount.
- You're unsure about the wiring diagram: Incorrect wiring can damage your AC unit.
- You suspect a more serious problem: If the hard start kit doesn't fix the problem, there may be a deeper issue that requires professional diagnosis and repair.
- You're not confident in your abilities: It's better to be safe than sorry. A professional can ensure that the job is done correctly and safely.
- Your AC unit is under warranty: Installing a hard start kit yourself may void the warranty.
Preventative Maintenance for Your AC Unit
To prolong the life of your AC unit and prevent future problems, consider these preventative maintenance tips:
- Change the air filter regularly: A dirty air filter restricts airflow and puts strain on the compressor. Replace the filter every 1-3 months, depending on usage.
- Clean the condenser coils: The condenser coils are located in the outdoor unit. Use a garden hose to gently rinse away dirt and debris. Be careful not to damage the fins.
- Keep the area around the outdoor unit clear: Remove any vegetation or debris that could block airflow.
- Schedule annual maintenance: A qualified HVAC technician can inspect your AC unit, clean the coils, check the refrigerant charge, and identify any potential problems before they become major issues.
Installing a hard start kit can be a relatively straightforward way to address a struggling AC compressor. By following these steps carefully and prioritizing safety, you can potentially save money and extend the life of your AC unit. However, always remember to err on the side of caution and call a professional if you're unsure about any aspect of the process. A well-maintained AC system will keep you comfortable all summer long!