How To Insulate Concrete Floor From Cold

Concrete floors are known for their durability and sleek aesthetic. However, they can also be notoriously cold, especially in colder climates. This is because concrete is a good conductor of heat, meaning it readily transfers heat away from your body. Insulating a concrete floor is a crucial step towards creating a more comfortable and energy-efficient living space. This guide provides a comprehensive overview of how to insulate a concrete floor from the cold, covering various methods, materials, and considerations.
Why Insulate a Concrete Floor?
Before diving into the 'how,' let's understand the 'why.' Insulating your concrete floor provides several significant benefits:
- Improved Comfort: A warmer floor is simply more comfortable underfoot, especially during winter. No more cold shock when getting out of bed!
- Reduced Energy Bills: Insulation acts as a barrier to heat loss. By preventing heat from escaping through the floor, you reduce the amount of energy needed to heat your home, leading to lower energy bills.
- Prevention of Condensation: A cold concrete floor can lead to condensation, which can encourage mold and mildew growth, potentially impacting your health and damaging your property. Insulation helps maintain a warmer floor temperature, reducing condensation risk.
- Increased Property Value: Energy-efficient homes are increasingly desirable. Insulating your concrete floor is an investment that can improve your home's overall value.
Understanding Heat Loss Through Concrete Floors
Think of your home like a leaky bucket. Heat is like the water, constantly trying to escape through any available opening. Concrete floors, without insulation, represent a significant 'leak.' The R-value of a material measures its resistance to heat flow; the higher the R-value, the better the insulation. Concrete has a relatively low R-value, allowing heat to escape into the ground below.
The amount of heat loss depends on several factors, including:
- Climate: Colder climates will experience greater heat loss.
- Floor Thickness: Thicker concrete floors can actually *increase* heat loss if they are not insulated, due to their increased thermal mass.
- Proximity to Ground Water: Damp ground is an excellent conductor of heat, further exacerbating heat loss.
Methods for Insulating Concrete Floors
There are several effective methods for insulating concrete floors, each with its pros and cons. The best method for you will depend on your budget, the existing floor structure, and your DIY skills.
1. Underfloor Insulation (Ideal for New Construction or Renovations)
This is generally considered the most effective method, as it creates a continuous layer of insulation directly beneath the concrete slab. It's easiest to implement during new construction or major renovations.
Materials Commonly Used:
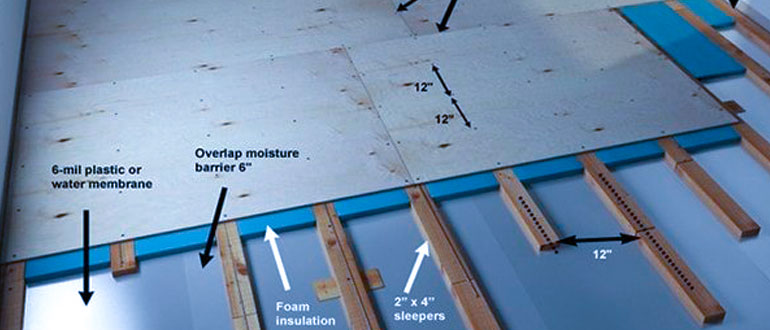
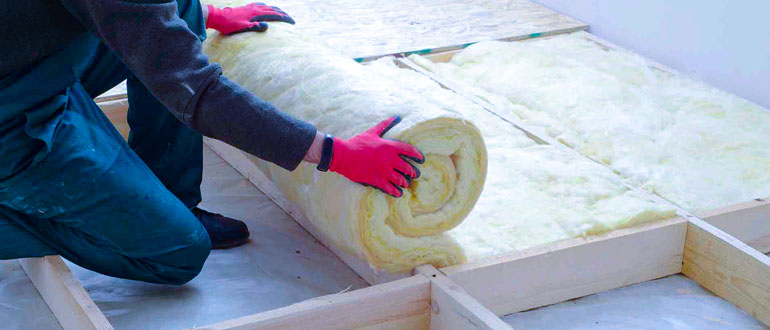
- Rigid Foam Insulation: This includes expanded polystyrene (EPS), extruded polystyrene (XPS), and polyisocyanurate (polyiso) boards. XPS offers superior moisture resistance, which is critical below concrete.
- Spray Foam Insulation: Closed-cell spray foam provides excellent insulation and also acts as a vapor barrier. It's more expensive than rigid foam but can fill irregular spaces effectively.
Installation Process:
- Prepare the Subgrade: Ensure the ground is level, compacted, and free of debris.
- Install a Vapor Barrier: This prevents moisture from the ground from migrating into the concrete. Overlap the seams by at least 6 inches and seal them with tape. Think of this like a raincoat for your insulation.
- Lay Down Insulation Boards (or Spray Foam): Ensure the boards fit tightly together, and tape the seams to prevent thermal bridging (where heat can escape through gaps). If using spray foam, follow the manufacturer's instructions carefully.
- Pour the Concrete Slab: Follow standard concrete pouring and finishing procedures.
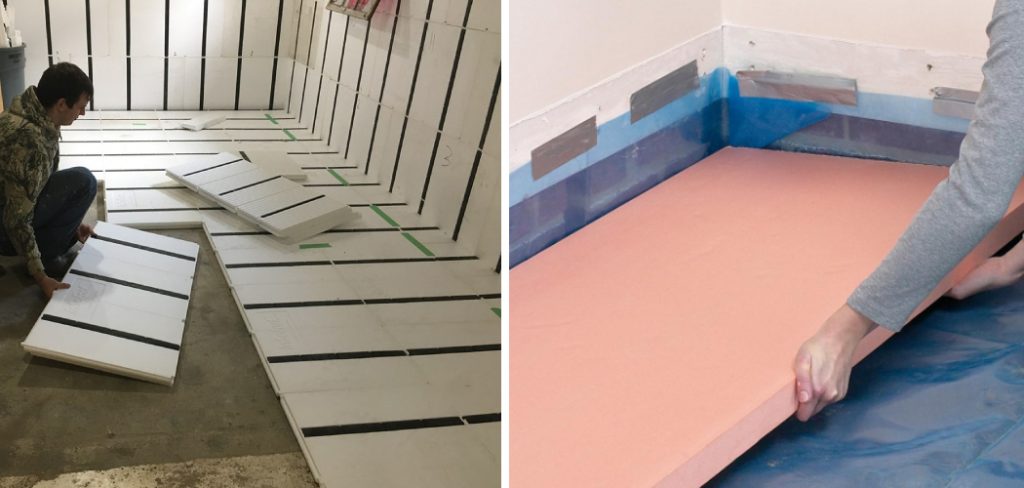
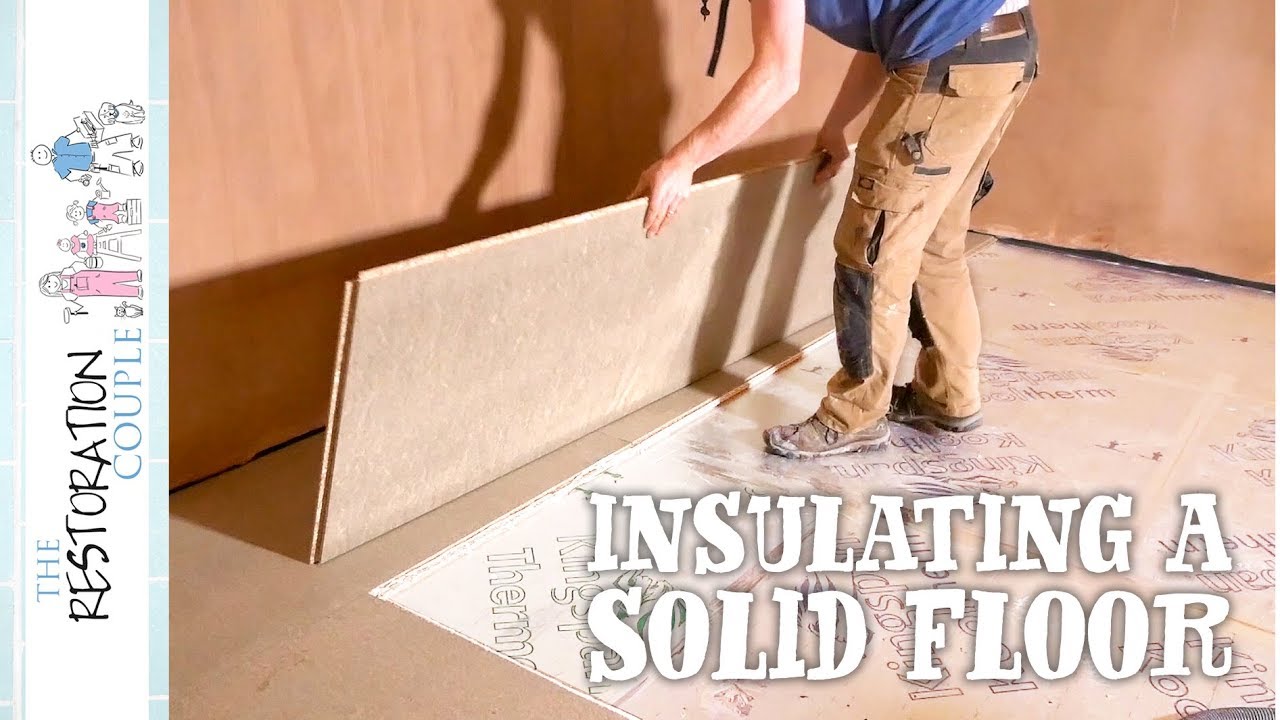
2. Overfloor Insulation (Good for Existing Floors)
This method involves adding insulation on top of the existing concrete floor. While not as effective as underfloor insulation, it's a more practical option for existing homes where you don't want to rip up the concrete.
Methods and Materials:
- Insulated Subfloor Systems: These are pre-fabricated panels that combine insulation with a subfloor material like oriented strand board (OSB) or plywood. They provide a solid base for flooring. Examples include DRIcore and Barricade subfloor panels.
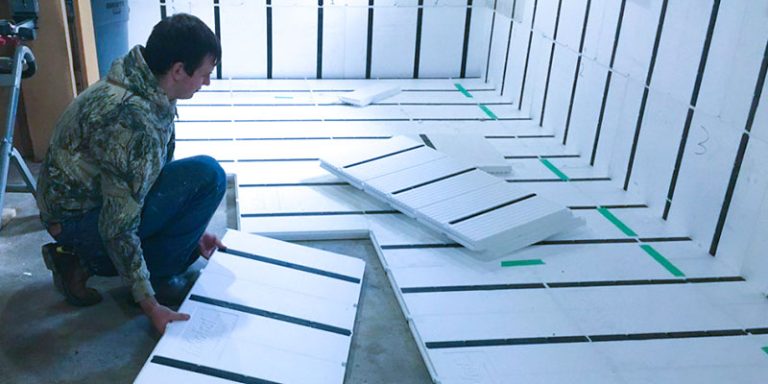
- Rigid Foam Insulation Covered with Subfloor: You can lay rigid foam insulation directly on the concrete and then cover it with a subfloor material. This is a more DIY-friendly option.
- Carpet and Pad: While not a dedicated insulation method, carpet and a thick pad can significantly improve the floor's thermal comfort. Look for high-density pads for better insulation.
- Area Rugs: Strategic placement of area rugs can warm up specific areas of the floor.
Installation Process (Example: Rigid Foam and Subfloor):
- Clean the Concrete Floor: Remove any dirt, debris, and existing flooring.
- Apply a Vapor Barrier (Optional but Recommended): If you are concerned about moisture, apply a vapor barrier to the concrete floor before installing the insulation.
- Lay Down Rigid Foam Insulation: Cut the boards to fit and stagger the seams. You may need to use construction adhesive to secure them to the floor.
- Install the Subfloor: Screw the subfloor panels into the concrete floor. Use concrete screws and follow the manufacturer's instructions.
- Install Flooring: Choose your desired flooring material, such as hardwood, laminate, or tile.
3. Radiant Floor Heating (Combined Heating and Insulation)
Radiant floor heating systems provide both heat and a degree of insulation. While they require a more significant upfront investment, they offer superior comfort and energy efficiency. They work by circulating warm water or electric cables through tubes or mats embedded in the concrete slab or a thin layer of concrete poured over the existing floor.
Types of Radiant Floor Heating:
- Hydronic Systems: These systems use heated water circulated through pipes. They are generally more energy-efficient for larger areas.
- Electric Systems: These systems use electric heating cables or mats. They are easier to install but can be more expensive to operate.
Installation Considerations:
- Professional Installation Recommended: Radiant floor heating systems require specialized knowledge and skills to install correctly.
- Insulation is Crucial: To maximize the efficiency of a radiant floor heating system, proper insulation is essential. Insulate the concrete slab beneath the heating elements to prevent heat loss into the ground.
Choosing the Right Insulation Material
Selecting the appropriate insulation material is crucial for optimal performance. Here are some key factors to consider:
- R-Value: Choose a material with a high R-value for maximum insulation. Building codes often specify minimum R-values for floor insulation.
- Moisture Resistance: Concrete floors are often prone to moisture problems, so choose a material that is resistant to water damage. XPS and closed-cell spray foam are excellent choices.
- Compressive Strength: The insulation material must be able to withstand the weight of the concrete and any loads placed on the floor.
- Cost: Consider the cost of the materials and installation. Balance your budget with the desired level of insulation and durability.
- Ease of Installation: If you are a DIY enthusiast, choose a material that is relatively easy to install. Rigid foam boards are generally easier to work with than spray foam.
Important Considerations
Before embarking on your concrete floor insulation project, consider these crucial factors:
- Local Building Codes: Check your local building codes for specific requirements regarding floor insulation. Some jurisdictions may require permits for certain types of insulation projects.
- Moisture Control: Proper moisture control is essential to prevent mold and mildew growth. Always use a vapor barrier when insulating concrete floors.
- Floor Height: Adding insulation on top of an existing concrete floor will raise the floor height. Ensure that this doesn't create any problems with doorways, stairs, or appliances.
- Professional Consultation: If you are unsure about any aspect of the project, consult with a qualified contractor or insulation specialist.
- Existing Utilities: Be mindful of any existing plumbing, electrical wiring, or HVAC systems that may be located within the concrete floor.
DIY vs. Professional Installation
Whether you choose to DIY or hire a professional depends on your skill level, the complexity of the project, and your budget.
DIY Advantages:
- Cost Savings: You can save money on labor costs.
- Control Over the Project: You have complete control over the materials and the installation process.
DIY Disadvantages:
- Time Commitment: The project can take a significant amount of time.
- Potential for Errors: Mistakes can be costly to fix.
- Lack of Expertise: You may not have the necessary knowledge or skills to install the insulation properly.
Professional Advantages:
- Expertise and Experience: Professionals have the knowledge and experience to install the insulation correctly.
- Warranty: Many contractors offer warranties on their work.
- Time Savings: Professionals can complete the project much faster than you can.
Professional Disadvantages:
- Higher Cost: Labor costs can be significant.
- Finding a Reputable Contractor: It's important to choose a contractor with a good reputation and a proven track record.
Conclusion
Insulating a concrete floor is a worthwhile investment that can improve comfort, reduce energy bills, and protect your home from moisture damage. By understanding the different methods, materials, and considerations outlined in this guide, you can make an informed decision and choose the best solution for your needs. Whether you opt for a DIY approach or hire a professional, taking the time to insulate your concrete floor will create a warmer, more comfortable, and energy-efficient living space for years to come. Remember to prioritize moisture control and adhere to local building codes for a successful and long-lasting insulation project. Good luck!