How To Insulate Water Heater Pipes

Do you find yourself constantly adjusting the thermostat, yet your home never quite reaches that comfortable “just right” temperature? Maybe you're noticing unusually high energy bills, even when you haven't drastically changed your heating or cooling habits. One often overlooked culprit behind these problems could be uninsulated water heater pipes. These pipes, particularly the hot water lines, lose a significant amount of heat as water travels from the heater to your faucets. This forces your water heater to work harder and longer, wasting energy and increasing your utility costs. This article will guide you through diagnosing this issue and taking practical DIY steps to insulate your water heater pipes, saving you money and improving your home's energy efficiency.
Diagnosing the Issue: Are Your Water Heater Pipes the Problem?
Before diving into insulation, it's crucial to confirm that your water heater pipes are indeed contributing to your heating or cooling woes. Here's a methodical approach to help you diagnose the problem:
Step 1: The Touch Test (No Tools Required)
This is the simplest and often most revealing test. Carefully touch the exposed hot water pipes coming out of your water heater. Be cautious as these pipes can be very hot. If the pipes feel excessively hot to the touch, even when the water hasn't been recently used, it indicates significant heat loss. Repeat the test on cold water pipes. They should feel cool or at ambient temperature.
Note: If you have a tankless water heater, the pipes will only heat up when hot water is actively being used.
Step 2: Observe Water Temperature Fluctuations (No Tools Required)
Pay attention to how long it takes for hot water to reach your faucets, especially those furthest from the water heater. If you notice a significant delay or the water initially runs lukewarm before getting hot, it suggests heat loss in the pipes. This is more pronounced in colder months when the surrounding air is cooler, further exacerbating the heat loss.
Step 3: Check for Existing Insulation (No Tools Required)
Visually inspect the pipes near your water heater. Are they already insulated? If so, is the insulation damaged, missing sections, or improperly installed? Even partial or inadequate insulation can contribute to heat loss. Look for signs of moisture damage, which can degrade the insulating properties of the material.
Step 4: Monitor Your Energy Bills (No Tools Required, Requires Tracking)
Keep a close eye on your gas or electricity bills. Compare them to previous months and years, factoring in seasonal changes and usage patterns. A sudden or unexplained increase in energy consumption could be a sign that your water heater is working harder due to heat loss from uninsulated pipes. Remember to account for other potential factors like changes in thermostat settings or increased appliance usage.
Step 5: Room Temperature Around the Water Heater (No Tools Required)
Pay attention to the temperature in the room where your water heater is located. If the room feels noticeably warmer than other areas of your home, especially during the heating season, it could be due to heat radiating from the uninsulated water heater and pipes. This wasted heat is energy you're paying for but not using effectively.
Step 6: Visual Inspection for Leaks (No Tools Required)
While not directly related to insulation, carefully inspect the pipes and fittings for any signs of leaks. Even small leaks can lead to significant water waste and contribute to energy loss. Address any leaks before proceeding with insulation.
DIY Insulation: Taking Action
Once you've confirmed that your water heater pipes are contributing to energy loss, you can take several DIY steps to improve insulation. These steps are generally straightforward and safe, but always prioritize safety and consult a professional if you're unsure about any part of the process.
Materials You'll Need:
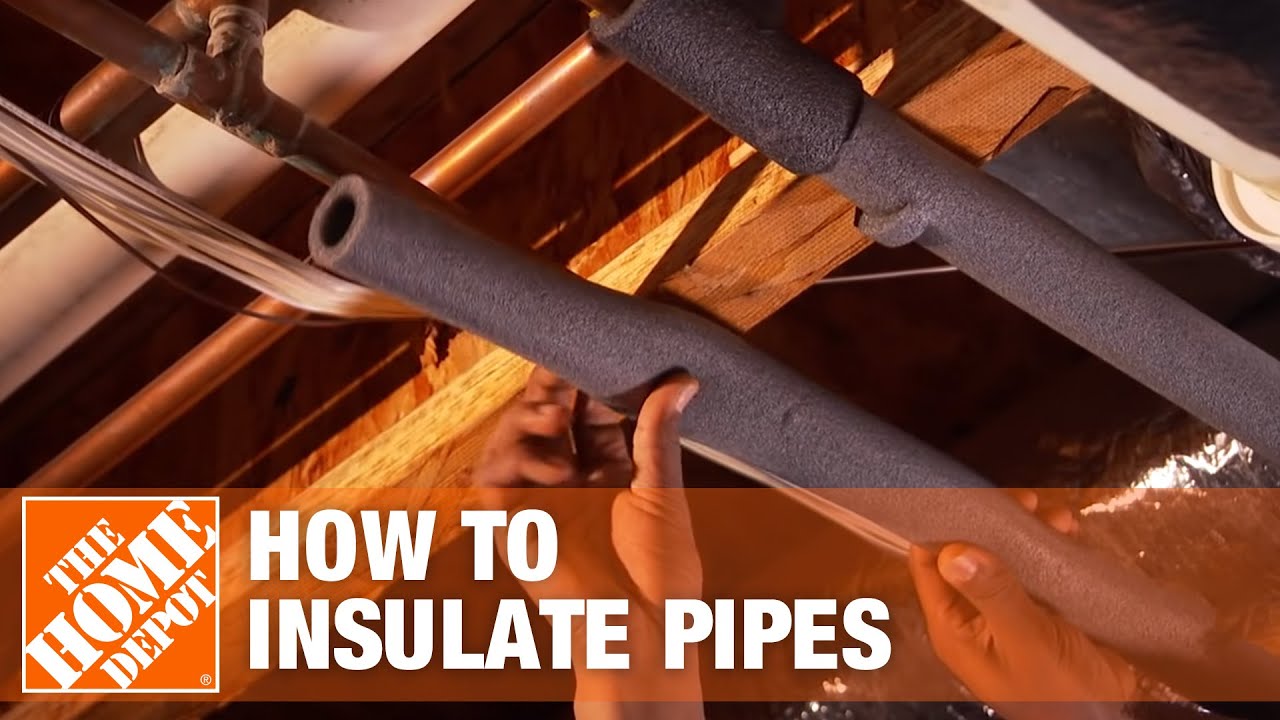
* Pipe Insulation Sleeves: These pre-cut foam or rubber sleeves are designed to fit snugly around pipes. Choose the correct diameter for your pipes (typically ½ inch or ¾ inch). * Insulation Tape: Use foil tape or specialized pipe insulation tape to seal the seams and ends of the insulation sleeves. * Utility Knife or Scissors: For cutting insulation to the correct length. * Measuring Tape: To accurately measure the pipe lengths. * Safety Glasses: To protect your eyes from dust and debris. * Gloves: To protect your hands from dirt and potential irritants.Step-by-Step Insulation Guide:
- Safety First: Turn off the power or gas supply to your water heater. This is crucial to prevent accidents during the insulation process. For electric heaters, switch off the breaker. For gas heaters, turn the gas valve to the "off" position. Allow the pipes to cool down before handling them.
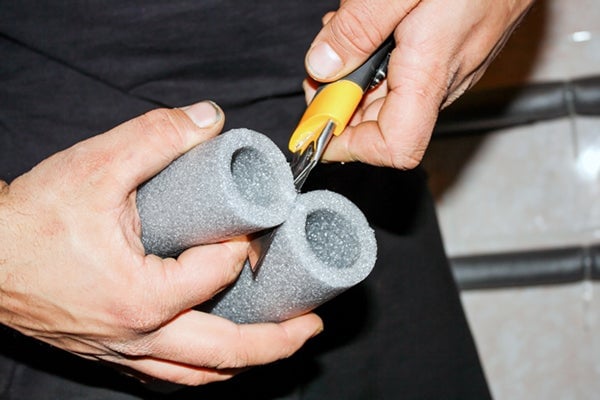
- Measure and Cut: Measure the length of the exposed pipes you want to insulate. Use the utility knife or scissors to cut the insulation sleeves to the appropriate lengths. Remember to account for any bends or fittings.
- Install the Insulation Sleeves: Open the slit in the insulation sleeve and carefully fit it around the pipe. Ensure a snug fit. If the sleeve is too long, trim it as needed.
- Seal the Seams and Ends: Use the insulation tape to securely seal the seams where the insulation sleeve meets itself. Also, tape the ends of the insulation to prevent heat loss. Overlap the tape slightly to create a tight seal.
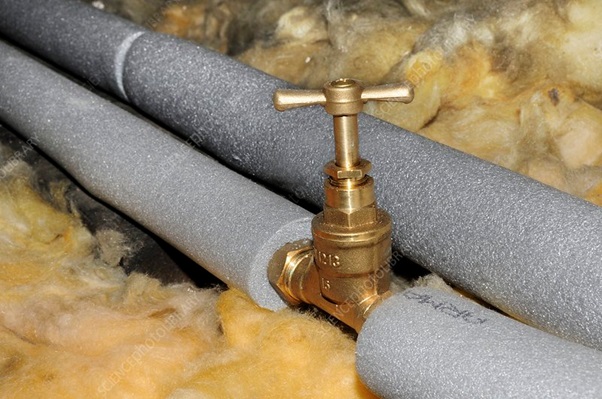
- Insulate Fittings and Bends: For fittings and bends, you may need to use scraps of insulation and carefully wrap them with tape. Pre-made fitting covers are also available at hardware stores.
- Repeat for All Exposed Pipes: Repeat the process for all exposed hot water pipes and as much of the cold water pipes as possible, especially in unheated areas.
- Inspect Your Work: Once you've finished insulating, carefully inspect your work to ensure that all seams and ends are properly sealed.
- Restore Power/Gas: Once you're satisfied with the insulation, turn the power or gas supply back on to your water heater.
Important Considerations and Safety Tips:
* Avoid Overlapping Insulation: While you want a snug fit, avoid overlapping the insulation layers excessively, as this can trap moisture and reduce its effectiveness. * Proper Ventilation: Ensure proper ventilation in the area around your water heater to prevent moisture buildup. * Don't Insulate the T&P Valve: Do not insulate the Temperature and Pressure (T&P) relief valve or its discharge pipe. This valve is a critical safety device, and insulating it could prevent it from functioning properly. * Mind the Flue: If you have a gas water heater, be careful not to obstruct the flue (the vent pipe that carries exhaust gases outside). Ensure that the insulation doesn't come into contact with the flue. * Check Local Codes: Check your local building codes for any specific requirements regarding water heater insulation. * Wear Appropriate Safety Gear: Always wear safety glasses and gloves to protect yourself during the insulation process.When to Call a Professional:
While insulating water heater pipes is a relatively straightforward DIY project, there are situations where it's best to call a professional HVAC technician or plumber. Consider seeking professional help if:
* You're uncomfortable working with gas or electricity. * You suspect a gas leak. Evacuate the area immediately and call your gas company. * You're unsure about the type of water heater you have or the proper insulation techniques. * The pipes are severely corroded or damaged. * You need to move or alter any gas or water lines. * You're dealing with asbestos insulation (common in older homes). Do not disturb asbestos. Contact a qualified asbestos abatement professional. * You have difficulty accessing the pipes due to their location or obstructions. * You notice any signs of water damage or mold growth around the water heater.Beyond Pipe Insulation: Additional Energy-Saving Measures
Insulating your water heater pipes is a great first step, but there are other measures you can take to further reduce energy consumption and lower your utility bills:
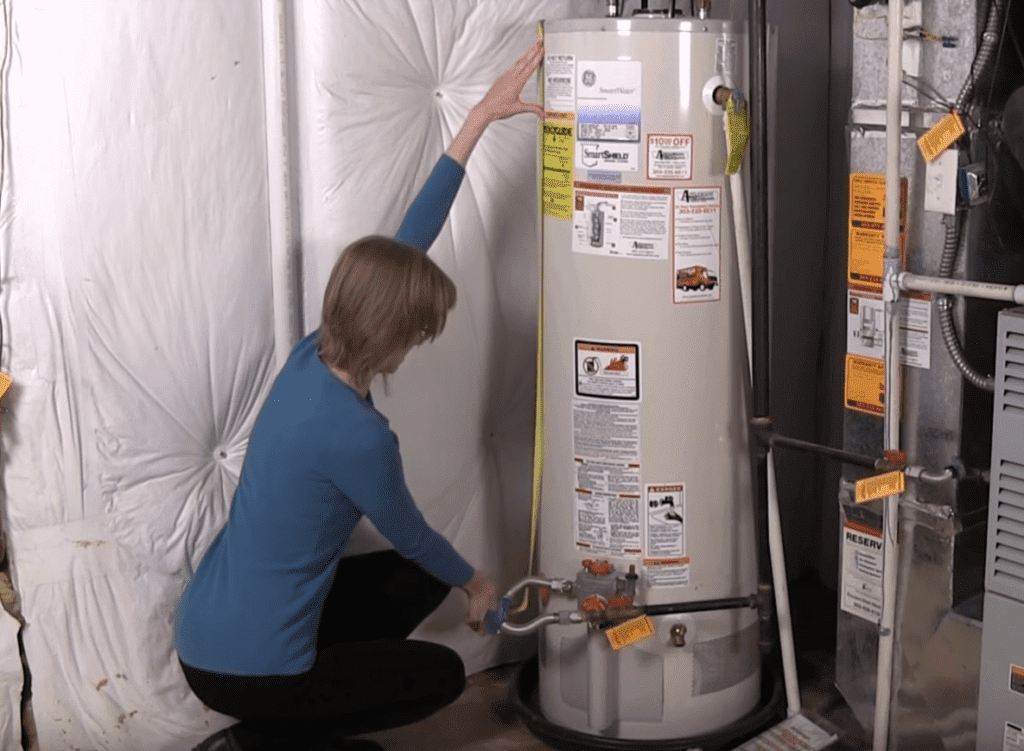
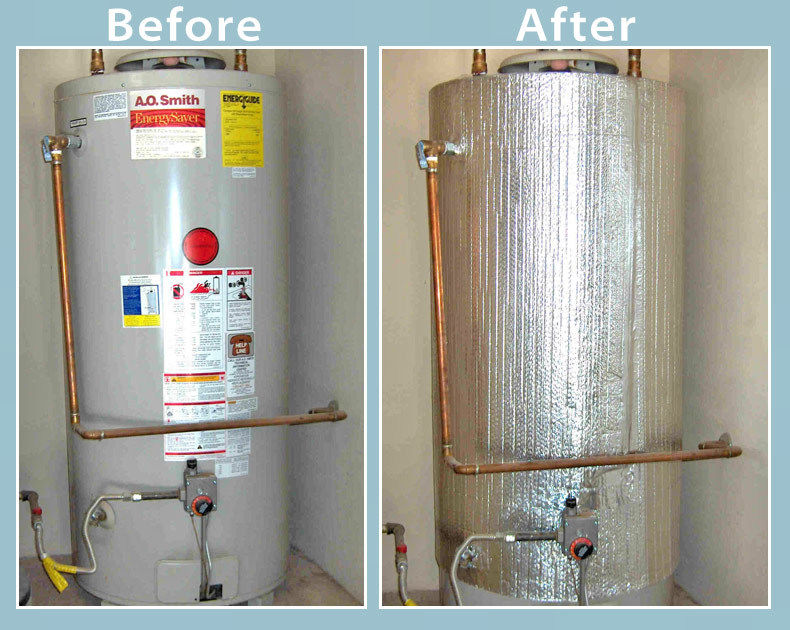
* Insulate Your Water Heater Tank: Consider adding an insulation blanket to your water heater tank, especially if it's an older model. Many newer water heaters come with built-in insulation, but older models may benefit from additional insulation. * Lower Your Water Heater Temperature: Most water heaters are set to 140°F (60°C), which is often higher than necessary. Lowering the temperature to 120°F (49°C) can save energy and reduce the risk of scalding. * Install Low-Flow Showerheads and Faucet Aerators: These devices reduce water consumption without sacrificing water pressure, saving you both water and energy. * Fix Leaky Faucets and Pipes: Even small leaks can waste a significant amount of water and energy over time. Repair any leaks promptly. * Wash Clothes in Cold Water: Washing clothes in cold water can save a significant amount of energy, as the water heater doesn't have to heat the water. * Consider a Tankless Water Heater: If you're replacing your water heater, consider a tankless model. Tankless water heaters heat water on demand, eliminating the standby heat loss associated with traditional tank-style water heaters. * Regular Water Heater Maintenance: Flush your water heater regularly to remove sediment buildup, which can reduce its efficiency.Conclusion: A Simple Step Towards Home Energy Efficiency
Insulating your water heater pipes is a relatively simple and inexpensive DIY project that can yield significant energy savings. By following the steps outlined in this article, you can diagnose the issue, properly insulate your pipes, and enjoy lower utility bills and a more comfortable home. Remember to prioritize safety and consult a professional when needed. With a little effort, you can make a big difference in your home's energy efficiency and contribute to a more sustainable future. So, take the first step today and start saving!