How To Insulate Water Pipes In A Crawl Space
Have you ever noticed your water heater working overtime in the winter, or your showers starting cold faster than they should? Maybe your energy bills are creeping up even though you haven't changed your thermostat settings. One frequently overlooked culprit behind these issues, especially for homes with crawl spaces, is uninsulated water pipes.
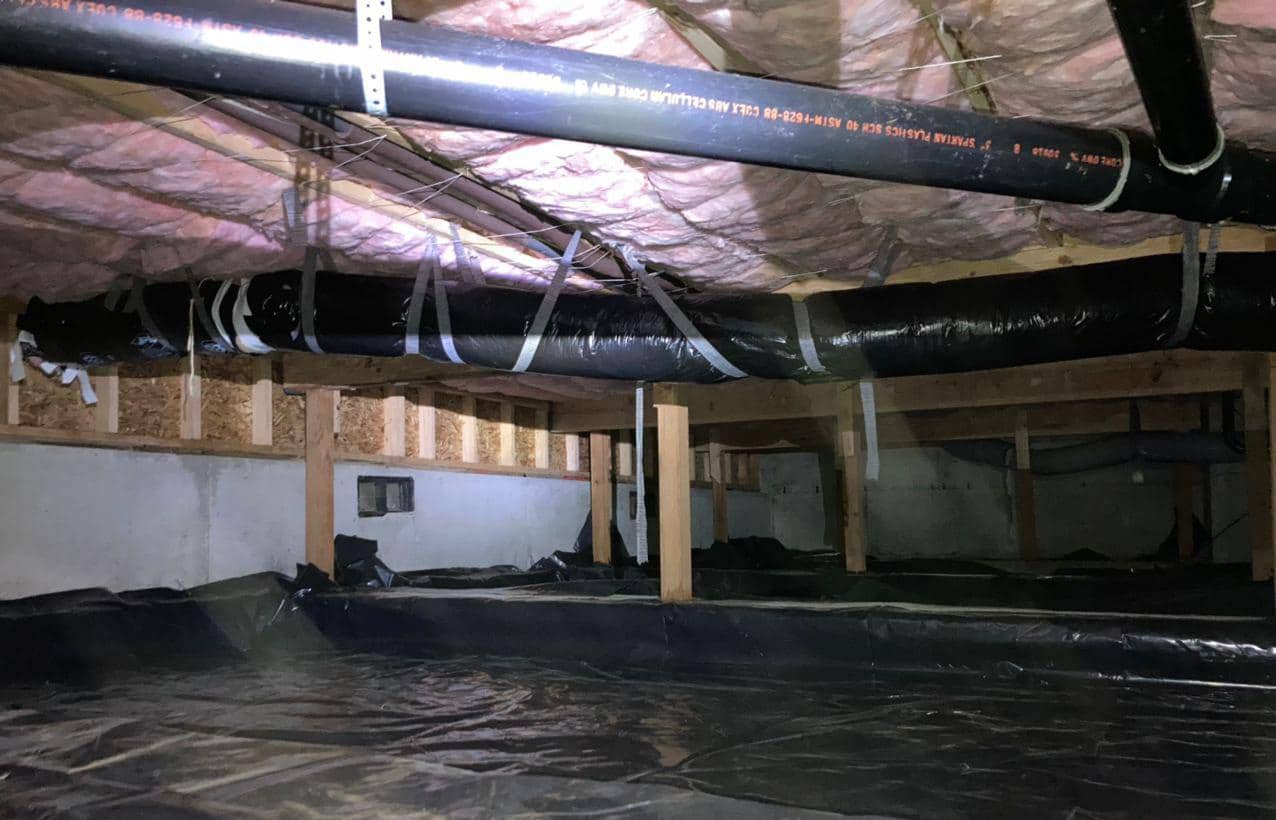
Crawl spaces are often cold and damp environments, making them prime locations for heat loss from your hot water pipes. This means your water heater has to work harder to maintain the desired temperature, wasting energy and potentially shortening its lifespan. Similarly, cold water pipes can become excessively cold, impacting the temperature of the water reaching your faucets.
Diagnosing the Problem: Is Pipe Insulation the Answer?
Before diving into insulating your pipes, let's make sure that's actually the root of the problem. Here's a methodical approach to diagnosis:
Step 1: The Touch Test (No Tools Required)
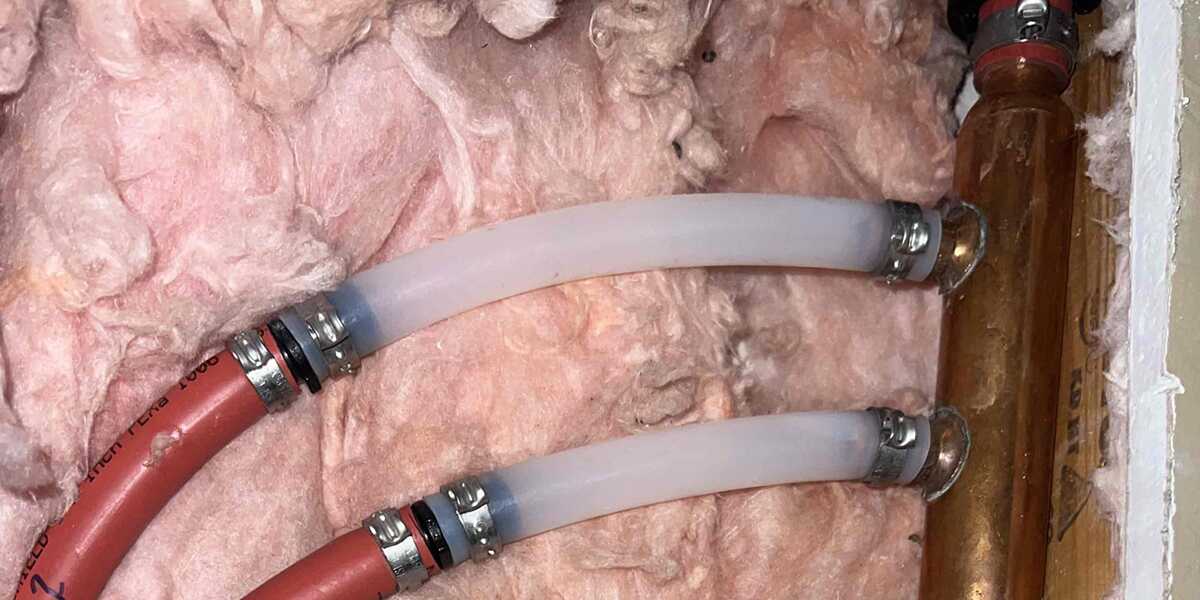
First, access your crawl space (remembering to take appropriate safety precautions like wearing gloves, a mask, and eye protection!). Carefully touch your exposed water pipes. Are they noticeably cold to the touch, especially the hot water pipes? Do they feel damp or have condensation on them?
If the pipes are cold and/or damp, it's a strong indicator that they're losing heat to the surrounding environment. This is especially true if it's a cold day outside.
Step 2: Monitor Water Temperature
Run hot water from a faucet furthest from your water heater. How long does it take for the water to get hot? Does the temperature fluctuate significantly while running? A prolonged wait time or significant temperature fluctuations can indicate heat loss along the pipe run.
Step 3: Visual Inspection (No Tools Required)
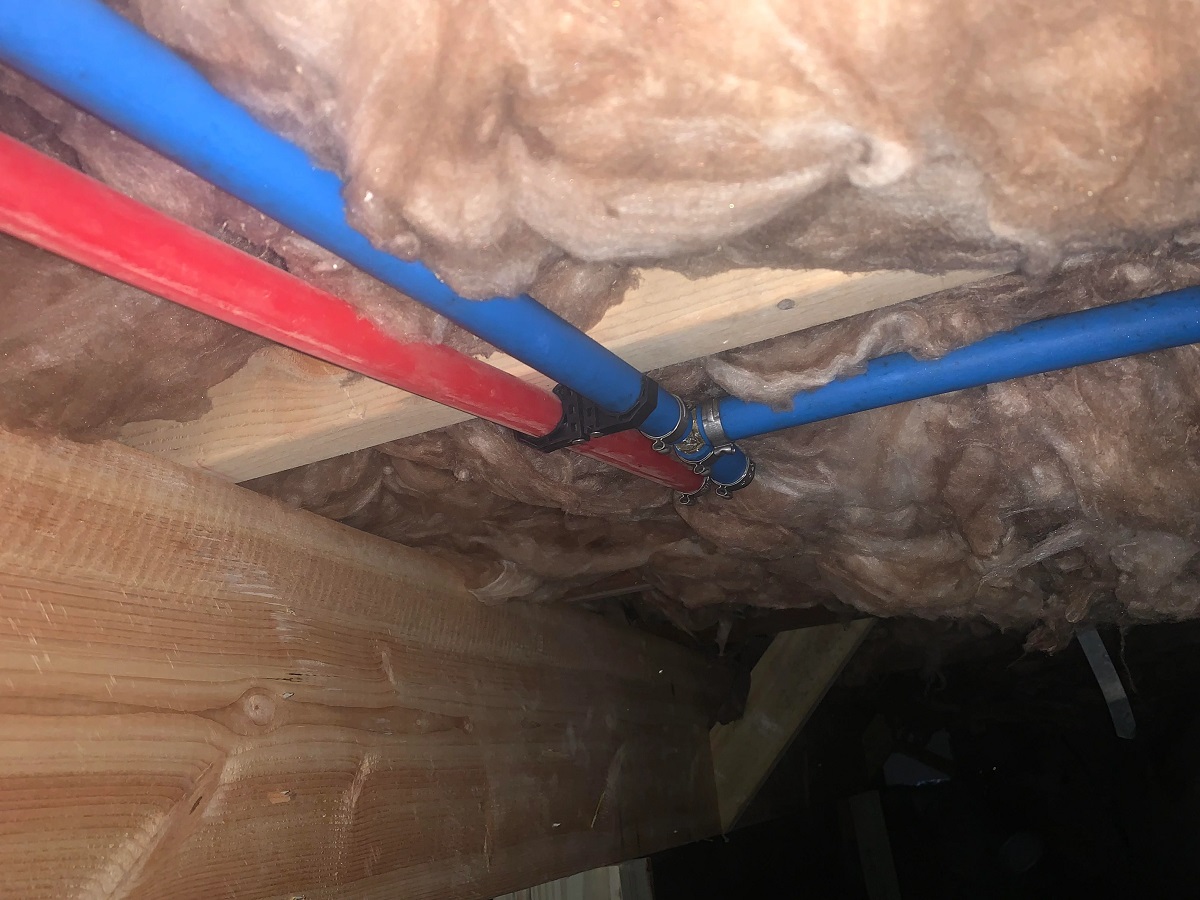
Carefully examine the pipes for existing insulation. Is there any? If so, is it damaged, missing sections, or wet? Look for signs of rodent damage or water leaks. Pay close attention to pipe joints, bends, and areas where pipes pass through walls or floors. These are often points where insulation is missing or inadequate.
Step 4: Examine Your Water Heater (No Tools Required)
Inspect your water heater itself. Is it properly insulated? Many older water heaters lack sufficient insulation, contributing to energy loss. While this article focuses on pipe insulation, a poorly insulated water heater will exacerbate the problem. Look for a label indicating the R-value of the insulation. A higher R-value indicates better insulation. If your water heater is old and poorly insulated, consider replacing it with a newer, more energy-efficient model. If you suspect issues with the water heater itself (e.g., strange noises, leaks), it's best to call a qualified plumber.
Step 5: Assess Crawl Space Conditions (No Tools Required)
Take note of the overall conditions in your crawl space. Is it excessively damp? Is there standing water? Proper crawl space ventilation and moisture control are crucial for the effectiveness of pipe insulation. If your crawl space is consistently damp, address the moisture issue *before* insulating your pipes. Consider installing a vapor barrier to prevent moisture from rising from the ground.
Step 6: Analyze Energy Bills
Compare your energy bills from previous years, especially during the colder months. Have they been steadily increasing? A significant increase in energy consumption without a corresponding change in usage habits could indicate heat loss from uninsulated pipes.
DIY Pipe Insulation: A Step-by-Step Guide
If your diagnosis points to inadequate pipe insulation, you can often tackle this project yourself. Here's a breakdown of the process:
Tools and Materials You'll Need:
* Pipe insulation sleeves (foam or fiberglass, with appropriate R-value) * Measuring tape * Utility knife or scissors * Duct tape or insulation tape * Gloves * Safety glasses * Optional: Self-adhering insulation wrap for tight spacesStep 1: Safety First!
Before you begin, turn off the power to your water heater at the circuit breaker. This is a crucial safety step to prevent electrical shock. Also, wear gloves and safety glasses to protect your hands and eyes during the insulation process. If you are working in a confined space, ensure adequate ventilation.
Step 2: Measure and Cut the Insulation
Carefully measure the length of the pipes you plan to insulate. Use a measuring tape to get accurate measurements. Then, use a utility knife or scissors to cut the insulation sleeves to the appropriate lengths. It's always better to cut the insulation slightly longer than needed; you can trim off any excess later.
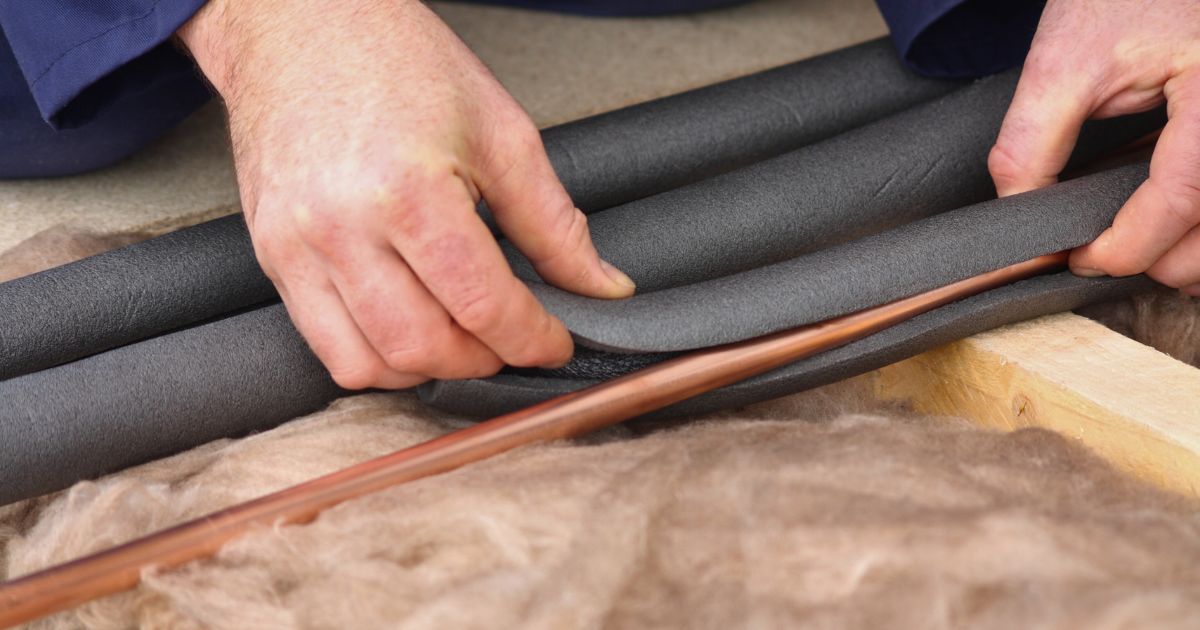
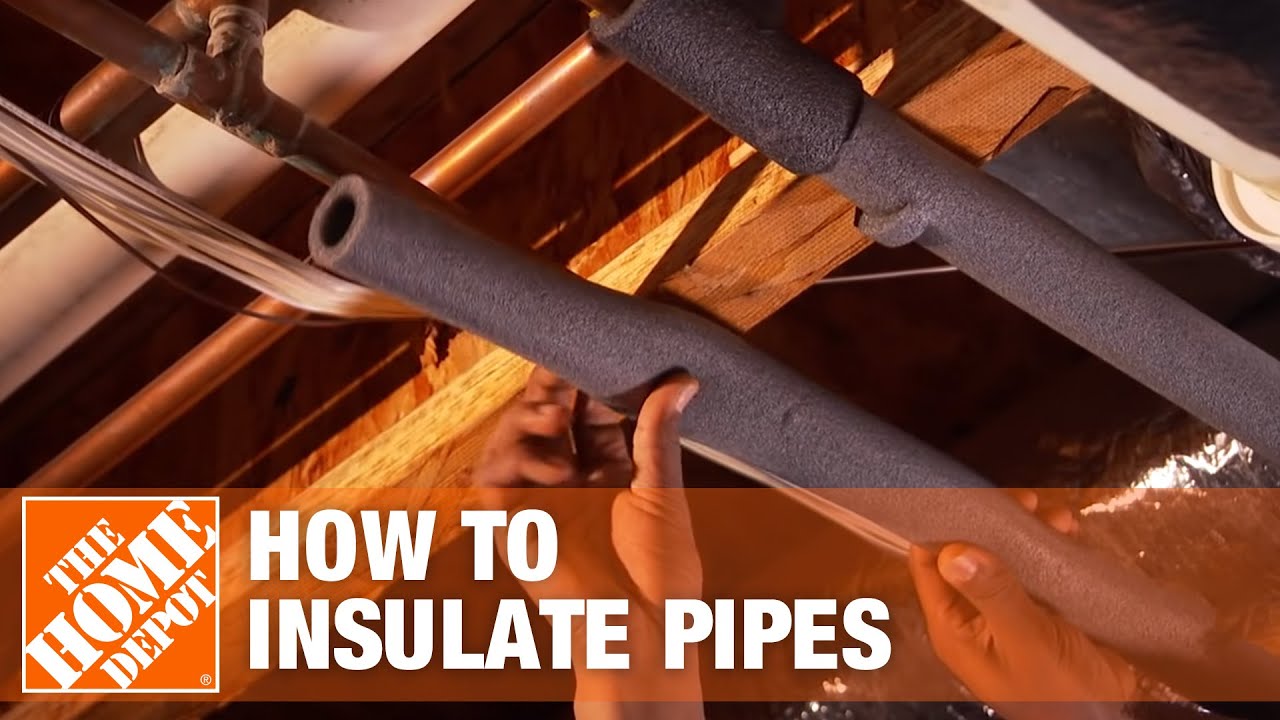
Step 3: Apply the Insulation
Split the insulation sleeves along the pre-cut slit. Carefully wrap the insulation around the pipes, ensuring a snug fit. If using foam sleeves, they often have an adhesive strip to help secure them. If using fiberglass sleeves, you'll need to use duct tape or insulation tape to hold them in place.
Step 4: Seal the Seams
Pay close attention to the seams where the insulation sleeves meet. Use duct tape or insulation tape to securely seal these seams. This will prevent heat loss and protect the insulation from moisture.
Step 5: Insulate Pipe Joints and Bends
Insulating pipe joints and bends can be a bit trickier. You may need to cut the insulation into smaller pieces to fit around these areas. Use plenty of tape to secure the insulation and create a tight seal. Self-adhering insulation wrap can be particularly useful for these tight spaces.
Step 6: Address Any Gaps
Inspect the insulated pipes for any gaps or areas where the insulation is not snug. Fill any gaps with small pieces of insulation or insulation wrap. Secure everything with tape.
Step 7: Insulate Valves
Don't forget to insulate any exposed valves. You can wrap them with insulation wrap or cut pieces of insulation to fit around them. Secure the insulation with tape.
Step 8: Check Your Work
Once you've finished insulating all the pipes, carefully inspect your work. Make sure all the pipes are fully covered with insulation, and that all seams and gaps are properly sealed. Pay particular attention to areas where pipes pass through walls or floors.
Step 9: Turn the Power Back On
Once you're satisfied with your work, turn the power back on to your water heater at the circuit breaker.
Choosing the Right Insulation
There are several types of pipe insulation available, each with its own advantages and disadvantages:
* Foam Pipe Insulation: This is a popular and relatively inexpensive option. It's easy to install and provides good insulation. Foam insulation is typically available in pre-slit sleeves, making it easy to wrap around pipes. * Fiberglass Pipe Insulation: Fiberglass insulation offers excellent thermal performance but can be more challenging to install. It requires careful handling to avoid skin irritation. Fiberglass insulation is often wrapped in a foil or paper facing. * Rubber Pipe Insulation: Rubber insulation is more expensive but provides excellent insulation and is resistant to moisture. It's a good choice for damp crawl spaces. * Self-Adhering Insulation Wrap: This is a versatile option that can be used to insulate pipe joints, bends, and other difficult-to-reach areas. It's easy to apply and provides a good seal.When choosing insulation, consider the R-value. A higher R-value indicates better insulation. Check local building codes for recommended R-values for pipe insulation.
When to Call a Professional
While insulating water pipes is often a manageable DIY project, there are situations where it's best to call in a professional:
* If you're uncomfortable working in a crawl space: Crawl spaces can be cramped, dirty, and potentially hazardous. If you're not comfortable working in these conditions, it's best to leave the job to a professional. * If you suspect mold or asbestos: If you notice signs of mold or asbestos in your crawl space, do not disturb it. Contact a qualified professional for inspection and remediation. * If you have extensive plumbing repairs needed: If you notice leaks, corrosion, or other significant plumbing problems, it's best to call a qualified plumber. * If you're unsure about the proper insulation techniques: If you're not confident in your ability to properly insulate the pipes, it's best to consult with a professional. Improperly installed insulation can be ineffective and even create moisture problems. * If you lack the necessary tools or experience: Some insulation projects may require specialized tools or experience. If you don't have these, it's best to leave the job to a professional. * Complex or Extensive Plumbing Systems: Homes with complex plumbing configurations or extensive runs of pipework in the crawl space might benefit from professional assessment and insulation to ensure comprehensive coverage.Maintaining Your Insulated Pipes
Once you've insulated your pipes, it's important to maintain them to ensure their continued effectiveness:
* Regular Inspections: Periodically inspect your insulated pipes for damage, moisture, or rodent activity. * Repair Damage Promptly: If you find any damage to the insulation, repair it promptly to prevent heat loss. * Address Moisture Issues: If you notice moisture problems in your crawl space, address them promptly to prevent damage to the insulation and pipes. * Keep Crawl Space Clean: Keep your crawl space clean and free of debris to prevent rodent infestation and other problems.The Payoff: Energy Savings and Comfort
Insulating your water pipes in the crawl space is a relatively simple and inexpensive project that can provide significant benefits. You'll enjoy lower energy bills, a more comfortable home, and a longer lifespan for your water heater. By following these steps and taking the necessary precautions, you can confidently tackle this DIY project and reap the rewards of a well-insulated plumbing system. Remember, if you're ever unsure about any aspect of the project, don't hesitate to consult with a qualified professional. Your comfort and safety are the top priorities!