How To Join Pex To Copper Pipe

Connecting PEX (cross-linked polyethylene) to copper pipe is a common plumbing task, whether you're making repairs, adding new fixtures, or repiping parts of your home. While it might seem daunting, with the right tools and knowledge, it's a manageable DIY project. This guide will walk you through the process, explaining the different methods and offering helpful tips.
Understanding the Materials: PEX vs. Copper
Before diving in, let's briefly compare these two popular plumbing materials:
* Copper: A traditional choice known for its durability, resistance to corrosion (in most water conditions), and ability to handle high temperatures and pressures. However, it can be more expensive and requires soldering, which involves heat and potential fire hazards. * PEX: A flexible plastic tubing that's become increasingly popular due to its affordability, ease of installation, and resistance to freezing. PEX uses various connection methods that don't require soldering. Think of PEX as a modern alternative, offering flexibility both literally and figuratively in your plumbing projects.Understanding the strengths and weaknesses of each material is crucial for making informed decisions about your plumbing system.
Choosing the Right Connection Method
Several methods exist for joining PEX to copper, each with its own pros and cons. We'll cover the most common and reliable options:
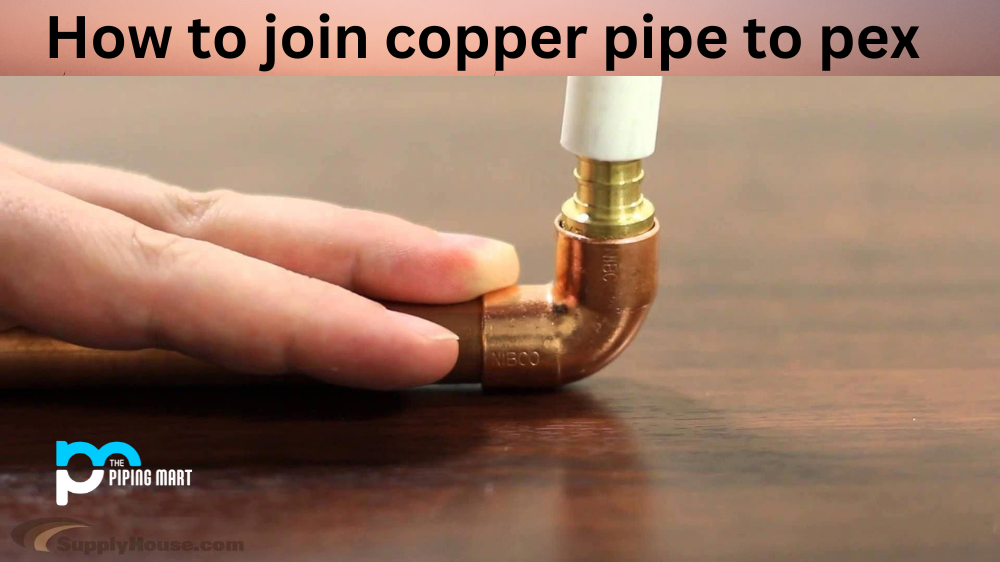
1. Compression Fittings
What they are: Compression fittings utilize a nut, a compression ring (often called a ferrule), and the fitting body to create a watertight seal. As you tighten the nut, the ferrule compresses against the pipe, creating a mechanical bond.
How they work: Imagine squeezing a clay ball around a pipe. The tighter you squeeze, the stronger the grip. Compression fittings work on a similar principle, compressing the ferrule to form a secure seal.
Pros: Relatively easy to install, requiring only wrenches. They are also removable, making them useful for temporary connections or repairs. No soldering is required, reducing fire risk.
Cons: Can be prone to leaks if not installed correctly. Overtightening can damage the fitting or the pipe. It's crucial to follow the manufacturer's instructions precisely.
When to use: Suitable for small repairs or connecting appliances where disassembly may be needed in the future. Ideal for DIYers comfortable with hand tools.
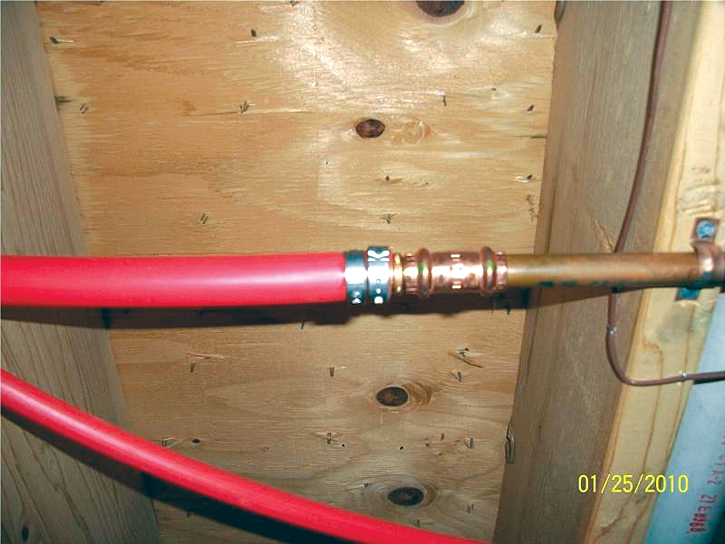
2. Crimp Fittings (with Copper Crimp Rings)
What they are: Crimp fittings involve inserting the PEX pipe into a fitting and then using a specialized crimping tool to compress a copper ring around the pipe, creating a tight seal.
How they work: Think of it like securing a hose with a metal clamp. The crimping tool applies uniform pressure to the copper ring, squeezing the PEX pipe against the fitting's barbs, forming a strong and reliable connection.
Pros: Considered a very reliable and durable connection method. Relatively easy to learn and use with the proper tools. Cost-effective for larger projects.
Cons: Requires a specialized crimping tool, which can be an initial investment. Crimped connections are not easily removable. Using the wrong size crimp ring or tool can lead to leaks.
When to use: Excellent for permanent connections and larger plumbing projects. A good choice for homeowners looking for a long-lasting and dependable solution.
3. Expansion Fittings (Uponor/Wirsbo)
What they are: Expansion fittings utilize a special expansion tool to enlarge the PEX pipe before inserting it onto the fitting. The PEX then shrinks back down, creating a tight seal. Uponor (formerly Wirsbo) is the most well-known brand using this system.
How they work: Imagine stretching a rubber band and then placing it over an object. As the rubber band returns to its original size, it grips the object tightly. Expansion fittings work similarly, using the PEX's memory to create a strong grip.
Pros: Known for creating very strong and reliable connections. The full-port design minimizes flow restriction. Uponor PEX is highly regarded for its durability and resistance to chlorine.
Cons: Requires a specialized (and often more expensive) expansion tool. The process can be a bit more involved than crimping. Only compatible with Uponor PEX.
When to use: Ideal for projects where maximum reliability and minimal flow restriction are critical. A popular choice for professional plumbers and homeowners willing to invest in a high-quality system.
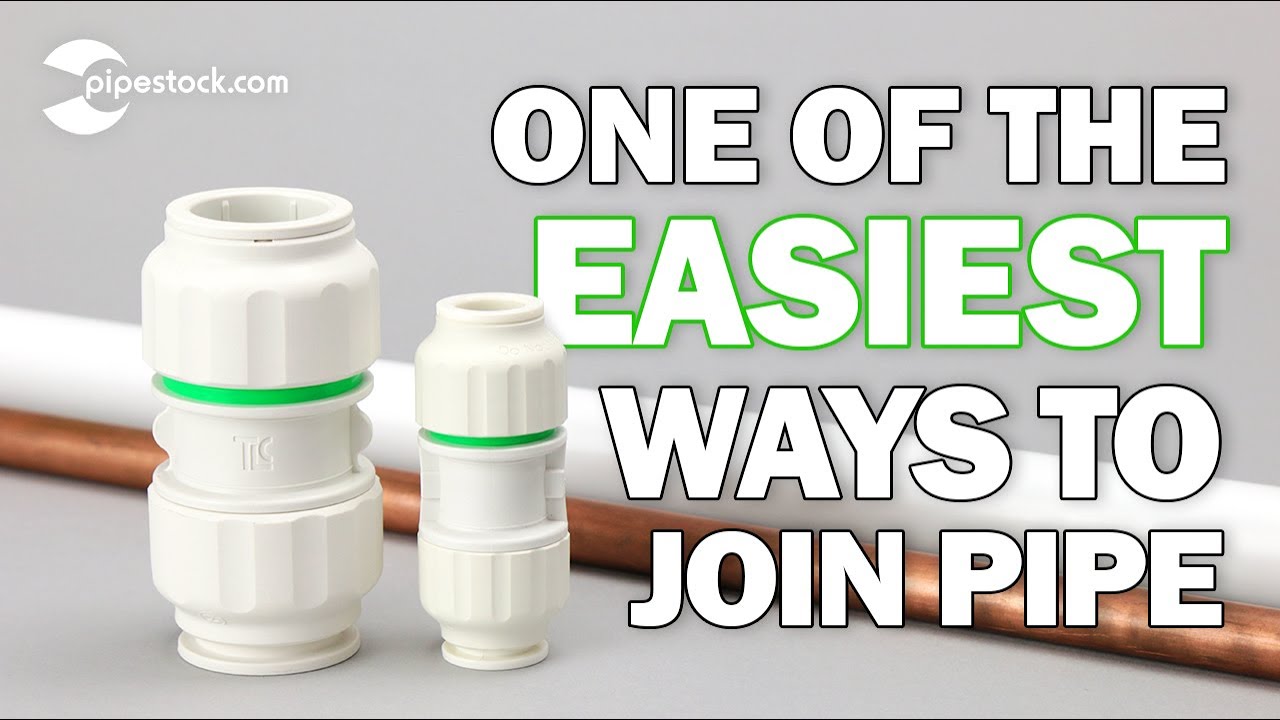
4. Push-Fit Fittings (SharkBite, etc.)
What they are: Push-fit fittings, like those made by SharkBite, are designed for quick and easy connections without the need for special tools (beyond a pipe cutter). They have internal teeth that grip the pipe and an O-ring that creates a watertight seal.
How they work: Think of these fittings like quick-connect air hose fittings. You simply push the pipe into the fitting until it clicks, and the internal mechanism locks it in place.
Pros: Extremely easy and fast to install. No special tools are required (though a deburring tool is recommended). Removable with a special disconnect clip.
Cons: Can be more expensive than other fitting types. Some plumbers are hesitant to use them for concealed connections due to perceived reliability concerns (though modern push-fit fittings are generally very reliable). Can be susceptible to corrosion in certain water conditions.
When to use: Perfect for quick repairs, small projects, and situations where soldering or crimping is difficult or impossible. Ideal for DIYers looking for a simple and straightforward solution.
Step-by-Step Guide: Connecting PEX to Copper (Using Compression Fittings)
Let's walk through the process of connecting PEX to copper using compression fittings. This method is relatively simple and requires minimal tools.
Tools and Materials:
* PEX tubing * Copper pipe * Compression fitting (PEX to copper adapter) * Pipe cutter (for copper) * PEX cutter (or sharp utility knife) * Deburring tool (for copper) * Two adjustable wrenches * Measuring tape * Pencil or marker * Safety glassesSteps:
- Preparation is Key: Turn off the water supply to the pipe you'll be working on. Open a nearby faucet to relieve pressure in the line. Wear safety glasses to protect your eyes.
- Cut the Copper Pipe: Use a pipe cutter to make a clean, square cut on the copper pipe. Remove any burrs from the inside of the pipe using a deburring tool. This is crucial for a proper seal. Think of it like sanding wood smooth before painting – it ensures a better finish.
- Cut the PEX Tubing: Use a PEX cutter or a sharp utility knife to make a clean, square cut on the PEX tubing. A clean cut is essential for a leak-free connection.
- Assemble the Compression Fitting: Disassemble the compression fitting. It will typically consist of a nut, a compression ring (ferrule), and the fitting body.
- Slide the Nut and Ferrule onto the Copper Pipe: Slide the nut onto the copper pipe, followed by the compression ring. Make sure the orientation of the ring is correct (refer to the fitting manufacturer's instructions). The ring will usually have a tapered side that faces towards the fitting body.
- Insert the Copper Pipe into the Fitting Body: Insert the copper pipe into the fitting body as far as it will go. Make sure it's seated properly.
- Slide the Nut and Ferrule onto the PEX Tubing: Slide the nut onto the PEX tubing, followed by the compression ring. Again, ensure the correct orientation of the ring.
- Insert the PEX Tubing into the Fitting Body: Insert the PEX tubing into the other side of the fitting body as far as it will go.
- Tighten the Nuts: Hand-tighten both nuts onto the fitting body. Then, use two adjustable wrenches to tighten the nuts further. Hold the fitting body with one wrench and tighten the nut with the other. Do not overtighten! Refer to the fitting manufacturer's instructions for the recommended torque or number of turns. Overtightening can damage the fitting or the pipe, leading to leaks.
- Test for Leaks: Slowly turn the water supply back on. Carefully inspect the connections for any leaks. If you see a leak, slightly tighten the nut (but be careful not to overtighten). If the leak persists, disassemble the fitting and inspect the components for damage.
Important Considerations and Best Practices
* Always follow the manufacturer's instructions: Each fitting type and brand may have specific installation requirements. * Use the correct tools: Using the wrong tools can damage the fittings or the pipes, leading to leaks. * Ensure clean cuts: Clean, square cuts are essential for creating a watertight seal. * Deburr copper pipe: Removing burrs from the inside of the copper pipe ensures a proper fit and prevents damage to the O-rings or seals in the fitting. * Don't overtighten: Overtightening can damage the fittings and lead to leaks. * Test for leaks: Always test the connections for leaks before concealing them behind walls or floors. * Consider water quality: Some water conditions can affect the longevity of certain fitting types. If you have hard water or acidic water, consult with a plumbing professional to choose the most appropriate fitting type. * Understand local codes: Plumbing codes vary by location. Check with your local building department to ensure that your plumbing work complies with all applicable regulations. Failure to comply with local codes can result in fines or other penalties.Troubleshooting Common Problems
* Leaks: If you experience leaks, first try tightening the fitting slightly. If the leak persists, disassemble the fitting and inspect the components for damage or debris. Ensure that the pipes are properly inserted into the fitting and that the compression ring or O-ring is correctly positioned. * Difficulty inserting the pipe: If you're having trouble inserting the pipe into the fitting, make sure the cut is clean and square. You may also need to use a deburring tool to remove any sharp edges. * Fitting damage: If you suspect that a fitting is damaged, replace it with a new one. Do not attempt to repair a damaged fitting.Connecting PEX to copper pipe can be a straightforward task with the right knowledge, tools, and techniques. By understanding the different connection methods, following the manufacturer's instructions, and taking the necessary precautions, you can create reliable and leak-free plumbing connections. When in doubt, consult with a licensed plumber.
Disclaimer: This guide provides general information and should not be considered a substitute for professional advice. Plumbing work can be complex and potentially dangerous. If you are not comfortable performing plumbing work yourself, it is best to hire a qualified plumber.


:max_bytes(150000):strip_icc()/ConnectPEXtoCopperPipe-565c9d555f9b5835e477a655.jpg)