How To Jump Thermostat Wires For Heat Pump
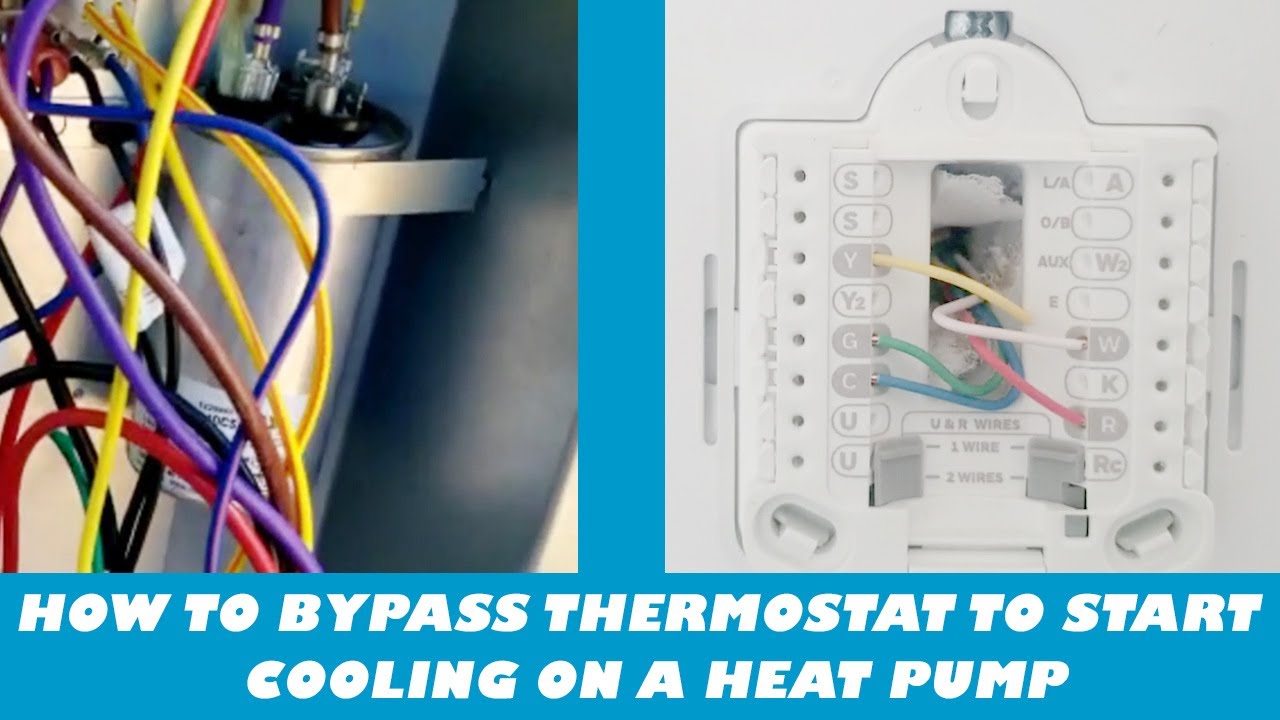
This guide provides information on how to jump thermostat wires for a heat pump system. However, it's crucial to understand that this is an advanced troubleshooting technique and should only be attempted if you have a strong understanding of electrical circuits and HVAC systems. If you are not comfortable working with electrical wiring, contact a qualified HVAC technician. Working with electricity can be dangerous and could result in serious injury or damage to your equipment.
Disclaimer: This guide is for informational purposes only and should not be considered a substitute for professional advice. The author and publisher are not responsible for any injury or damage resulting from the use of this information.
Understanding Heat Pump Thermostats
Heat pumps are heating and cooling systems that move heat instead of generating it. Think of it like this: in the summer, they act like air conditioners, removing heat from your home and expelling it outside. In the winter, they reverse the process, extracting heat from the outside air (even when it's cold!) and bringing it inside. Because of this dual function, heat pump thermostats are more complex than those for furnaces or air conditioners.
The Role of Thermostat Wires
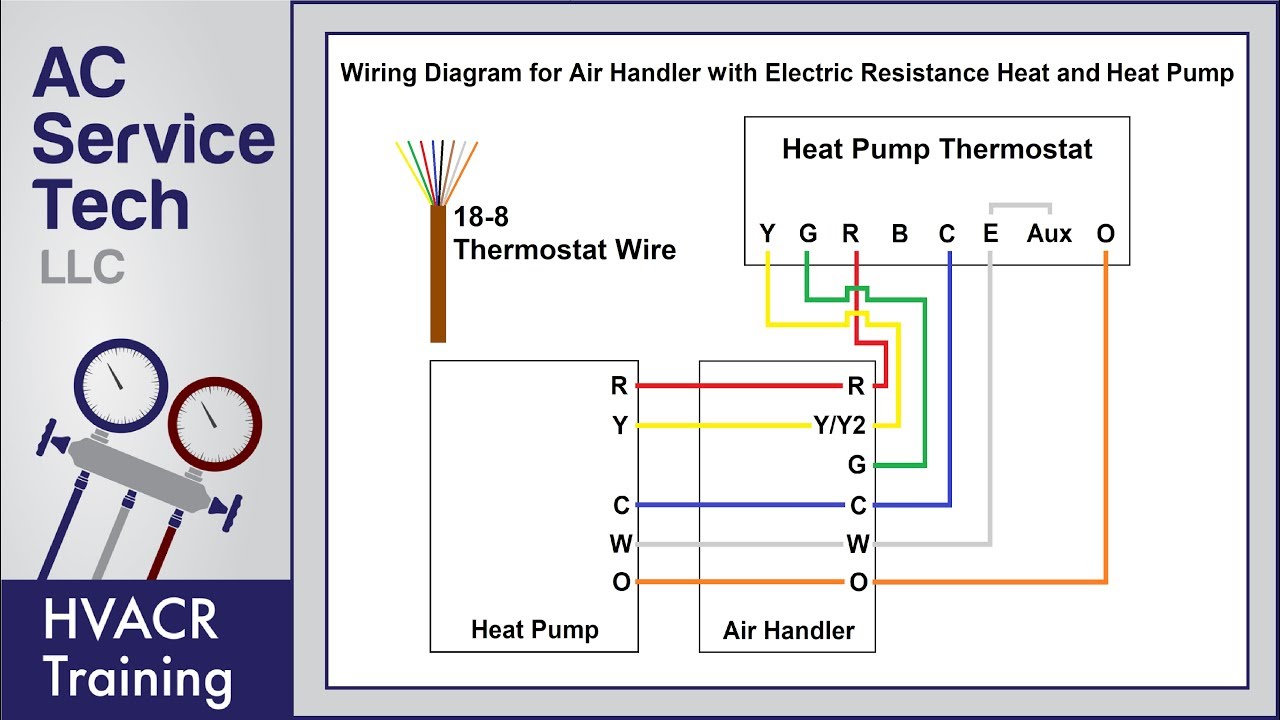
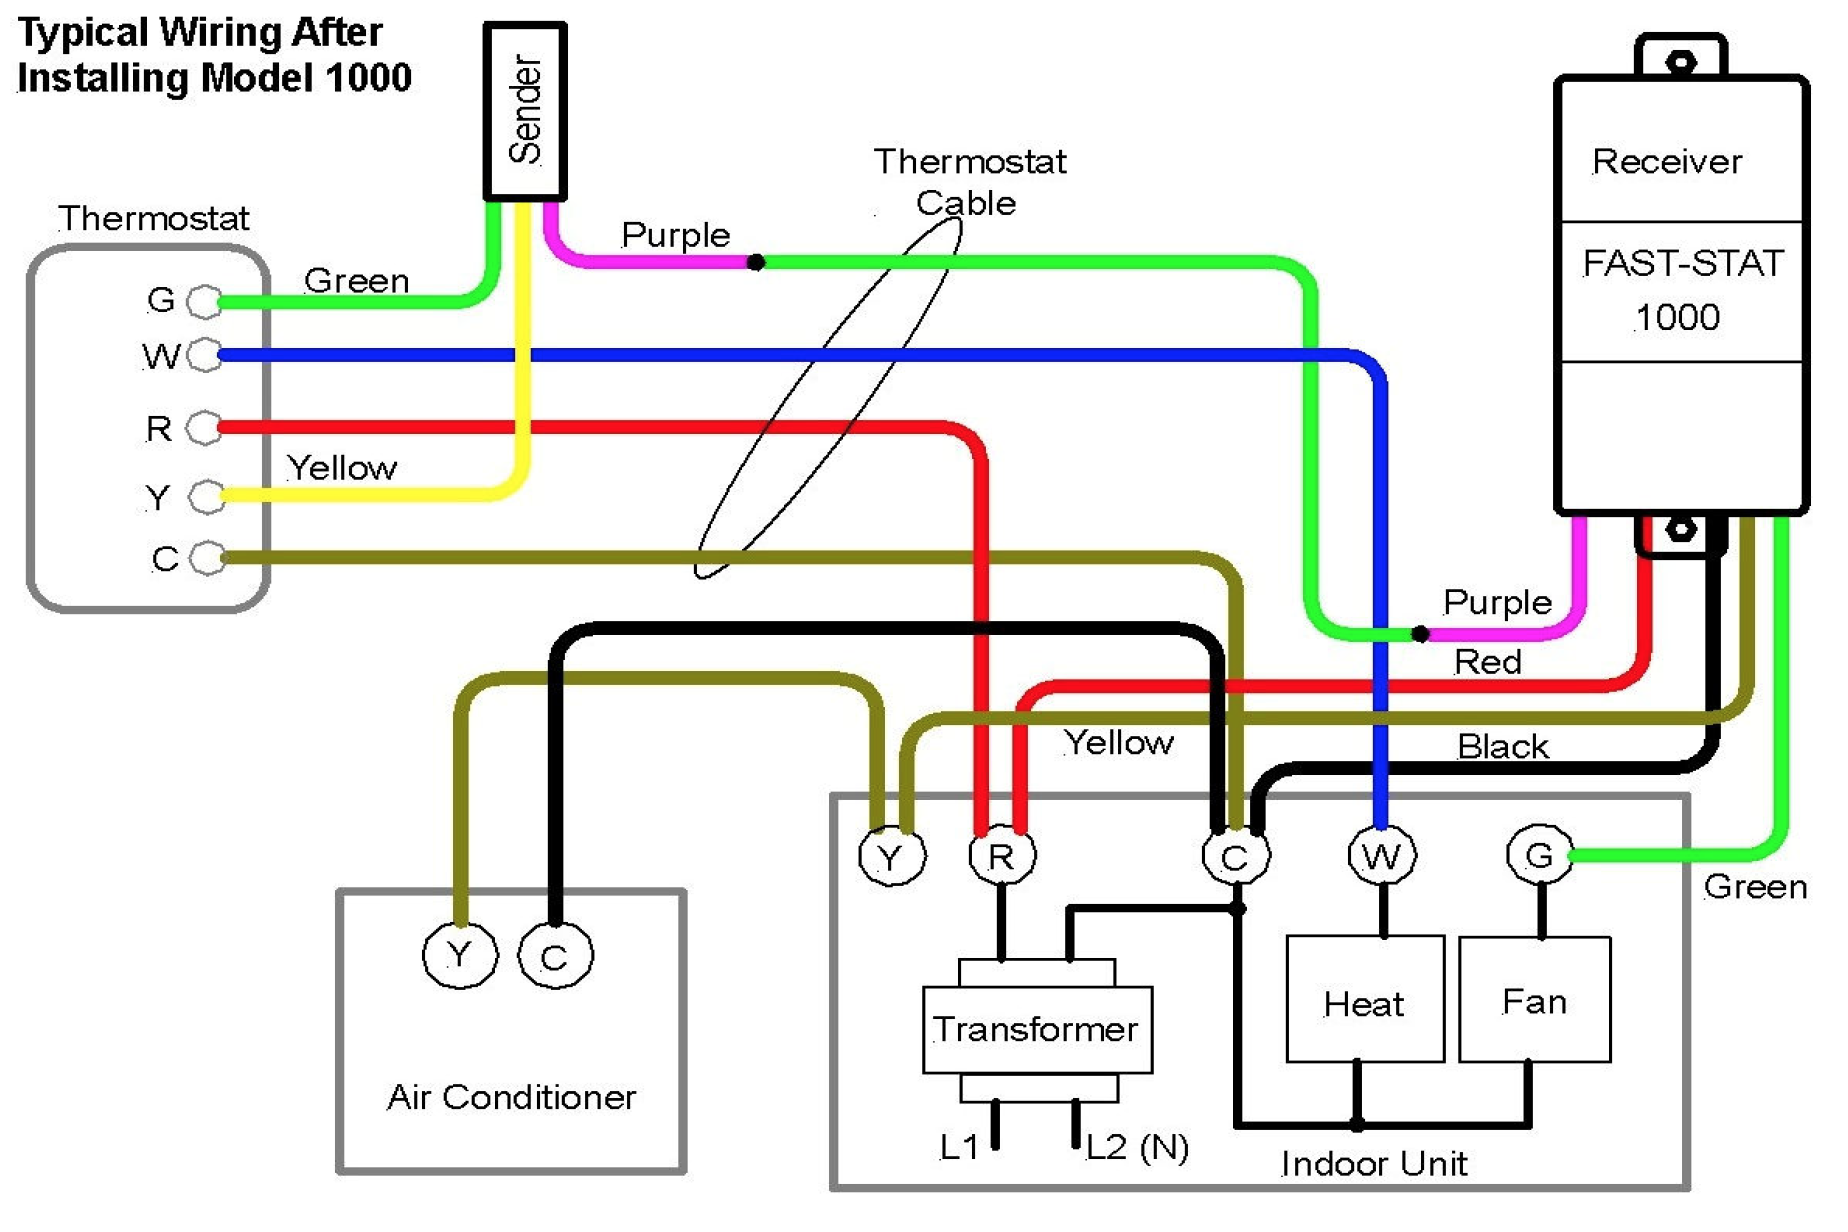
Each wire connected to your thermostat serves a specific purpose, sending signals to your heat pump to control different functions. Common thermostat wires include:
- R (Red): Power wire. This typically provides 24 volts AC from the transformer in your HVAC system.
- C (Common): The return path for the power. Many modern thermostats require a C wire for their own internal power.
- Y (Yellow): Activates the compressor for cooling mode.
- G (Green): Controls the fan. Turning the fan on and off independently.
- W (White): Activates the auxiliary or emergency heat, usually electric resistance heaters. This is used when the heat pump can't keep up with the heating demand.
- O/B (Orange/Blue): Reversing valve. This switches the heat pump between heating and cooling modes. Whether it's O or B depends on the manufacturer's wiring convention. *O* energizes in cooling, *B* energizes in heating.
Note: Wire colors can vary, especially in older installations. Always document the existing wiring configuration before disconnecting anything.
Why Jump Thermostat Wires?
Jumping thermostat wires involves connecting two or more wires together to manually activate a specific function of your heat pump. This is primarily used for troubleshooting purposes, such as:
- Isolating a thermostat problem: If your heat pump isn't working as expected, jumping the wires can bypass the thermostat to see if the issue lies with the thermostat itself or with the heat pump system.
- Testing individual components: You can use jumpers to test specific components like the compressor, fan, or auxiliary heat.
- Emergency heating: In a rare case, if your thermostat completely fails during very cold weather, jumping the wires can manually activate the emergency heat to prevent your pipes from freezing (but only as a temporary measure!).
Safety Precautions
Before attempting any wiring work, it's absolutely critical to take these safety precautions:
- Turn off the power: Locate the circuit breaker that controls your heat pump system and turn it OFF. Double-check that the power is off using a non-contact voltage tester. This is the *most important* step.
- Document existing wiring: Take clear pictures of your thermostat wiring *before* disconnecting anything. Draw a diagram if necessary. This will be invaluable when you need to reconnect the wires.
- Use insulated tools: Use tools with insulated handles to minimize the risk of electric shock.
- Work in a well-lit area: Ensure you have adequate lighting to clearly see what you are doing.
- Wear appropriate safety gear: Consider wearing safety glasses to protect your eyes.
How to Jump Thermostat Wires (Step-by-Step)
Important: This procedure assumes you are working with a standard heat pump thermostat wiring configuration. If your wiring is different, consult a qualified HVAC technician.
- Turn off the power: As mentioned above, absolutely ensure the power to your HVAC system is turned off at the circuit breaker.
- Remove the thermostat cover: Most thermostats have a cover that can be easily removed. Some may have screws holding the cover in place.
- Identify the wires: Refer to the wiring diagram you created earlier. If you don't have a diagram, now is the time to carefully document the existing connections before proceeding further.
- Prepare the jumper wire: You will need a short piece of insulated wire (18-22 gauge is typically sufficient) with stripped ends. You can purchase pre-made jumper wires or create your own.
- Jump for Cooling (Testing the compressor): To test the cooling function, use the jumper wire to connect the R (Red) wire to the Y (Yellow) wire. This sends a signal to the compressor to turn on.
- Jump for Heating (Testing the heat pump): To test the heating function (without auxiliary heat), use the jumper wire to connect the R (Red) wire to the Y (Yellow) wire *and* the O/B (Orange or Blue) wire. This activates the compressor and the reversing valve to switch to heating mode. Remember to determine whether your system uses O or B for the reversing valve.
- Jump for Auxiliary Heat (Testing emergency heat): To test the auxiliary or emergency heat, use the jumper wire to connect the R (Red) wire to the W (White) wire. This will activate the electric resistance heaters. Do not run the auxiliary heat for extended periods, as it can be expensive and may overheat.
- Jump for Fan: To test the fan, use the jumper wire to connect the R (Red) wire to the G (Green) wire. This will turn on the fan independently of the heating or cooling system.
- Observe the results: After making the appropriate jumper connection, turn the power back on at the circuit breaker. Observe whether the corresponding component (compressor, fan, or auxiliary heat) activates. Do not leave the system running jumped for a prolonged amount of time. It's for testing purposes only.
- Disconnect the jumper: Once you have completed your testing, turn the power off at the circuit breaker again. Remove the jumper wire.
- Reconnect the thermostat wires: Carefully reconnect all the thermostat wires to their original positions, referring to your wiring diagram or photograph.
- Replace the thermostat cover: Put the thermostat cover back on and secure it.
- Turn the power back on: Turn the power back on at the circuit breaker.
- Test the thermostat: Test the thermostat to ensure it is functioning correctly.
Interpreting the Results
The results of jumping thermostat wires can help you diagnose the problem with your heat pump system:
- If the component activates when jumped: This suggests that the thermostat is likely the problem. The thermostat is not sending the correct signal to the heat pump.
- If the component does not activate when jumped: This indicates that the problem lies with the heat pump itself, or with the wiring between the thermostat and the heat pump. It could be a faulty compressor, fan motor, reversing valve, or a wiring issue.
Troubleshooting Tips
- No power: If nothing happens when you turn the power back on, double-check that the circuit breaker is on and that you have correctly reconnected all the wires.
- Incorrect wiring: If the heat pump operates in an unexpected way, double-check your wiring diagram and ensure that all the wires are connected to the correct terminals.
- Blown fuse: If you suspect a short circuit, check the fuse on the control board of your heat pump. Replace the fuse if necessary.
When to Call a Professional
Jumping thermostat wires is a useful troubleshooting technique, but it's not a substitute for professional diagnosis and repair. You should contact a qualified HVAC technician in the following situations:
- You are not comfortable working with electrical wiring.
- You are unable to diagnose the problem based on the results of jumping the wires.
- You suspect a more serious problem with your heat pump, such as a refrigerant leak or a faulty compressor.
- Your heat pump is under warranty. Attempting repairs yourself may void the warranty.
Remember: Safety should always be your top priority. If you are unsure about any aspect of working with electrical wiring or your heat pump system, call a professional.
By understanding the basics of heat pump thermostats and following these steps carefully, you can safely troubleshoot common issues and determine whether you need to call a professional. This knowledge empowers you to communicate more effectively with HVAC technicians and potentially save time and money on repairs. Always prioritize safety and consult a professional when in doubt.