How To Measure Apartment Steampipe For Fiberglass Cover

Steampipes are essential for heating many older apartment buildings, but they can also be a significant source of heat loss and even burns if left uncovered. Installing fiberglass covers is a relatively straightforward DIY project that can improve energy efficiency and safety. This guide will walk you through the process of measuring your apartment steampipes to ensure you purchase the correct size fiberglass covers.
Understanding Your Steampipe System
Before you grab your measuring tape, it's helpful to understand the basics of your steampipe system. Most apartment buildings use a one-pipe or two-pipe system. The difference lies in how steam is delivered and condensate (water) is returned. For this project, understanding the type of system isn't crucial, but knowing the general layout of your pipes will help you measure accurately.
Safety First!
Caution: Always ensure the steampipes are cool before touching them. Even when the heat is off, residual heat can cause burns. Wear gloves and eye protection to avoid contact with dust or debris. If you're unsure about working around your steampipes, it's always best to consult a professional.
Tools You'll Need
- Measuring Tape (preferably flexible)
- Gloves
- Eye Protection (safety glasses or goggles)
- Pencil and Paper (for recording measurements)
- Step Stool or Ladder (if necessary)
- Optional: String or Flexible Wire (for measuring complex curves)
Step-by-Step Guide to Measuring Your Steampipes
These instructions cover measuring straight pipe sections, elbows, and valves.
1. Measuring Straight Pipe Sections
This is the most common measurement you'll need.
- Locate the Section: Identify the straight section of pipe you want to cover.
- Measure the Length: Use your measuring tape to measure the length of the straight section. Start at one end and extend the tape to the other end. Record this measurement in inches.
- Measure the Circumference: Wrap the measuring tape around the pipe to measure its circumference. Ensure the tape is snug but not too tight. Record this measurement in inches. You can also measure the diameter and multiply by Pi (approximately 3.14) to get the circumference.
2. Measuring Elbows (90-degree Bends)
Elbows require a bit more attention as pre-made elbow covers are available, or you can wrap them with straight sections of fiberglass.
- Identify the Elbow: Locate the 90-degree bend in your steampipe.
- Measure the Centerline Radius: The centerline radius is the distance from the center of the bend to the centerline of the pipe. You can approximate this by holding a straight edge against the outside of the elbow and measuring the distance from the edge to the center of the pipe on one side.
- Measure the Circumference: Measure the circumference of the pipe at the points where the elbow connects to the straight sections. These circumferences should be the same.
3. Measuring Valves
Valves are irregular shapes and often require custom-cut fiberglass or specialized valve covers.
- Identify the Valve: Locate the valve you want to cover.
- Measure the Length: Measure the overall length of the valve assembly, including any connecting pipes on either side.
- Measure the Width: Measure the widest point of the valve body.
- Measure the Height: Measure the height of the valve body from the bottom to the top.
- Consider Obstacles: Note any handles, gauges, or other protrusions that need to be accommodated by the cover.
4. Dealing with Obstacles and Irregular Shapes
Sometimes, pipes run close to walls or other obstructions, or they have unusual bends. In these cases, you'll need to take extra care when measuring.
- Use Flexible Tools: If a straight measuring tape won't work, use a flexible wire or string to trace the shape of the pipe. Then, measure the length of the string.
- Break it Down: Divide complex sections into smaller, more manageable segments. Measure each segment individually.
- Take Pictures: Take photos of the pipes and your measurements. This will help you remember the details when you're purchasing your fiberglass covers.
Choosing the Right Fiberglass Cover Size
Once you have your measurements, you can start shopping for fiberglass covers. Here's what to keep in mind:
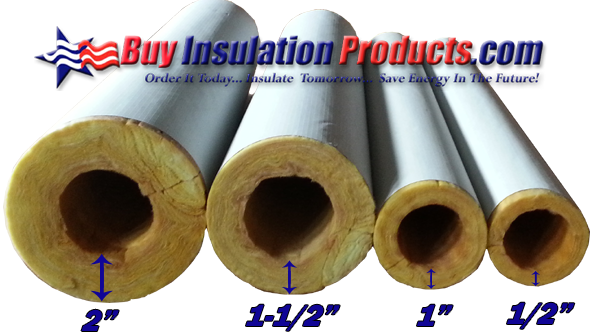
- Inside Diameter: This is the most crucial measurement. The inside diameter of the cover should be slightly larger than the outside diameter of your pipe. A snug fit is good, but avoid forcing the cover on.
- Length: Choose a cover length that matches or is slightly longer than the length of your pipe section. You can always trim excess length with a utility knife.
- Thickness: Fiberglass covers come in various thicknesses. Thicker covers provide better insulation but may be more expensive. Consider the level of insulation you need and the available space around the pipes.
- Elbow and Valve Covers: If you're covering elbows or valves, look for pre-made covers that match your measurements. If you can't find a perfect match, you may need to cut and shape straight sections of fiberglass to fit.
Installation Tips
Installing fiberglass covers is generally a simple process, but here are a few tips to ensure a successful installation:
- Wear Gloves and Eye Protection: Fiberglass can irritate the skin and eyes. Always wear gloves and eye protection when handling it.
- Cut Carefully: Use a sharp utility knife to cut the fiberglass. Make clean, precise cuts to avoid creating gaps in the insulation.
- Secure the Covers: Use foil tape or wire to secure the fiberglass covers in place. Overlap the tape slightly to create a tight seal.
- Ventilation: Ensure adequate ventilation in the room while working with fiberglass.
Common Problems and Solutions
- Too Much Heat Loss: If you're still experiencing significant heat loss after installing fiberglass covers, check for gaps in the insulation or areas where the covers are not properly secured.
- Condensation: If condensation forms on the outside of the fiberglass covers, it could indicate that the insulation is not effective enough. Consider adding a second layer of insulation.
- Mold Growth: If mold grows on the fiberglass covers, it could be a sign of a moisture problem. Address the moisture source and clean the affected areas with a mold-killing solution.
When to Call a Professional
While measuring and installing fiberglass covers is a DIY-friendly project, there are situations where it's best to call a professional HVAC technician:
- Extensive Damage: If your steampipes are severely corroded or damaged, they may need to be repaired or replaced before you can install fiberglass covers.
- Complex Systems: If you have a complex steampipe system with numerous valves, elbows, and other fittings, it may be challenging to measure and insulate everything properly on your own.
- Uncertainty: If you're unsure about any aspect of the project, it's always best to consult a professional. Working with steampipes can be dangerous, and it's important to ensure that the job is done safely and correctly.
- Gas Leaks: If you suspect a gas leak near your steampipes, evacuate the area immediately and call your gas company or a qualified HVAC technician.
Cost Considerations
The cost of this project will depend on the size of your steampipes, the type of fiberglass covers you choose, and whether you hire a professional. Here's a general breakdown:
- Fiberglass Covers: Expect to pay between $5 and $20 per foot for fiberglass covers, depending on the thickness and quality.
- Elbow and Valve Covers: Pre-made elbow and valve covers can range from $10 to $50 each.
- Foil Tape and Supplies: A roll of foil tape will cost around $10 to $20.
- Professional Installation: If you hire a professional, expect to pay between $50 and $150 per hour for labor.
By taking accurate measurements and following these guidelines, you can successfully insulate your apartment steampipes and improve your home's energy efficiency and safety. Remember to prioritize safety and consult a professional if you're unsure about any aspect of the project. Properly insulated steampipes can lead to lower energy bills and a more comfortable living environment.
Disclaimer: This information is for general guidance only. Consult with a qualified HVAC professional for specific advice related to your situation. Improperly installed insulation can create fire hazards or exacerbate existing problems.