How To Measure Diameter Of Pipe

Ever tried to replace a leaky pipe fitting only to discover you've bought the wrong size? It's a common frustration for homeowners. Ordering the wrong size coupling or adapter not only wastes your time and money, but it can also prolong the leak, potentially causing more water damage. Properly measuring pipe diameter is crucial for any plumbing project, big or small. This guide will walk you through the process, ensuring you get the right fit every time.
Understanding Pipe Size vs. Diameter
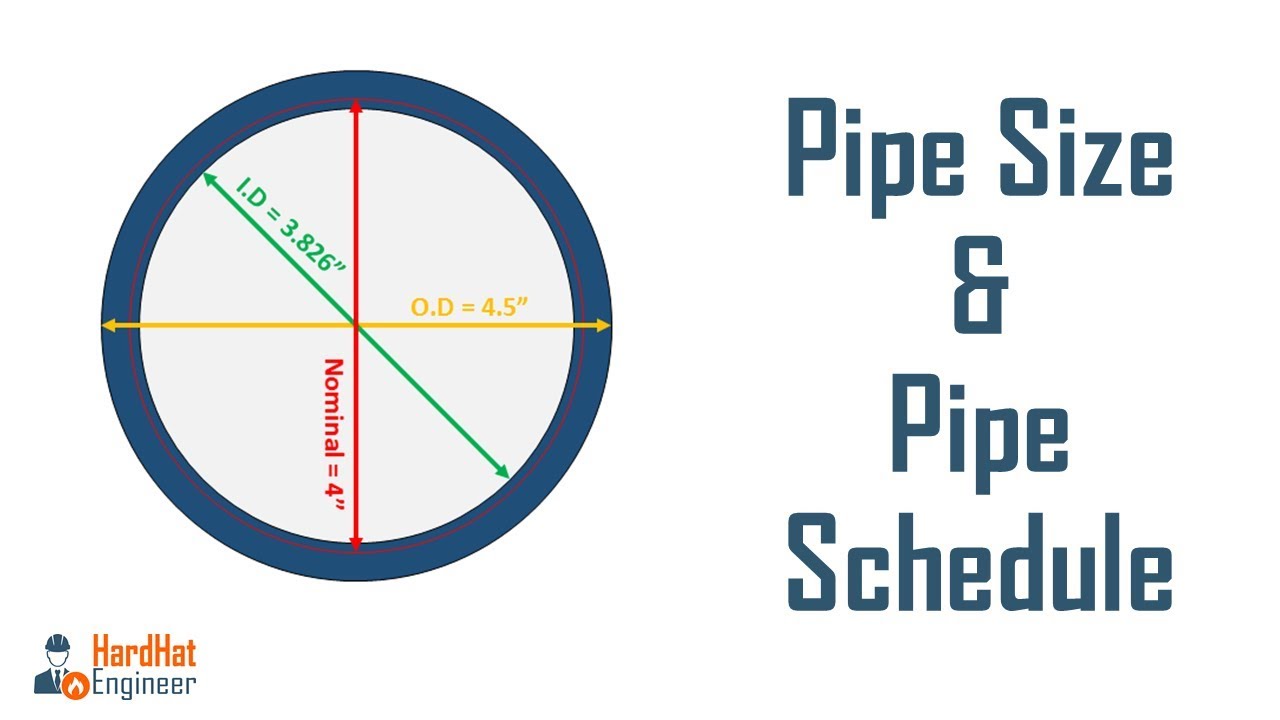
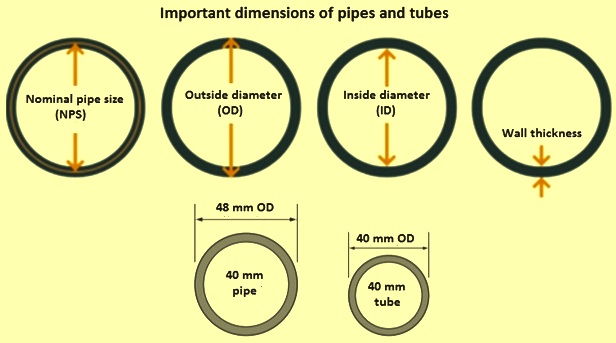
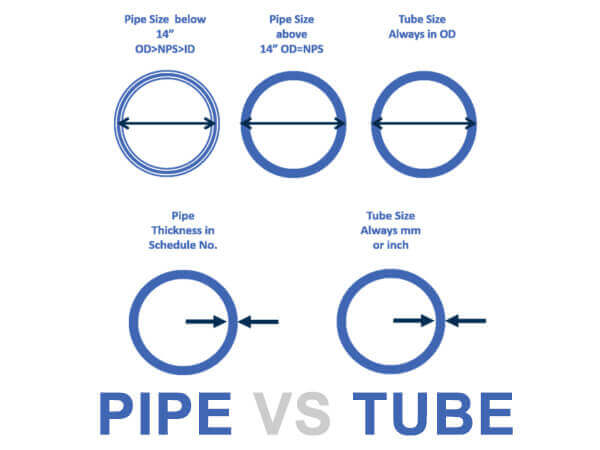
Before we dive into measuring, it's important to understand the difference between pipe size and outside diameter (OD). Pipe size is a nominal dimension, meaning it's a "name" for the pipe, not its actual measurement. The OD is the actual measurement across the outside of the pipe.
For example, a ½-inch copper pipe doesn't actually measure ½ inch across its outside. The actual OD will be larger. This discrepancy exists due to manufacturing standards and the need for fittings to fit snugly. So, simply measuring a pipe and assuming that's the size you need will almost always lead to error.
Tools You'll Need
To accurately measure pipe diameter, you'll need a few basic tools:
- Measuring Tape: A standard measuring tape is sufficient for most situations.
- Ruler: A ruler can be helpful for smaller pipes and more precise measurements.
- Pipe Diameter Tape (Pi Tape): This is the most accurate tool, but it's not essential for every DIYer. Pi tape wraps around the pipe and directly displays the diameter.
- Caliper: A caliper provides the most precise measurement of OD, especially for rigid pipes. Both digital and analog calipers are available.
- Wrench (if removing a section of pipe): You might need a wrench if you need to detach a small section of pipe to get a clearer measurement.
- Safety Glasses: Protect your eyes from debris.
- Pencil and Paper: For recording your measurements.
Step-by-Step Guide to Measuring Pipe Diameter
Here's a step-by-step guide to accurately measuring pipe diameter, using common tools.
Method 1: Using a Measuring Tape or Ruler
This is the most common method for homeowners, especially when dealing with larger pipes.
- Clean the Pipe: Wipe down the area you'll be measuring. Dirt and grime can affect the accuracy of your measurement.
- Measure the Circumference: Wrap the measuring tape around the outside of the pipe, ensuring it's snug but not overly tight. Note the measurement of the circumference.
- Calculate the Diameter: Divide the circumference by pi (π), which is approximately 3.14159. A calculator will make this easier. The formula is: Diameter = Circumference / π
- Record the Measurement: Write down the calculated diameter.
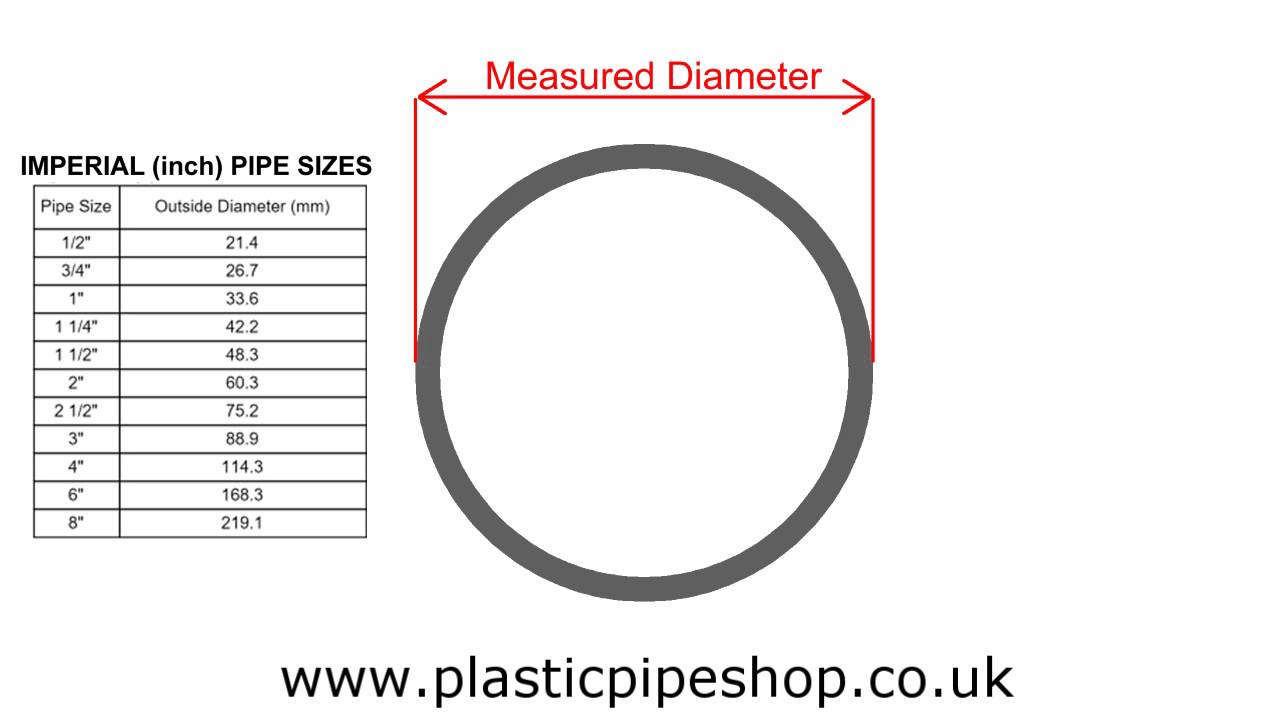
- Identify the Pipe Size: Use a pipe size chart (available online or at most hardware stores) to match the calculated diameter to the nominal pipe size. Remember, the diameter you measured is the OD; you need to find the corresponding pipe size.
Example: Let's say you measure the circumference of a pipe and get 6.28 inches. Dividing 6.28 by 3.14159 gives you approximately 2 inches. Looking at a pipe size chart, you'll find that an OD of 2 inches corresponds to a 1 ½ inch nominal pipe size for Schedule 40 PVC pipe.
Method 2: Using a Caliper
A caliper provides a more precise measurement, especially for smaller pipes or when you need to be very accurate.
- Clean the Pipe: As with the previous method, clean the pipe's surface.
- Open the Caliper: Open the jaws of the caliper wider than the diameter of the pipe.
- Position the Pipe: Place the pipe between the jaws of the caliper.
- Close the Jaws: Gently close the jaws of the caliper until they make contact with the outside of the pipe. Do not overtighten.
- Read the Measurement: Read the measurement displayed on the caliper. For digital calipers, the reading is displayed directly. For analog calipers, you'll need to read the scales carefully.
- Record the Measurement: Write down the diameter measurement.
- Identify the Pipe Size: Use a pipe size chart to convert the OD to the nominal pipe size.
Method 3: Using Pi Tape
Pi tape is specifically designed for measuring the diameter of round objects. It's the easiest and most accurate method, but requires specialized tape.
- Clean the Pipe: Clean the pipe's surface.
- Wrap the Tape: Wrap the Pi tape around the outside of the pipe.
- Read the Measurement: The tape will directly display the diameter of the pipe.
- Record the Measurement: Write down the diameter measurement.
- Identify the Pipe Size: Use a pipe size chart to convert the OD to the nominal pipe size.
Important Considerations for Different Pipe Materials
The material of the pipe can affect the outside diameter for a given nominal pipe size. Here are some key considerations:
- PVC and CPVC: PVC and CPVC pipes are commonly used for plumbing and irrigation. Schedule 40 and Schedule 80 are common wall thickness standards. The OD is fairly consistent within a given schedule for a specific nominal pipe size.
- Copper: Copper pipes come in different types (Type K, Type L, Type M), each with a different wall thickness. While the OD is relatively consistent for a given nominal size *across* types, the inside diameter varies due to the different wall thicknesses.
- PEX: PEX (cross-linked polyethylene) is a flexible plastic pipe often used for potable water. PEX sizing can be a bit confusing, as it sometimes refers to the inside diameter, especially when connecting to specific fittings. When in doubt, measure the OD and consult a PEX sizing chart.
- Galvanized Steel/Iron: Galvanized steel pipes are less common in new construction but are still found in older homes. Rust and corrosion can make it difficult to get an accurate measurement. Clean the pipe thoroughly before measuring.
Common Mistakes to Avoid
Here are some common mistakes homeowners make when measuring pipe diameter:
- Measuring the Inside Diameter: Always measure the outside diameter of the pipe.
- Assuming the Measurement is the Pipe Size: Remember that pipe size is a nominal dimension, not the actual measurement. Always consult a pipe size chart.
- Not Cleaning the Pipe: Dirt and grime can affect the accuracy of your measurement.
- Overtightening the Caliper: Overtightening a caliper can compress the pipe, giving you an inaccurate measurement.
- Using a Worn-Out Measuring Tape: A stretched or damaged measuring tape will not provide accurate measurements.
- Ignoring the Pipe Material: Different pipe materials have different ODs for the same nominal pipe size.
Simple DIY Fixes and When to Call a Professional
Once you've accurately measured the pipe diameter, you can often tackle simple DIY fixes, such as replacing a leaking fitting or extending a water line.
Simple DIY Fixes:
- Replacing a leaky fitting: Purchase a new fitting of the correct size and material. Turn off the water supply before removing the old fitting. Use pipe dope or Teflon tape to create a watertight seal on the new fitting.
- Extending a water line: Cut the existing pipe and install a coupling to connect the new section of pipe. Ensure you use the correct fittings and materials for the job.
- Replacing a section of damaged pipe: Cut out the damaged section and replace it with a new section of pipe of the same size and material. Use couplings to connect the new section to the existing pipe.
When to Call a Professional:
While many plumbing repairs can be handled by confident DIYers, certain situations require the expertise of a licensed plumber. Call a professional if:
- You are uncomfortable working with plumbing. Safety should always be your top priority.
- You are dealing with gas lines. Never attempt to repair or modify gas lines yourself. Gas leaks are extremely dangerous and can be fatal.
- You need to work on the main water line. Repairs to the main water line often require specialized tools and knowledge.
- You are dealing with complex plumbing systems. If you're unsure about the proper way to repair a plumbing issue, it's best to call a professional.
- You suspect there is a larger underlying problem. A leaking pipe could be a sign of a more serious plumbing issue.
- You are required to obtain permits for the work. Plumbing work often requires permits, and a licensed plumber can ensure that the work is done to code.
- Your DIY attempts have failed to fix the problem. Don't keep throwing money at a problem that you can't solve. Call a professional before you cause further damage.
Attempting plumbing repairs beyond your skill level can lead to serious water damage and costly repairs. When in doubt, it's always best to err on the side of caution and call a qualified plumber.
Final Thoughts
Accurately measuring pipe diameter is a fundamental skill for any homeowner undertaking plumbing projects. By following these steps and using the appropriate tools, you can avoid costly mistakes and ensure your repairs are done correctly. Remember to prioritize safety and don't hesitate to call a professional when needed. With a little knowledge and preparation, you can confidently tackle many common plumbing repairs around your home.