How To Plumb A Double Vanity Sink

Plumbing a double vanity sink might seem daunting, but with careful planning and the right tools, it's a manageable DIY project. This guide will walk you through the process, providing clear instructions and explanations to help you achieve a professional-looking and leak-free installation.
Planning and Preparation
Before you even think about touching a pipe, careful planning is crucial. This stage minimizes errors and ensures a smooth installation process.
1. Assess Your Existing Plumbing
Inspect your existing plumbing: Locate the hot and cold water supply lines and the drainpipe. Note their position and diameter. Are they centered between where each sink bowl is or off to one side?
This information will dictate the type of fittings and pipes you'll need. If your existing plumbing isn't ideally positioned, you might need to make adjustments before proceeding.
2. Gather Your Materials and Tools
Having all the necessary materials and tools readily available will save you time and frustration. Here's a comprehensive list:
- Double Vanity Sink: Ensure it's the style and size you want.
- Faucets: Two faucets, one for each sink. Choose your style and finish.
- P-Traps: Two P-traps, one for each sink's drain.
- Drain Assemblies: Including drain flange, stopper, and tailpiece for each sink.
- Tailpiece Extensions: You might need these if the tailpieces aren't long enough to reach the P-traps.
- Supply Lines: Two flexible supply lines for each faucet (hot and cold). Measure the distance from the shut-off valves to the faucet connections to determine the correct length.
- Shut-Off Valves (Optional): If you don't have them already, install new shut-off valves on the hot and cold water supply lines for easy maintenance.
- Drain Fittings: A tee fitting (to connect the two P-traps) and potentially extension pipes to reach the main drain line.
- PVC Primer and Cement (if using PVC): For joining PVC pipes.
- Plumber's Putty or Silicone Sealant: For sealing the drain flange to the sink.
- Teflon Tape: For sealing threaded connections.
- Basin Wrench: For tightening faucet connections in tight spaces.
- Pipe Wrench: For gripping and turning pipes.
- Adjustable Wrench: For tightening various fittings.
- Pliers: For gripping and holding.
- Pipe Cutter (for PVC or Copper): Depending on your existing plumbing.
- Safety Glasses: Protect your eyes!
- Gloves: Protect your hands.
- Bucket: To catch water.
- Measuring Tape: For accurate measurements.
- Level: To ensure the vanity is level.
Purchasing a double vanity plumbing kit can often simplify this process by providing many of the necessary fittings in one package.
3. Turn Off the Water Supply
Before you begin any plumbing work, turn off the water supply to the sink. Locate the shut-off valves under the sink. If there are no shut-off valves, you'll need to turn off the main water supply to your house.
Test that the water is off by turning on the existing faucet. Have a bucket handy to catch any residual water.
Step-by-Step Plumbing Instructions
Now that you've planned and prepared, let's get to the actual plumbing!
1. Install the Faucets and Drain Assemblies
Install the faucets according to the manufacturer's instructions. This usually involves inserting the faucet through the holes in the sink and tightening the mounting hardware from underneath. Use a basin wrench to reach tight spaces.
Install the drain assemblies. Apply a bead of plumber's putty or silicone sealant around the underside of the drain flange where it will contact the sink. Insert the flange into the drain opening and tighten the nut from underneath. Remove any excess putty or sealant. Connect the tailpiece to the drain flange.
2. Connect the P-Traps
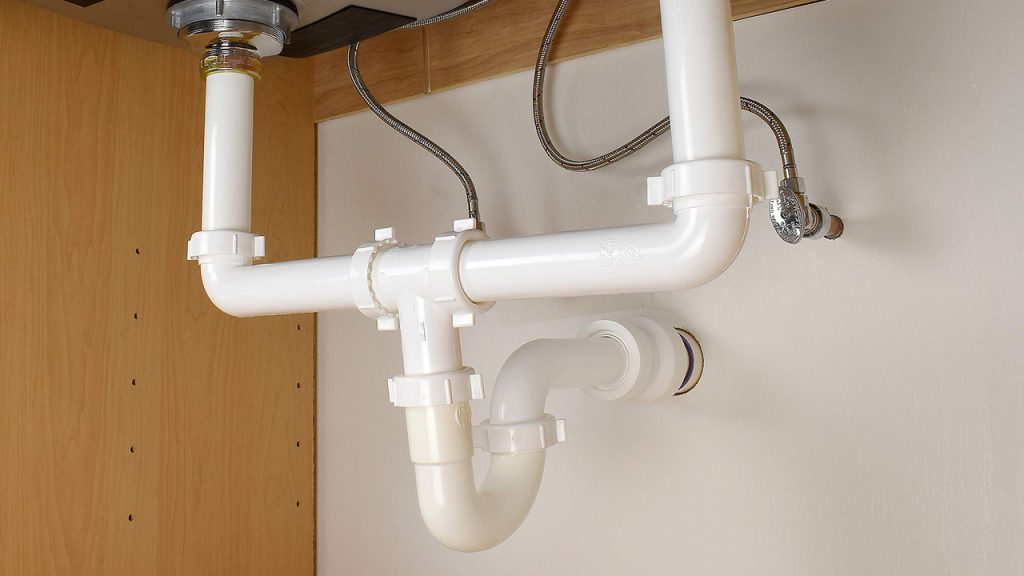
Install the P-traps to the tailpieces. The P-trap is a U-shaped pipe that traps debris and prevents sewer gases from entering your home. Ensure the P-traps are properly aligned and tightened.
Connect the two P-traps to a tee fitting. This fitting will combine the drainage from both sinks into a single line.
The height of the P-traps is crucial. They should be positioned so that the tee fitting aligns with the existing drain line in the wall.
3. Connect to the Main Drain Line
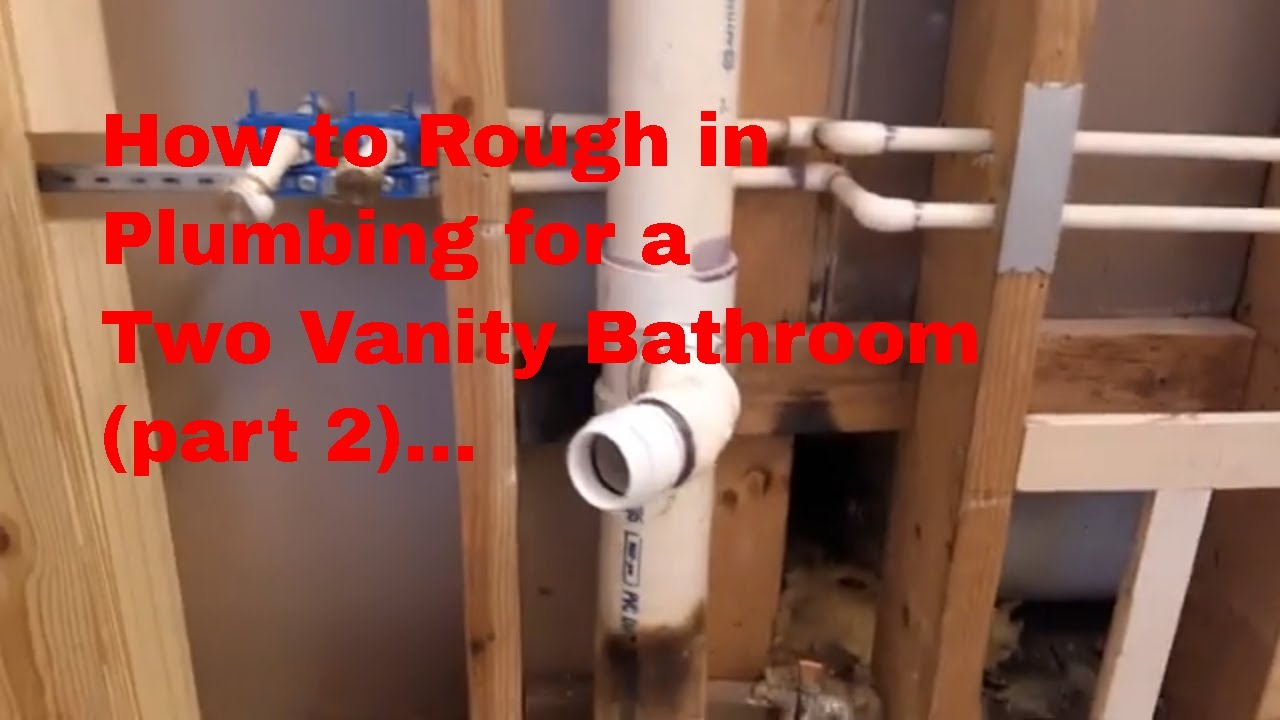
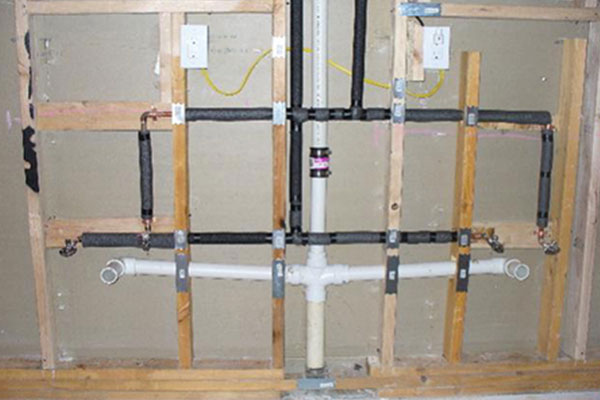
Connect the tee fitting to the existing drain line in the wall. This might involve using extension pipes and various fittings to bridge the gap. If you're using PVC pipes, use PVC primer and cement to join the connections. Ensure all connections are secure and leak-proof.
Consider the slope of the drain line. There should be a slight downward slope towards the main drain to ensure proper drainage.
4. Connect the Water Supply Lines
Connect the flexible supply lines to the faucets. Use Teflon tape on the threaded connections to prevent leaks. Tighten the connections with an adjustable wrench, but be careful not to overtighten.
Connect the other ends of the supply lines to the shut-off valves. Again, use Teflon tape and tighten the connections securely.
5. Turn on the Water and Check for Leaks
Slowly turn on the shut-off valves. Check all connections for leaks. If you find any leaks, tighten the connections or reapply Teflon tape. Don't overtighten and risk damaging the fittings.
Run water in both sinks to test the drainage. Watch for leaks under the sink and around the drain connections.
Troubleshooting Common Problems
Even with careful planning, you might encounter some common problems. Here are a few troubleshooting tips:
- Leaks: The most common problem. Tighten connections, reapply Teflon tape, or replace faulty fittings.
- Slow Drainage: Could be caused by a clogged drain. Try using a plunger or drain snake to clear the blockage.
- Gurgling Sounds: This could indicate a venting problem. Ensure the drain line is properly vented.
- Misaligned Pipes: Use flexible couplings or adjustable fittings to compensate for misalignments.
Choosing the Right Materials
The type of materials you use for your plumbing can significantly impact the longevity and performance of your system.
PVC vs. Copper
PVC (Polyvinyl Chloride): A common and affordable option for drain lines. It's lightweight, easy to cut and install, and resistant to corrosion. However, it's not suitable for hot water supply lines.
Copper: A durable and reliable material for both hot and cold water supply lines. It's more expensive than PVC and requires soldering for connections, which can be challenging for beginners. Copper is more resistant to extreme temperatures.
Fittings
Choose fittings that are compatible with the type of pipe you're using. Ensure the fittings are the correct size and type for the connections you're making.
High-quality fittings will provide a better seal and reduce the risk of leaks.
Safety Precautions
Safety should always be your top priority when working with plumbing.
- Wear safety glasses to protect your eyes from debris.
- Wear gloves to protect your hands from dirt and chemicals.
- Turn off the water supply before starting any work.
- Be careful when using tools to avoid injuries.
- If you're not comfortable with any aspect of the plumbing work, call a professional plumber.
When to Call a Professional
While plumbing a double vanity sink can be a DIY project, there are times when it's best to call a professional.
- If you're not comfortable working with plumbing.
- If you encounter any major problems or complications.
- If you're unsure about any aspect of the plumbing work.
- If you need to move or alter existing plumbing lines.
- If you're dealing with lead pipes.
Hiring a professional plumber will ensure the job is done correctly and safely, giving you peace of mind.
Final Touches
Once you've finished plumbing your double vanity sink, take some time to clean up the area and inspect your work.
- Remove any debris or tools from the work area.
- Clean the sink and countertop.
- Inspect all connections one last time for leaks.
- Ensure the vanity is level and secure.
With careful planning, the right tools, and these detailed instructions, you can successfully plumb your double vanity sink and enjoy a beautiful and functional bathroom. Remember to always prioritize safety and don't hesitate to call a professional if you encounter any difficulties.