How To Prime Shallow Well Pump
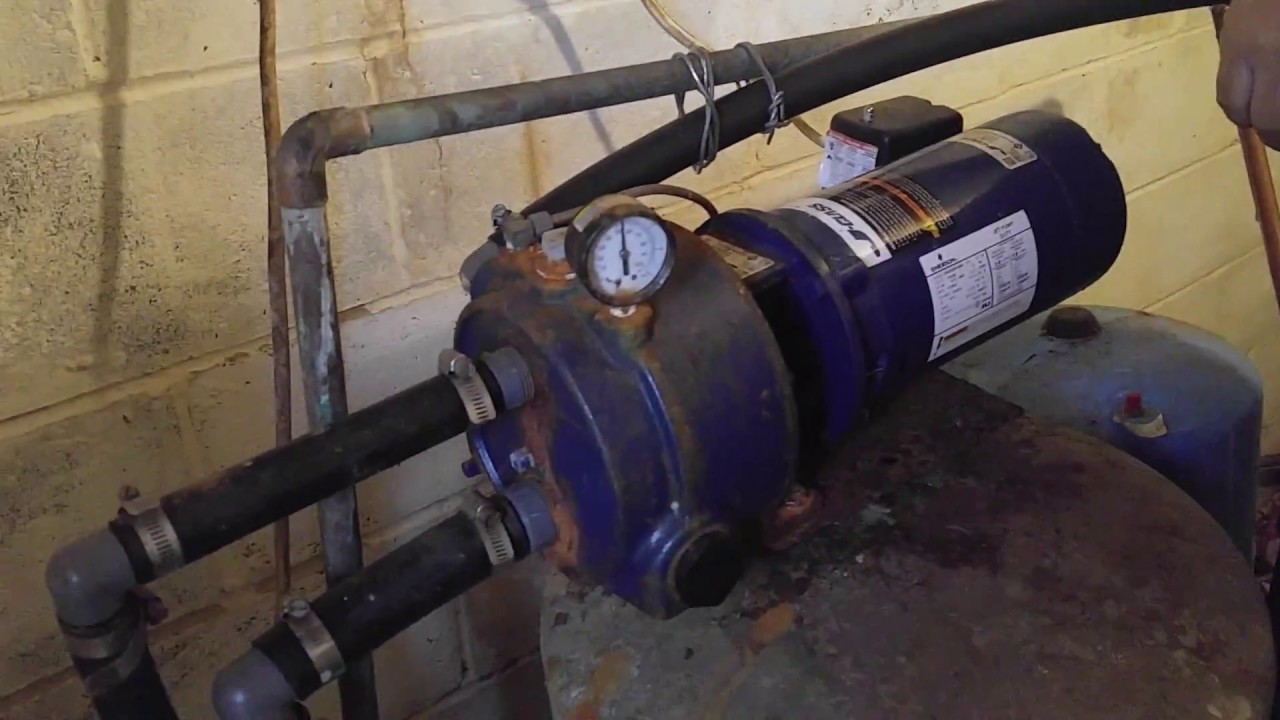
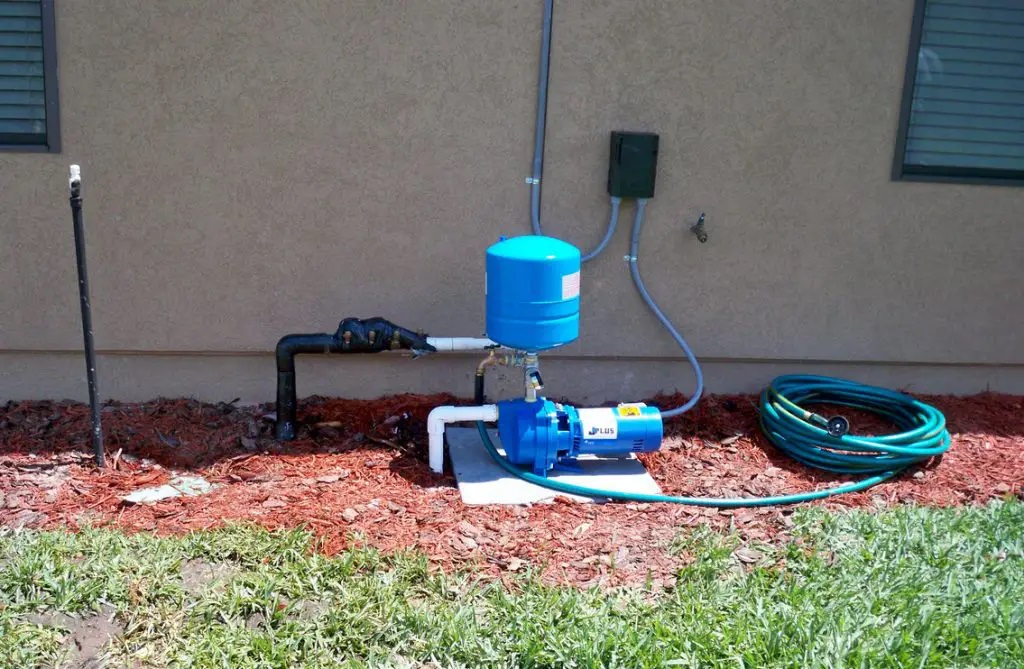
A shallow well pump is a vital piece of equipment for many homes and farms, providing access to groundwater sources. However, these pumps need to be primed regularly, especially after installation or periods of disuse. Priming essentially means filling the pump and the suction pipe with water, enabling the pump to create the necessary suction to draw water from the well. Without proper priming, the pump will only suck air and fail to deliver water. This guide provides a comprehensive, easy-to-understand explanation of how to prime a shallow well pump effectively.
Understanding Shallow Well Pumps and Priming
Before diving into the priming process, it's crucial to understand how a shallow well pump works and why priming is necessary.
How Shallow Well Pumps Work
Shallow well pumps are designed to draw water from wells that are typically 25 feet deep or less. They operate by creating a vacuum inside the pump housing. This vacuum reduces the pressure inside the pipe, allowing atmospheric pressure to push water up the well and into the pump. Think of it like drinking through a straw: you create suction in your mouth, which lowers the pressure, and atmospheric pressure pushes the liquid up the straw.
Why Priming is Essential
Priming is essential because shallow well pumps rely on creating a vacuum to lift water. Air is less dense than water, and a pump designed to move water is usually not efficient at evacuating air. If the pump and suction pipe are filled with air, the pump will struggle to create the necessary vacuum. It will simply circulate air, making noise, and potentially overheating without ever drawing water from the well. In effect, priming replaces the air in the pump and suction pipe with water, enabling the pump to function as intended.
Tools and Materials You'll Need
Before you begin, gather the necessary tools and materials. Having everything readily available will make the priming process smoother and more efficient.
- Water Source: A clean water source, such as a garden hose connected to a municipal water supply or a bucket of clean water.
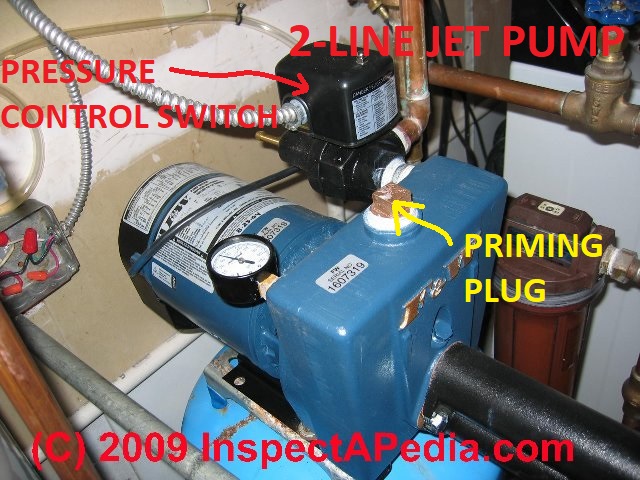
- Priming Plug/Port: Locate the priming plug or port on your pump. This is usually a threaded opening on the top or side of the pump housing.
- Wrench (if needed): You might need a wrench to loosen or remove the priming plug.
- Screwdriver (if needed): Some priming plugs may require a screwdriver for removal.
- Clean Rags: For cleaning up any spills.
- Plumber's Tape (Teflon Tape): For resealing the priming plug, if necessary.
Step-by-Step Guide to Priming a Shallow Well Pump
Follow these steps carefully to prime your shallow well pump:
1. Safety First: Turn Off the Power
Always turn off the power to the pump at the circuit breaker before beginning any maintenance or priming work. This prevents accidental electrical shock and protects the pump from damage if it runs dry.
2. Locate the Priming Plug or Port
Identify the priming plug or port on your pump. Refer to your pump's manual if you are unsure of its location. It's typically a threaded plug on the top or side of the pump housing, often labeled "Priming Plug."
3. Remove the Priming Plug
Using a wrench or screwdriver, carefully remove the priming plug. Place the plug in a safe place to avoid losing it. Some pumps may have a priming valve instead of a plug; in this case, open the valve.
4. Check the Foot Valve (Optional but Recommended)
The foot valve is a one-way valve located at the bottom of the suction pipe inside the well. Its purpose is to prevent water from flowing back into the well when the pump is not running. A faulty foot valve is a common cause of priming problems.
To check the foot valve, you can try the following:
- Listen for a "check" sound: After the pump has been off for a while, listen carefully near the well. You should hear a faint "check" sound as the water column settles and the foot valve closes. If you don't hear this sound, the foot valve might be leaking.
- If you have access to the well: (Exercise extreme caution and follow safety protocols) You can visually inspect the foot valve, but this is usually a more involved process.
If you suspect a faulty foot valve, it might need to be replaced. This is usually best left to a qualified well service professional.
5. Fill the Pump and Suction Pipe with Water
This is the core of the priming process. Slowly pour water into the priming port until the pump housing is completely full and water begins to overflow. It's important to pour the water slowly to allow air to escape from the system. If you pour too quickly, you can trap air pockets, which will hinder the priming process.
If you have a long suction pipe, it may take a significant amount of water to fill it completely. Continue pouring water until you are sure the pipe is full.
6. Replace the Priming Plug or Close the Valve
Once the pump and suction pipe are full of water, carefully replace the priming plug or close the priming valve. Make sure the plug is tightened securely to create a good seal. If necessary, use plumber's tape (Teflon tape) on the threads of the plug to ensure a watertight seal. A leaky plug will allow air to enter the system, defeating the purpose of priming.
7. Turn On the Power to the Pump
Now, turn the power back on to the pump at the circuit breaker. Stand clear of the pump and listen carefully.
8. Observe the Pump's Operation
The pump should start running and begin to draw water from the well. Listen for any unusual noises, such as grinding or excessive vibration. It may take a few minutes for the pump to fully prime and start delivering water. Be patient.
9. Check for Water Output
Open a faucet or valve downstream of the pump to check for water output. If water flows freely, the pump is successfully primed. If the pump continues to run without delivering water, it may need to be reprimed.
10. Repriming (If Necessary)
If the pump doesn't prime on the first attempt, repeat steps 3 through 9. You may need to reprime several times to fully evacuate all the air from the system. If the problem persists after several attempts, there may be a more serious issue, such as a leak in the suction pipe or a faulty foot valve.
Troubleshooting Common Priming Problems
Even with careful priming, issues can arise. Here are some common problems and how to address them:
- Pump Runs but Doesn't Draw Water:
- Possible Cause: Air leak in the suction pipe, faulty foot valve, obstructed well point.
- Solution: Check all pipe connections for leaks and tighten them. Inspect or replace the foot valve. Have the well point checked for obstructions.
- Pump Loses Prime Quickly:
- Possible Cause: Leaky foot valve, crack in the suction pipe, air leak at the priming plug.
- Solution: Replace the foot valve. Inspect the suction pipe for cracks and repair or replace as needed. Ensure the priming plug is properly sealed.
- Pump Overheats:
- Possible Cause: Running dry due to lack of prime, obstructed impeller, low voltage.
- Solution: Immediately turn off the pump to prevent damage. Prime the pump thoroughly. Check for obstructions in the impeller. Have the voltage to the pump checked.
- Water is Dirty or Discolored:
- Possible Cause: Sediment in the well, corrosion in the piping, contamination of the water source.
- Solution: Flush the well thoroughly. Inspect and replace corroded pipes. Have the water tested for contaminants and take appropriate action.
Preventative Maintenance for Shallow Well Pumps
Regular maintenance can help prevent priming problems and extend the life of your shallow well pump.
- Regularly Check for Leaks: Inspect all pipe connections and the pump housing for leaks. Address any leaks promptly.
- Monitor Water Quality: Periodically test your well water to ensure it remains safe and free from contaminants.
- Protect from Freezing: In cold climates, protect the pump and piping from freezing temperatures. Insulate exposed pipes and consider installing a heat tape.
- Annual Inspection: Have a qualified well service professional inspect your pump and well system annually.
When to Call a Professional
While many priming issues can be resolved with a DIY approach, there are situations where it's best to call a professional well service technician. These include:
- Persistent Priming Problems: If you have tried priming the pump multiple times without success, there may be a more serious underlying issue.
- Suspected Foot Valve Problems: Replacing a foot valve typically requires specialized tools and knowledge.
- Well Contamination: If you suspect your well water is contaminated, a professional can help you assess the situation and take appropriate action.
- Pump Repairs: If your pump is making unusual noises, vibrating excessively, or showing other signs of malfunction, it's best to have it inspected and repaired by a professional.
Priming a shallow well pump is a relatively straightforward process that can save you time and money. By understanding the principles behind priming, following the steps outlined in this guide, and performing regular maintenance, you can keep your pump running smoothly and reliably for years to come. Remember to prioritize safety and don't hesitate to call a professional when needed.