How To Put Dye In Ac System
A frustrating situation many homeowners encounter, especially during the peak of summer, is an air conditioning system that's not cooling effectively. You might notice the air is lukewarm, the unit runs constantly, and your energy bills are skyrocketing. One potential culprit is a refrigerant leak. Finding that leak quickly can save you money on repairs and refrigerant refills. This article will guide you through using UV dye to pinpoint a refrigerant leak in your AC system, outlining safe DIY steps and highlighting when a professional HVAC technician is absolutely necessary.
Understanding the Basics: Refrigerant and Leaks
Your air conditioner relies on refrigerant, a special chemical that absorbs heat from inside your home and releases it outside. This cycle keeps your home cool. However, over time, leaks can develop in the refrigerant lines, coils, or connections. These leaks cause the system to lose refrigerant, reducing its cooling capacity. A low refrigerant level means your AC has to work harder to achieve the same temperature, leading to increased energy consumption and potential compressor damage.
It's crucial to understand that working with refrigerants can be dangerous and is often regulated. This guide focuses on using UV dye to *locate* leaks. Actual refrigerant handling and repairs must often be performed by licensed professionals.
Why Use UV Dye?
UV dye is a fluorescent liquid that you introduce into your AC system. It circulates with the refrigerant and, when exposed to a UV light, glows brightly at the site of a leak. This makes even small, hard-to-find leaks visible. It's a relatively inexpensive and effective method for leak detection.
Safety First!
Before you begin any work on your AC system, prioritize safety:
- Turn off the power to the outdoor unit: Locate the disconnect switch near the outdoor unit and flip it to the "off" position. This prevents accidental electrocution.
- Wear safety glasses: Protect your eyes from potential refrigerant or dye splashes.
- Wear gloves: Protect your skin from contact with refrigerant or dye.
- Work in a well-ventilated area: Although the dye is generally non-toxic, good ventilation minimizes any potential inhalation of fumes.
Step-by-Step Guide: Adding UV Dye to Your AC System
This process requires some basic tools and materials, which you can typically find at automotive supply stores or online retailers.
1. Gather Your Supplies
You'll need the following:
- UV Dye: Purchase a UV dye specifically designed for AC systems. Be sure to check compatibility with your refrigerant type (R-22, R-410A, etc.).
- UV Light: A UV flashlight is essential for detecting the dye.
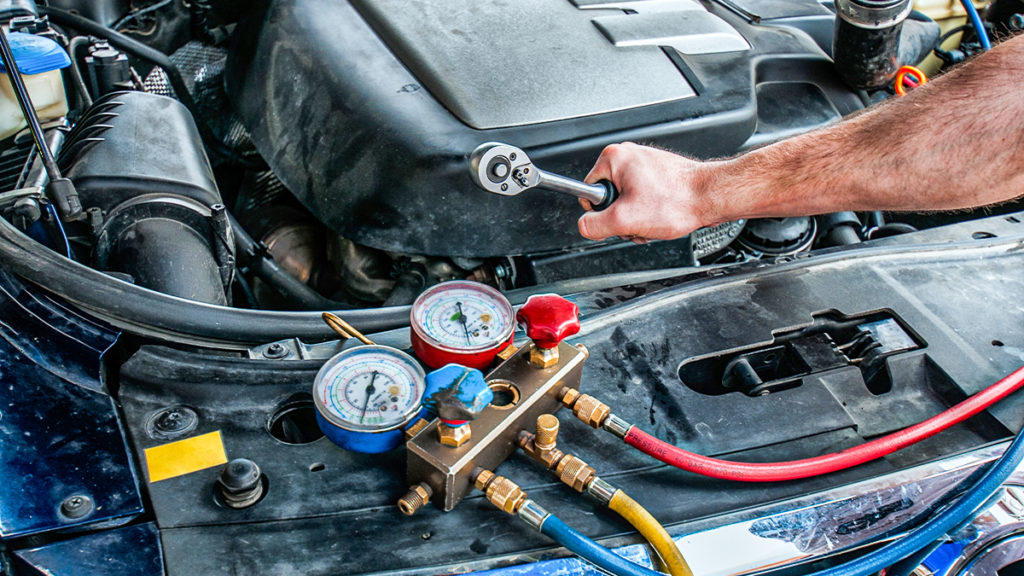
- Refrigerant Manifold Gauge Set: This is used to measure the pressure in the AC system. If you're not familiar with using a manifold gauge set, this is a good indication that you should call a professional.
- Refrigerant Hose with Injector: Some dyes come with a pre-filled injector. If not, you'll need a refrigerant hose with an injection valve.
- Wrench Set: To tighten or loosen connections.
- Safety Glasses and Gloves: As mentioned before, safety is paramount.
- Rags or Paper Towels: For cleaning up any spills.
2. Access the Service Ports
Locate the service ports on the outdoor AC unit. These are typically capped brass fittings. There will be two: a low-pressure port (larger diameter) and a high-pressure port (smaller diameter). We will only be using the low-pressure port for this procedure.
3. Connect the Manifold Gauge Set
Carefully remove the cap from the low-pressure service port. Connect the low-pressure hose (usually blue) from your manifold gauge set to the low-pressure port. Make sure the connection is secure.
4. Check the System Pressure
Before adding the dye, check the system pressure on the manifold gauge. This will give you a baseline reading. Note the reading.
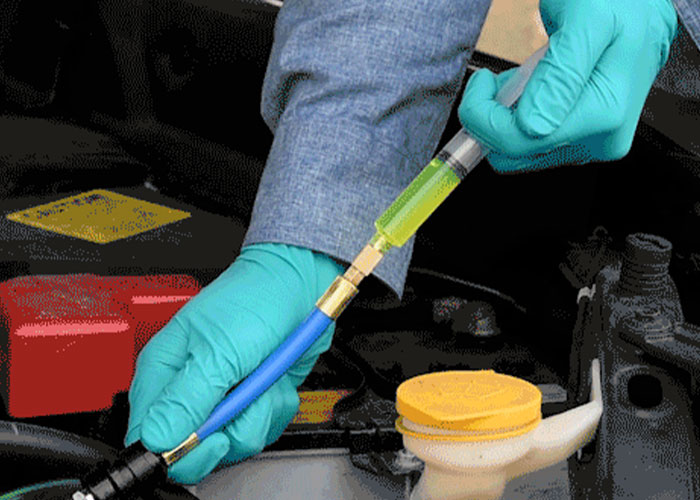
5. Inject the UV Dye
This is where the method varies depending on the type of dye and injector you have. Always follow the instructions provided with your specific UV dye kit.
For a Pre-Filled Injector:
- Connect the pre-filled injector to the low-pressure hose of the manifold gauge set.
- Open the valve on the injector to release the dye into the system.
- You may need to slightly open the low-pressure valve on the manifold gauge to assist in drawing the dye into the system. *Do not open the high-pressure valve.*
- Once the dye is injected, close the injector valve and disconnect the injector.
For a Separate Dye Bottle and Injector:
- Attach the refrigerant hose with an injection valve to the low-pressure hose of the manifold gauge set.
- Attach the dye bottle to the injection valve.
- Open the valve on the injection valve to allow the dye to be drawn into the system.
- You may need to slightly open the low-pressure valve on the manifold gauge to assist in drawing the dye into the system. *Do not open the high-pressure valve.*
- Once the dye is injected, close the injection valve and disconnect the dye bottle and injector.
Important Considerations:
- Do not overfill the system with dye. Follow the manufacturer's recommendations for the correct amount of dye to use.
- Avoid getting dye on any surfaces. If you do, clean it up immediately with a damp cloth.
6. Disconnect the Manifold Gauge Set
Once the dye is injected, carefully close the low-pressure valve on the manifold gauge and disconnect the hose from the low-pressure service port. Replace the cap on the service port, tightening it securely.
7. Run the AC System
Turn the power back on to the outdoor AC unit. Let the system run for at least 30 minutes, or preferably an hour, to allow the dye to circulate thoroughly throughout the refrigerant system.
8. Inspect for Leaks with the UV Light
After the system has run for a sufficient amount of time, turn off the AC unit again. Use the UV flashlight to inspect all visible refrigerant lines, connections, coils (both at the outdoor unit and the indoor unit), and the compressor. Look for a bright, glowing green or yellow residue. This indicates the presence of dye and, therefore, a refrigerant leak.
Areas to Pay Close Attention To:
- Coil Fins: Especially on the outdoor unit, these are prone to damage and leaks.
- Connections: Where refrigerant lines connect to the compressor, coils, or other components.
- Service Ports: These can sometimes leak around the valve.
- Refrigerant Lines: Follow the lines along their entire length, looking for any signs of dye.
- Indoor Evaporator Coil: This is located inside your air handler or furnace. You may need to remove an access panel to inspect it. Be extremely careful when working around electrical components inside the air handler.
9. Document Your Findings
Take pictures of any leaks you find. This will be helpful when you consult with an HVAC technician.
Simple DIY Fixes (With Caution!)
In some cases, you might find a very minor leak at a loose connection. If you are comfortable and confident, you *might* be able to tighten the connection slightly with a wrench. However, be extremely careful not to overtighten, as this can damage the fitting and create a larger leak.
If tightening the connection doesn't stop the leak, or if you are uncomfortable performing this step, DO NOT PROCEED.
When to Call a Professional HVAC Technician
It is crucial to contact a qualified HVAC technician in the following situations:
- You find a leak in the coils or compressor. These repairs require specialized equipment and expertise.
- You are not comfortable working with refrigerant or electrical components.
- You are unsure about the type of refrigerant your system uses.
- You suspect a large leak. Continually adding refrigerant to a leaking system is not a sustainable solution and can damage the compressor.
- You are unable to locate the leak yourself. A professional has the tools and experience to find even the most elusive leaks.
- You need to recharge the system with refrigerant. Handling refrigerant requires EPA certification and specialized equipment.
Attempting to repair refrigerant leaks or recharge the system without proper training and certification can be dangerous and illegal.
Preventative Maintenance
Regular maintenance can help prevent refrigerant leaks and other AC problems. Consider the following:
- Schedule annual AC tune-ups with a qualified HVAC technician. They can inspect the system for leaks, clean the coils, and ensure proper operation.
- Clean the outdoor unit regularly. Remove any debris that may be blocking airflow.
- Change your air filters regularly. A dirty air filter can restrict airflow and put strain on the AC system.
Conclusion
Using UV dye to find refrigerant leaks is a valuable troubleshooting tool for homeowners. By following these steps carefully and prioritizing safety, you can potentially identify and address minor issues. However, it's essential to recognize when a problem requires professional attention. By knowing your limits and seeking expert help when needed, you can keep your AC system running efficiently and your home comfortably cool for years to come.