How To Read Ac Gauges For 410a
Understanding how to read AC gauges is a crucial skill for anyone involved in HVAC, whether you're a seasoned technician, a diligent homeowner looking to maintain your system, or a property manager overseeing a large building’s climate control. With the phase-out of R-22 refrigerant, R-410A has become a prevalent refrigerant in many residential and commercial AC systems. This article will provide a comprehensive guide to reading AC gauges specifically for R-410A systems, covering everything from the basics to advanced troubleshooting.
Understanding the Basics of AC Gauges and R-410A
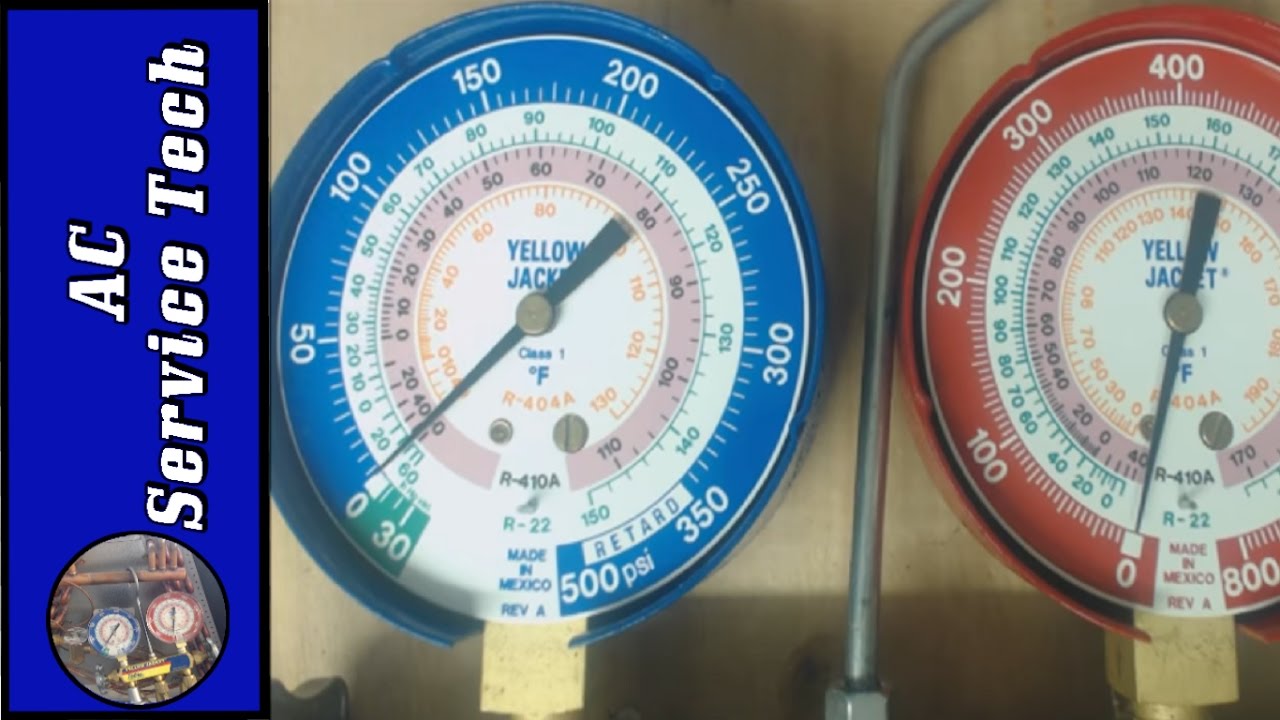
Before diving into the specifics, let's establish a foundational understanding. AC gauges, often referred to as manifold gauges, are essential tools for diagnosing and servicing air conditioning systems. They measure the pressure within the system, which is directly related to the refrigerant charge and overall system performance. A manifold gauge set typically consists of two gauges: a high-pressure gauge (usually red) and a low-pressure gauge (usually blue), connected to a manifold with valves and hoses.
R-410A is a hydrofluorocarbon (HFC) refrigerant known for its higher operating pressures compared to R-22. This difference is critical when interpreting gauge readings and working on systems that use it. Using gauges designed for R-22 on an R-410A system can be dangerous and inaccurate, leading to potential system damage or personal injury.
Components of an AC Gauge Set
- High-Pressure Gauge (Red): Measures the discharge or high-side pressure of the AC system.
- Low-Pressure Gauge (Blue): Measures the suction or low-side pressure of the AC system.
- Manifold: The central body connecting the gauges, valves, and hoses.
- Hoses: Colored hoses (red, blue, and yellow) connect the gauges to the system's service ports and refrigerant source.
- Temperature Scales: Most manifold gauges have temperature scales corresponding to different refrigerants, including R-410A. These scales help determine the superheat and subcooling, crucial metrics for assessing system charge and performance.
Connecting AC Gauges to an R-410A System
Properly connecting the gauges is paramount for accurate readings and safety. Here’s a step-by-step guide:
- Safety First: Wear appropriate personal protective equipment (PPE), including safety glasses and gloves.
- Identify Service Ports: Locate the high-side and low-side service ports on the AC unit. These are typically found on the refrigerant lines near the compressor.
- Connect the Hoses: Connect the blue hose to the low-side service port and the red hose to the high-side service port. Ensure the connections are tight to prevent leaks. The yellow hose is typically connected to a vacuum pump, refrigerant tank, or recovery unit.
- Purge the Hoses: Before taking readings, purge the hoses to remove any air or contaminants. This is done by briefly opening the hose connection at the manifold while refrigerant flows through it.
- Open the Manifold Valves: Slowly open the manifold valves to allow refrigerant pressure to register on the gauges.
Interpreting R-410A Gauge Readings
Once the gauges are connected and the system is running, you can begin interpreting the readings. Understanding the relationship between pressure and temperature is key to diagnosing system issues. Here’s how to analyze the readings:
Understanding Pressure-Temperature Relationship
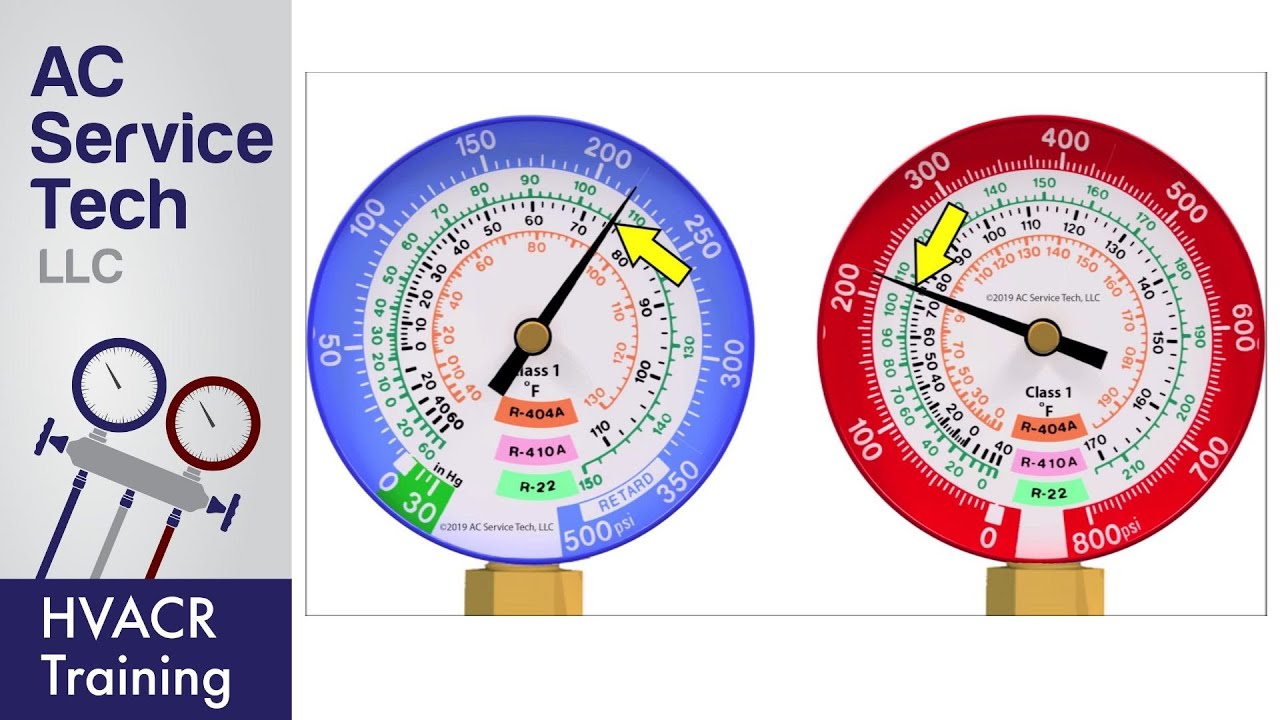
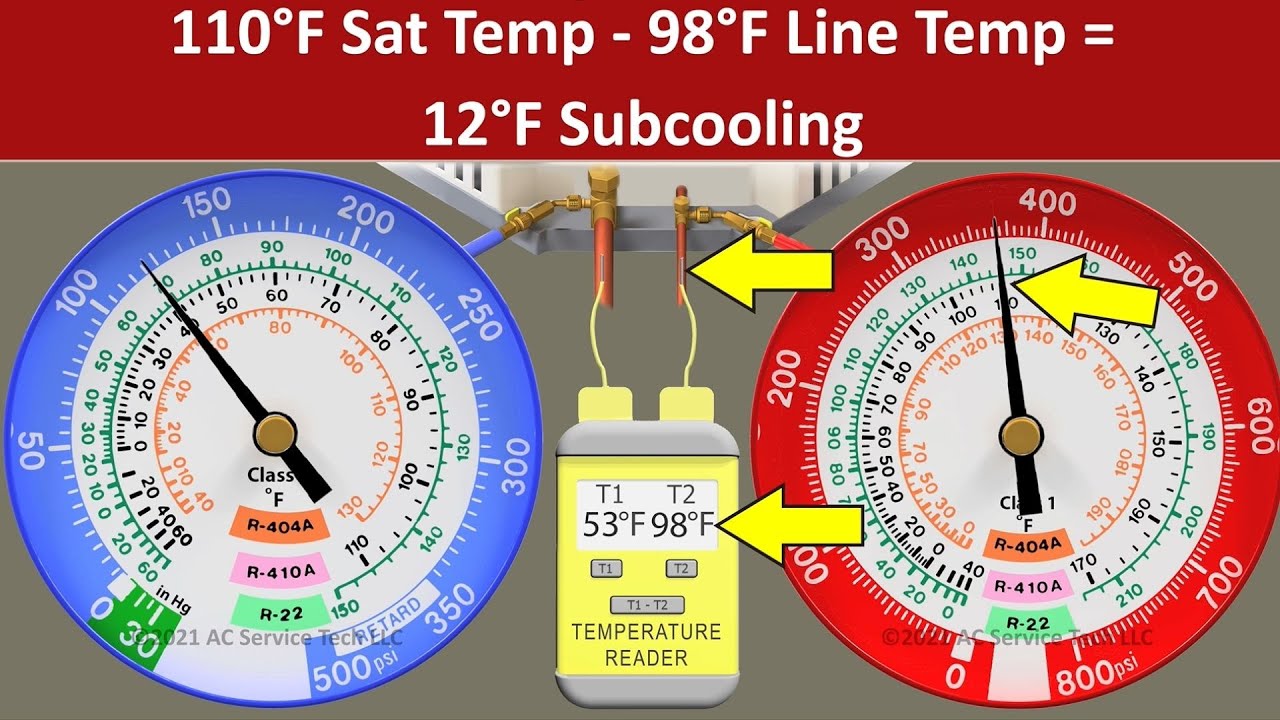
Refrigerant pressure and temperature are directly related. At a given pressure, the refrigerant will boil or condense at a specific temperature. This relationship is defined by the refrigerant's pressure-temperature (PT) chart. Most manifold gauges for R-410A have a temperature scale overlaid on the pressure gauge, allowing you to quickly determine the saturation temperature corresponding to the measured pressure.
Ideal R-410A Operating Pressures
The ideal operating pressures for an R-410A system depend on several factors, including the ambient temperature, indoor temperature, and system load. However, here are some general guidelines:
- Low-Side Pressure (Suction): Typically ranges from 110 to 150 psi.
- High-Side Pressure (Discharge): Typically ranges from 300 to 400 psi.
These are just guidelines; always refer to the manufacturer's specifications for the specific AC unit you are working on. Factors such as ductwork design, evaporator coil condition, and condenser coil cleanliness can all influence these readings.
Superheat and Subcooling
Superheat and subcooling are critical measurements used to determine the correct refrigerant charge and system performance. They indicate how efficiently the refrigerant is absorbing heat in the evaporator and rejecting heat in the condenser.
- Superheat: The difference between the actual refrigerant temperature at the evaporator outlet and the saturation temperature corresponding to the low-side pressure. Target superheat is typically between 8-12°F for TXV systems and higher for fixed orifice systems. High superheat indicates a low refrigerant charge or restricted refrigerant flow. Low superheat indicates a high refrigerant charge.
- Subcooling: The difference between the saturation temperature corresponding to the high-side pressure and the actual refrigerant temperature at the condenser outlet. Target subcooling is typically between 10-15°F. High subcooling indicates an overcharged system or restricted airflow across the condenser coil. Low subcooling indicates an undercharged system.
To calculate superheat and subcooling, you'll need a thermometer to measure the actual refrigerant line temperatures. Use a clamp-on thermometer for accurate readings.
Troubleshooting with AC Gauges
AC gauges are invaluable for diagnosing a wide range of AC system problems. Here are some common issues and how they manifest in gauge readings:
- Low Refrigerant Charge: Low-side pressure will be lower than normal, and high-side pressure may also be lower. Superheat will be high, and subcooling will be low. The system may not cool effectively.
- High Refrigerant Charge: Low-side pressure will be higher than normal, and high-side pressure will be significantly higher. Superheat will be low, and subcooling will be high. The system may cool excessively, and compressor damage is possible.
- Restricted Refrigerant Flow: High-side pressure will be high, and low-side pressure will be low. This could be due to a clogged filter drier, kinked refrigerant line, or malfunctioning TXV.
- Compressor Issues: Erratic gauge readings or significantly different pressures than expected could indicate a failing compressor. This requires further investigation, potentially including a compressor performance test.
- Air in the System: High-side pressure will be elevated, and the system may experience inconsistent cooling. This requires evacuation and recharge of the system.
Example Scenario
Let's say you connect your gauges to an R-410A system and observe the following readings on a moderately warm day:
- Low-Side Pressure: 90 psi
- High-Side Pressure: 250 psi
- Liquid Line Temperature: 85°F
- Suction Line Temperature: 50°F
Using your PT chart or gauge set's temperature scale, you find that 90 psi corresponds to a saturation temperature of approximately 45°F on the low side. This gives you a superheat of 5°F (50°F - 45°F), which is low. On the high side, 250 psi corresponds to a saturation temperature of approximately 75°F. This gives you a subcooling of 10°F (85°F - 75°F). Given the low superheat and moderate subcooling, this likely indicates the system is slightly overcharged or has a restricted evaporator coil. Further investigation is needed to pinpoint the exact cause.
Advanced Techniques and Considerations
Beyond basic troubleshooting, advanced techniques can provide even more insight into system performance:
- Using a Vacuum Pump: A vacuum pump is essential for removing air and moisture from the system after repairs or when charging a new system. Pulling a deep vacuum is crucial for ensuring proper refrigerant performance and preventing system damage.
- Weighing in Refrigerant: For precise refrigerant charging, it's best to weigh in the refrigerant according to the manufacturer's specifications. This ensures the system has the correct amount of refrigerant for optimal performance.
- Understanding System Load: The load on the AC system significantly impacts gauge readings. During periods of high heat and humidity, the pressures will be higher than during cooler periods. Take this into account when interpreting the readings.
Conclusion
Reading AC gauges for R-410A systems is a valuable skill for maintaining and troubleshooting HVAC equipment. By understanding the basics of pressure-temperature relationships, superheat, subcooling, and common troubleshooting scenarios, you can effectively diagnose and resolve many AC system issues. Always prioritize safety and consult with qualified HVAC professionals for complex repairs or if you are unsure about any aspect of the process. Proper gauge usage extends the lifespan and efficiency of your R-410A AC system, saving you money and ensuring comfortable climate control.