How To Read Goodman Model Numbers

Imagine this: It's a sweltering summer day, and your air conditioner suddenly stops blowing cold air. Or perhaps it's a freezing winter night, and your furnace is stubbornly refusing to ignite. Before you panic and call a repair technician, understanding your equipment and attempting a few basic troubleshooting steps can save you time and money. This guide focuses on understanding your Goodman unit by decoding its model number and performing some preliminary checks. Remember, safety first! If you are ever uncertain, call a professional.
Understanding Your Goodman Model Number
The first step in diagnosing any issue with your Goodman HVAC system is understanding its model number. This alphanumeric code provides crucial information about the unit's type, efficiency, capacity, and features. Knowing how to read it empowers you to find the correct replacement parts, access the right technical documentation, and communicate effectively with HVAC professionals.
Locating the Model Number
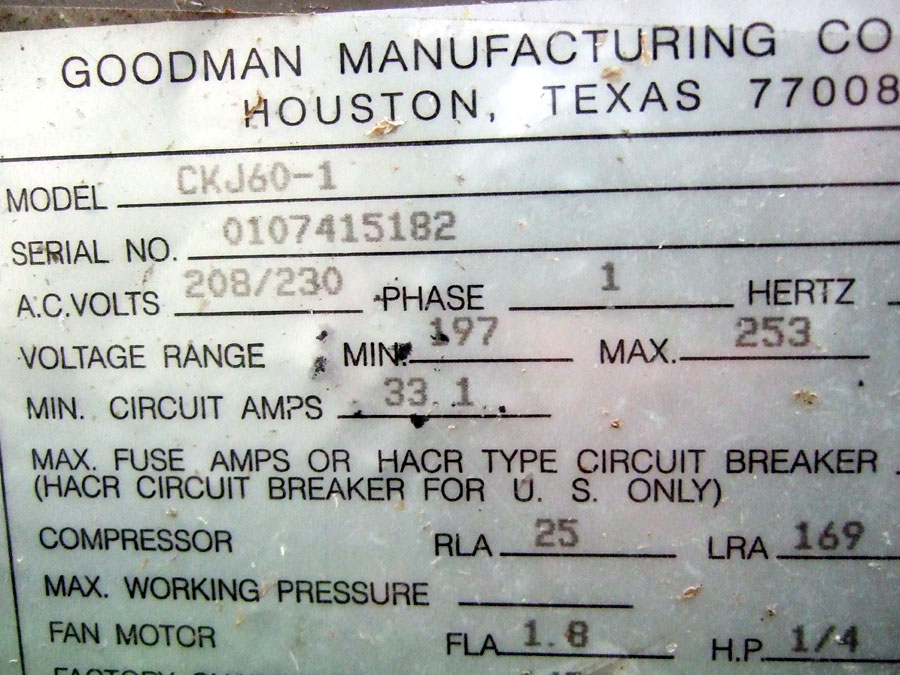
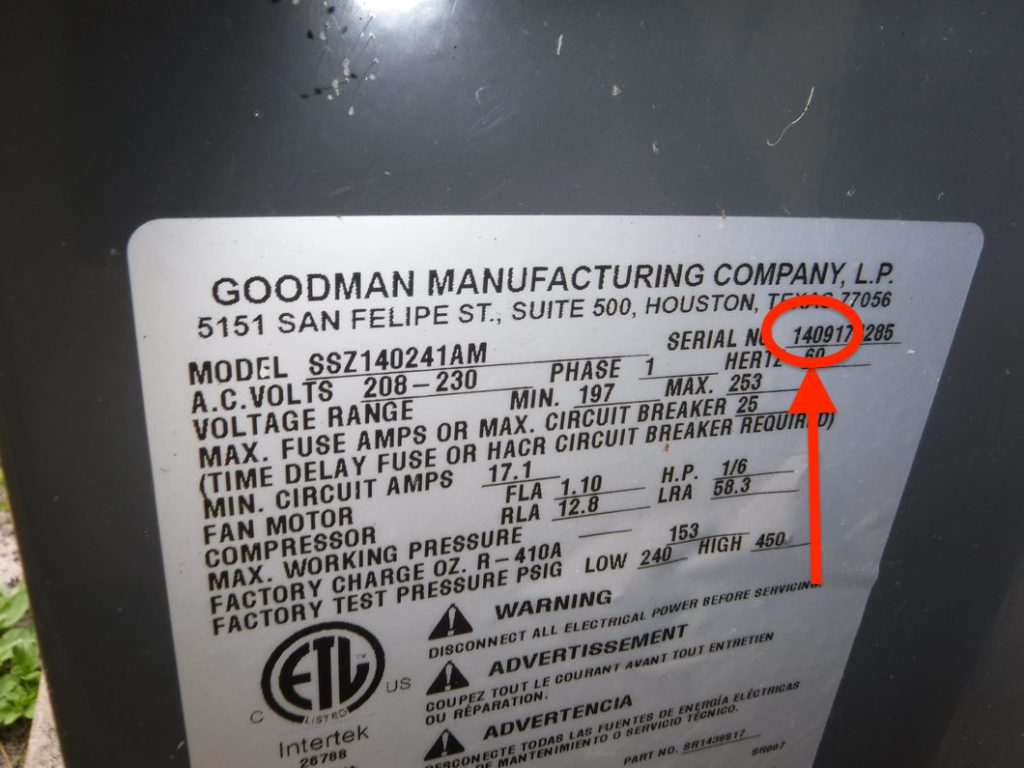
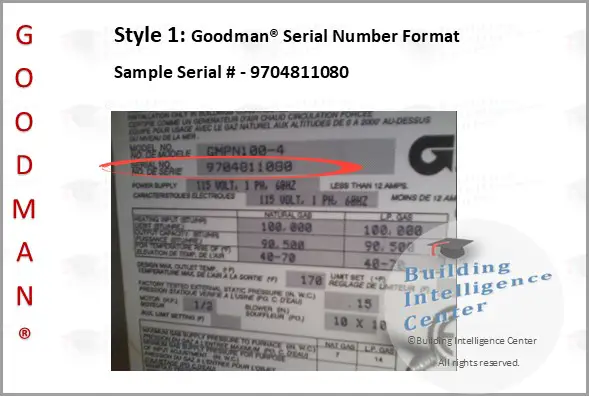
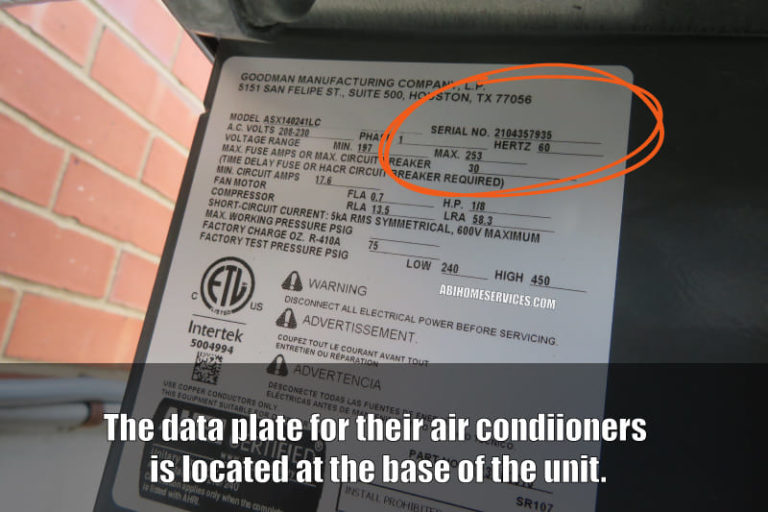
The model number is typically found on a nameplate attached to the unit. The location varies depending on the type of equipment:
- Air Conditioners (Outdoor Unit): Look for a sticker or plate on the side of the unit, often near the electrical disconnect.
- Furnaces (Indoor Unit): This is usually inside the cabinet, accessible by removing an access panel. Always turn off the power before opening any access panel!
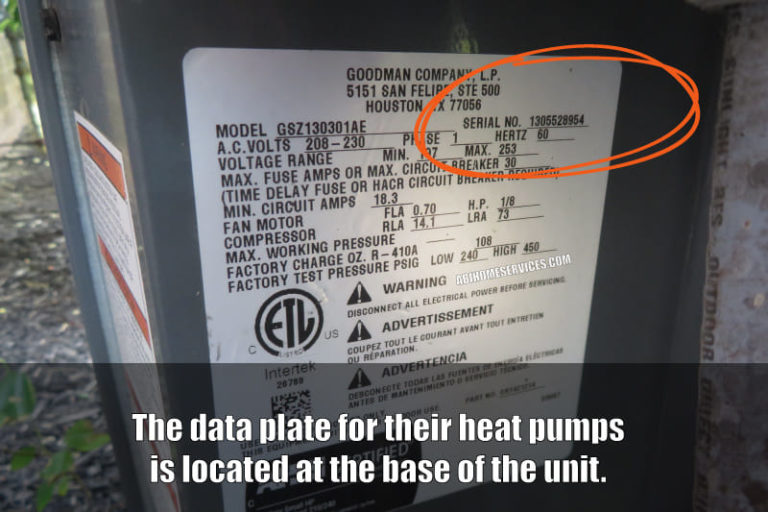
- Heat Pumps (Outdoor and Indoor Units): You'll find nameplates on both the outdoor and indoor units, similar to air conditioners and furnaces.
Decoding the Model Number: A General Guide
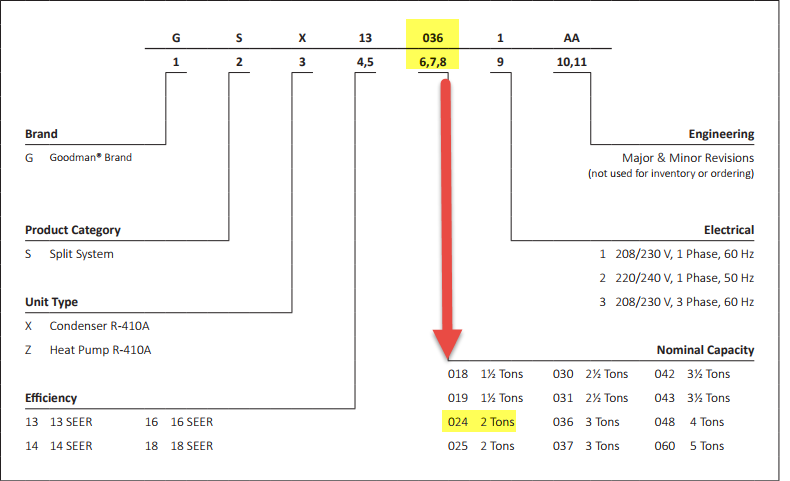
Goodman model numbers can seem cryptic, but they follow a logical structure. While the exact format can vary slightly depending on the age and specific model, here's a general breakdown:
Let's use a hypothetical Goodman air conditioner model number as an example: GSX160361CD
- GSX: This usually indicates the type of unit.
- GSX: Typically refers to a Goodman Air Conditioner Condensing Unit.
- GMV: Often designates a Goodman Gas Furnace.
- GPH: Could signify a Goodman Heat Pump.
- 16: This often indicates the SEER rating (Seasonal Energy Efficiency Ratio) for air conditioners and heat pumps. A higher SEER rating generally means greater energy efficiency. So, '16' suggests a 16 SEER unit.
- 036: This usually represents the cooling capacity in thousands of BTUs (British Thermal Units) per hour. In this case, '036' indicates a 36,000 BTU/hour (3-ton) unit. Remember that 1 ton is equivalent to 12,000 BTU/hour.
- 1: This could represent a specific series or version of the model. The meaning of this digit can vary.
- CD: These letters usually indicate the specific features or characteristics of the unit, such as the type of compressor, coil material, or other specific design elements. These are specific to the Goodman product line.
Important Considerations:
- This is a general guide. Goodman model numbers can vary. Always refer to the official Goodman documentation for your specific model.
- The letters and numbers following the BTU rating are highly specific to Goodman's product variations. You'll need to consult Goodman's resources to decipher their precise meaning.
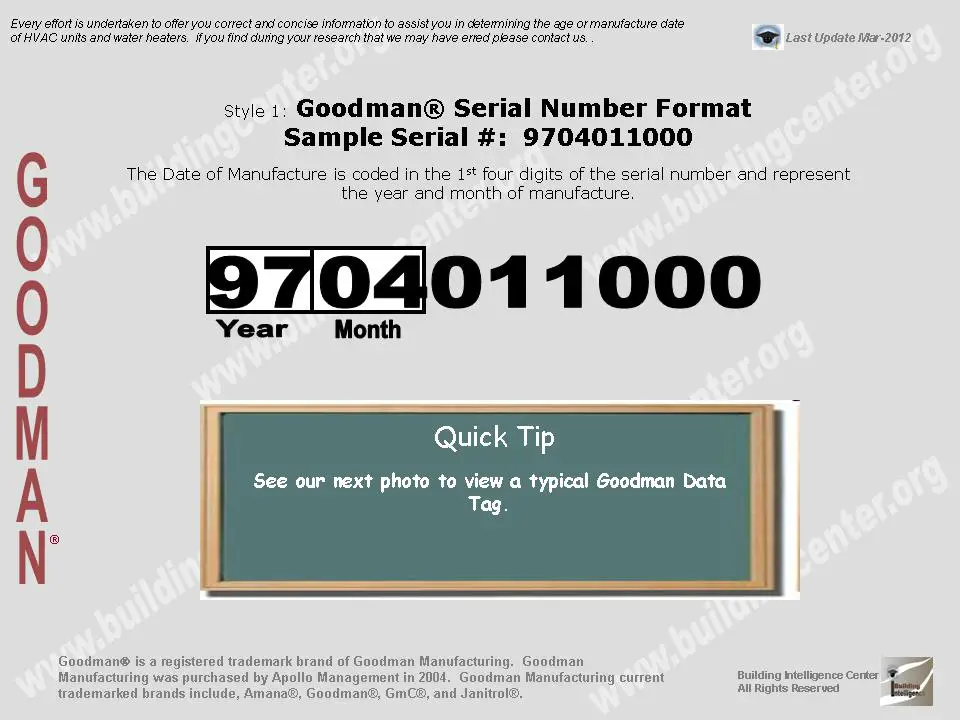
- The age of the unit can also influence the model number format. Older models might have slightly different conventions.
Using the Model Number for Troubleshooting
Once you have the model number, you can use it to:
- Find the correct replacement parts: When ordering parts like filters, capacitors, or blower motors, the model number ensures you get the exact match.
- Access technical documentation: Goodman and other online resources provide manuals, wiring diagrams, and troubleshooting guides specific to your model.
- Communicate effectively with HVAC professionals: Providing the model number allows technicians to quickly identify your equipment and diagnose the problem.
Basic Troubleshooting Steps (DIY-Friendly)
Before calling a professional, try these simple troubleshooting steps. Always prioritize safety. Turn off the power to the unit before performing any inspection or maintenance.
1. Check the Power Supply
A surprisingly common cause of HVAC failure is a simple power issue.
- Circuit Breakers: Locate the circuit breaker for your HVAC system in your electrical panel. Make sure it hasn't tripped. If it has, reset it. If it trips again immediately, do not keep resetting it. This indicates a more serious electrical problem that requires a qualified electrician.
- Disconnect Switch: There's usually a disconnect switch located near the outdoor unit (air conditioner or heat pump) and sometimes near the indoor unit (furnace). Ensure this switch is in the "ON" position.
- Power Cord (Window Units): If you're dealing with a window air conditioner, check the power cord for any damage and ensure it's securely plugged into the outlet.
2. Inspect the Air Filter
A dirty air filter restricts airflow, which can cause your HVAC system to overheat or freeze up. This is one of the easiest things to check and fix.
- Location: The air filter is typically located in the return air duct, either at the furnace or in a wall or ceiling grille.
- Inspection: Remove the filter and hold it up to the light. If you can't see much light passing through, it's time to replace it.
- Replacement: Replace the filter with a new one of the correct size. The size is usually printed on the filter frame. Make sure to install the filter with the arrow pointing in the direction of airflow.
3. Check the Thermostat Settings
Sometimes the problem is as simple as an incorrect thermostat setting.
- Mode: Ensure the thermostat is set to the correct mode (Cool, Heat, or Auto).
- Temperature: Verify that the set temperature is lower than the current room temperature if you want cooling, or higher if you want heating.
- Fan Setting: The fan setting should be set to "Auto" for normal operation. If it's set to "On," the fan will run continuously, even when the unit isn't heating or cooling.
- Battery: If your thermostat is battery-powered, check the batteries and replace them if necessary. Low batteries can cause erratic behavior.
4. Clean the Outdoor Unit (Air Conditioner or Heat Pump)
Debris buildup on the outdoor unit can restrict airflow and reduce efficiency.
- Safety First: Turn off the power to the unit at the disconnect switch.
- Remove Debris: Clear away any leaves, grass clippings, branches, or other debris from around the unit.
- Clean the Fins: Use a garden hose to gently spray the fins from the inside out, removing any dirt or dust. Avoid using high-pressure sprayers, as they can damage the fins.
- Straighten Bent Fins: If the fins are bent, you can use a fin comb (available at most hardware stores) to gently straighten them.
5. Check the Condensate Drain Line (Air Conditioner or Heat Pump)
A clogged condensate drain line can cause water to back up and shut down the unit.
- Location: The condensate drain line is a PVC pipe that runs from the indoor unit (furnace or air handler) to a drain.
- Inspection: Look for any clogs or obstructions in the drain line.
- Clearing the Clog: You can try clearing the clog with a wet/dry vacuum or by using a stiff wire to break up the blockage. Some people pour a cup of diluted bleach down the drain line periodically to prevent algae growth.
When to Call a Professional
While these DIY troubleshooting steps can resolve many common issues, some problems require the expertise of a qualified HVAC technician. Never attempt repairs involving electricity, gas, or complex components unless you have the necessary training and experience.
Call a professional if:
- You suspect a refrigerant leak. Handling refrigerant requires specialized equipment and training.
- You notice any burning smells or unusual noises coming from the unit.
- The unit is not starting at all after checking the power supply.
- The compressor is not running. The compressor is a vital part of the air conditioning system, and its repair needs professional expertise.
- You are dealing with gas-related issues, such as a gas leak or a malfunctioning gas valve. Gas is a highly flammable substance, and any gas-related repairs should be handled by a qualified professional.
- You are unsure about any aspect of the repair process. It's always better to be safe than sorry.
Empowering Yourself with Knowledge
By understanding your Goodman model number and performing these basic troubleshooting steps, you can save time, money, and frustration. Remember to always prioritize safety and call a professional when needed. Knowing your equipment and being able to communicate effectively with HVAC technicians will make the repair process smoother and more efficient. Don't be afraid to ask questions and learn more about your HVAC system. The more you know, the better equipped you'll be to keep your home comfortable year-round.