How To Read Ma On A Multimeter

Understanding Milliamps (mA) on Your Multimeter: A Guide for HVAC Professionals & Homeowners
When troubleshooting HVAC systems, understanding electrical measurements is crucial. One of the most common measurements you'll encounter is milliamps (mA), a unit of electrical current. This guide will break down how to read mA on your multimeter, why it's important, and how it applies to diagnosing problems in your heating and cooling systems.
Why Measure Milliamps in HVAC Systems?
Milliamps are frequently used to measure the current draw of low-voltage circuits and components, such as:
- Control circuits: Thermostats, control boards, and sensors.
- Flame sensors: Used in gas furnaces to detect the presence of a flame.
- Solenoid valves: Used in various HVAC components to control fluid flow.
Deviations from the specified mA readings for these components can indicate a malfunction. For example, a weak or non-existent flame sensor signal can prevent a furnace from staying lit. A faulty control board might draw excessive current, indicating a short circuit or component failure.
Setting Up Your Multimeter for mA Measurement
Before you start, it's crucial to use a multimeter that's rated for the voltages you'll be working with and that has a mA measurement setting. Most modern digital multimeters (DMMs) are suitable for HVAC work.
- Safety First: Always disconnect power to the circuit you'll be measuring before connecting your multimeter. HVAC systems can carry dangerous voltages. Follow all safety protocols and wear appropriate personal protective equipment (PPE).
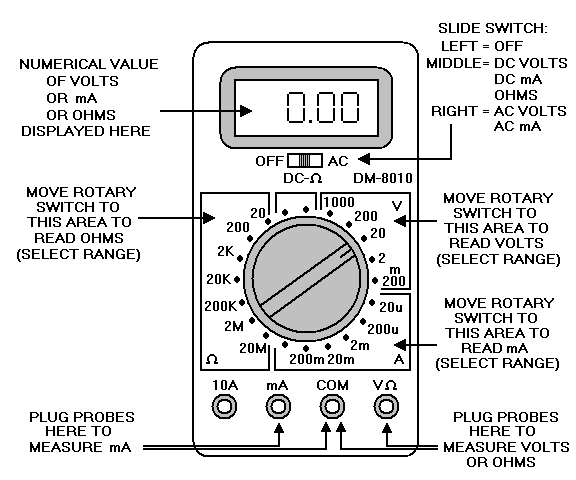
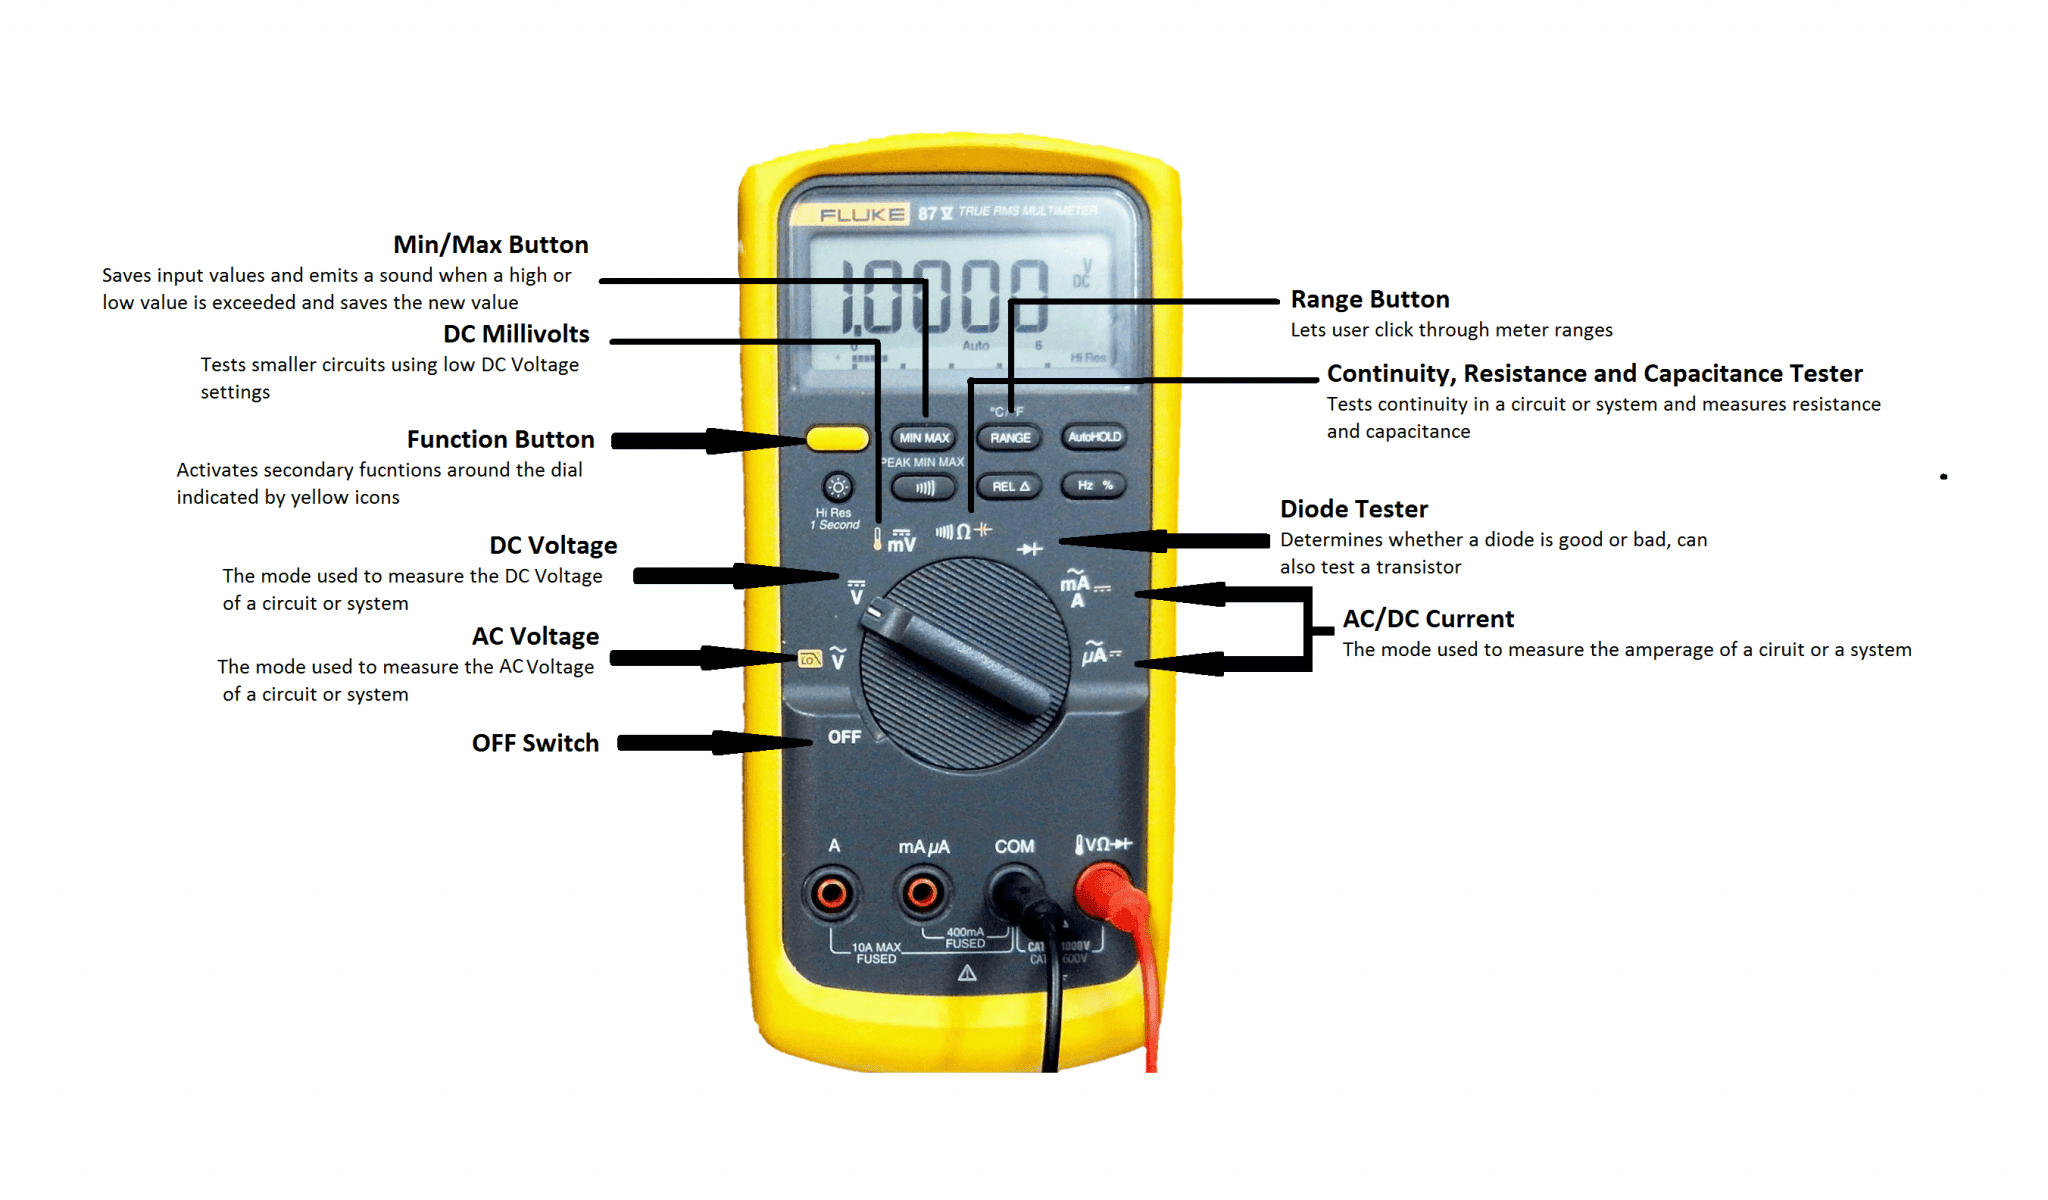
- Select the Correct Function: Turn the multimeter's rotary switch to the mA setting. You'll typically see an "mA" symbol, which may be shared with other functions, like voltage (V) or resistance (Ω). Ensure the selector is pointing to the correct "mA" position. Some multimeters have separate settings for AC and DC milliamps. Make sure you select the appropriate one based on the circuit you are measuring. HVAC control circuits are typically DC.
- Choose the Range: Many multimeters have multiple mA ranges (e.g., 200mA, 20mA, 2mA). Start with the highest range and work your way down to get the most accurate reading. This prevents overloading the meter if the current is higher than expected. If the meter reads "OL" or "Overload," switch to a higher range. Some multimeters have an auto-ranging feature, which automatically selects the appropriate range.
- Connect the Leads: Locate the mA input jack on your multimeter. This is usually a separate input jack from the voltage and resistance jacks, often labeled "mA" or "A" (for Amps). Connect the red test lead to the mA jack. Connect the black test lead to the common (COM) jack.
Taking a Milliamps Reading: In-Series Measurement
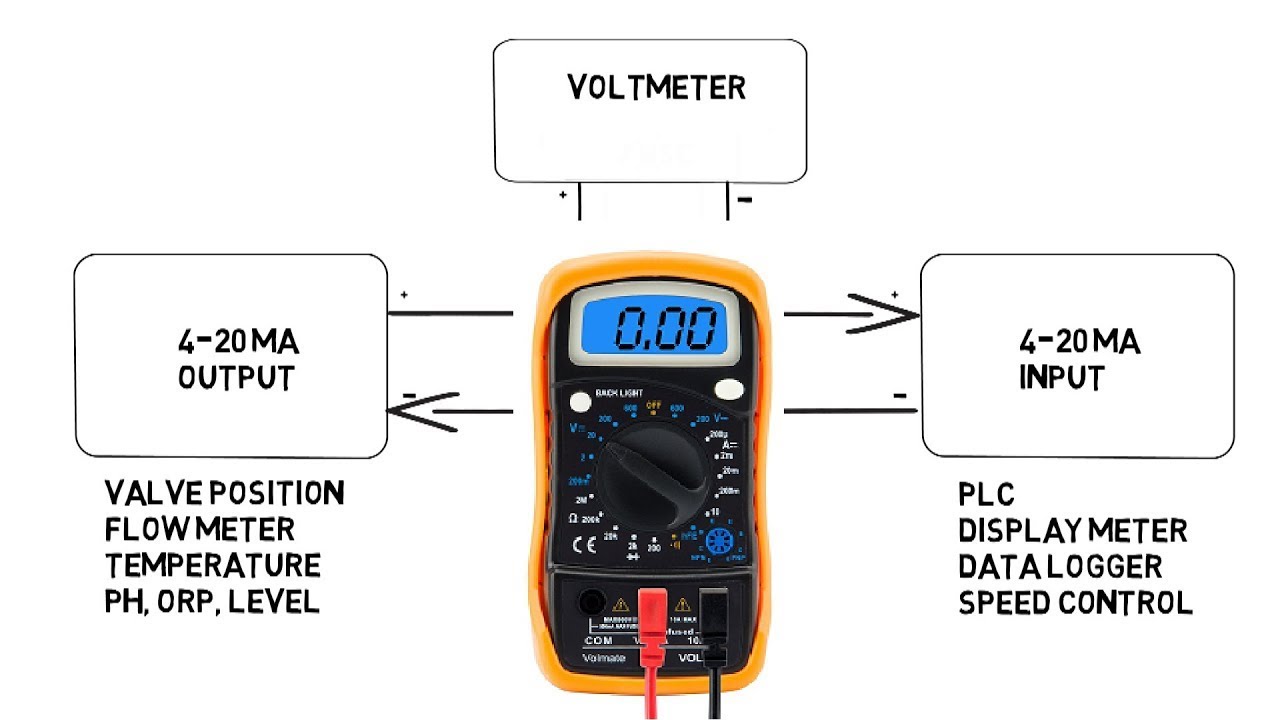
Measuring current requires you to connect the multimeter in series with the circuit you want to measure. This means you need to break the circuit and insert the multimeter to allow the current to flow through it. This is a critical difference from voltage measurements, where you connect the multimeter in parallel.
- Identify the Circuit: Determine the component or section of the circuit you want to measure.
- Break the Circuit: Carefully disconnect the wire on one side of the component or circuit you are testing.
- Connect the Multimeter: Connect one test lead of the multimeter to the disconnected wire and the other test lead to the component or the other side of the break. You've now created a path for the current to flow through the multimeter.
- Apply Power: Re-energize the circuit.
- Read the Display: Observe the reading on the multimeter display. It will show the current flowing through the circuit in milliamps. Note the reading and its polarity (positive or negative).
- Disconnect and Reconnect: Once you've recorded the reading, disconnect the power, remove the multimeter, and reconnect the original wiring.
Important Note: Never connect a multimeter set to measure current (mA) directly across a voltage source (in parallel). This will create a short circuit and can damage the multimeter and the circuit.
Interpreting Milliamps Readings in HVAC Applications
Once you have your mA reading, you need to know what it means. This often involves consulting the manufacturer's specifications for the component you're testing. Here are some common scenarios:
Flame Sensor Current
A flame sensor generates a small DC current when it detects a flame. A typical flame sensor current reading is between 1 and 5 microamps (µA), or 0.001 to 0.005 mA. A low or absent reading can indicate:
- A dirty or corroded flame sensor.
- A weak flame.
- A faulty flame sensor.
- A problem with the gas valve.
Clean the flame sensor with emery cloth and retest. If the reading is still low, consider replacing the flame sensor.
Control Circuit Current
Control circuits use low-voltage signals to operate various components. The current draw of these circuits is typically in the milliamps range. Excessive current draw can indicate a short circuit or a faulty component. For example, a shorted thermostat wire can cause the control board to draw excessive current.
Solenoid Valve Current
Solenoid valves are electrically operated valves that control the flow of refrigerants or other fluids. The current draw of a solenoid valve can vary depending on the valve's size and voltage. A reading that's significantly higher or lower than the specified value can indicate a faulty valve.
Safety Precautions When Measuring Milliamps
Working with electrical circuits can be dangerous. Always follow these safety precautions:
- Disconnect Power: Always disconnect power to the circuit before making any connections or disconnections.
- Use Insulated Tools: Use insulated screwdrivers and pliers to prevent accidental shocks.
- Wear PPE: Wear safety glasses and gloves to protect yourself from injury.
- Know Your Limits: If you're not comfortable working with electricity, call a qualified HVAC technician.
- Check Your Meter: Inspect your multimeter before each use for any damage to the case, leads, or connectors. A damaged meter can give inaccurate readings or pose a safety hazard.
Common Mistakes to Avoid
- Connecting in Parallel: As mentioned before, never connect a multimeter set to measure current directly across a voltage source. This creates a short circuit.
- Using the Wrong Range: Always start with the highest range and work your way down to avoid overloading the meter.
- Ignoring Polarity: Some circuits are polarity-sensitive. Pay attention to the polarity of the reading (positive or negative) and ensure you're connecting the test leads correctly.
- Forgetting to Reconnect: After taking a reading, always disconnect the multimeter and reconnect the original wiring.
- Working Live: Avoid working on energized circuits whenever possible. Disconnect the power whenever safe to do so.
Conclusion
Understanding how to read mA on a multimeter is a valuable skill for anyone working with HVAC systems. By following the steps outlined in this guide and taking the necessary safety precautions, you can accurately measure current, diagnose problems, and keep your heating and cooling systems running smoothly. Remember to consult the manufacturer's specifications for the components you're testing to interpret your readings correctly. If you encounter any difficulties or are unsure about any aspect of the process, consult a qualified HVAC professional.