How To Replace A Moen 1222 Cartridge

Replacing a Moen 1222 Cartridge: A Step-by-Step Guide
The Moen 1222 cartridge is a common component found in many single-handle Moen faucets. Over time, these cartridges can wear out, leading to drips, leaks, or difficulty controlling water temperature. Replacing the cartridge is a straightforward DIY project that can save you the cost of hiring a plumber. This guide provides a comprehensive, step-by-step process for homeowners, HVAC technicians, and facility managers alike.
Tools and Materials Required
Before you begin, gather the necessary tools and materials:
- New Moen 1222 Cartridge (ensure it's the correct replacement for your faucet model)
- Moen Cartridge Puller Tool (highly recommended for stubborn cartridges)
- Flathead Screwdriver
- Phillips Head Screwdriver
- Adjustable Wrench or Pliers
- Penetrating Oil (e.g., WD-40)
- Clean Cloths or Rags
- Small Container (to catch drips)
- Optional: Replacement O-rings and Retaining Clip (if visibly worn or damaged)
Step-by-Step Instructions
Follow these steps carefully to ensure a successful cartridge replacement:
- Turn Off the Water Supply: Locate the shut-off valves under the sink. There should be separate valves for hot and cold water. Turn both valves clockwise until they are completely closed. If you don't have individual shut-off valves, you'll need to shut off the main water supply to your house.
- Protect the Sink: Place a cloth or towel in the sink to prevent scratches or damage from dropped tools.
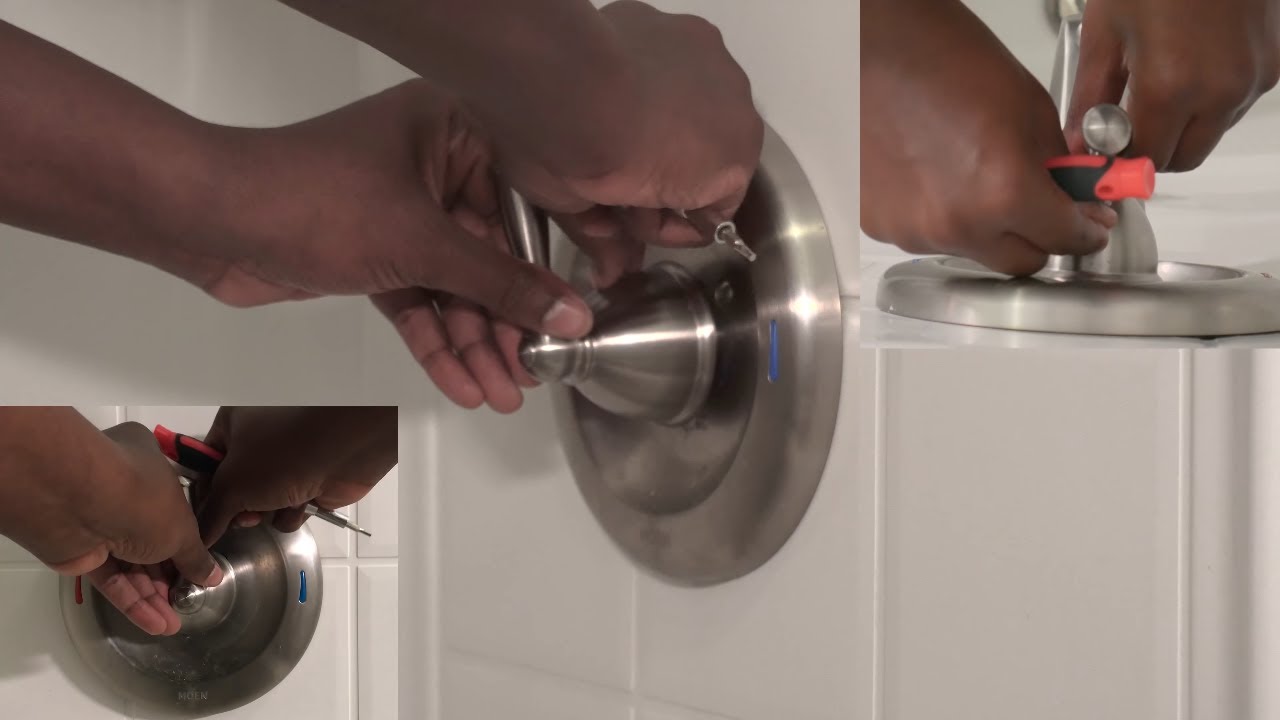
- Remove the Handle: The handle attachment varies depending on the faucet model. Typically, you'll find a setscrew on the side or underneath the handle. Use a small Allen wrench (usually 3/32 inch) to loosen the setscrew and pull the handle straight off. Some handles may have a decorative cap that needs to be pried off with a flathead screwdriver to reveal the setscrew.
- Remove the Handle Adapter (if applicable): Some Moen faucets have a handle adapter that connects the handle to the cartridge. If your faucet has one, remove any screws holding it in place. The adapter should then pull straight off.
- Remove the Retaining Clip: This is a U-shaped clip that secures the cartridge in place. Use a flathead screwdriver to carefully pry the clip upwards and out of its slot. Be careful not to lose this clip, as you'll need it for the new cartridge. If the clip appears corroded or damaged, replace it with a new one.
- Loosen the Cartridge (if necessary): If the cartridge is stuck, apply a generous amount of penetrating oil around the cartridge body and let it soak for at least 15-20 minutes. This will help to loosen any mineral deposits or corrosion that may be binding the cartridge.
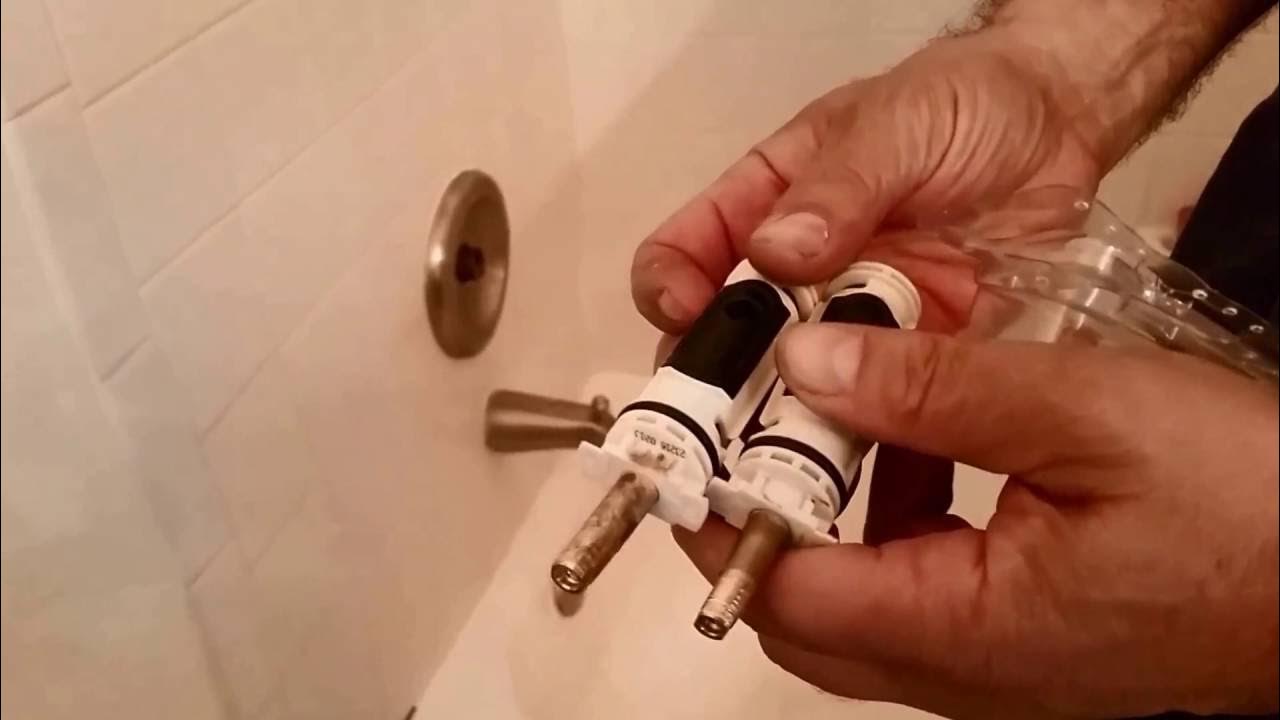
- Remove the Old Cartridge: This is where the Moen Cartridge Puller Tool becomes invaluable. Insert the tool into the cartridge stem and tighten the screw to grip the cartridge securely. Then, use the tool to pull the cartridge straight out. If you don't have the tool, you can try using pliers to grip the stem, but be careful not to damage it. Work the cartridge back and forth gently while pulling. Avoid twisting the cartridge, as this can break it and make removal more difficult. If the cartridge breaks, you may need to use a specialized cartridge extractor tool or call a plumber.
- Inspect the Cartridge Bore: Once the old cartridge is removed, inspect the inside of the faucet body for any debris, corrosion, or mineral buildup. Use a clean cloth to wipe out the bore. If there is significant buildup, you can use a mild abrasive cleaner (like baking soda paste) to gently scrub the area. Rinse thoroughly.
- Install the New Cartridge: Before installing the new cartridge, lubricate the O-rings with plumber's grease (silicone-based lubricant). This will help to ensure a smooth installation and prevent leaks. Align the keyways on the new cartridge with the corresponding slots in the faucet body. Push the cartridge straight in until it is fully seated. You should hear a click or feel it snap into place.
- Reinstall the Retaining Clip: Insert the retaining clip back into its slot, ensuring that it is securely seated. This clip is crucial for holding the cartridge in place, so make sure it is properly installed.
- Reinstall the Handle Adapter (if applicable): If your faucet has a handle adapter, reinstall it, securing it with the screws you removed earlier.
- Reinstall the Handle: Slide the handle back onto the stem and tighten the setscrew. Make sure the handle is properly aligned and securely fastened.
- Turn on the Water Supply: Slowly turn on the hot and cold water supply valves. Check for leaks around the faucet base, spout, and handle. If you see any leaks, tighten the connections or adjust the cartridge position slightly.
- Test the Faucet: Turn the faucet on and off, and check the water temperature. Make sure the water flow is smooth and consistent. If you experience any issues, such as dripping or difficulty controlling the temperature, double-check the cartridge installation and make sure all connections are tight.
Troubleshooting Common Issues
Here are some common issues you might encounter during a Moen 1222 cartridge replacement and how to address them:
- Cartridge is Stuck: As mentioned earlier, use penetrating oil and a cartridge puller tool. Patience is key.
- Cartridge Breaks During Removal: Use a cartridge extractor tool or call a plumber. Avoid using excessive force.
- Leaks After Replacement: Ensure the cartridge is fully seated and the retaining clip is securely in place. Check the O-rings for damage and replace if necessary.
- Water Temperature Not Correct: Double-check the cartridge orientation. Some cartridges have markings indicating hot and cold sides.
- Low Water Pressure: Inspect the faucet aerator for debris and clean it if necessary. Also, check the water supply lines for kinks or obstructions.
Preventative Maintenance
To extend the life of your Moen 1222 cartridge and prevent future issues, consider these preventative measures:
- Install a Water Softener: Hard water can cause mineral buildup and corrosion, which can damage the cartridge. A water softener can help to remove these minerals and prolong the life of your faucet.
- Regularly Clean the Faucet: Use a mild soap and water solution to clean the faucet exterior. Avoid using harsh chemicals or abrasive cleaners, as these can damage the finish.
- Periodically Check for Leaks: Inspect the faucet for leaks around the base, spout, and handle. Address any leaks promptly to prevent further damage.
Cost Considerations
The cost of replacing a Moen 1222 cartridge is relatively low, especially if you do it yourself. A new cartridge typically costs between $20 and $40. A Moen Cartridge Puller Tool costs around $15 to $30. If you hire a plumber, the total cost can range from $100 to $200 or more, depending on the plumber's hourly rate and the complexity of the job.
Environmental Impact
Replacing a worn-out cartridge is a sustainable practice that can help conserve water. A dripping faucet can waste a significant amount of water over time, leading to higher water bills and environmental concerns. By fixing leaks promptly, you can reduce water waste and save money.
Conclusion
Replacing a Moen 1222 cartridge is a manageable task for most homeowners with basic plumbing skills. By following these step-by-step instructions and troubleshooting tips, you can restore your faucet to proper working order and prevent further water damage. For HVAC technicians and facility managers, this guide provides a valuable resource for maintaining and repairing Moen faucets in residential and commercial properties.