How To Replace Heating Element In Electric Fireplace
An electric fireplace can provide warmth and ambiance to your home without the need for a traditional chimney or gas line. However, like any appliance, components can wear out over time. One of the most common parts to fail is the heating element. Replacing it yourself is often possible, saving you money on repair costs. This guide will walk you through the process, helping you determine if replacement is the right option and explaining the steps involved in safely and effectively replacing the heating element in your electric fireplace.
Is Replacement the Right Choice? Diagnosis and Considerations
Before diving into a replacement, it's crucial to diagnose the problem correctly. A non-functioning electric fireplace isn't always due to a faulty heating element. Other components, such as the thermostat, control board, or even a simple blown fuse, could be the culprit.
Symptoms of a Faulty Heating Element
Here are some common signs that your heating element might be failing:
- No heat: The fireplace turns on, but there's no warm air being produced. This is the most obvious sign.
- Inconsistent heat: The fireplace produces heat intermittently, or the heat output is significantly reduced.
- Burning smell: A distinct burning smell when the fireplace is turned on could indicate a problem with the heating element's wiring or the element itself.
- Visible damage: Upon inspection (after unplugging the unit!), you might see physical damage to the heating element, such as breaks, cracks, or corrosion.
Checking Other Potential Issues
Before ordering a new heating element, rule out other common problems:
- Check the power supply: Ensure the fireplace is properly plugged into a working outlet. Test the outlet with another device to confirm it's providing power.
- Inspect the fuse or circuit breaker: Locate the fuse or circuit breaker that controls the fireplace. If the fuse is blown or the breaker is tripped, replace the fuse or reset the breaker. If it trips again immediately, there is likely an electrical problem.
- Examine the thermostat: A faulty thermostat can prevent the heating element from activating. If your fireplace has an adjustable thermostat, try turning it up to the highest setting to see if that triggers the heating element. Consider bypassing the thermostat temporarily (if you're comfortable with electrical work and understand the risks) to see if the element heats up directly. (Warning: Bypass only for testing, do not run continuously!)
- Inspect the control board: The control board manages the various functions of the fireplace, including the heating element. Damage or failure of the control board can prevent the heating element from working. Inspect the board for any visible signs of damage, such as burned components or corrosion.
If you've ruled out these other possibilities, then a faulty heating element is the likely cause.
Gathering Your Tools and Materials
Once you've determined that the heating element needs replacing, gather the necessary tools and materials. Having everything on hand will make the process smoother and more efficient.
Essential Tools
- Screwdrivers: You'll likely need both Phillips head and flathead screwdrivers in various sizes.
- Pliers: For gripping and manipulating wires.
- Wire stripper/cutter: For safely stripping the insulation from wires.
- Multimeter: This is a critical tool for testing the heating element and confirming it is indeed faulty.
- Voltage tester: To ensure the fireplace is completely disconnected from power before you begin working.
- Safety glasses: To protect your eyes from dust and debris.
- Gloves: To protect your hands.
- Camera or Smartphone: To take pictures of wiring configurations before disconnecting anything. This will be invaluable when reassembling the fireplace.
Required Materials
- Replacement heating element: This is the most important item. Make sure to order the correct part for your specific fireplace model. The model number is usually found on a sticker on the back or bottom of the unit.
- Wire connectors (wire nuts): To safely connect the new heating element's wires to the existing wiring.
- Electrical tape: For insulating wire connections.
Step-by-Step Guide to Replacing the Heating Element
Follow these steps carefully to safely and effectively replace the heating element in your electric fireplace.
Step 1: Safety First - Disconnect the Power!
This is the most crucial step! Before you touch anything, unplug the electric fireplace from the power outlet. Use a voltage tester to confirm that there is no voltage present at the outlet and at the fireplace's power cord. Double-check to be absolutely certain that the power is off.
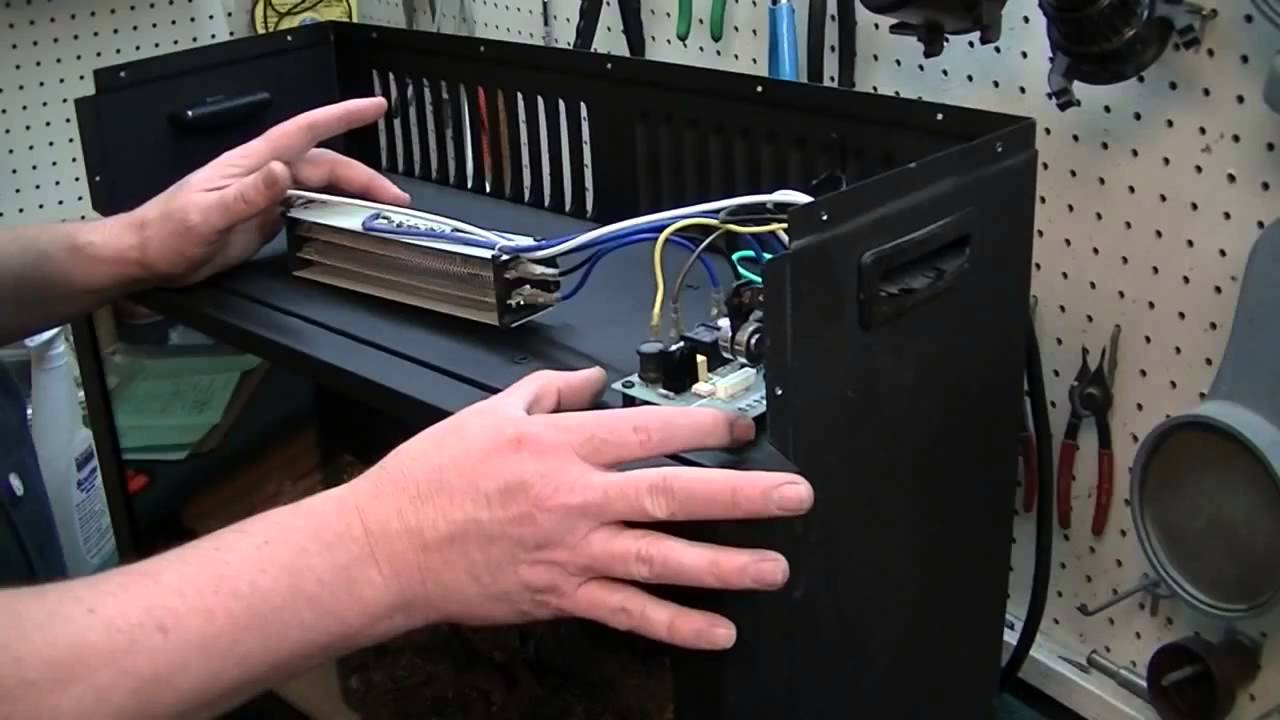
Step 2: Accessing the Heating Element
The method for accessing the heating element will vary depending on the specific model of your electric fireplace. Consult your owner's manual for specific instructions. In general, you'll need to:
- Remove the outer casing: This usually involves removing screws from the back, sides, or bottom of the unit. Some fireplaces may have a removable front panel.
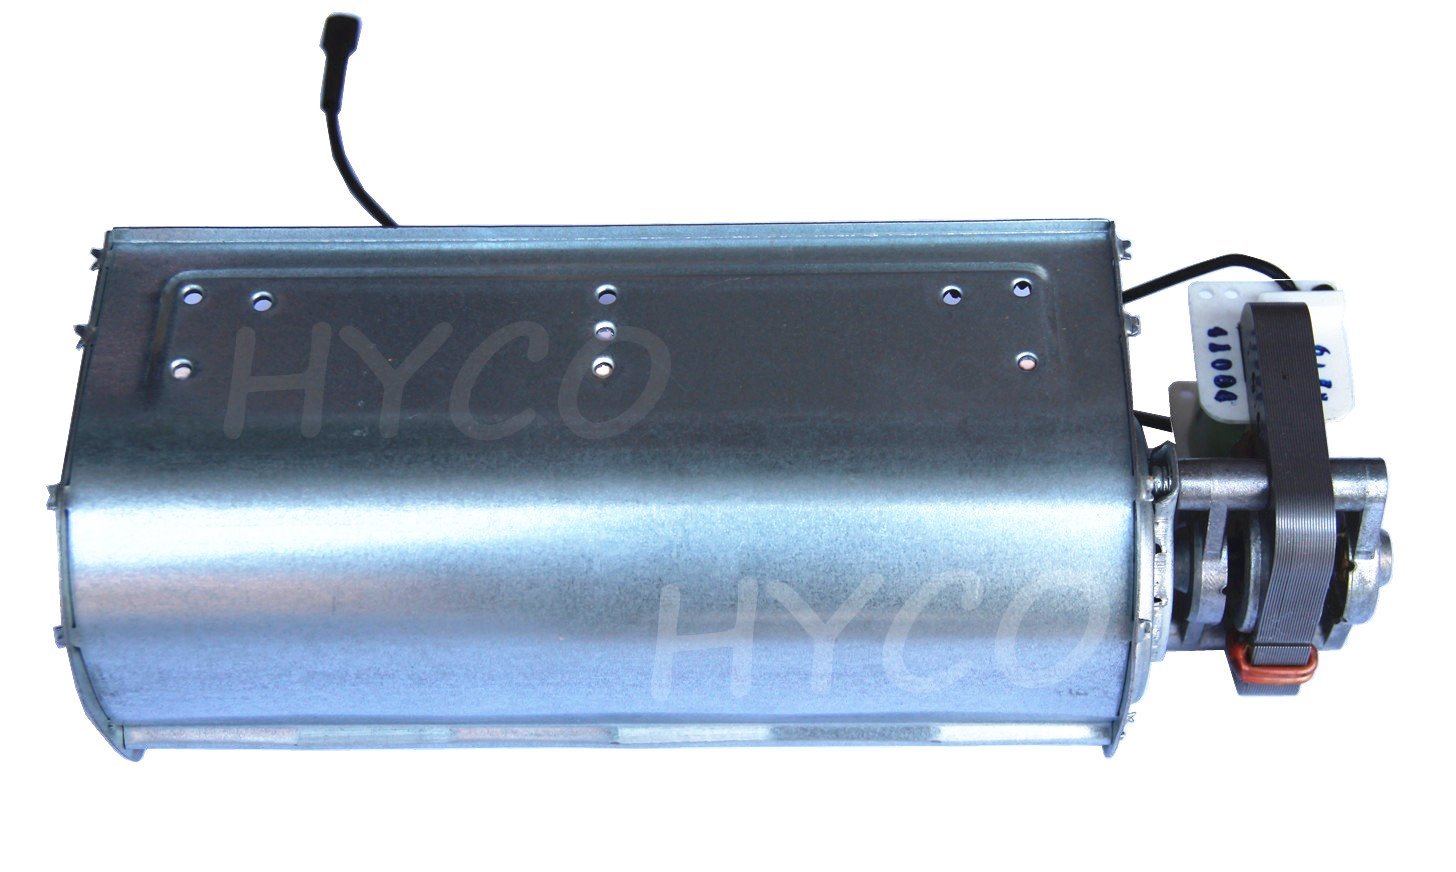
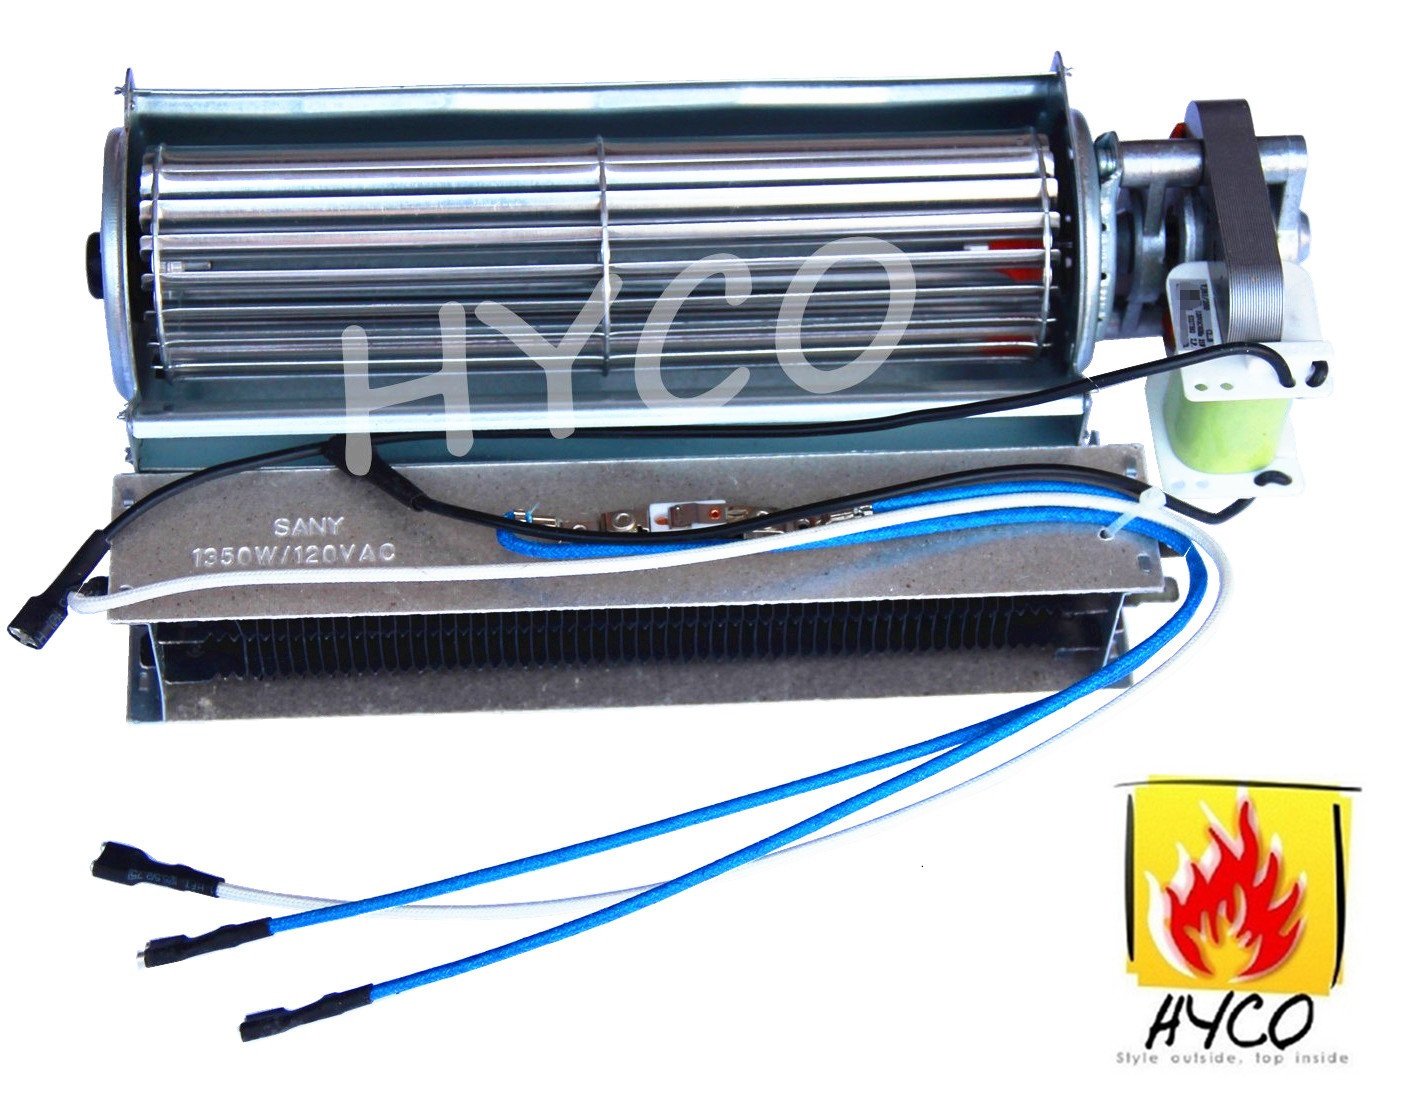
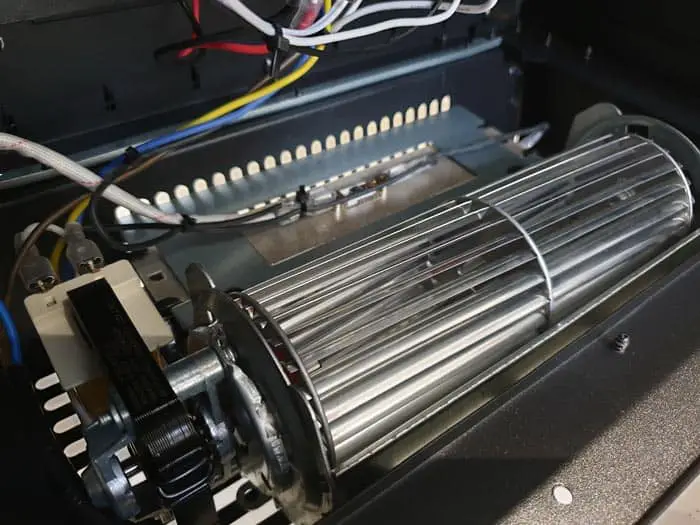
- Locate the heating element: The heating element is typically located in the back of the fireplace, near the fan. It usually looks like a coiled wire or a ceramic plate.
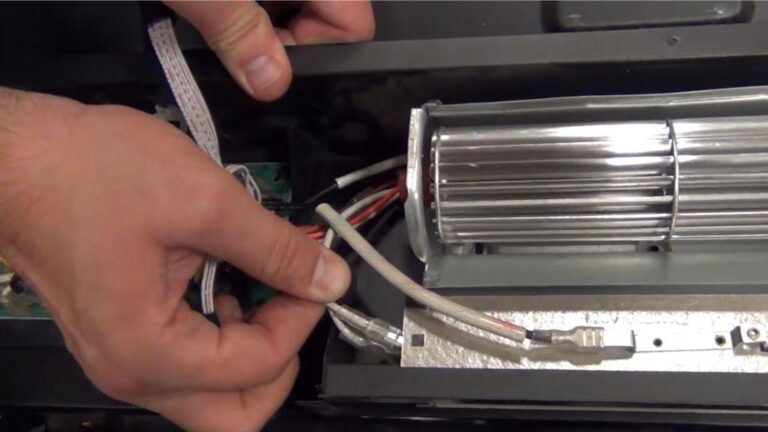
- Take pictures of the wiring: Before disconnecting any wires, use your camera or smartphone to take clear pictures of the wiring configuration. This will be essential for reconnecting the wires correctly later. Make sure the pictures show the colors of the wires and where they connect.
Step 3: Disconnecting the Old Heating Element
Carefully disconnect the wires from the old heating element. Use the following steps:
- Loosen the wire connectors: Use pliers to gently loosen the wire connectors (wire nuts) that connect the heating element's wires to the existing wiring.
- Detach the wires: Once the wire connectors are loose, carefully detach the wires.
- Remove the old heating element: The heating element is usually held in place by screws or clips. Remove these to detach the old heating element from the fireplace.
Step 4: Installing the New Heating Element
Install the new heating element in the reverse order of removal:
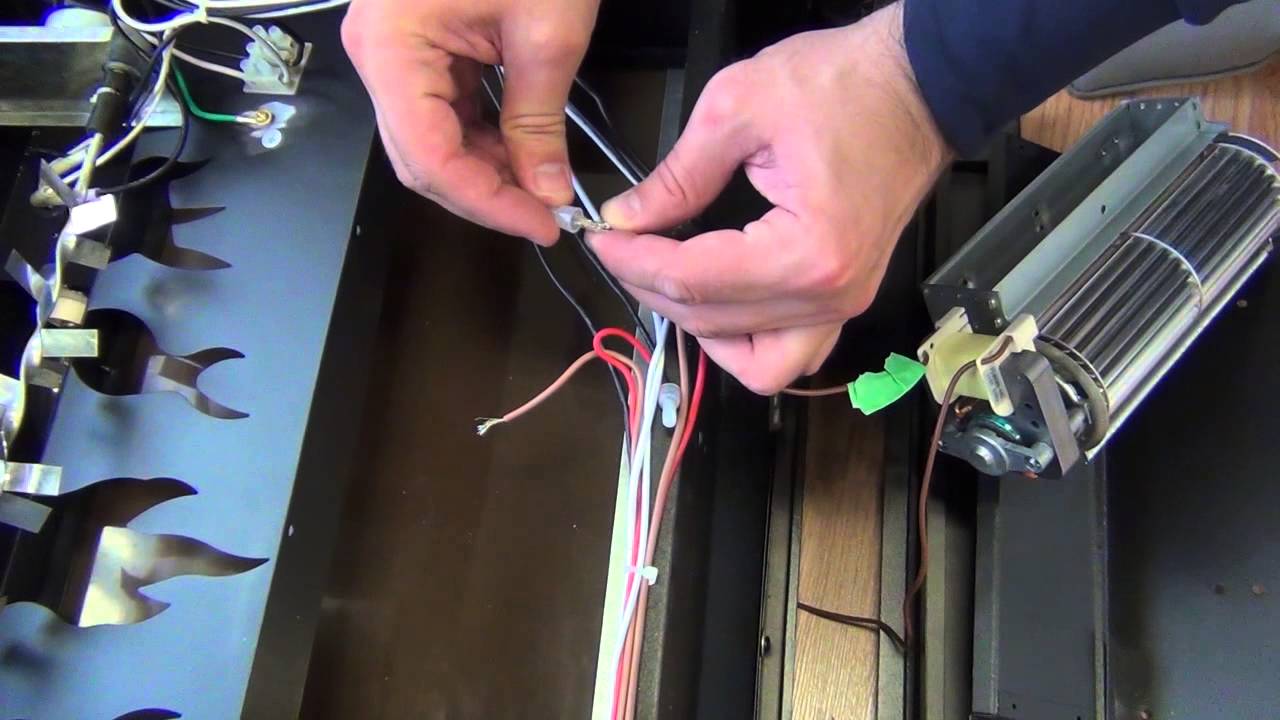
- Attach the new heating element: Secure the new heating element to the fireplace using the screws or clips that held the old element in place.
- Connect the wires: Using your pictures as a guide, connect the wires from the new heating element to the existing wiring using wire connectors (wire nuts). Ensure that the connections are secure and that the wires are properly insulated. Match the wire colors as accurately as possible.
- Secure the wire connectors: Tighten the wire connectors to ensure a secure connection. Wrap the connections with electrical tape for added insulation.
Step 5: Reassembling the Fireplace
Once the new heating element is installed and the wires are connected, reassemble the fireplace:
- Replace the outer casing: Reattach the outer casing to the fireplace using the screws that you removed earlier.
- Ensure all components are securely in place: Double-check that all components are properly installed and secured before plugging in the fireplace.
Step 6: Testing the New Heating Element
Before you consider the job done, test the new heating element.
- Plug in the fireplace: Plug the fireplace back into the power outlet.
- Turn on the fireplace: Turn on the fireplace and set the thermostat to a high setting.
- Check for heat: Verify that the heating element is producing heat.
- Monitor for any unusual smells or sounds: Keep an eye on the fireplace for any unusual smells or sounds. If you notice anything unusual, immediately unplug the fireplace and investigate the problem.
Safety Precautions and Important Considerations
Working with electrical appliances can be dangerous if not done properly. Here are some important safety precautions to keep in mind:
- Always disconnect the power: As mentioned before, this is the most important safety precaution. Never work on an electric fireplace while it is plugged in.
- Use appropriate tools: Use the correct tools for the job to avoid damaging the fireplace or injuring yourself.
- Wear safety glasses and gloves: Protect your eyes and hands from dust, debris, and electrical shock.
- Don't work with wet hands: Ensure your hands are dry before working on the fireplace.
- If you're not comfortable, call a professional: If you're not comfortable working with electrical appliances, it's best to call a qualified electrician or appliance repair technician.
Troubleshooting Tips
Even after following all the steps carefully, you might encounter some problems. Here are some troubleshooting tips:
- The fireplace still doesn't heat up: Double-check all the wiring connections to ensure they are secure and properly insulated. Verify that the thermostat is set correctly. Use your multimeter to test the new heating element for continuity. If it still doesn't work, the element itself may be faulty.
- The fireplace trips the circuit breaker: This could indicate a short circuit in the wiring. Carefully inspect all the wiring connections for any exposed wires or loose connections. The new heating element may also be drawing too much power; ensure it's the correct wattage for your fireplace.
- The fireplace produces a burning smell: This could be due to dust or debris on the heating element. Let the fireplace run for a few minutes to burn off any residue. If the smell persists, unplug the fireplace and inspect the heating element for any signs of damage.
Conclusion
Replacing the heating element in an electric fireplace can be a straightforward task if you follow these instructions carefully and take the necessary safety precautions. By diagnosing the problem correctly, gathering the right tools and materials, and following the step-by-step guide, you can often save money on repair costs and get your electric fireplace back up and running in no time. However, remember that working with electricity can be dangerous. If you're not comfortable with the process, it's always best to consult a qualified electrician or appliance repair technician.