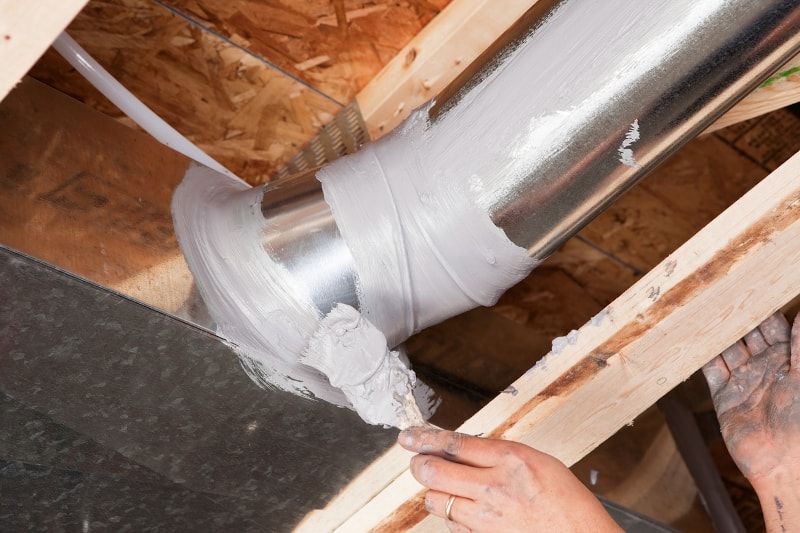
How To Seal Around Furnace Vent Pipe

A properly sealed furnace vent pipe is crucial for the safety and efficiency of your home's heating system. Leaks around the vent can lead to dangerous carbon monoxide (CO) poisoning, energy loss, and potential damage to your property. This guide provides a step-by-step approach to sealing around your furnace vent pipe effectively.
Understanding the Importance of a Sealed Vent Pipe
Your furnace vent pipe, also known as a flue pipe, is responsible for safely expelling combustion gases, including carbon monoxide, from your home. A compromised seal allows these gases to escape into your living spaces. Carbon monoxide is odorless, colorless, and deadly. Regular inspection and prompt sealing of any gaps are essential for maintaining a safe and healthy home environment.
Think of your furnace vent as a chimney. Just as a chimney directs smoke away from a fireplace, the vent pipe directs harmful gases away from your furnace. Cracks or gaps defeat this purpose.
Potential Risks of Leaking Vent Pipes
Ignoring leaks around your furnace vent can have serious consequences:
- Carbon Monoxide Poisoning: This is the most severe risk, leading to illness, brain damage, or even death.
- Reduced Heating Efficiency: Leaks allow cold air to enter, forcing your furnace to work harder and increasing energy bills.
- Water Damage: Condensation from the exhaust gases can leak through gaps, causing damage to walls, ceilings, and surrounding structures.
- Fire Hazard: In rare cases, combustible materials near the vent could ignite if exposed to high temperatures and escaping gases.
Identifying Leakage Points
Before you start sealing, you need to identify where the leaks are originating. Common leakage points include:
- Joints in the Vent Pipe: Where sections of the vent pipe connect, especially if they're held together with screws or tape.
- Where the Vent Pipe Passes Through Walls or Ceilings: The opening around the pipe where it exits the building can be a significant source of leaks.
- At the Furnace Flue Collar: The connection point between the furnace and the vent pipe.
- Damaged or Rusted Sections of the Vent Pipe: Corrosion can create holes and cracks.
Visual Inspection: Look for obvious signs of damage, such as rust, cracks, gaps, or loose connections.
Smoke Test: Carefully hold a lit incense stick or a smoke pencil near potential leak points. If the smoke is drawn towards the pipe, it indicates a leak.
Carbon Monoxide Detector: Ensure you have working CO detectors installed on every level of your home, especially near sleeping areas. While they won't pinpoint the leak, they will alert you to the presence of CO.
Necessary Tools and Materials
Gathering the right tools and materials is crucial for a successful sealing job.
- Safety Glasses: Protect your eyes from debris.
- Gloves: Protect your hands.
- Aluminum Foil Tape (HVAC Tape): Specifically designed for sealing metal ductwork and vent pipes. Do not use duct tape, as it is not heat resistant and will degrade over time.
- High-Temperature Silicone Caulk: For sealing gaps where the vent pipe passes through walls or ceilings. Ensure it's rated for high temperatures.
- Wire Brush or Sandpaper: For cleaning the surfaces before applying tape or caulk.
- Utility Knife: For trimming tape and caulk.
- Ladder: If the vent pipe is located in a hard-to-reach area.
- Caulk Gun: For applying silicone caulk.
- Rags or Paper Towels: For cleaning surfaces.
Step-by-Step Sealing Process
Follow these steps to effectively seal around your furnace vent pipe.
Step 1: Safety First
Turn off the furnace. Before you begin any work, completely shut down your furnace. This prevents the release of exhaust gases while you're working and eliminates the risk of burns.
Ventilate the area. Open windows and doors to ensure adequate ventilation. This is particularly important if you suspect a carbon monoxide leak.
Step 2: Cleaning the Surfaces
Clean the area around the leak. Use a wire brush or sandpaper to remove any rust, dirt, or debris from the surfaces you'll be sealing. This will ensure proper adhesion of the tape or caulk.
Wipe down the surfaces. Use a clean rag or paper towel to remove any remaining dust or particles. A clean surface is essential for a strong and durable seal.
Step 3: Sealing Joints with Aluminum Foil Tape
Apply the tape. Cut a length of aluminum foil tape that is long enough to wrap completely around the joint with some overlap. Press the tape firmly onto the clean surface, working your way around the joint.
Overlap the tape. Ensure that each layer of tape overlaps the previous layer by at least an inch. This creates a stronger and more airtight seal.
Smooth out the tape. Use your fingers or a smooth tool to press the tape firmly onto the surface, eliminating any air bubbles. This helps to create a tight and secure seal.
Multiple Layers: For joints that are heavily compromised, consider applying two or three layers of tape for increased protection.
Step 4: Sealing Gaps Around Walls or Ceilings with High-Temperature Silicone Caulk
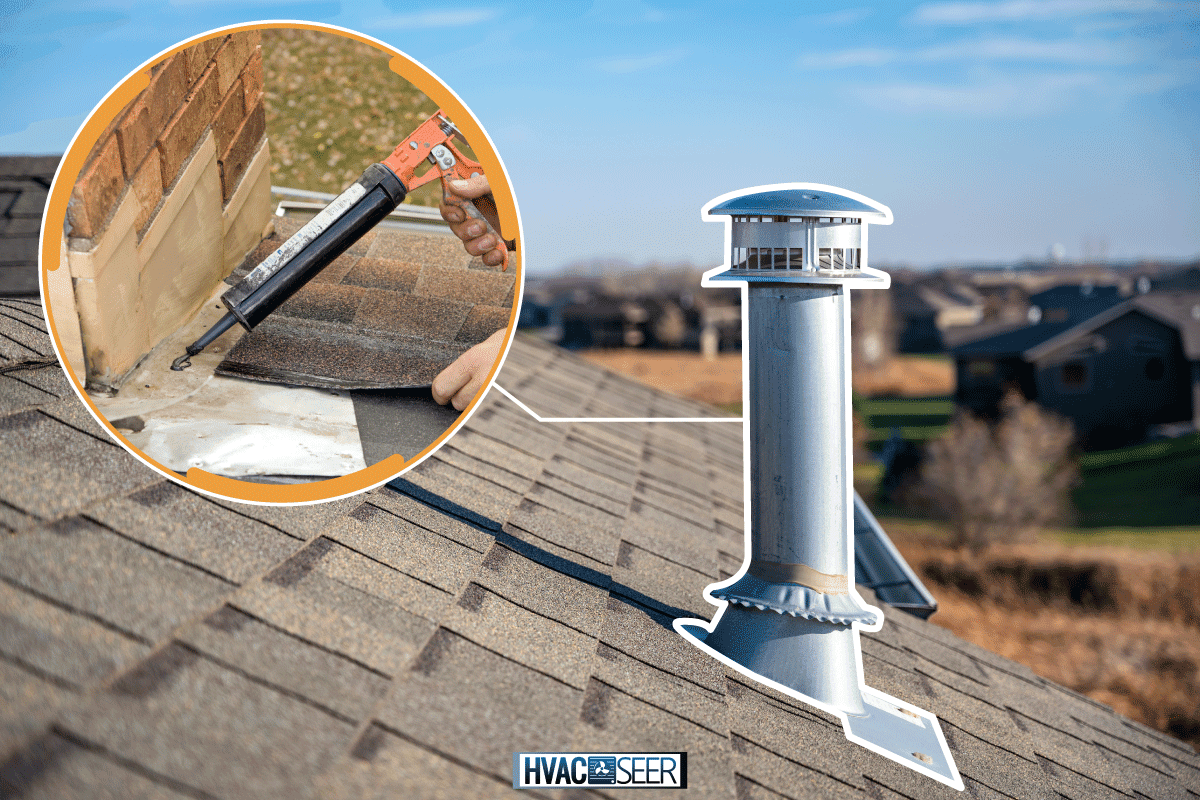
Apply the caulk. Load the high-temperature silicone caulk into a caulk gun. Cut the tip of the caulk tube at a 45-degree angle to create a smooth bead. Apply a bead of caulk around the gap between the vent pipe and the wall or ceiling.
Smooth the caulk. Use your finger or a caulk smoothing tool to smooth out the caulk bead and ensure it fills the gap completely. This creates an airtight and watertight seal.
Clean up excess caulk. Use a damp rag to wipe away any excess caulk from the surrounding surfaces.
Curing Time: Allow the caulk to fully cure according to the manufacturer's instructions. This may take several hours or even a day, depending on the product.
Step 5: Addressing Damaged Vent Pipes
Minor Damage: For small holes or cracks, you might be able to use aluminum foil tape as a temporary fix. However, this is not a long-term solution.
Significant Damage: If the vent pipe is significantly damaged or rusted, it needs to be replaced. Contact a qualified HVAC technician to replace the damaged section of the pipe. Ignoring significant damage can lead to dangerous carbon monoxide leaks and potential fire hazards.
Step 6: Inspection and Testing
Visual Inspection: Once the sealing is complete, carefully inspect all the sealed areas to ensure there are no gaps or cracks.
Smoke Test: Perform another smoke test to confirm that the leaks have been eliminated.
Carbon Monoxide Detector: Double-check that your carbon monoxide detectors are working properly.
Professional Inspection: It's always a good idea to have a qualified HVAC technician inspect your furnace and vent pipe at least once a year to ensure they are in good working order. This can help to identify potential problems before they become serious.
When to Call a Professional
While sealing around a furnace vent pipe can be a DIY project in some cases, there are situations where you should always call a professional HVAC technician:
- Extensive Damage: If the vent pipe is severely damaged, rusted, or corroded, it needs to be replaced. This is a job for a professional.
- Uncertainty: If you're not comfortable working with gas appliances or if you're unsure about any aspect of the sealing process, it's best to call a professional.
- Suspected Carbon Monoxide Leak: If you suspect a carbon monoxide leak, immediately evacuate your home and call 911 or your local fire department. Do not attempt to fix the leak yourself.
- Older Furnaces: Older furnaces may have venting systems that require specialized knowledge and skills. A professional can ensure that the venting system is properly sealed and functioning safely.
- After any DIY repair: It is a good idea to have a professional HVAC technician inspect your work to ensure it was done safely and correctly.
Remember: Your safety is the top priority. When in doubt, call a professional.
Maintenance Tips
Regular maintenance can help to prevent leaks and ensure that your furnace vent pipe remains in good working order.
- Annual Inspections: Have your furnace and vent pipe inspected by a qualified HVAC technician at least once a year.
- Clean the Vent Pipe: Remove any debris or obstructions from the vent pipe.
- Check for Rust and Corrosion: Regularly inspect the vent pipe for signs of rust and corrosion.
- Replace Damaged Sections: Replace any damaged or corroded sections of the vent pipe promptly.
- Ensure Proper Ventilation: Make sure that the area around your furnace is well-ventilated.
By following these guidelines, you can effectively seal around your furnace vent pipe and protect your home and family from the dangers of carbon monoxide poisoning. A properly sealed vent pipe also improves energy efficiency and prevents water damage, saving you money in the long run.