How To Set Pressure Relief Valve
A pressure relief valve (PRV), also sometimes called a safety valve, is a critical safety device in any HVAC system that handles pressurized fluids or gases, such as boilers, chillers, and even some water heaters. These valves are designed to automatically release pressure when it exceeds a predetermined safe level, preventing catastrophic equipment failure and potential harm to people and property. Correctly setting a PRV is therefore essential for safe and efficient operation. This article provides a comprehensive guide to setting a pressure relief valve, suitable for homeowners, HVAC technicians, and facility managers.
Understanding Pressure Relief Valves
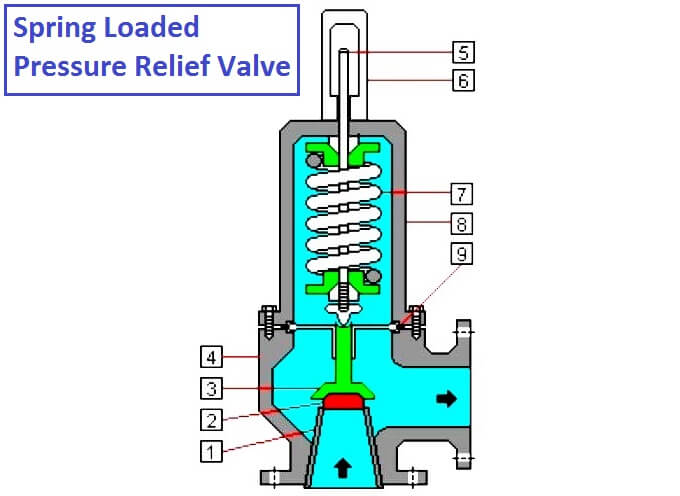
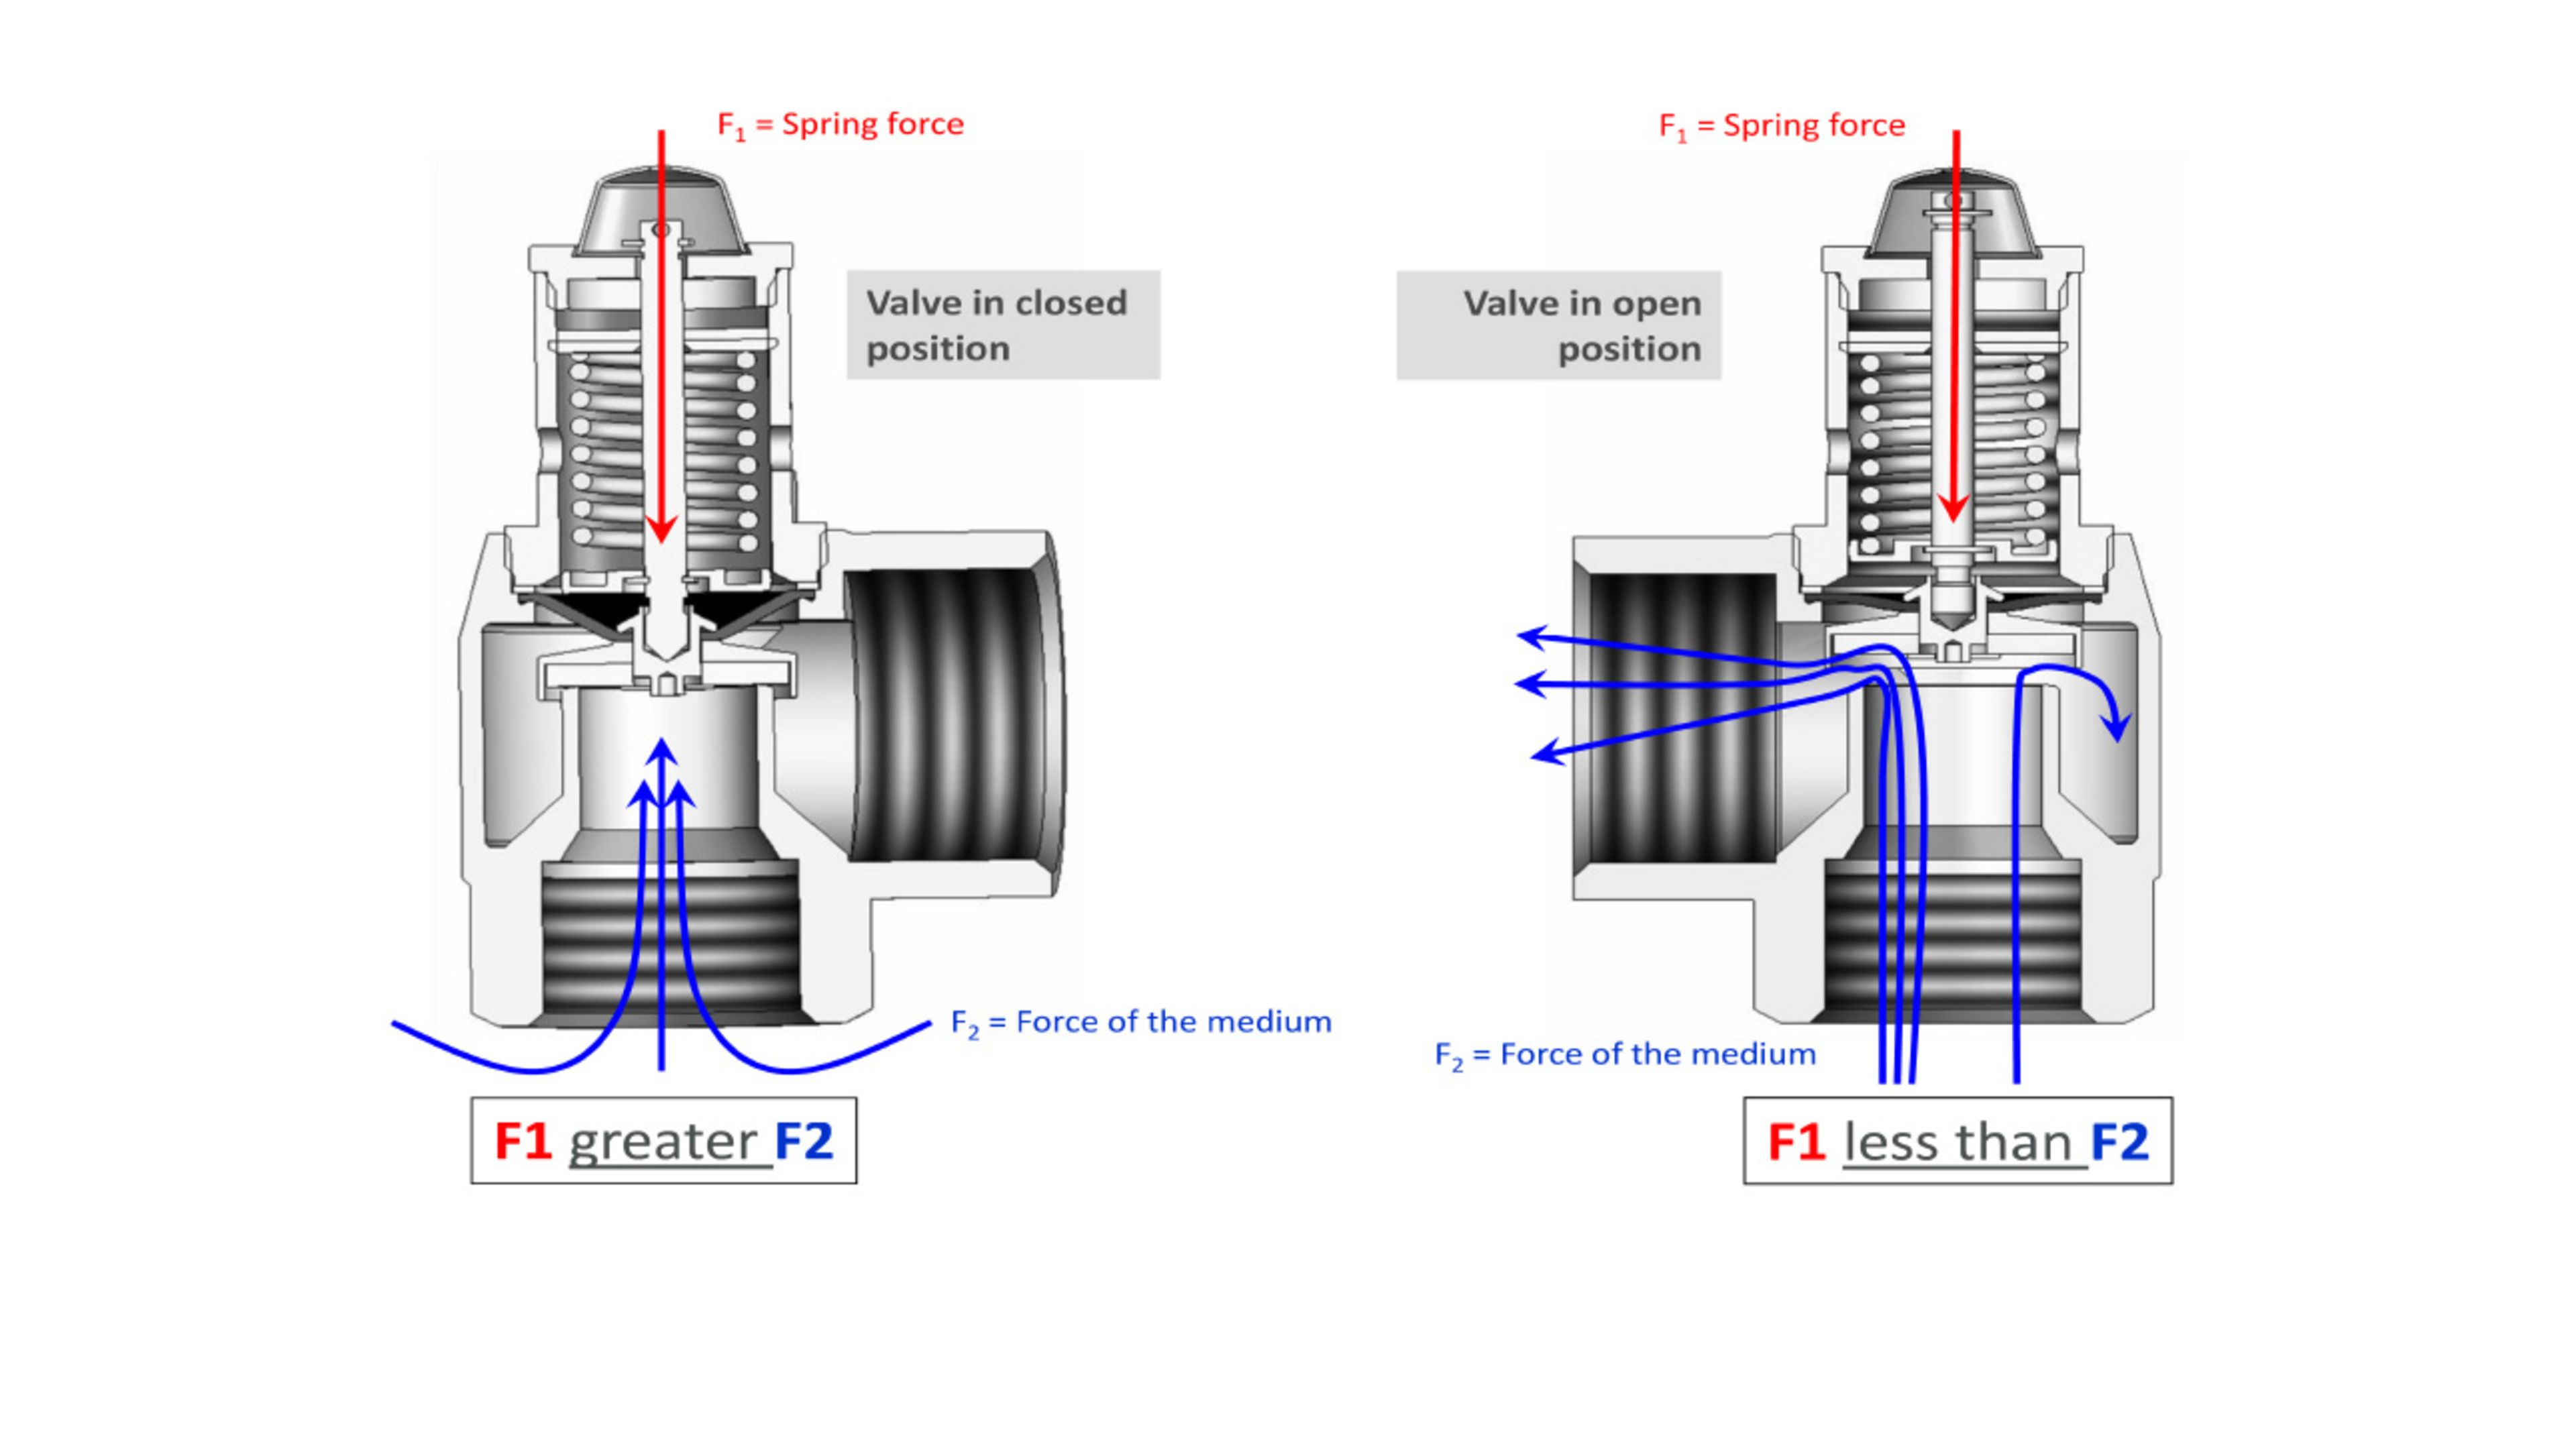
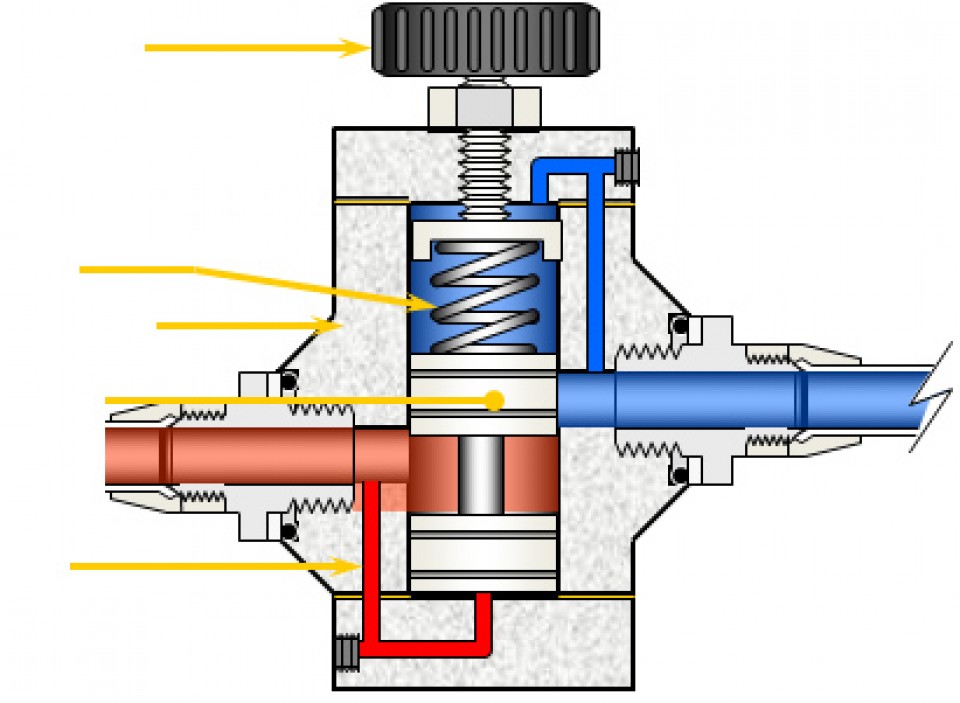
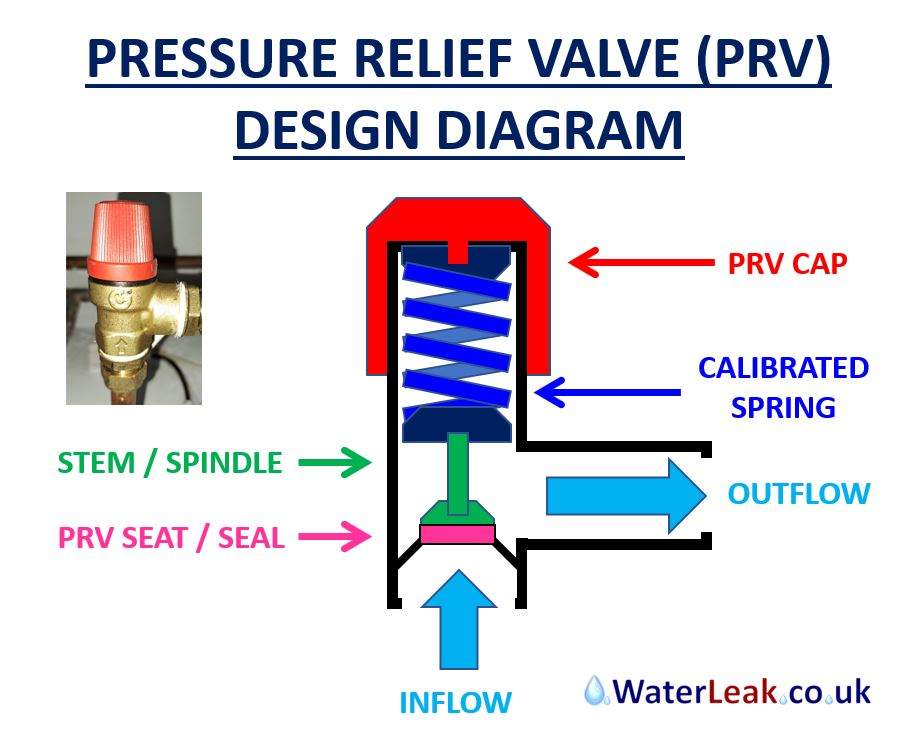
Before diving into the setup process, it's important to understand the basics of PRVs. They are spring-loaded valves calibrated to open at a specific pressure, known as the set pressure. When the system pressure reaches this point, the valve opens, releasing excess pressure until the system returns to a safe operating level. Different types of PRVs exist, including spring-loaded, pilot-operated, and balanced bellows valves, each suited to different applications and pressure ranges. For typical residential and light commercial HVAC systems, spring-loaded valves are the most common.
Key Terms:
- Set Pressure: The pressure at which the PRV is designed to open.
- Relieving Pressure: The pressure at which the PRV is fully open and discharging fluid at its maximum capacity.
- Reseating Pressure: The pressure at which the PRV closes after relieving pressure.
- Backpressure: The pressure on the outlet side of the valve. This can affect the set pressure in some valve designs.
Preparing for PRV Setup
Setting a PRV requires careful planning and preparation. Here's a step-by-step guide:
1. Gather Necessary Tools and Equipment
You will need:
- A calibrated pressure gauge with a range that covers the expected system pressure and the PRV set pressure. Digital gauges are preferred for accuracy.
- Adjustable wrench or socket set (appropriate size for the PRV adjustment nut).
- Appropriate personal protective equipment (PPE), including safety glasses, gloves, and hearing protection.
- The PRV's manufacturer specifications, including the set pressure range and adjustment procedure.
- A container or drainage system to safely collect any discharged fluid or gas.
2. Review System Documentation
Consult the system's design specifications and operating manuals. This information will provide the correct set pressure for the PRV. This pressure is typically determined by the weakest component in the system. Exceeding the maximum allowable working pressure of any component can lead to failure. Look for the MAWP (Maximum Allowable Working Pressure) of all the system components and choose the lowest as the set point for the PRV.
3. Inspect the PRV
Before adjusting the PRV, visually inspect it for any signs of damage, corrosion, or wear. Ensure that the valve is properly installed and that the discharge piping is clear and directed to a safe location. Replace the PRV if any damage is detected. A faulty PRV will not protect the system.
4. Depressurize the System
Safety First! Before making any adjustments, completely depressurize the system. This can be done by shutting down the equipment and allowing the pressure to bleed off. For systems containing hot fluids or gases, allow them to cool down sufficiently to prevent burns or scalds. Use appropriate lockout/tagout procedures to ensure the system remains de-energized during the setup process.
Step-by-Step Procedure for Setting a Spring-Loaded PRV
The following procedure applies specifically to spring-loaded PRVs, which are the most common type. Always consult the manufacturer's instructions for your specific valve model, as variations may exist.
1. Locate the Adjustment Nut
The adjustment nut is typically located on top of the PRV, covered by a protective cap. Remove the cap to expose the nut. Be sure to record the current setting of the nut, as the current setting can be used as a basis for changes.
2. Connect the Pressure Gauge
Connect the calibrated pressure gauge to a test port on the system piping, as close to the PRV as possible. This will provide an accurate reading of the system pressure at the valve.
3. Gradually Increase System Pressure
Slowly and carefully re-pressurize the system, monitoring the pressure gauge. Increase the pressure gradually to avoid overshooting the desired set pressure.
4. Adjust the Set Pressure
As the pressure approaches the desired set point, use an adjustable wrench or socket to turn the adjustment nut.
- To increase the set pressure: Turn the nut clockwise. This increases the spring compression, requiring more pressure to open the valve.
- To decrease the set pressure: Turn the nut counterclockwise. This reduces the spring compression, allowing the valve to open at a lower pressure.
5. Verify the Set Pressure
Once the desired set pressure is reached, allow the system pressure to stabilize. Carefully observe the PRV and the pressure gauge. The valve should open when the pressure reaches the set point. If the valve opens prematurely or fails to open at the set point, repeat the adjustment process.
6. Test the Valve Operation
After setting the pressure, test the valve’s operation by slightly exceeding the set pressure and verifying that it relieves and reseats properly. The valve should close tightly after relieving excess pressure and the system pressure should return to normal operating range.
7. Secure the Adjustment Nut and Replace the Cap
Once you have verified the correct set pressure and valve operation, tighten the lock nut (if applicable) to secure the adjustment. Replace the protective cap to prevent tampering or damage to the adjustment mechanism.
8. Document the Set Pressure
Record the date, time, and set pressure in the system's maintenance log. This information will be valuable for future inspections and maintenance.
Common Issues and Troubleshooting
Here are some common issues encountered when setting up and maintaining PRVs:
- Valve Leaks: A leaking PRV can indicate a worn or damaged valve seat. Try to manually "pop" the valve open by using the test lever on the valve. If the valve continues to leak, the PRV may need to be replaced.
- Valve Fails to Open: This can be caused by a stuck valve, incorrect set pressure, or excessive backpressure. Check the valve for obstructions and ensure that the set pressure is properly adjusted.
- Chattering or Vibration: This can be caused by unstable flow conditions or excessive backpressure. Ensure that the discharge piping is properly sized and supported to minimize vibration.
- Incorrect Set Pressure: Always verify the set pressure using a calibrated pressure gauge. If the set pressure is incorrect, readjust the valve according to the manufacturer's instructions.
Maintenance and Inspection
Regular maintenance and inspection are crucial for ensuring the reliable operation of PRVs. The frequency of inspection depends on the severity of the application, but is recommended to be on at least an annual basis.
- Visual Inspection: Inspect the valve for signs of corrosion, damage, or leakage.
- Manual Testing: Periodically test the valve by manually lifting the lever to ensure that it opens and closes freely. This helps to remove any debris or deposits that may have accumulated on the valve seat.
- Pressure Testing: Conduct periodic pressure tests to verify that the valve opens at the correct set pressure.
- Replacement: Replace PRVs according to the manufacturer's recommended replacement schedule, or sooner if any signs of damage or wear are detected.
Cost Considerations
The cost of a PRV varies depending on its size, type, and material. Small spring-loaded PRVs for residential applications can cost between $50 and $200. Larger, more sophisticated valves for commercial or industrial applications can cost several thousand dollars. The cost of labor for installing and setting a PRV will also vary depending on the complexity of the job.
While PRVs represent an upfront cost, the cost of not having a properly functioning PRV can be significantly higher. Equipment damage, downtime, and potential safety hazards can result in substantial financial losses.
Conclusion
Setting a pressure relief valve correctly is essential for the safe and efficient operation of HVAC systems. By following the steps outlined in this article and adhering to manufacturer's instructions, homeowners, HVAC technicians, and facility managers can ensure that their systems are protected from overpressure. Regular maintenance and inspection are also crucial for maintaining the long-term reliability of PRVs. Remember that working with pressurized systems can be dangerous; if you are not comfortable performing these tasks yourself, consult a qualified HVAC professional.