How To Set Temp On Air Conditioner
One of the most frustrating experiences for any homeowner is when their air conditioner refuses to cooperate. You set the thermostat to a comfortable temperature, but the house remains stubbornly hot, or worse, the AC blasts freezing air even when it's not needed. Before you call in the professionals and potentially face a hefty repair bill, let's walk through a systematic approach to troubleshooting and setting the temperature correctly on your air conditioner.
Understanding the Problem: Is it Really the Temperature Setting?
Before diving into temperature setting adjustments, it's crucial to determine if that's truly the root of the problem. A poorly performing AC can stem from several issues, making it feel like the temperature settings are ineffective.
Common Symptoms of a Malfunctioning AC System:
- Inconsistent Cooling: Some rooms are cold, while others remain warm.
- Weak Airflow: Air barely trickles from the vents.
- Strange Noises: Rattling, hissing, or grinding sounds emanating from the unit.
- Unusual Odors: Musty, burning, or chemical smells.
- Frequent Cycling: The AC turns on and off rapidly.
- High Energy Bills: A sudden, unexpected spike in your electricity consumption.
If you notice these symptoms alongside temperature setting difficulties, it might indicate a more serious underlying issue. Don't worry; we'll still cover some basic checks before recommending a professional.
Step 1: The Obvious – Is the AC Even *On* and Set Correctly? (No Tools Needed)
Let's start with the basics. Sometimes, the simplest solutions are the ones we overlook.
- Power Check: Ensure the AC unit and thermostat are both powered on. Check the circuit breaker for the AC unit; it may have tripped. Reset it if necessary.
- Thermostat Mode: Confirm the thermostat is set to "Cool" or "AC" mode. Avoid "Auto" unless you specifically want the system to switch between heating and cooling.
- Fan Setting: Make sure the fan is set to "Auto" for energy efficiency. In "On" mode, the fan runs continuously, even when the AC isn't actively cooling, potentially wasting energy.
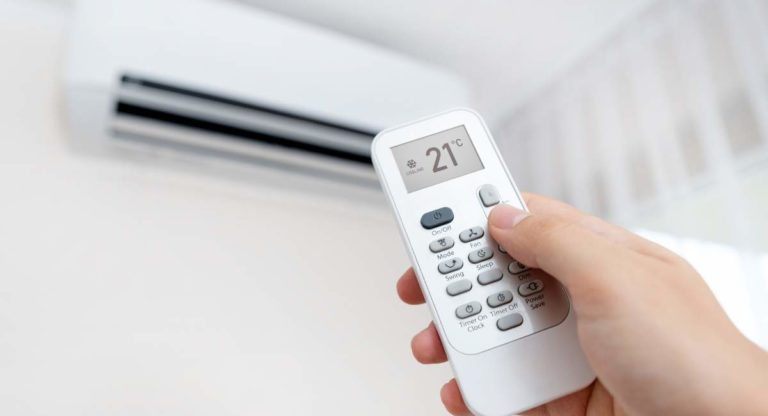
- Temperature Setting: Verify the set temperature on the thermostat is *lower* than the current room temperature. Setting it higher than the room temperature will, obviously, result in no cooling.
- Thermostat Batteries: Digital thermostats rely on batteries. Low or dead batteries can cause inaccurate readings or prevent the thermostat from communicating with the AC unit. Replace them.
- Obstructions: Check around the indoor air vents. Are any curtains, furniture, or other objects blocking airflow? Clear any obstructions.
If everything seems correct so far, move on to the next step.
Step 2: Air Filter Inspection (No Tools Needed, Usually)
A dirty air filter is a prime suspect in many AC problems. It restricts airflow, forcing the system to work harder, reducing cooling efficiency, and potentially leading to freezing. Replacing the filter is a simple and inexpensive task.
- Locate the Air Filter: The air filter is usually located in the indoor air handler unit, either behind a removable grill on the unit itself or in a wall or ceiling vent. Consult your AC unit's manual if you're unsure.
- Inspect the Filter: Remove the filter and hold it up to the light. If you can barely see light through it, it's definitely dirty and needs replacing.
- Replace the Filter: Use a filter of the correct size and MERV (Minimum Efficiency Reporting Value) rating as recommended by the manufacturer. Write the date on the new filter as a reminder for the next change.
Regular filter changes (every 1-3 months, depending on usage and air quality) are essential for maintaining AC performance and prolonging its lifespan.
Step 3: Outdoor Unit Inspection (No Tools Needed, Watch for Safety)
The outdoor condenser unit plays a crucial role in releasing heat from your home. Obstructions around the unit can significantly reduce its efficiency.
Safety First: Before inspecting the outdoor unit, turn off the power to the AC at the outdoor disconnect switch. This is typically a red box located near the unit.
- Clear Debris: Remove any leaves, grass clippings, branches, or other debris that may be blocking the unit's fins. Use a soft brush or garden hose to gently clean the fins. Avoid using a pressure washer, as it can damage the fins.
- Ensure Clearance: Ensure there's at least two feet of clear space around the unit on all sides to allow for proper airflow. Cut back any overgrown shrubs or vines.
- Inspect the Fins: Carefully examine the fins for damage. Straighten any bent fins using a fin comb (available at most hardware stores). This improves airflow and efficiency.
Once you've cleared the unit and straightened the fins, turn the power back on and observe its operation.
Step 4: Thermostat Calibration (May Require a Thermometer)
Sometimes, the thermostat itself might be inaccurate, displaying a temperature that doesn't match the actual room temperature. This can lead to incorrect temperature settings and inefficient cooling.
- Compare Temperatures: Place a reliable thermometer next to the thermostat. After about 15-20 minutes, compare the readings. If there's a significant difference (more than 2-3 degrees), the thermostat might need calibration.
- Calibrate the Thermostat: Some thermostats have a calibration setting that allows you to adjust the displayed temperature. Consult your thermostat's manual for instructions on how to calibrate it. If it doesn't have a calibration setting, consider replacing it.
Step 5: Checking for Ice Buildup (No Tools Needed Initially)
Ice buildup on the evaporator coil (inside the indoor unit) can severely restrict airflow and reduce cooling capacity. It's often caused by low refrigerant levels, a dirty air filter, or a malfunctioning blower motor.
- Listen for Unusual Sounds: A hissing sound might indicate a refrigerant leak.
- Inspect the Evaporator Coil: If you can safely access the evaporator coil (usually behind a panel in the indoor unit), check for ice buildup. Do not attempt to disassemble the unit without proper knowledge and tools.
- Turn off the AC: If you find ice buildup, turn off the AC and allow the ice to melt completely. This may take several hours.
- Address the Underlying Cause: Once the ice has melted, address the underlying cause of the icing, such as replacing the air filter. If the problem persists, it likely indicates a refrigerant leak or a malfunctioning blower motor, requiring professional attention.
When to Call a Professional (Requires Professional Tools and Expertise)
Certain AC problems are best left to the professionals. Attempting to fix them yourself could be dangerous or could further damage the system. Always prioritize safety.
Here are situations that require professional HVAC service:
- Refrigerant Leaks: Handling refrigerants requires specialized equipment and knowledge. Leaking refrigerant is harmful to the environment and can pose health risks.
- Electrical Issues: Working with electrical components can be extremely dangerous. If you suspect an electrical problem, such as a faulty capacitor or wiring issue, contact a qualified electrician or HVAC technician.
- Compressor Problems: The compressor is the heart of the AC system. If it's malfunctioning, it usually requires replacement, which is a complex and expensive repair.
- Blower Motor Problems: A malfunctioning blower motor can restrict airflow and cause the evaporator coil to freeze. Replacing the blower motor requires specialized tools and expertise.
- Ductwork Issues: Leaky or damaged ductwork can significantly reduce cooling efficiency. Inspecting and repairing ductwork often requires specialized equipment and knowledge.
- You are unsure about what you are doing: If at any point you feel uncomfortable or uncertain about any of these steps, it's best to call a professional.
Signs That It's Time To Call a Professional HVAC Technician:
- The AC is making loud, unusual noises.
- The AC is blowing warm air.
- The AC is constantly running.
- You notice a burning smell.
- You suspect a refrigerant leak.
- You are uncomfortable working with electricity.
Preventative Maintenance: Keeping Your AC Running Smoothly
Regular maintenance can help prevent many AC problems and extend the life of your system.
- Schedule Annual Maintenance: Have a qualified HVAC technician inspect and tune-up your AC system at least once a year. This includes cleaning the coils, checking refrigerant levels, and inspecting electrical components.
- Change Air Filters Regularly: As mentioned earlier, replace the air filter every 1-3 months.
- Keep the Outdoor Unit Clear: Regularly clear debris from around the outdoor unit.
- Monitor Energy Bills: Pay attention to your energy bills. A sudden spike in consumption could indicate a problem with your AC system.
By following these troubleshooting steps and performing regular maintenance, you can often resolve minor AC issues yourself and ensure that your system is running efficiently. However, remember that some problems require professional attention. When in doubt, don't hesitate to call a qualified HVAC technician.
With a little knowledge and effort, you can keep your home cool and comfortable all summer long!