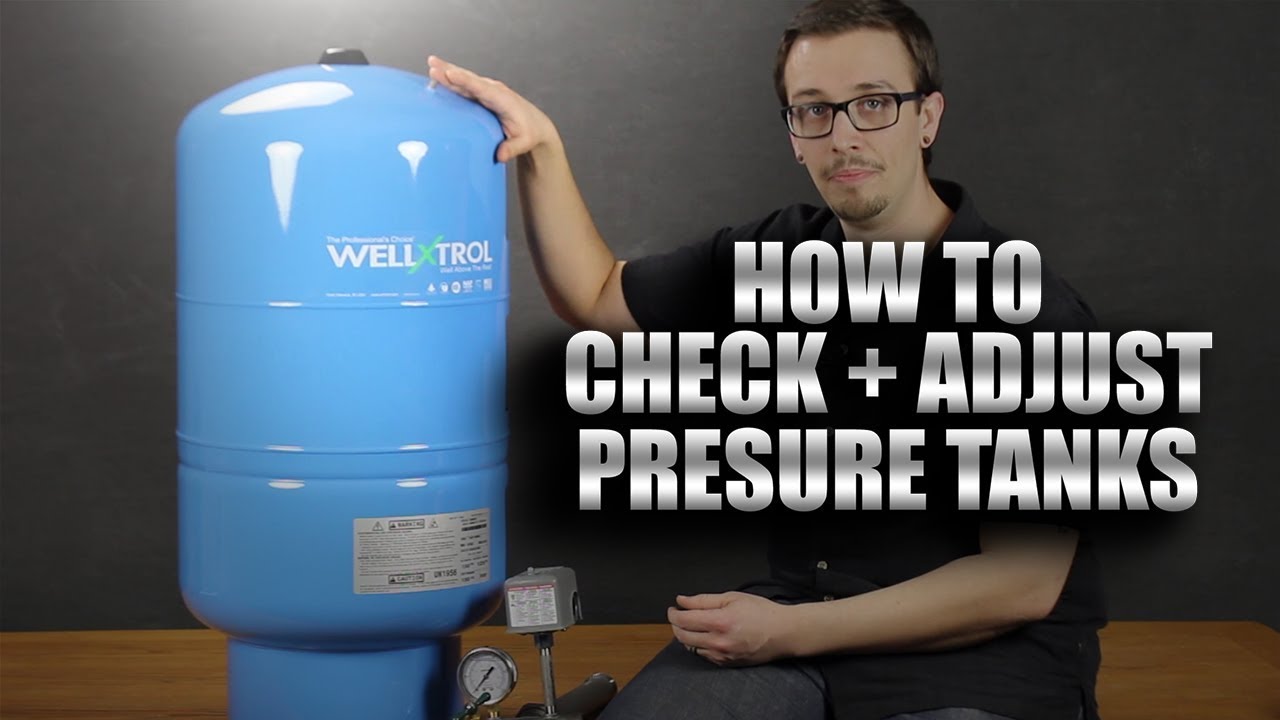
How To Set The Pressure On A Pressure Tank
Frequently Asked Questions: Setting Your Pressure Tank Pressure
Understanding and maintaining your pressure tank is crucial for a healthy and efficient water system. This FAQ addresses common questions homeowners and facility managers have about setting the pressure on a pressure tank.
Question 1: What exactly is a pressure tank, and why is setting the correct pressure so important?
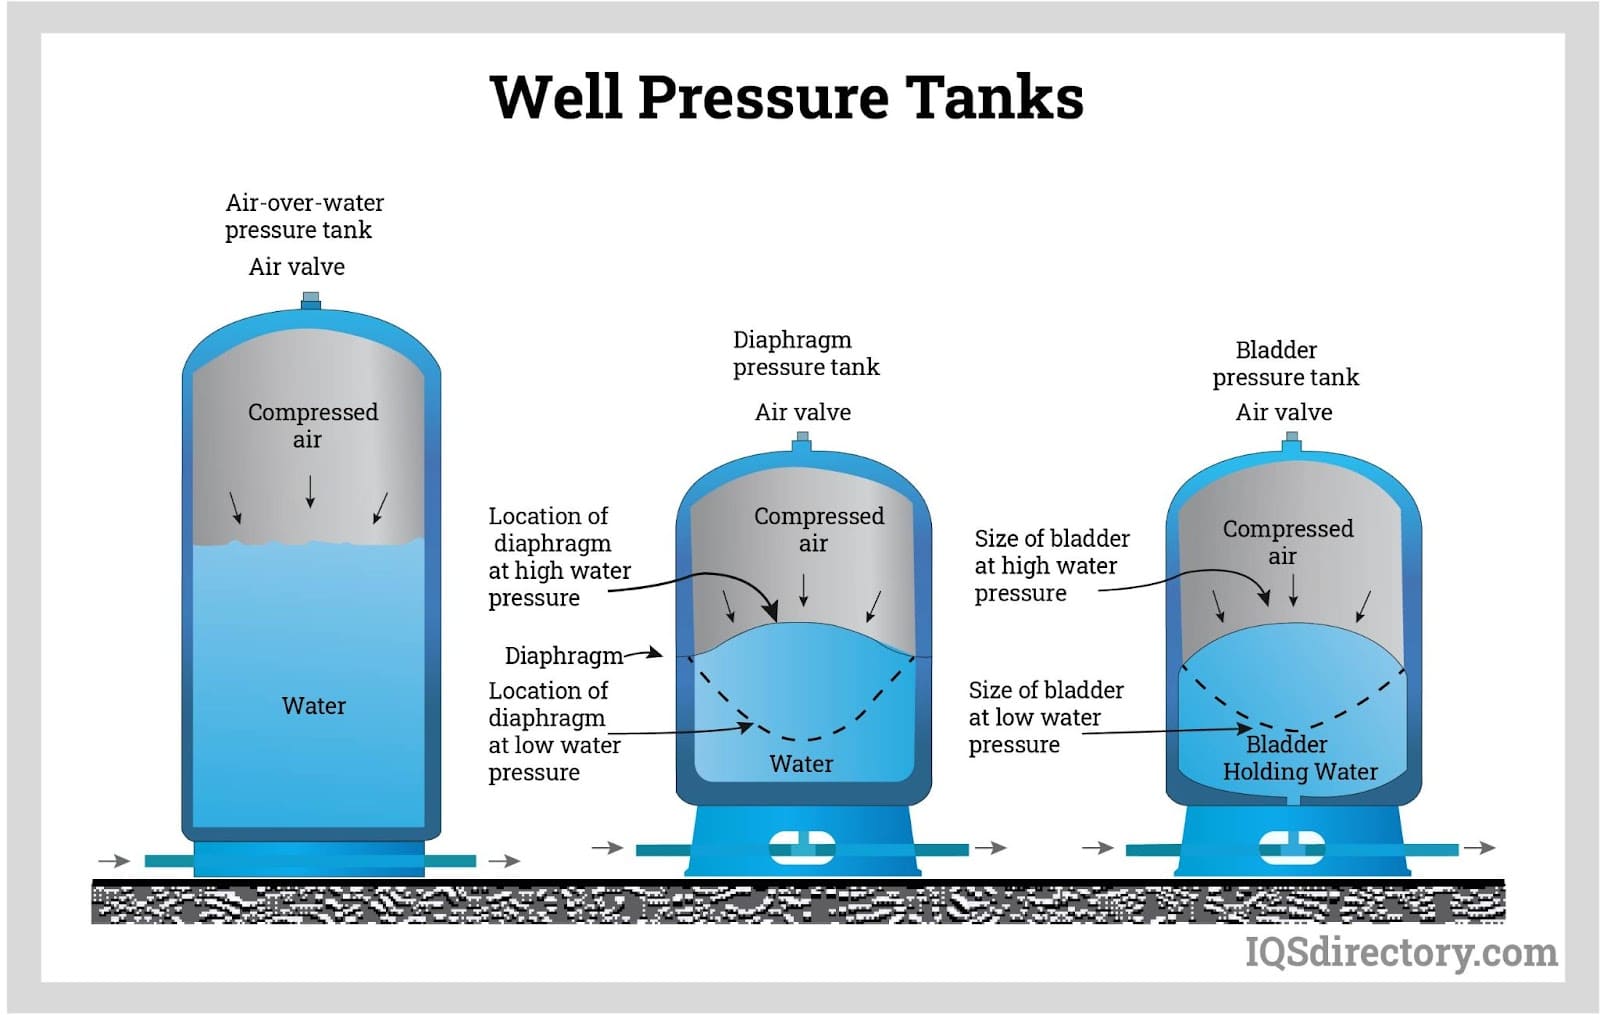
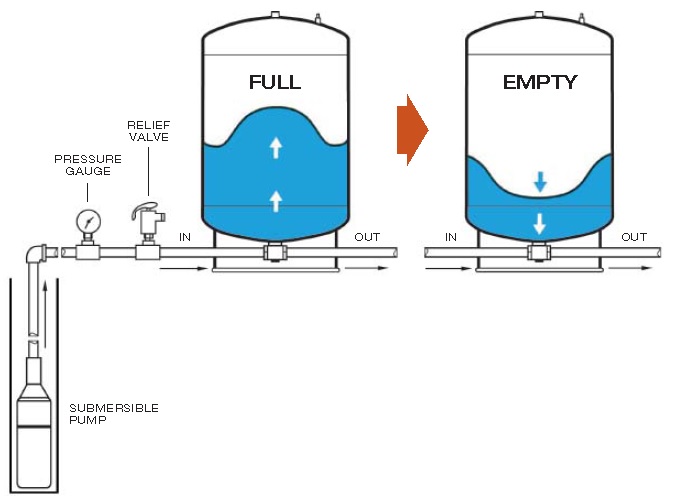
A pressure tank is a vital component of most well water systems and some municipal water systems. It's essentially a water storage container with a compressed air cushion inside. This air cushion provides pressure, allowing your pump to cycle on and off less frequently and deliver water at a consistent pressure throughout your home or building.
Setting the correct pressure is important for several reasons:
- Extends Pump Life: Proper pressure minimizes pump cycling, reducing wear and tear and prolonging its lifespan. Excessive cycling can quickly burn out a well pump.
- Ensures Consistent Water Pressure: A properly charged tank delivers a more stable water pressure at your fixtures, preventing annoying fluctuations when multiple appliances are running.
- Prevents Water Hammer: Incorrect pressure can contribute to water hammer, the banging noise in pipes caused by sudden changes in water flow.
- Optimizes Water System Efficiency: When the pressure is appropriately set, the water system functions optimally, reducing energy consumption and potentially lowering your utility bills.
Question 2: What pressure should my pressure tank be set to?
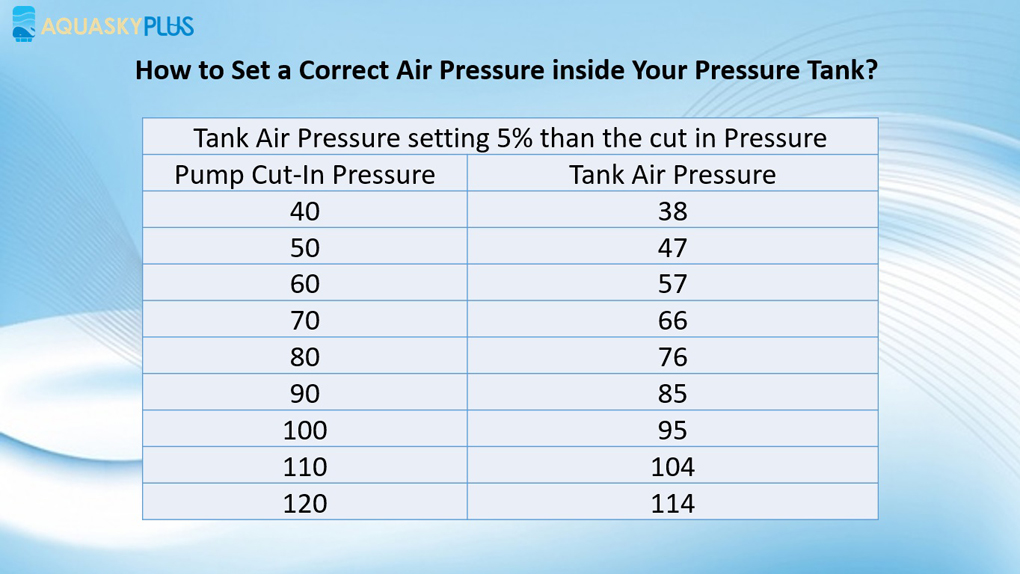
The general rule of thumb is to set the air pressure in your pressure tank to 2 PSI below the pump's cut-in pressure. The cut-in pressure is the pressure at which your well pump turns on to refill the tank. This setting ensures that the pump cycles on and off effectively.
Here's how to determine the correct pressure:
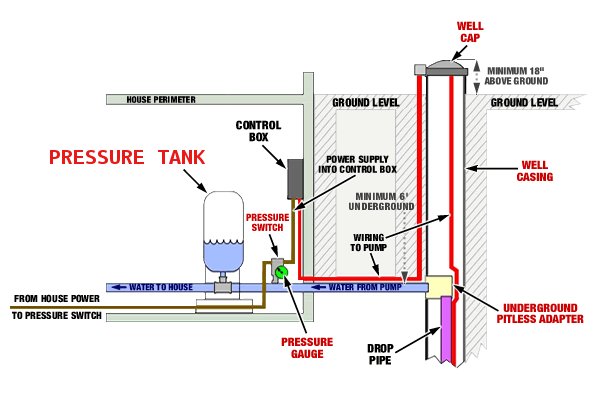
- Check your Pressure Switch: The pressure switch, usually located near the pressure tank, will have the cut-in and cut-out pressures listed on it. For example, you might see "30/50" or "40/60". This means the pump turns on at 30 or 40 PSI (cut-in) and turns off at 50 or 60 PSI (cut-out).
- Calculate the Tank Pressure: If your pressure switch is set to 30/50, you should set the tank pressure to 28 PSI (30 - 2). If it's 40/60, set the tank pressure to 38 PSI (40 - 2).
- Consult the Manufacturer's Specifications: Refer to the pressure tank's documentation for specific recommendations. Some tanks may have unique pressure requirements.
Important Note: Never exceed the maximum pressure rating of your pressure tank, which is usually printed on the tank itself. Over-pressurizing can cause the tank to rupture, leading to flooding and damage.
Question 3: How do I actually set the pressure on my pressure tank? What tools will I need?
Setting the pressure on your pressure tank is a relatively straightforward process, but it's crucial to follow the steps carefully. Here's a step-by-step guide:
- Gather Your Tools: You'll need:
- A tire pressure gauge (the kind used for car tires).
- An air compressor (a portable compressor will work fine).
- A screwdriver (to remove the pressure gauge cover).
- Turn Off the Pump: Locate the circuit breaker that controls your well pump and turn it off. This prevents the pump from running while you're adjusting the tank pressure.
- Drain the Tank Completely: Open a faucet in your house – preferably one that's located lower than the pressure tank. Let the water run until the tank is completely empty and the water stops flowing. This ensures an accurate pressure reading.
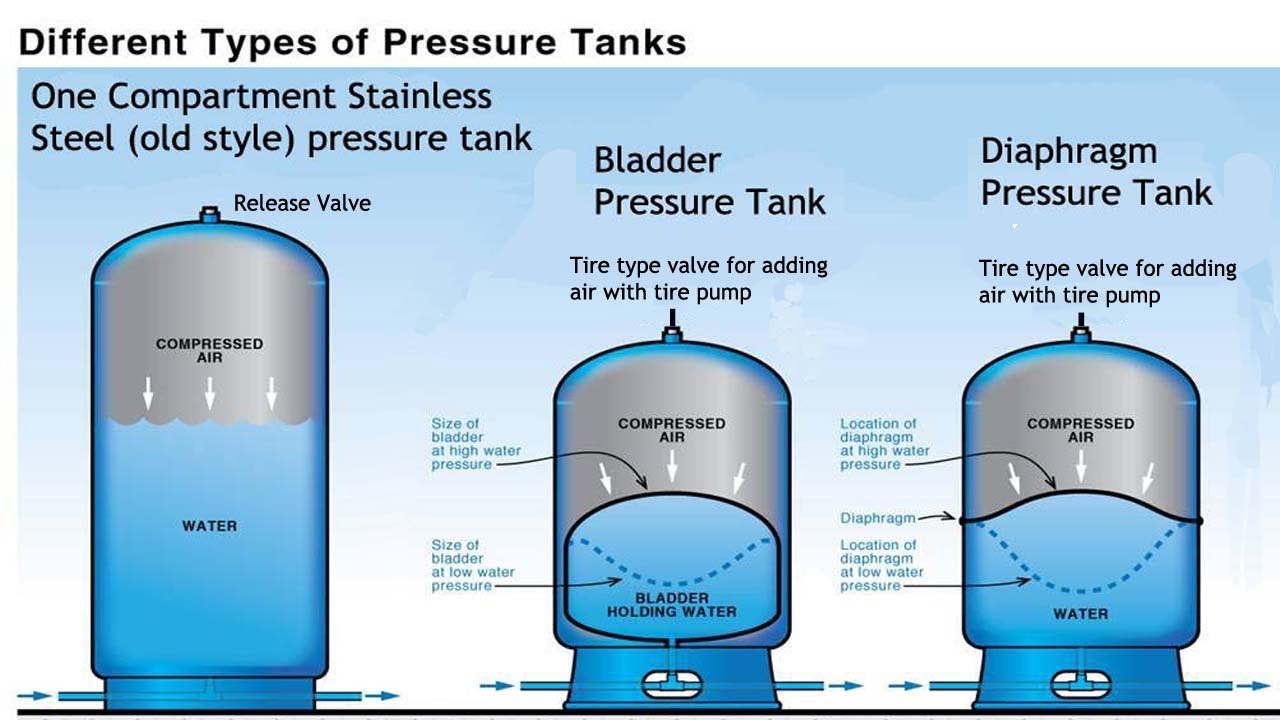
- Locate the Schrader Valve: This valve, similar to the valve on a car tire, is usually located on the top or side of the pressure tank, often under a plastic cap.
- Check the Existing Pressure: Remove the cap and use your tire pressure gauge to check the current air pressure in the tank.
- Adjust the Pressure:
- If the pressure is too low: Connect your air compressor to the Schrader valve and add air until you reach the desired pressure (2 PSI below the pump's cut-in pressure). Check the pressure with your gauge frequently as you add air.
- If the pressure is too high: Depress the center pin of the Schrader valve (like deflating a tire) to release air until you reach the desired pressure. Again, check the pressure frequently.
- Close the Faucet: Once the pressure is correctly set, close the faucet you opened to drain the tank.
- Turn On the Pump: Turn the circuit breaker back on to power the well pump.
- Monitor the System: Observe the pump as it refills the tank. Check for any leaks around the tank, fittings, and pressure switch.
- Verify Pump Cycling: Listen to the pump as it operates. It should turn on at the cut-in pressure and turn off at the cut-out pressure. If the pump cycles on and off too frequently (short cycling), there may be another issue, such as a waterlogged tank or a malfunctioning pressure switch.
Question 4: What if I don't know my pump's cut-in pressure?
If you can't find the pressure switch or the markings are illegible, here are a few ways to determine the cut-in pressure:
- Check the Well Log: If you have access to the well log (often provided when the well was drilled), it may contain information about the pump and pressure settings.
- Observe the Pressure Gauge While the Pump is Running: Install a pressure gauge near the pressure tank if one isn't already present. Turn on a faucet and let the water run until the pump turns on. Note the pressure reading on the gauge at the exact moment the pump starts. This is your cut-in pressure.
- Contact a Qualified Well Technician: If you're unsure or uncomfortable determining the cut-in pressure yourself, it's best to call a professional well technician. They can accurately assess your system and set the pressure correctly.
- Typical Default Setting Many residential systems are set to a 30/50 or 40/60 switch. If you absolutely cannot determine the specific settings, start with the assumption of a 30/50 switch and set the tank to 28PSI. Observe the system and adjust accordingly, keeping in mind not to exceed the tank's maximum pressure rating.
Question 5: How often should I check and adjust the pressure on my pressure tank?
It's a good practice to check the pressure on your pressure tank at least every six months. Seasonal changes in temperature can affect the air pressure in the tank. Regular checks allow you to identify and address any issues early on, preventing more significant problems down the road.
You should also check the pressure if you notice any of the following:
- Fluctuating Water Pressure: If your water pressure is inconsistent or drops noticeably when multiple fixtures are in use.
- Short Cycling: If your pump turns on and off rapidly and frequently.
- Water Hammer: If you hear banging noises in your pipes when you turn faucets on or off.
- A Change in Water Quality: Although less common, changes in water taste or odor can sometimes be related to pressure tank issues.
Question 6: What are the signs of a failing or waterlogged pressure tank?
A waterlogged pressure tank is one where the air cushion has been lost, and the tank is filled mostly with water. This can cause several problems:
- Short Cycling: As mentioned earlier, this is a primary symptom. The pump turns on and off rapidly because there's no air cushion to maintain pressure.
- Low Water Pressure: The water pressure may be consistently low, or it may fluctuate wildly.
- Pump Running Constantly: In severe cases, the pump may run almost continuously, trying to maintain pressure.
- Rusty Water: A failing tank can rust internally, leading to rusty or discolored water.
- Water Leaks: You may notice water leaking from the tank, especially around the fittings or seams.
- Heavy Condensation: Excessive condensation on the tank's exterior can indicate a problem with the internal air bladder.
To check if your tank is waterlogged, try tapping on the side of the tank. A tank with a proper air cushion will sound hollow at the top and full at the bottom. A waterlogged tank will sound full all the way up.
Question 7: When should I consider replacing my pressure tank?
While some pressure tank issues can be resolved by simply adjusting the pressure, other problems may necessitate replacement. Here are some situations where replacement is the best option:
- Rusted Tank: If the tank is heavily rusted, especially if there are signs of leaks, it's time to replace it. Rust weakens the tank and can contaminate your water.
- Waterlogged Tank That Won't Hold Air: If you've tried adding air to the tank, but it quickly loses pressure, the bladder inside the tank is likely damaged. Replacing the tank is usually more cost-effective than trying to repair the bladder (which is often not possible).
- Tank Exceeds Its Lifespan: Pressure tanks typically last 10-15 years, depending on the water quality and usage. If your tank is nearing or exceeding this age, consider replacing it preventatively to avoid unexpected failures.
- Physical Damage: If the tank has been physically damaged, such as dents or cracks, it should be replaced immediately.
- Repeated Problems: If you're constantly having to adjust the pressure or deal with other issues, it may be a sign that the tank is nearing the end of its life and should be replaced.
Replacing a pressure tank is a more complex task than simply adjusting the pressure. It's often best to hire a qualified plumber or well technician to ensure the job is done correctly and safely.
By understanding how to properly set and maintain your pressure tank, you can ensure a reliable and efficient water system for your home or business. Remember to always prioritize safety and consult with a professional if you have any doubts or concerns.