How To Support Roof Purlins
Let's talk about something crucial for the structural integrity of your home: roof purlins. These horizontal beams play a vital role in supporting the roof rafters, distributing the load and preventing sag. If you suspect your purlins are failing or need additional support, addressing the issue promptly is essential. This guide will walk you through assessing the situation and understanding when DIY support is appropriate, and when it's time to call in the professionals.
Understanding Roof Purlins and Their Importance
Before we dive into troubleshooting, let's clarify what roof purlins are and why they matter.
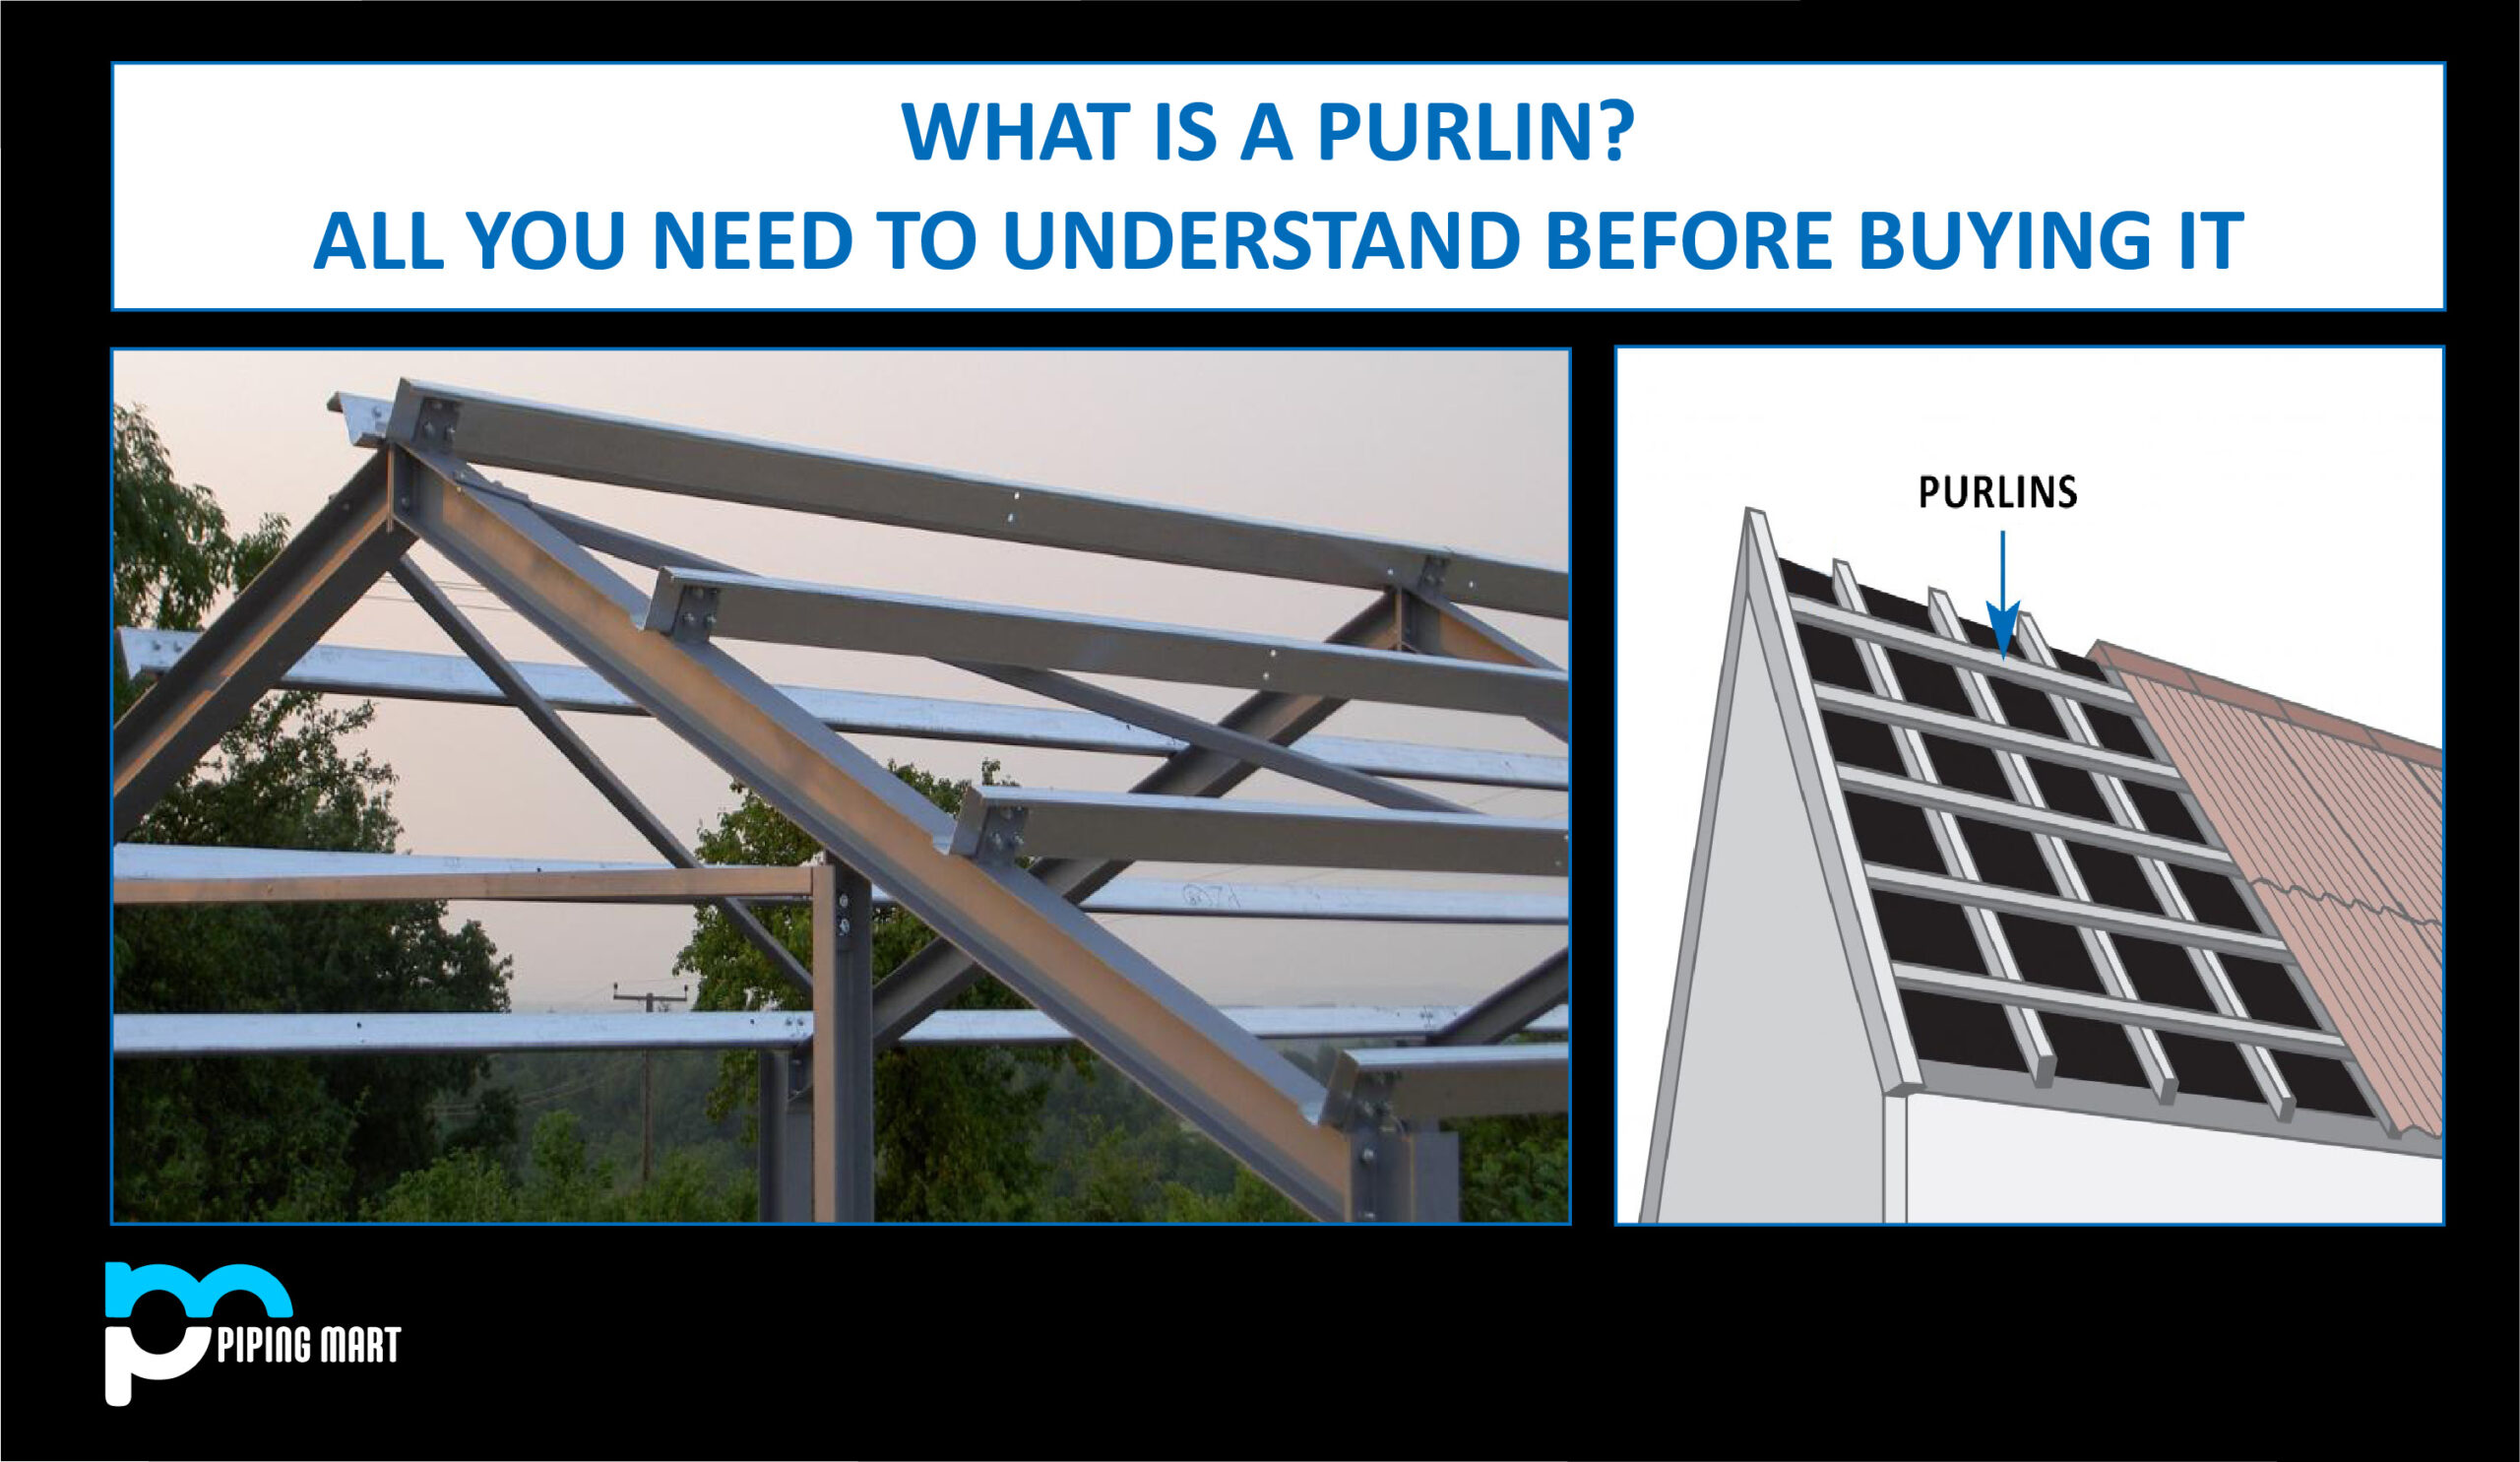
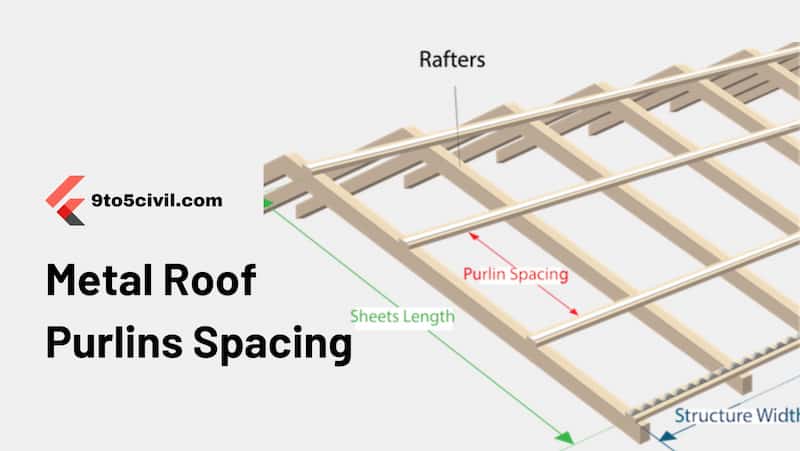
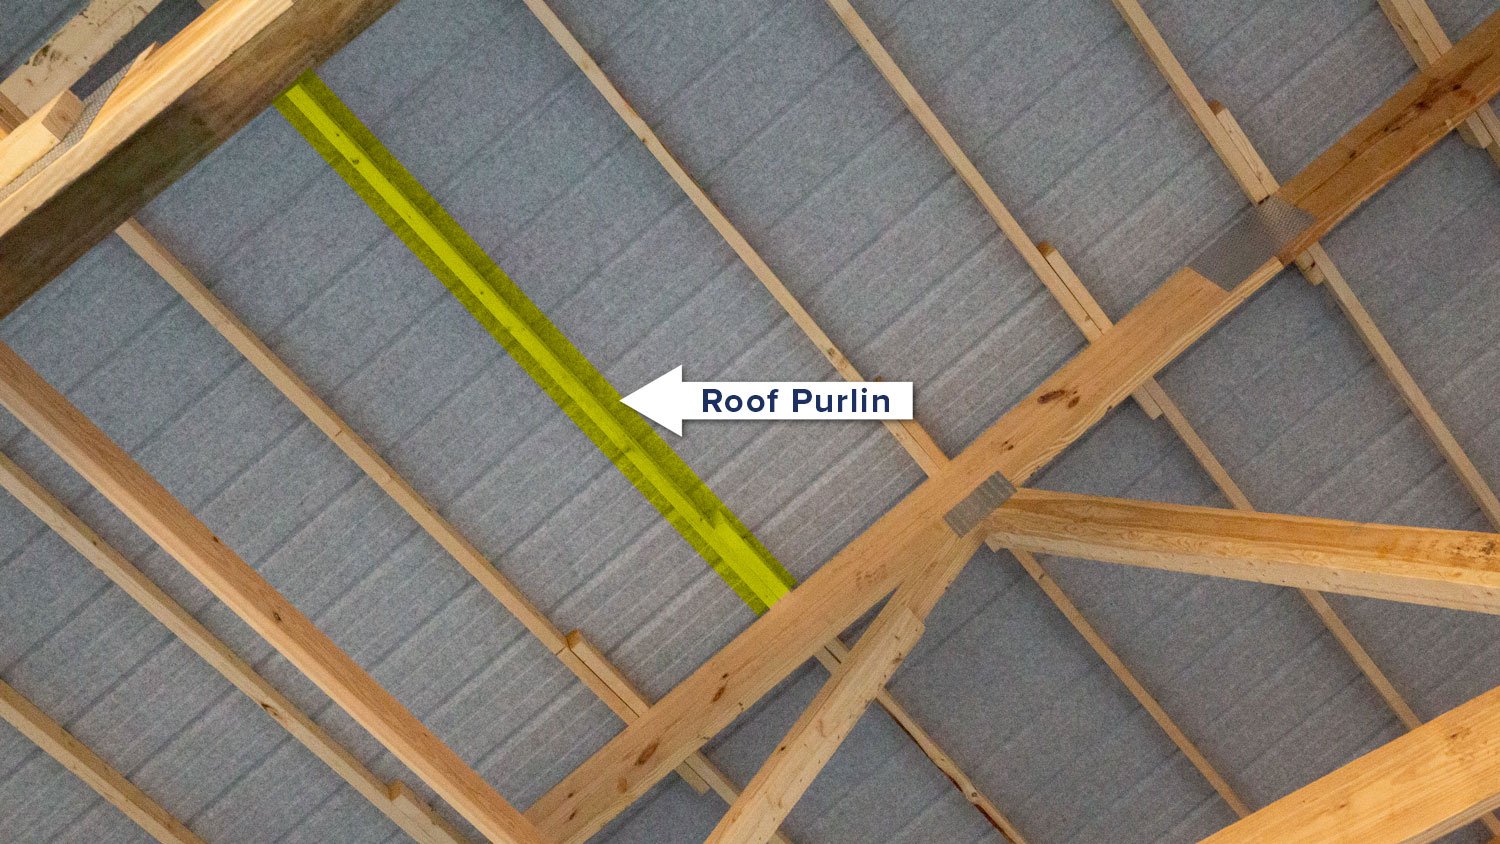
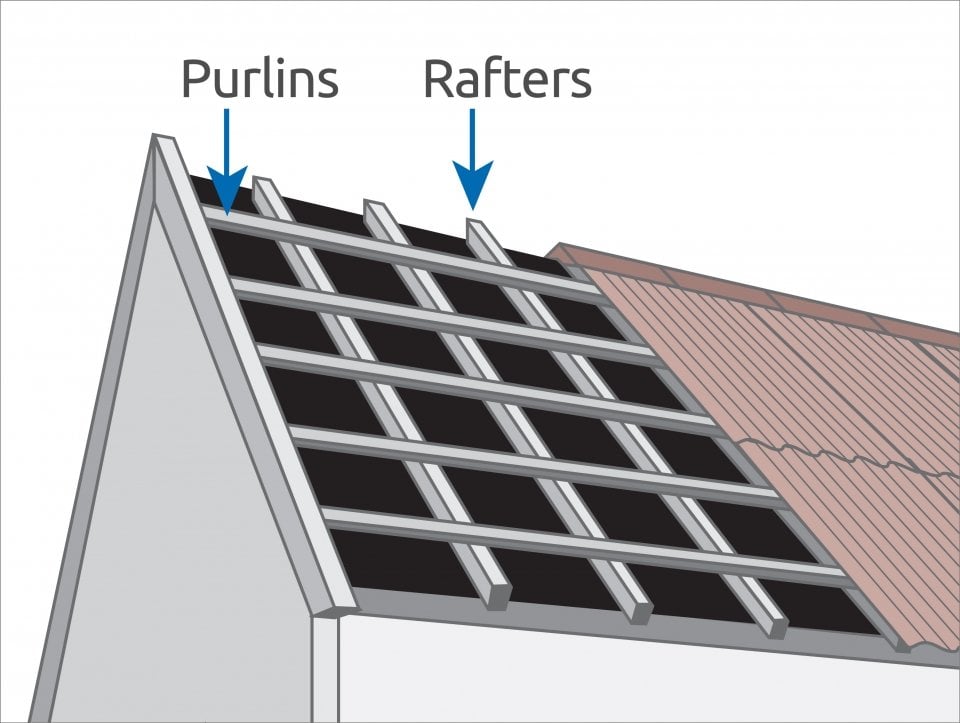
- Definition: Purlins are horizontal structural members that run between roof rafters or trusses. They provide intermediate support for the roof sheathing (the plywood or OSB covering).
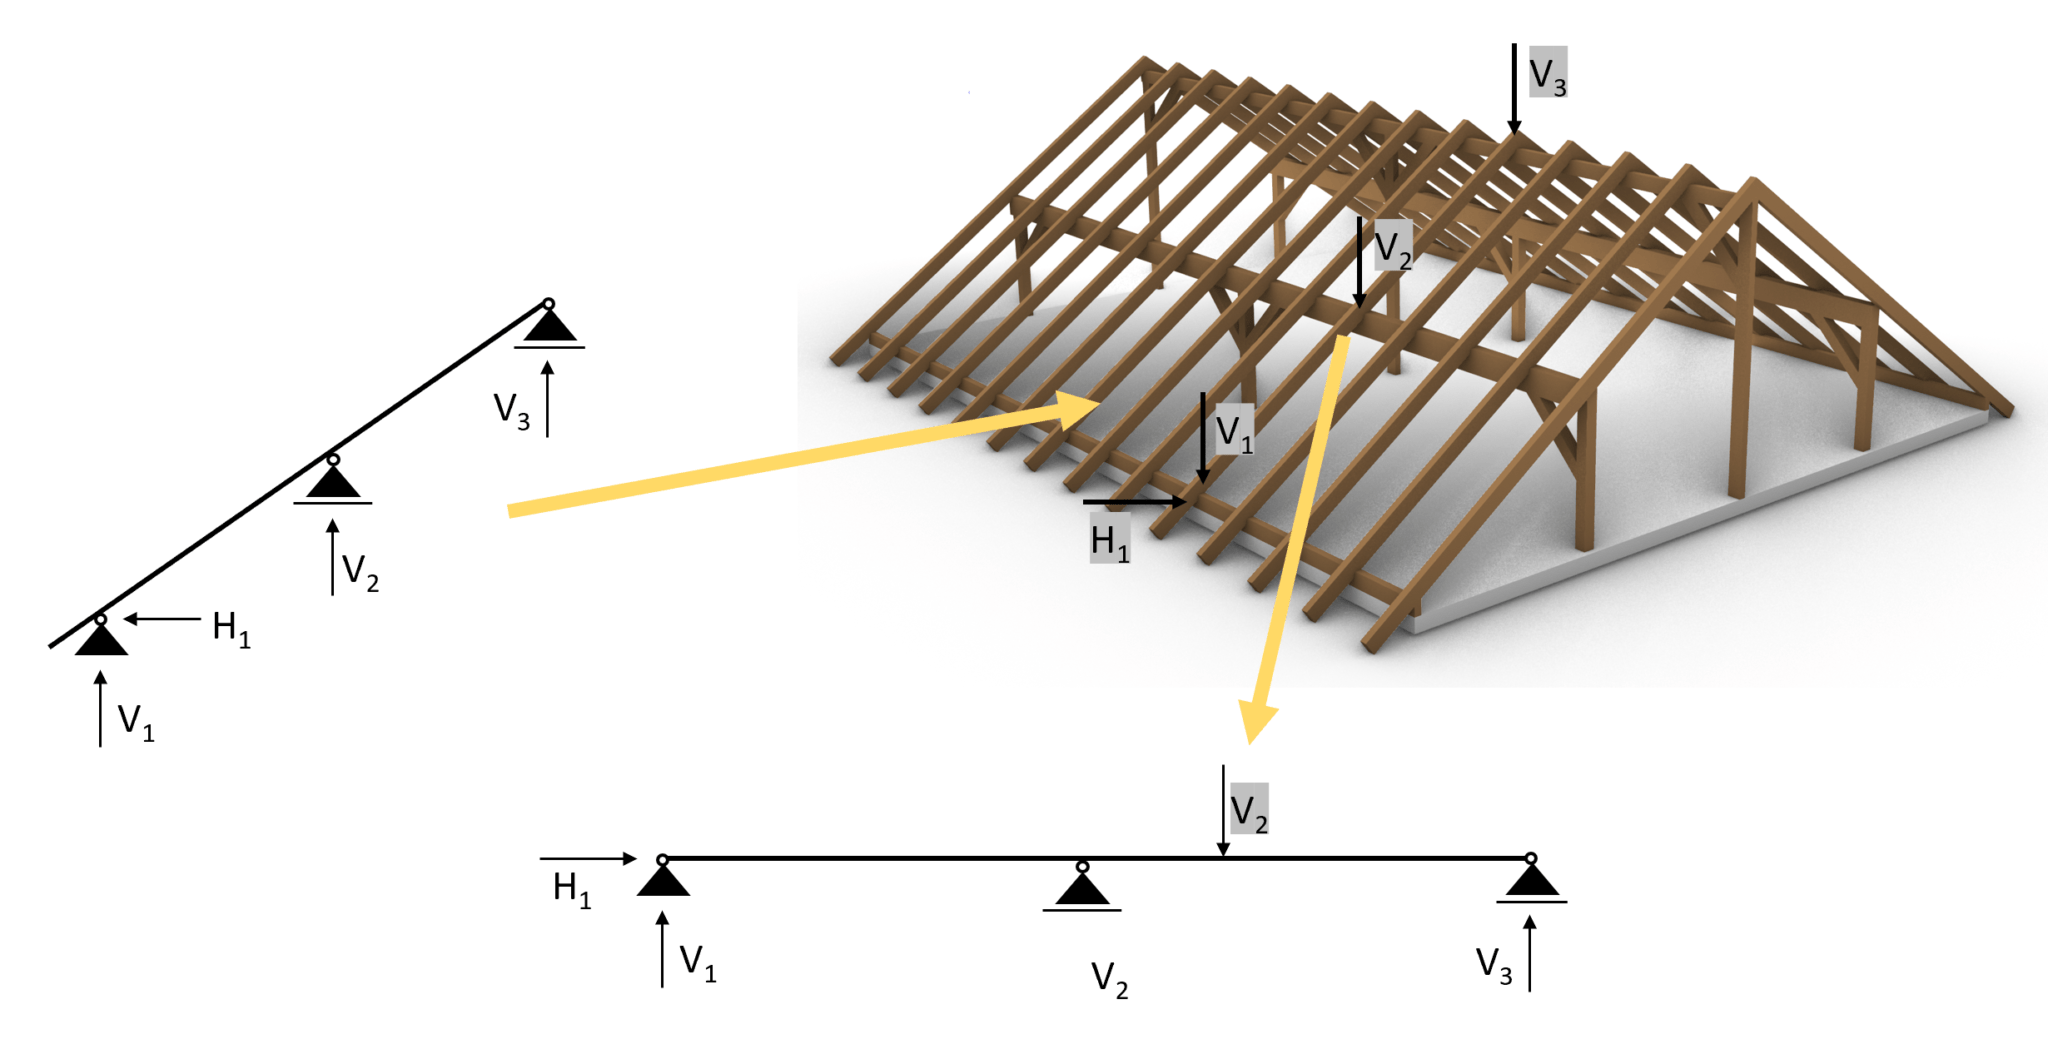
- Function: They transfer the weight of the roof covering (shingles, tiles, etc.) and snow load to the rafters or trusses, preventing them from buckling or sagging.
- Why They Matter: Weak or failing purlins can lead to roof sag, leaks, and even structural collapse in extreme cases. Addressing problems early can save you significant repair costs down the line.
Identifying Potential Purlin Problems
How do you know if your purlins might need attention? Here are some telltale signs:
- Visible Sagging: This is the most obvious sign. Look for dips or bows in the roofline, both from the exterior and the interior (if you have access to the attic).
- Cracks or Splits: Inspect the purlins themselves for any cracks, splits, or rot. These weaken the wood and compromise its ability to support the load.
- Water Stains: Water stains on or around the purlins can indicate a leak in the roof above, which can lead to rot and structural damage.
- Bowing Rafters: If the rafters are bowing inward or outward between the purlins, it could indicate that the purlins aren't providing adequate support.
- Unusual Noises: Creaking or groaning sounds, especially during strong winds or heavy snow, could signal stress on the roof structure.
Safety First!
Working on or around a roof can be dangerous. Prioritize safety above all else!
- Never work alone. Have someone nearby who can assist you and call for help if needed.
- Use a sturdy ladder. Ensure the ladder is properly positioned and secured.
- Wear appropriate footwear. Non-slip shoes or boots are essential.
- Be aware of weather conditions. Avoid working on the roof during rain, snow, or high winds.
- If you're not comfortable working at heights, do not attempt these repairs. Call a professional.
Troubleshooting and DIY Support Options
Now, let's explore some common situations and how you might address them. Remember, these are general guidelines. Always consult with a qualified structural engineer or contractor if you have any doubts about the safety or stability of your roof structure.
Scenario 1: Sagging Purlin Between Rafters
If you notice a purlin sagging between the rafters, it may simply need additional support. This is often the case in older homes or homes with heavy roofing materials.
- Assessment: Carefully inspect the sagging purlin for any signs of rot or damage. If it's significantly deteriorated, replacement is necessary (see Scenario 3).
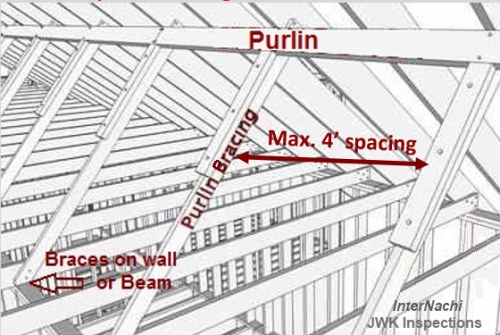
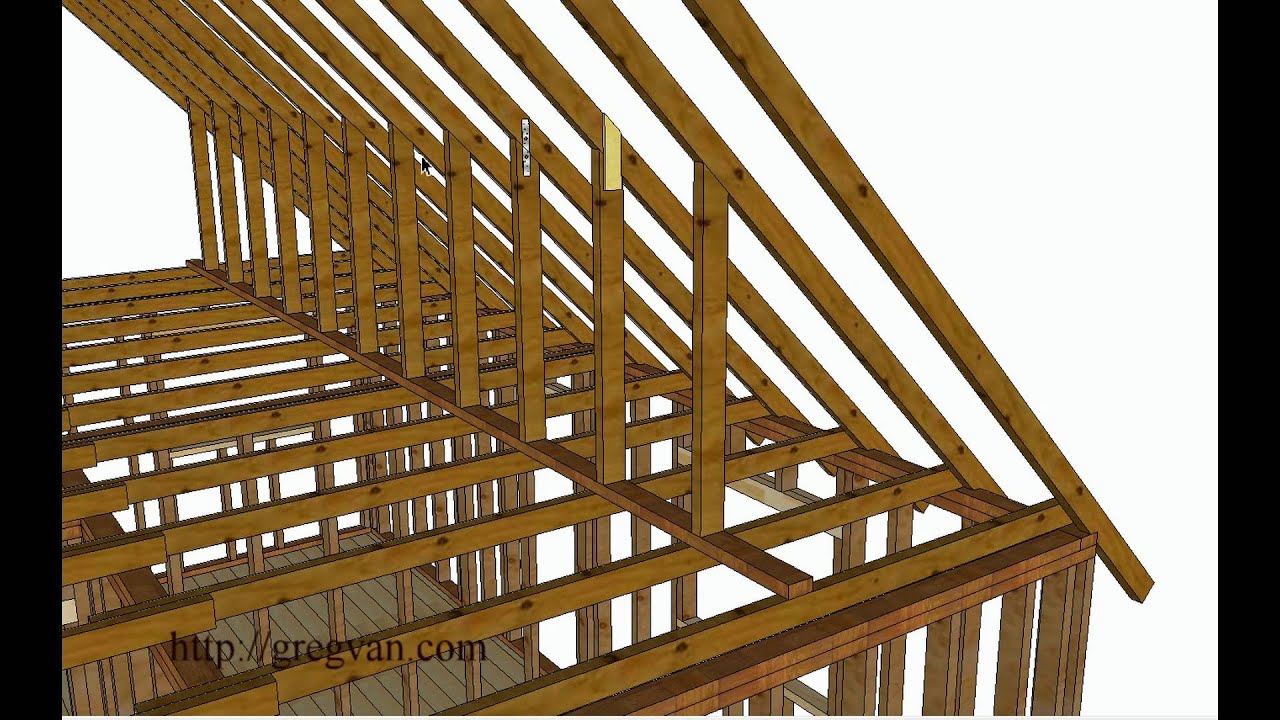
- Supporting Post: The most common solution is to install a vertical supporting post directly beneath the sagging purlin. This post will transfer the load to a solid bearing point below, such as a load-bearing wall or a foundation pier.
- Choosing the Post Material: Use pressure-treated lumber for the supporting post to prevent rot and insect damage. The size of the post will depend on the span and load. Consult with a local building supply store or contractor for guidance. Typically, a 4x4 or 6x6 post is sufficient for most residential applications.
- Installation:
- Locate a Solid Bearing Point: Ensure the post rests on a solid foundation. If necessary, add a concrete pier or footing.
- Cut the Post to Length: Measure the distance between the purlin and the bearing point. Cut the post slightly longer to allow for shimming.
- Install the Post: Position the post vertically beneath the sagging purlin. Use shims (thin pieces of wood) to ensure a snug fit and even distribution of weight.
- Secure the Post: Secure the post to the purlin and the bearing point using metal fasteners, such as angle brackets or screws.
- Monitoring: After installation, monitor the purlin for any further sagging. It may take some time for the purlin to return to its original position.
Scenario 2: Adding a Sister Purlin for Reinforcement
If the existing purlin is structurally sound but you want to increase its load-bearing capacity, you can add a "sister" purlin alongside it.
- Assessment: Ensure the existing purlin is free of rot, cracks, or other significant damage. If it's heavily deteriorated, replacement is a better option.
- Choosing the Sister Purlin: Use lumber of the same size and grade as the existing purlin.
- Preparation: Clean the surfaces of both the existing purlin and the sister purlin.
- Attachment:
- Apply Construction Adhesive: Apply a generous amount of construction adhesive between the two purlins.
- Fasten with Screws or Bolts: Secure the sister purlin to the existing purlin using screws or bolts spaced every 12-16 inches. Use galvanized fasteners to prevent rust.
- Supporting Posts (Optional): Depending on the span and load, you may also want to add supporting posts beneath the sister purlin, as described in Scenario 1.
Scenario 3: Replacing a Damaged Purlin
If a purlin is significantly damaged by rot, cracks, or insect infestation, replacement is necessary. This is a more complex task that may require professional assistance.
- Assessment: Carefully inspect the damaged purlin and the surrounding area. Determine the extent of the damage and identify any potential underlying causes (e.g., roof leaks).
- Temporary Support: Before removing the damaged purlin, provide temporary support to the rafters or trusses above. This is crucial to prevent the roof from collapsing. Use temporary posts and bracing to distribute the load.
- Removal: Carefully remove the damaged purlin, taking care not to damage the surrounding structures.
- Replacement:
- Cut the Replacement Purlin: Cut the new purlin to the exact length of the old one.
- Install the New Purlin: Position the new purlin in place, ensuring it's properly aligned with the rafters or trusses.
- Secure the New Purlin: Secure the new purlin to the rafters or trusses using appropriate fasteners, such as screws, bolts, or nails. Use the same type and size of fasteners that were used for the original purlin.
- Remove Temporary Support: Once the new purlin is securely in place, you can remove the temporary support.
When to Call a Professional
While some minor purlin repairs can be tackled by homeowners, certain situations require the expertise of a qualified structural engineer or contractor.
- Extensive Damage: If the damage to the purlins is widespread or severe, a professional assessment is essential.
- Structural Concerns: If you have any doubts about the structural integrity of your roof, consult with a structural engineer.
- Complex Repairs: If the repairs involve significant modifications to the roof structure, such as altering the rafter or truss system, hire a professional.
- Lack of Experience: If you're not comfortable working at heights or lack the necessary skills and experience, it's best to leave the repairs to the pros.
- Building Codes: Ensure any repairs comply with local building codes and regulations. A professional can help you navigate these requirements.
Preventative Maintenance
The best way to avoid purlin problems is to practice preventative maintenance. Here are some tips:
- Regular Inspections: Inspect your roof and attic regularly for any signs of leaks, damage, or sagging.
- Proper Ventilation: Ensure your attic is properly ventilated to prevent moisture buildup, which can lead to rot.
- Prompt Repairs: Address any roof leaks or other problems promptly to prevent further damage.
- Gutter Maintenance: Keep your gutters clean and free of debris to prevent water from backing up onto the roof.
- Snow Removal: If you live in an area with heavy snowfall, consider removing excess snow from your roof to reduce the load on the purlins.
Supporting roof purlins is a critical aspect of home maintenance. By understanding the function of purlins, identifying potential problems, and following these guidelines, you can take steps to ensure the structural integrity of your roof. Remember, safety is paramount, and when in doubt, always consult with a qualified professional.