How To Test Compressor On Fridge
The refrigerator compressor is the heart of any refrigeration system, responsible for circulating refrigerant and maintaining cool temperatures. Knowing how to effectively test a compressor is a vital skill for any HVAC technician, from apprentices to seasoned professionals. This article offers a comprehensive guide to compressor testing, covering various methods, safety precautions, and the career implications of mastering this essential skill.
Understanding the Importance of Compressor Testing
A faulty compressor can lead to a range of issues, including insufficient cooling, excessive energy consumption, and complete refrigerator failure. Accurate testing allows technicians to diagnose problems quickly and efficiently, saving time and money for both themselves and their clients. According to the U.S. Bureau of Labor Statistics, the demand for HVAC technicians is projected to grow 6 percent from 2022 to 2032, about as fast as the average for all occupations. This growth emphasizes the importance of a solid understanding of refrigeration systems, including compressor diagnostics.
Safety First: Preparing for Compressor Testing
Before commencing any testing procedure, prioritize safety. Here's a checklist:
- Disconnect Power: Always disconnect the refrigerator from its power source to prevent electrical shock.
- Wear PPE: Use appropriate personal protective equipment (PPE), including safety glasses, gloves, and insulated tools.
- Refrigerant Handling: If you suspect a refrigerant leak, ensure proper ventilation and avoid direct contact. Follow EPA regulations for refrigerant handling and recovery.
- Understand the System: Familiarize yourself with the specific refrigerator model and its wiring diagram before starting any tests.
Testing Methods for Refrigerator Compressors
There are several methods for testing a refrigerator compressor, each providing different insights into its condition. Here are some of the most common:
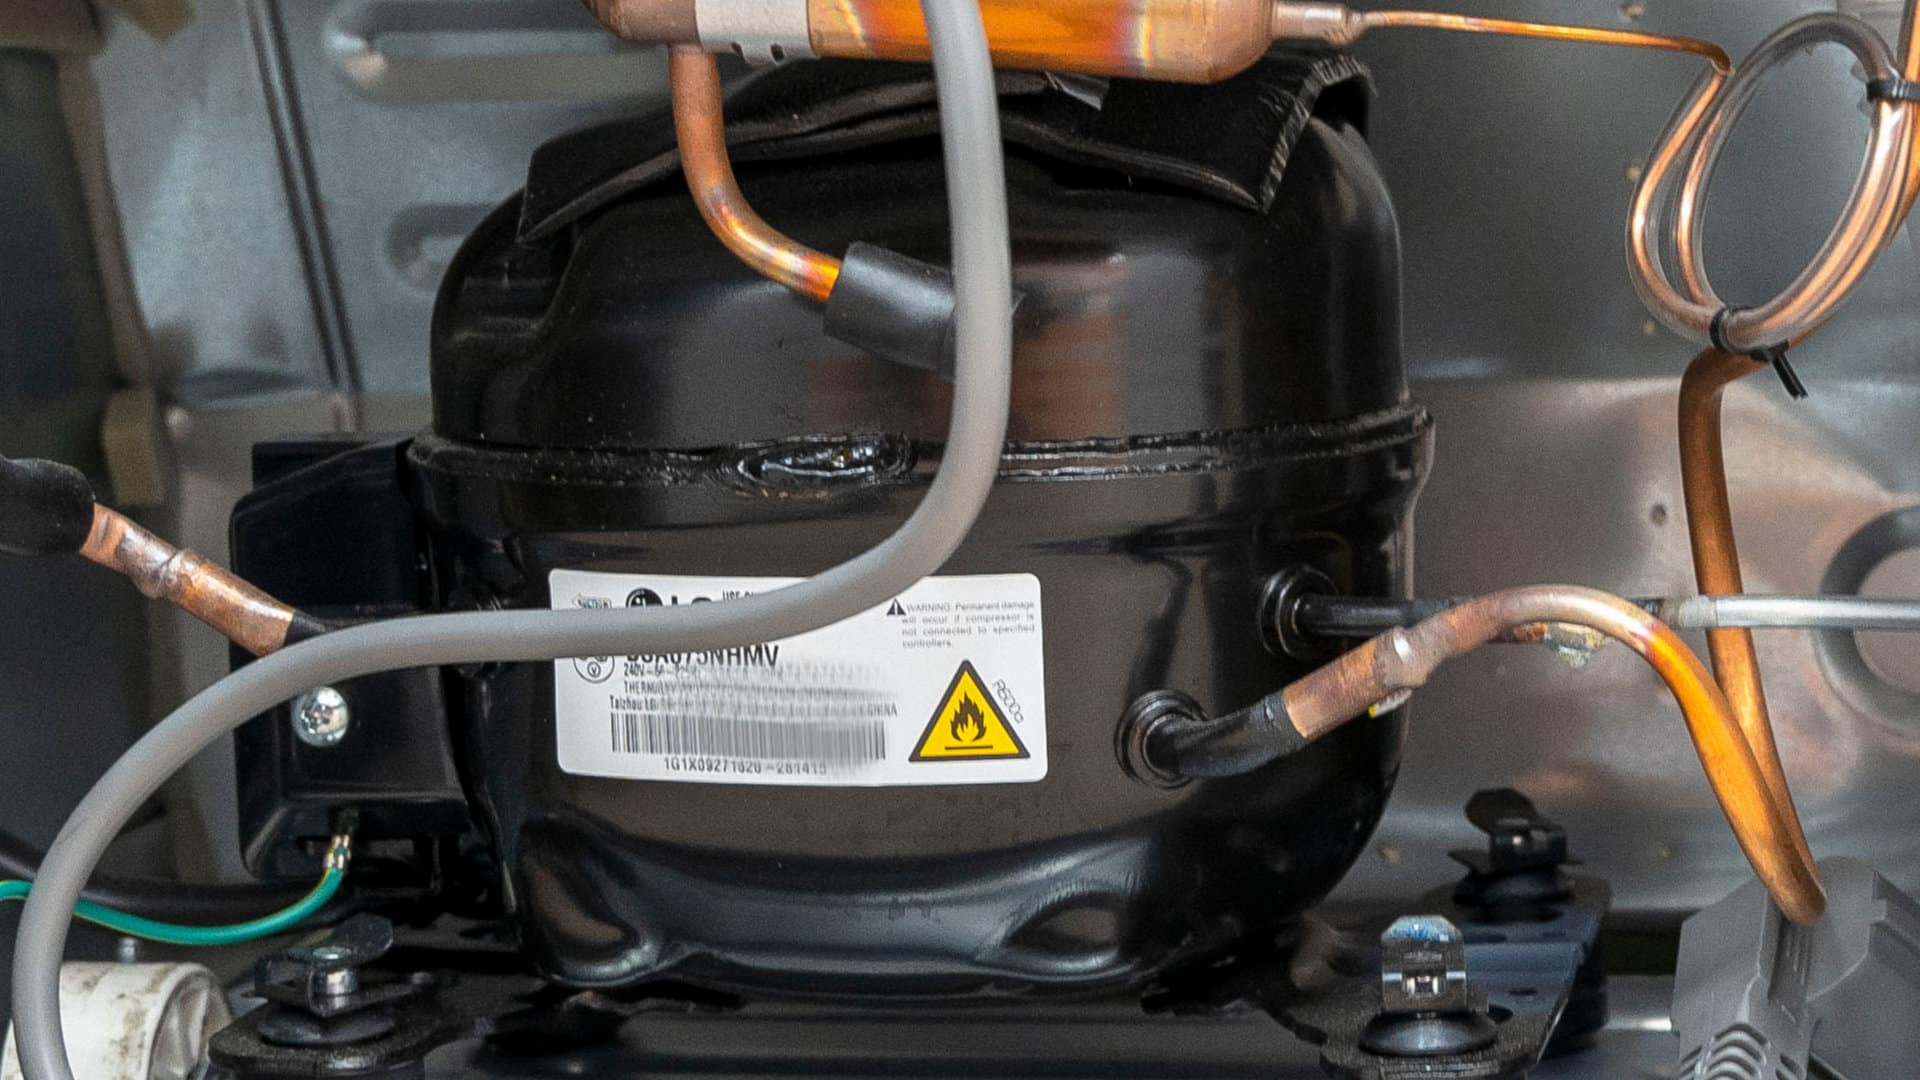
1. Visual Inspection
Begin with a thorough visual inspection of the compressor and its surrounding components. Look for:
- Physical Damage: Cracks, dents, or signs of overheating.
- Oil Leaks: Oil around the compressor indicates a potential leak.
- Burned Wires: Check wiring connections for signs of burning or corrosion.
- Loose Connections: Ensure all electrical connections are secure.
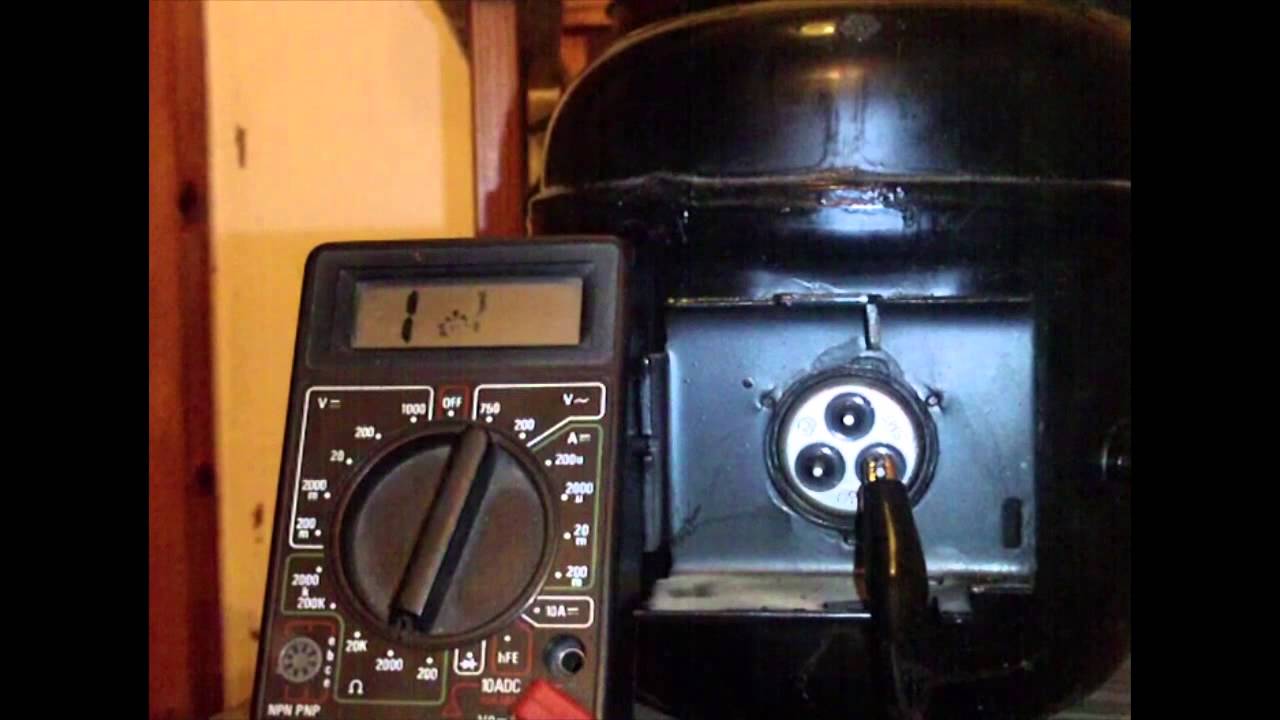
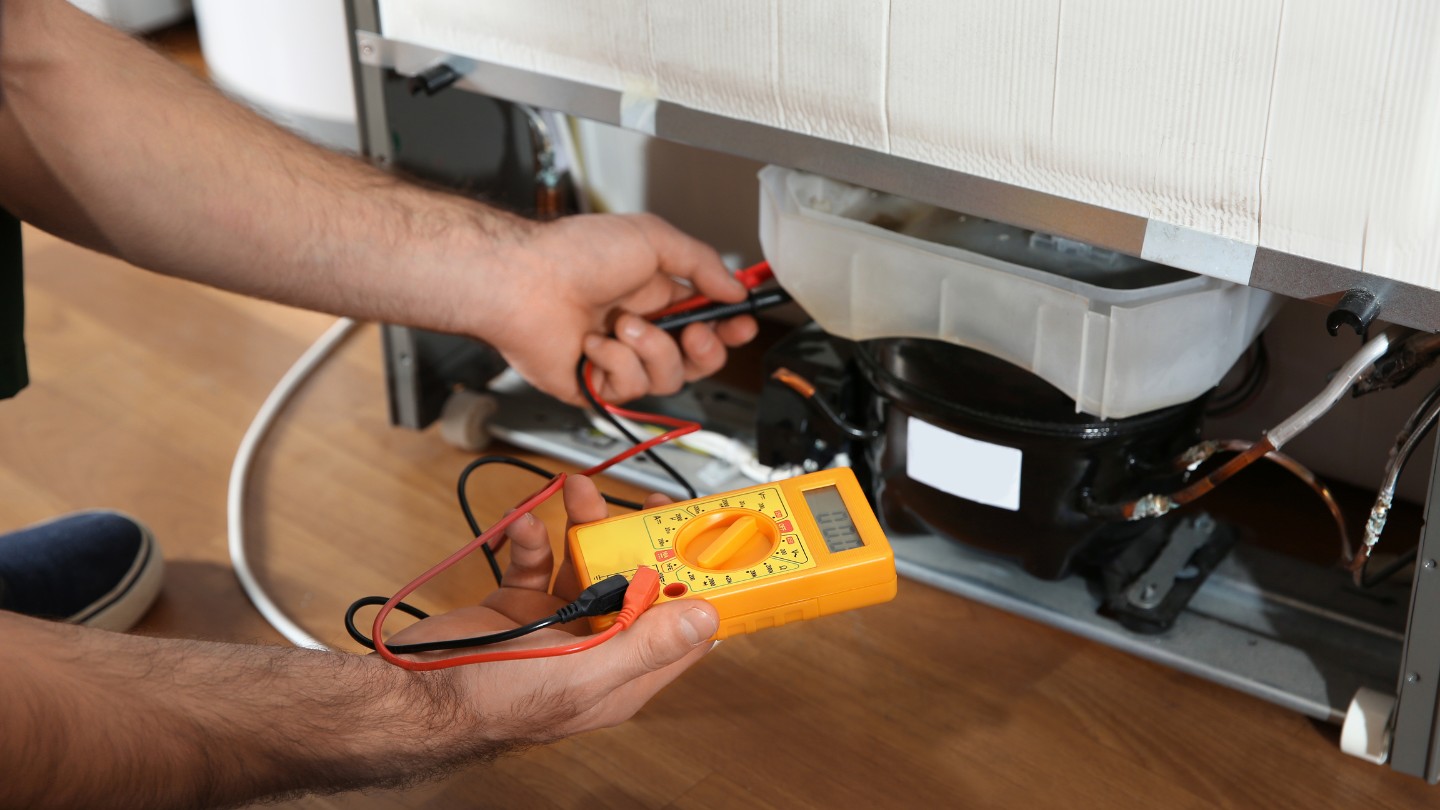
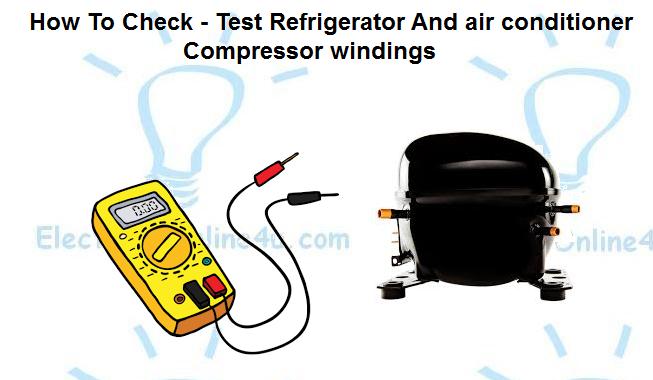
2. Continuity Test
A continuity test checks for electrical connectivity within the compressor windings. You'll need a multimeter for this test.
- Identify Terminals: Locate the common (C), start (S), and run (R) terminals on the compressor. These are usually labeled or indicated in the refrigerator's wiring diagram.
- Measure Resistance: Use a multimeter set to ohms (Ω) to measure the resistance between each pair of terminals: C-S, C-R, and S-R.
- Interpret Results:
- Low Resistance: Indicates good continuity. Typical values vary by compressor model, but generally, C-R will be the lowest, C-S will be higher, and S-R will be the highest.
- Open Circuit (Infinite Resistance): Indicates a broken winding and a faulty compressor.
- Short Circuit (Zero Resistance): Indicates a shorted winding, which also means the compressor is likely faulty.
Important Note: Compare your readings to the manufacturer's specifications whenever possible. Differences may indicate internal damage.
3. Ground Test
A ground test checks for shorts between the compressor windings and the compressor casing. This test also requires a multimeter.
- Set Multimeter: Set your multimeter to ohms (Ω) or continuity mode.
- Test Between Terminals and Casing: Touch one probe to each of the compressor terminals (C, S, and R) and the other probe to a clean, unpainted part of the compressor casing.
- Interpret Results:
- Continuity or Low Resistance: Indicates a short to ground, meaning the compressor is faulty and potentially dangerous.
- High Resistance (Infinite Resistance): Indicates no short to ground, which is the desired result.
4. Voltage Test
A voltage test confirms that the compressor is receiving the correct voltage when it is supposed to be running. Caution: This test involves working with live voltage and should only be performed by qualified technicians.
- Connect Voltmeter: Connect a voltmeter to the compressor's power terminals (L1 and L2).
- Start Refrigerator: Turn on the refrigerator and observe the voltage reading when the compressor is attempting to start.
- Interpret Results:
- Correct Voltage: Indicates that power is reaching the compressor. If the compressor is still not running, the issue lies within the compressor itself.
- Low or No Voltage: Indicates a problem with the power supply, wiring, or a control component like the thermostat or relay.
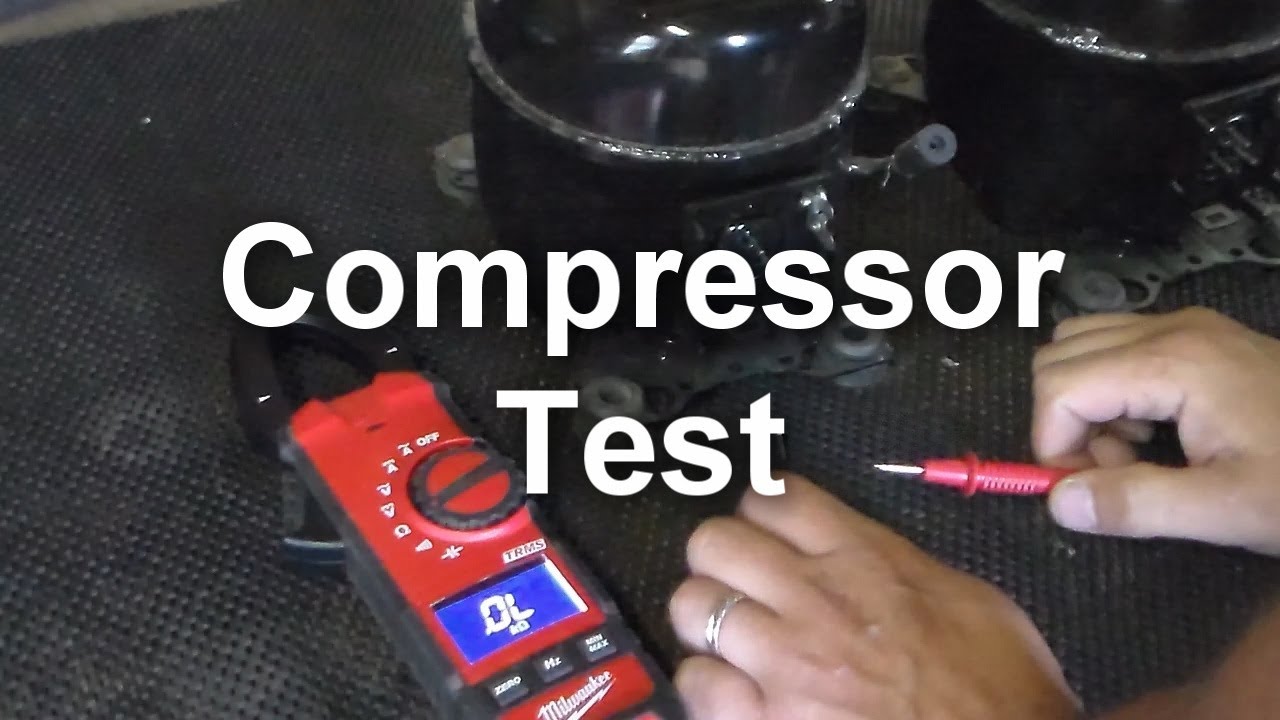
5. Amp Draw Test
An amp draw test measures the amount of current the compressor is drawing while running. This test can reveal internal issues like locked rotors or inefficient operation.
- Use Clamp Meter: Use a clamp meter (also called an amp meter) to measure the current flowing through one of the compressor's power wires.
- Start Refrigerator: Turn on the refrigerator and observe the amp draw reading when the compressor is running.
- Interpret Results:
- Compare to Specifications: Compare the measured amp draw to the compressor's nameplate rating.
- High Amp Draw: May indicate a locked rotor, shorted windings, or other internal mechanical issues.
- Low Amp Draw: May indicate a loss of refrigerant or inefficient compressor operation.
6. Compressor Starting Relay/Overload Protector Test
The starting relay and overload protector are crucial components for starting and protecting the compressor. A faulty relay or overload can prevent the compressor from running.
- Locate Components: Find the starting relay and overload protector, typically located near the compressor.
- Visual Inspection: Check for signs of burning, damage, or corrosion.
- Continuity Test (Relay): Use a multimeter to check for continuity through the relay contacts when the relay is energized.
- Continuity Test (Overload): Use a multimeter to check for continuity through the overload protector. An open circuit indicates a tripped or faulty overload.
Troubleshooting Based on Test Results
Once you've completed the testing procedures, you can use the results to diagnose the problem. Here's a general guide:
- No Continuity in Windings: Replace the compressor.
- Short to Ground: Replace the compressor.
- Incorrect Voltage: Troubleshoot the power supply, wiring, and control components.
- High Amp Draw: The compressor is likely failing and needs to be replaced.
- Faulty Starting Relay/Overload Protector: Replace the faulty component.
Career Implications and Industry Trends
Mastering compressor testing is a significant asset for HVAC technicians. It demonstrates a deep understanding of refrigeration systems and the ability to diagnose complex problems. This expertise can lead to career advancement opportunities, higher earning potential, and increased job security.
Salary Ranges: According to recent data, the median annual wage for HVAC technicians was $59,620 in May 2023. The highest 10 percent earned more than $82,720. Experienced technicians with specialized skills, such as compressor diagnostics and repair, can command even higher salaries.
Certifications: Obtaining certifications such as NATE (North American Technician Excellence) and EPA Section 608 can further enhance your career prospects. EPA 608 certification is mandatory for technicians who handle refrigerants. NATE certification demonstrates a high level of competence and professionalism.
Career Paths: The HVAC industry offers diverse career paths. Some technicians specialize in residential refrigeration, while others focus on commercial or industrial systems. There are also opportunities to become service managers, supervisors, or even business owners.
The Future of Refrigeration and Compressor Technology
The HVAC industry is constantly evolving, with new technologies and regulations emerging regularly. Some key trends include:
- Energy Efficiency: Increasing demand for energy-efficient refrigeration systems is driving the development of advanced compressor technologies, such as variable-speed compressors and scroll compressors.
- Refrigerant Regulations: Environmental concerns are leading to stricter regulations on refrigerants, with a shift towards more environmentally friendly alternatives like CO2 and propane. Technicians need to stay up-to-date on these regulations and be proficient in handling alternative refrigerants.
- Smart Technology: Integration of smart technology in refrigeration systems, such as remote monitoring and diagnostics, is becoming increasingly common. Technicians need to be familiar with these technologies to troubleshoot and repair them effectively.
Real-World Example: Consider a technician who specializes in servicing commercial refrigeration systems for supermarkets. Their ability to quickly diagnose and repair compressor issues can prevent significant food spoilage and financial losses for their clients. This expertise makes them a valuable asset and can lead to long-term client relationships and referrals.
Conclusion
Testing a refrigerator compressor requires a systematic approach, attention to detail, and a thorough understanding of electrical and refrigeration principles. By mastering the testing methods outlined in this guide, technicians can confidently diagnose compressor problems and provide effective solutions. Continuous learning and staying up-to-date with industry trends are essential for a successful career in the HVAC field. Investing in certifications, such as NATE and EPA 608, will not only enhance your skills but also increase your earning potential and career opportunities. Remember, the ability to diagnose and repair refrigeration systems is a crucial skill that is highly valued in the HVAC industry, contributing to a stable and rewarding career path.