How To Test Ecm Motor With Multimeter

Diagnosing HVAC issues can be frustrating, especially when your system suddenly stops working. One component that often causes problems is the ECM (Electronically Commutated Motor). These motors are found in many modern furnaces and air handlers due to their energy efficiency and quiet operation. While a full ECM repair is often best left to a professional, testing the motor with a multimeter can help you pinpoint the problem and potentially save on repair costs. This guide provides a step-by-step approach to testing your ECM motor, empowering you to troubleshoot effectively and make informed decisions about your HVAC system.
Safety First! Before You Begin
Working with electricity can be dangerous. Before you even think about touching your HVAC system, follow these critical safety precautions:
- Turn off the power! Locate the circuit breaker that controls your furnace or air handler and switch it to the "OFF" position. Double-check that the system is indeed powered down.
- Wear appropriate safety gear. Safety glasses and insulated gloves are essential.
- Never work alone. Having someone nearby can be crucial in case of an emergency.
- If you're uncomfortable with any part of this process, call a qualified HVAC technician. It's better to be safe than sorry.
Tools and Materials You'll Need
Before you start testing, gather the necessary tools. Having everything on hand will streamline the process and prevent unnecessary delays.
- Digital Multimeter: A reliable multimeter is the cornerstone of electrical testing. Make sure it's in good working condition and that you understand how to use it.
- Screwdrivers: You'll likely need a variety of screwdrivers (Phillips head and flathead) to access the motor.
- Wire Strippers/Crimpers: In case you need to disconnect or reconnect any wires.
- Voltage Tester (Non-Contact): To verify the power is off before touching any components.
- Wiring Diagram: A wiring diagram for your specific furnace or air handler model is invaluable for identifying the correct terminals.
- Camera or Phone: Taking pictures of the wiring before you disconnect anything is a smart move.
- Pen and Paper: To record your readings and observations.
Locating the ECM Motor
The ECM motor is typically located inside your furnace or air handler unit. Its appearance can vary slightly depending on the manufacturer and model, but it generally looks like a cylindrical motor with a control module attached. Follow these steps to locate it:
- Access the blower compartment. This usually involves removing an access panel secured with screws.
- Identify the blower assembly. The blower is a large fan that circulates air throughout your home.
- Locate the motor attached to the blower. The ECM motor will be directly connected to the blower wheel. Look for a module (often with a metal or plastic casing) attached to the motor.
Visual Inspection
Before diving into electrical testing, perform a thorough visual inspection of the ECM motor and its surrounding components. Look for:
- Burn Marks: Check for any signs of burning or overheating on the motor, control module, or wiring.
- Loose Connections: Ensure all wires are securely connected to the motor and control module.
- Damaged Wiring: Look for frayed, cracked, or otherwise damaged wires.
- Debris: Clean any dust, dirt, or debris that may be obstructing the motor or control module.
- Capacitor Bulge: If your ECM motor has a capacitor, check for any signs of bulging or leaking. This is a common sign of capacitor failure.
Testing the ECM Motor: Step-by-Step Guide
Now, let's get to the actual testing. Remember to prioritize safety throughout this process.
Step 1: Voltage Check
Ensure the motor is receiving the correct voltage. Consult your wiring diagram to identify the power leads. With the power ON (and being extremely careful!), set your multimeter to AC voltage and test between the power leads. You should read the voltage specified on the motor's nameplate (usually 120V or 240V). If you don't get the expected voltage, the problem likely lies elsewhere, such as a faulty circuit breaker, wiring issue, or control board problem.
Step 2: Testing Resistance (Motor Windings)
Turn the power OFF at the breaker before proceeding!
- Locate the motor winding terminals. These are usually labeled on the motor or in the wiring diagram (typically T1, T2, T3, etc.).
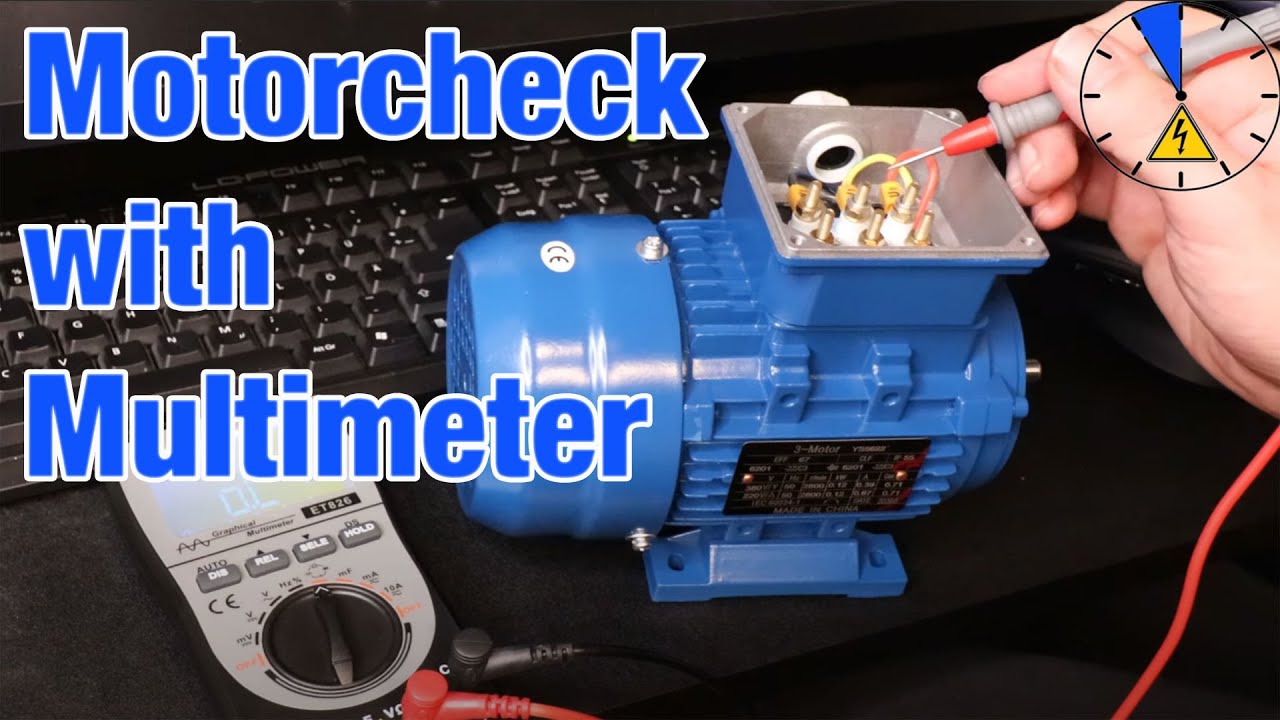
- Set your multimeter to Ohms (Ω). Select the appropriate resistance range on your multimeter.
- Test the resistance between each pair of motor windings. Touch the multimeter probes to each pair of terminals (e.g., T1 and T2, T1 and T3, T2 and T3).
- Compare your readings to the manufacturer's specifications. You'll need to consult the motor's datasheet or a service manual for the expected resistance values. Significant deviations from these values indicate a problem with the motor windings (e.g., a short circuit or open circuit).
Typical values for resistance readings can vary greatly from a few ohms to several hundred ohms depending on the specific ECM motor and manufacturer.
Step 3: Testing Resistance (Control Module)
Testing the control module's internal components is generally not recommended for homeowners. These modules are complex electronic devices, and testing them requires specialized knowledge and equipment. However, you can perform a basic continuity test on the control module's power and ground connections to ensure they are intact.
- Identify the power and ground terminals on the control module. Refer to the wiring diagram.
- Set your multimeter to continuity mode.
- Test for continuity between the power and ground terminals. You should not have continuity. If you do, this indicates a short circuit within the control module.
Step 4: Checking for Shorts to Ground
Ensure the power is OFF.
- Set your multimeter to Ohms (Ω).
- Touch one probe to a bare metal part of the motor housing (ground).
- Touch the other probe to each of the motor winding terminals (T1, T2, T3, etc.).
- You should read infinite resistance (or very high resistance). A low resistance reading indicates a short circuit between the motor windings and the motor housing, which means the motor is likely faulty.
Interpreting Your Results
Once you've completed the tests, it's time to analyze the results. Here's a summary of what different readings might indicate:
- No Voltage: Check the circuit breaker, wiring, and control board.
- Incorrect Voltage: Indicates a problem with the power supply to the motor.
- Open Circuit (Infinite Resistance): A broken wire or a burned-out winding.
- Short Circuit (Very Low Resistance): A damaged winding or insulation failure.
- Short to Ground (Low Resistance to Motor Housing): A dangerous condition that requires immediate attention.
- Control Module Short Circuit: Indicates a faulty control module.
Common ECM Motor Problems and Their Symptoms
Understanding common ECM motor problems can help you narrow down the potential causes of your HVAC issues.
- Motor Failure: This can be caused by overheating, worn bearings, or electrical problems. Symptoms include a motor that won't start, runs erratically, or makes unusual noises.
- Control Module Failure: The control module regulates the motor's speed and operation. Symptoms include a motor that runs at the wrong speed, doesn't respond to thermostat changes, or fails to start.
- Capacitor Failure: A failed capacitor can prevent the motor from starting or cause it to run inefficiently.
- Wiring Issues: Loose connections, damaged wires, or corroded terminals can disrupt the motor's operation.
When to Call a Professional
While testing an ECM motor with a multimeter can help you diagnose some problems, certain repairs are best left to a qualified HVAC technician. Call a professional if:
- You're uncomfortable working with electricity.
- You suspect a control module failure.
- The motor needs to be replaced.
- You can't identify the problem after testing.
- You're dealing with a complex HVAC system.
Estimated Repair Costs
The cost of repairing or replacing an ECM motor can vary depending on the motor's size, type, and the complexity of the repair. Here's a general estimate:
- ECM Motor Replacement: $500 - $1500 (including labor)
- Control Module Replacement: $300 - $800 (including labor)
- Minor Wiring Repair: $100 - $300 (including labor)
These are just estimates. Get quotes from multiple HVAC technicians to ensure you're getting a fair price.
Preventative Maintenance
Regular maintenance can help extend the life of your ECM motor and prevent costly repairs. Consider these tips:
- Change your air filters regularly. Dirty air filters restrict airflow and can cause the motor to overheat.
- Schedule annual HVAC checkups. A qualified technician can inspect your system and identify potential problems before they escalate.
- Keep the area around your HVAC unit clean and free of debris.
By following these steps, you can effectively test your ECM motor with a multimeter, diagnose potential problems, and make informed decisions about your HVAC system. Remember to prioritize safety and call a professional when needed. Understanding your HVAC system empowers you to maintain a comfortable and efficient home.