How To Use A Refrigerant Recovery Machine

Your refrigerator is the heart of your kitchen, keeping your food fresh and safe to eat. When it stops working, it can be a stressful situation. This guide will help you troubleshoot common refrigerator problems, offering simple DIY fixes you can try, and clearly indicating when it's time to call in a qualified appliance repair technician. Remember, safety first! If you're uncomfortable with any of these steps, or if they involve working with electricity, gas, or complex parts, do not proceed and contact a professional.
Common Refrigerator Problem: Not Cooling
The most frequent refrigerator complaint is a lack of cooling. Here's a step-by-step approach to diagnosing and potentially resolving the issue:
Step 1: The Obvious Checks - Power and Settings
Start with the basics. It sounds simple, but overlooking these can happen to anyone:
- Check the Power Cord: Ensure the refrigerator is properly plugged into a functioning outlet. Try plugging another appliance into the same outlet to confirm it's providing power. A tripped circuit breaker or blown fuse can also be the culprit. Check your home's electrical panel and reset any tripped breakers or replace blown fuses related to the refrigerator circuit.
- Examine the Temperature Settings: Accidentally bumping the temperature control dial is more common than you think. Make sure the thermostat is set to the desired cooling level. A setting that's too high will prevent the refrigerator from cooling effectively. Refer to your refrigerator's manual for the recommended temperature settings. Generally, the fresh food compartment should be around 37-40°F (3-4°C), and the freezer around 0°F (-18°C).
Step 2: Condenser Coils - Cleanliness Matters
The condenser coils are responsible for releasing heat. If they're covered in dust and debris, the refrigerator won't be able to cool properly. Typically, these coils are located at the back of the refrigerator, either exposed or behind a removable panel.
- Locate the Coils: Unplug the refrigerator from the power outlet before you begin. Then, locate the condenser coils. Refer to your refrigerator's manual if you're unsure where they are.
- Clean the Coils: Use a vacuum cleaner with a brush attachment to gently remove dust and debris from the coils. If the coils are heavily soiled, you can use a soft brush and a mild detergent solution (followed by a damp cloth to rinse) to clean them. Make sure the coils are completely dry before plugging the refrigerator back in.
- Improve Airflow: Ensure there's adequate space around the refrigerator for proper ventilation. Avoid packing items tightly against the back or sides of the unit.
Step 3: Check the Door Seals (Gaskets)
Leaky door seals can let warm air in, forcing the refrigerator to work harder and potentially preventing it from reaching the desired temperature.
- Visual Inspection: Carefully inspect the door seals (gaskets) for any signs of damage, such as cracks, tears, or stiffness.
- The Paper Test: Close the refrigerator door on a piece of paper. If you can easily pull the paper out without any resistance, the seal is likely compromised. Repeat this test at several points around the door.
- Cleaning the Gaskets: Clean the gaskets with a mild detergent solution and a damp cloth. Remove any food debris or grime that may be preventing a tight seal.
- Replacing the Gaskets: If the gaskets are damaged beyond cleaning, they will need to be replaced. You can usually find replacement gaskets online or at appliance parts stores. Be sure to order the correct gasket for your refrigerator model. Replacement typically involves removing the old gasket (often held in place by screws or a clip) and pressing the new one into place.
Step 4: Evaporator Fan Motor
The evaporator fan circulates cold air from the freezer compartment into the refrigerator compartment. If the fan motor is not working, the refrigerator won't cool properly.
- Locate the Evaporator Fan: The evaporator fan is typically located inside the freezer compartment, behind a panel. Unplug the refrigerator before accessing it.
- Inspect the Fan: Remove the panel and visually inspect the fan blades. Are they obstructed by ice or debris? Manually try to spin the fan blades. If they don't spin freely, the motor may be faulty.
- Listen for Noise: If the fan is running, listen for any unusual noises, such as squealing or grinding. These noises can indicate a failing motor.
- When to Call a Pro: Diagnosing and replacing the evaporator fan motor often requires electrical testing with a multimeter, which should only be done by a qualified technician. If you suspect the evaporator fan motor is the problem, it's best to call a professional.
Step 5: Condenser Fan Motor
The condenser fan helps cool the condenser coils. If this fan isn't working, the refrigerator's cooling ability is reduced.
- Locate the Condenser Fan: The condenser fan is typically located near the compressor at the back of the refrigerator. Unplug the refrigerator before inspecting.
- Visual Inspection: Check for any obstructions that might be preventing the fan from spinning freely.
- Test the Fan: If the fan motor isn't running while the compressor is on (you can usually hear the compressor running), it might be faulty.
- When to Call a Pro: Testing and replacing the condenser fan motor involves electrical components and is best left to a qualified technician.
Step 6: Overload Protector and Start Relay
These components work together to start the compressor. A faulty overload protector or start relay can prevent the compressor from starting, resulting in no cooling.
- Location: These components are typically located near the compressor. Unplug the refrigerator before attempting any inspection.
- Diagnosis: Diagnosing issues with the overload protector and start relay requires electrical testing with a multimeter and should only be performed by a qualified technician.
- When to Call a Pro: Due to the complexity and potential safety hazards, any work on the overload protector or start relay should be done by a professional appliance repair technician.
Step 7: The Compressor - The Heart of the System
The compressor is the component that circulates the refrigerant. If the compressor fails, the refrigerator will not cool.
- Listen to the Compressor: You should typically hear the compressor running (a humming or buzzing sound) when the refrigerator is trying to cool. If you don't hear anything, or if you hear clicking sounds but the compressor doesn't start, it could indicate a problem.
- When to Call a Pro: Compressor issues are complex and require specialized tools and knowledge. Replacing a compressor involves working with refrigerant and high-voltage electricity, which is extremely dangerous and should only be done by a licensed and certified professional.
When to Call a Professional
While some refrigerator issues can be resolved with simple DIY fixes, others require the expertise of a qualified appliance repair technician. Here are some situations where you should always call a professional:
- Any work involving refrigerant: Refrigerant is a hazardous substance, and handling it requires specialized equipment and training. Do not attempt to repair any leaks or recharge the refrigerant system yourself.
- Electrical repairs: Working with electrical components can be dangerous. If you're not comfortable working with electricity, or if you lack the necessary skills and tools, leave the repair to a professional.
- Compressor problems: Compressor repairs are complex and require specialized tools and knowledge.
- If you're unsure: If you've tried the basic troubleshooting steps and your refrigerator is still not cooling, it's best to call a professional to diagnose the problem and recommend the appropriate solution.
- If the refrigerator is still under warranty: Attempting to repair the refrigerator yourself may void the warranty. Contact the manufacturer or an authorized service center for assistance.
Important Safety Considerations
Working with appliances can be dangerous if proper safety precautions are not taken. Always remember these guidelines:
- Unplug the appliance: Always unplug the refrigerator from the power outlet before performing any repairs or maintenance.
- Work in a well-ventilated area: If you're working with any chemicals or cleaning solutions, make sure the area is well-ventilated.
- Wear appropriate safety gear: Wear safety glasses to protect your eyes from debris, and wear gloves to protect your hands from sharp edges or chemicals.
- Follow manufacturer's instructions: Always refer to the refrigerator's owner's manual for specific instructions and safety precautions.
- Don't be afraid to ask for help: If you're unsure about any step in the repair process, don't hesitate to call a professional for assistance.
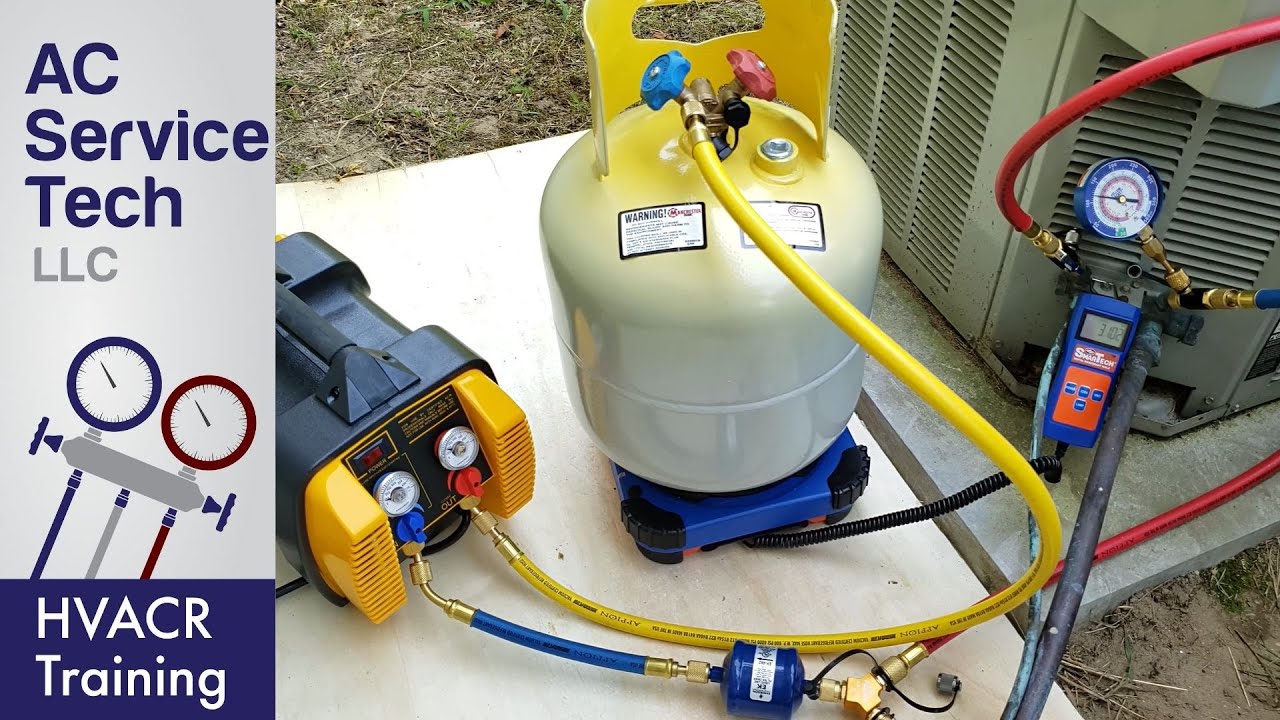
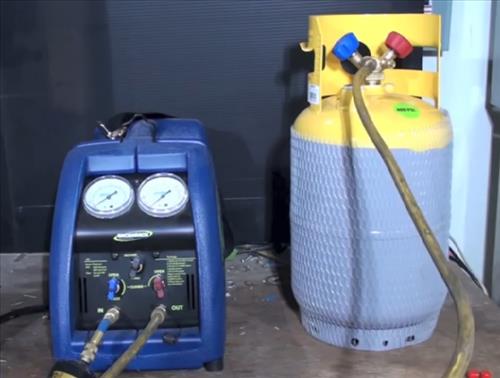
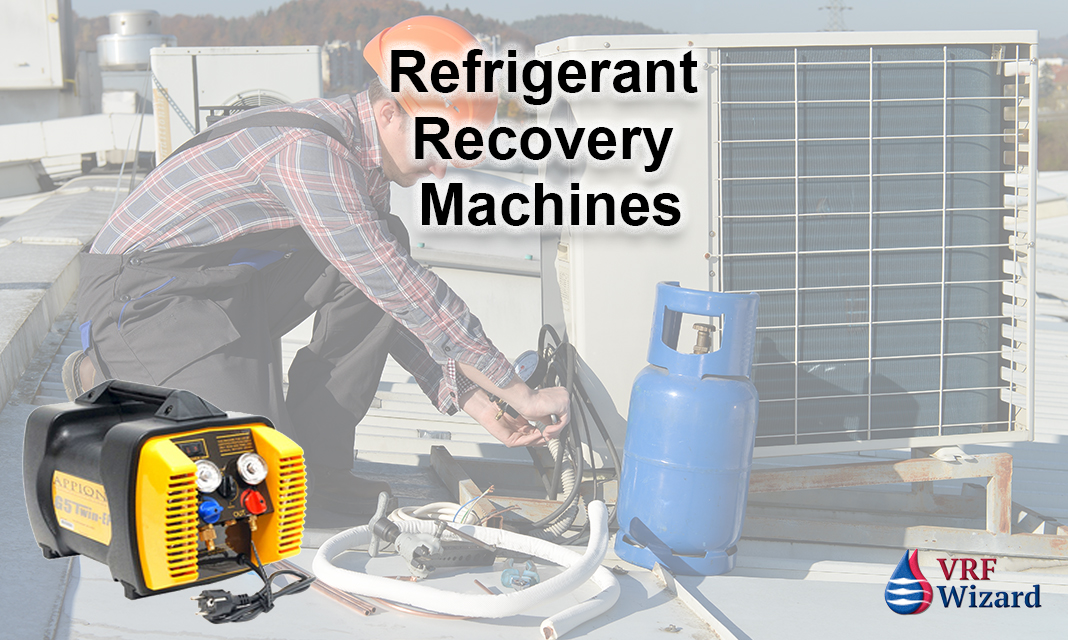
Refrigerant Recovery Machine
The following are steps on how to use a refrigerant recovery machine, but as previously stated, this task should only be performed by a trained and certified HVAC technician.
Refrigerant Recovery: A Process for Professionals
Recovering refrigerant is a crucial part of servicing or disposing of refrigeration systems. This process prevents harmful refrigerants from being released into the atmosphere, which is important for environmental protection. Important: Working with refrigerants requires specialized training and certification (like EPA Section 608 in the US). It is illegal and dangerous for untrained individuals to handle refrigerants. The following steps are for informational purposes only.
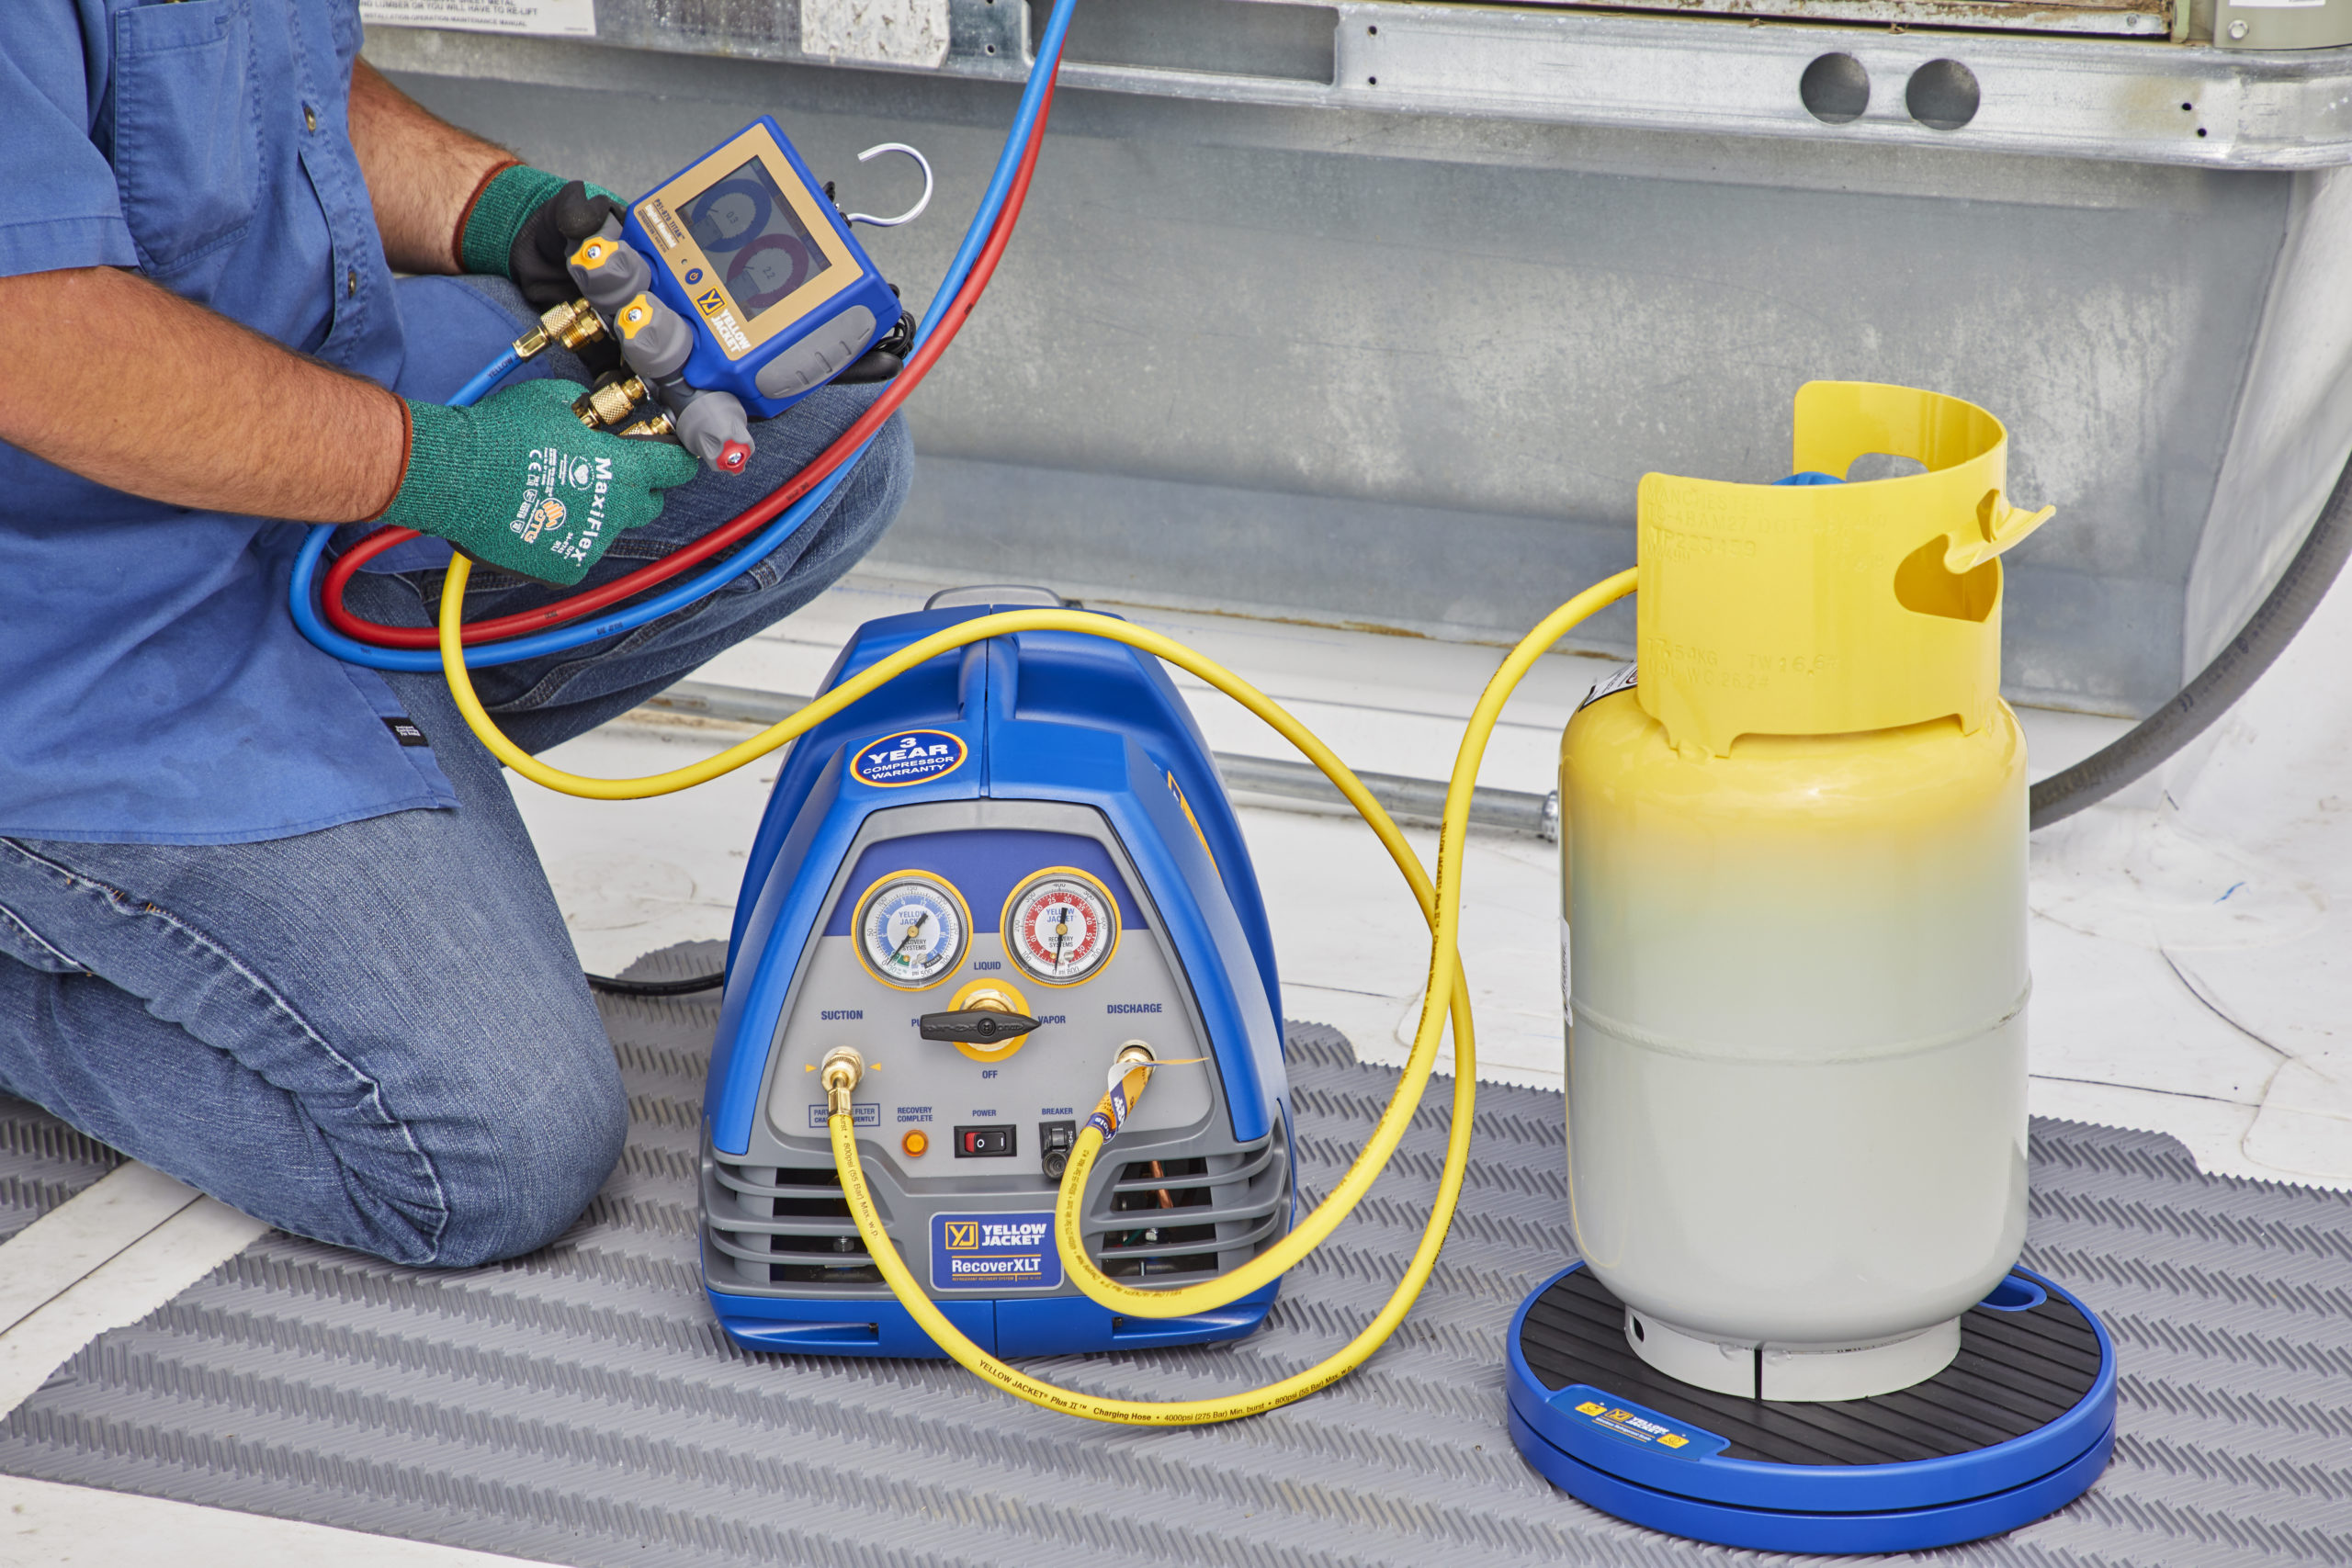
Step 1: Gather Necessary Equipment and Safety Gear
Before you begin, make sure you have all the necessary equipment and safety gear. This includes:
- Refrigerant Recovery Machine: A properly functioning and certified recovery machine. Ensure it is compatible with the type of refrigerant you're recovering.
- Recovery Tank: A DOT-approved recovery tank that is empty and has been properly evacuated. Know the tank's weight and maximum capacity.
- Refrigerant Identifier: To verify the type of refrigerant in the system. Mixing refrigerants is illegal and can damage your equipment.
- Hoses and Fittings: Hoses specifically designed for refrigerant use. Ensure they are in good condition and compatible with the fittings on the recovery machine and the appliance.
- Vacuum Pump: Used for evacuating the recovery tank and the system.
- Electronic Scale: To accurately measure the amount of refrigerant recovered.
- Safety Glasses: To protect your eyes from refrigerant splashes.
- Gloves: To protect your hands from refrigerant burns.
- Recovery Machine Filter Drier: To keep contaminants out of the recovery machine.
Step 2: Connect the Recovery Machine
- Connect the Hoses: Attach the hoses from the recovery machine to the appliance's service ports. Typically, there will be a low-side (suction) and a high-side (discharge) port.
- Connect to Recovery Tank: Connect another hose from the recovery machine to the recovery tank.
Step 3: Start the Recovery Process
- Start the Recovery Machine: Follow the manufacturer's instructions for starting the recovery machine.
- Monitor the Gauges: Keep a close eye on the pressure gauges on both the recovery machine and the appliance. Avoid over-pressurizing the system.
- Observe the Refrigerant Flow: Check the sight glass on the recovery machine (if equipped) to monitor the flow of refrigerant.
- Weigh the Recovery Tank: Periodically check the weight of the recovery tank using the electronic scale to prevent overfilling. Never exceed 80% of the tank's gross weight capacity.
Step 4: Complete the Recovery Process
- Achieve the Target Vacuum Level: Continue the recovery process until the system reaches the required vacuum level as specified by the manufacturer (typically a few inches of mercury vacuum). This ensures that most of the refrigerant has been removed.
- Shut Down the Machine: Once the recovery is complete, shut down the recovery machine according to the manufacturer's instructions.
- Close Valves: Close all valves on the recovery machine, hoses, and recovery tank.
Step 5: Disconnect and Store Equipment
- Disconnect the Hoses: Carefully disconnect the hoses from the appliance and the recovery tank. Some refrigerant may remain in the hoses, so be prepared for a small release.
- Properly Store the Refrigerant: The recovery tank now contains the recovered refrigerant. It must be properly labeled with the type and amount of refrigerant. Store the tank in a secure, well-ventilated area.
- Clean and Inspect Equipment: Clean and inspect all equipment, including the recovery machine, hoses, and fittings. Replace any worn or damaged parts. Replace the filter drier on the recovery machine.
Step 6: Proper Disposal/Recycling
- Recycle/Dispose Responsibly: The recovered refrigerant should be sent to a certified recycling or disposal facility. Releasing refrigerant into the atmosphere is illegal and harmful to the environment.
Important Considerations:
- Refrigerant Type: Always verify the type of refrigerant before starting the recovery process.
- Recovery Machine Compatibility: Ensure that the recovery machine is compatible with the refrigerant being recovered.
- Proper Ventilation: Work in a well-ventilated area to avoid inhaling refrigerant vapors.
- Leak Detection: Use a leak detector to check for any refrigerant leaks during the recovery process.
- Vacuum Pump: Use a vacuum pump to remove any remaining air and moisture from the system after the recovery process.
- EPA Regulations: Be familiar with and follow all applicable EPA regulations regarding refrigerant handling, recovery, and disposal.
By following these steps and prioritizing safety, you can effectively troubleshoot common refrigerator problems and potentially save yourself the cost of a service call. However, always remember that some repairs are best left to the professionals. Knowing your limits and seeking expert help when needed is the key to keeping your refrigerator running smoothly and your kitchen functioning optimally.