How To Vent A Hot Water Tank
A common problem homeowners encounter, often noticed during colder months, is a hot water tank that doesn't seem to be heating water efficiently, or worse, emits a concerning smell of rotten eggs. This can often be traced back to issues with venting. Proper venting is critical for safe and efficient operation of your gas or propane hot water tank, allowing harmful exhaust gases to escape your home.
This article will guide you through troubleshooting common hot water tank venting problems and provide some simple, safe DIY fixes. However, remember safety is paramount. If at any point you feel uncomfortable or unsure about a step, call a qualified professional immediately.
Understanding the Basics of Hot Water Tank Venting
Before we dive into troubleshooting, let's quickly review the basic components of a hot water tank venting system:
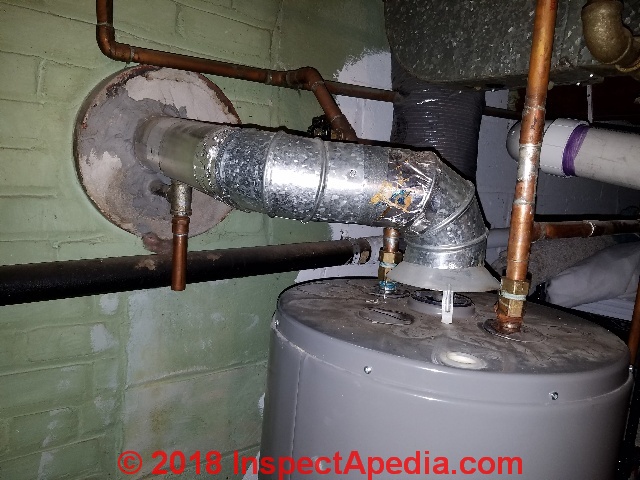
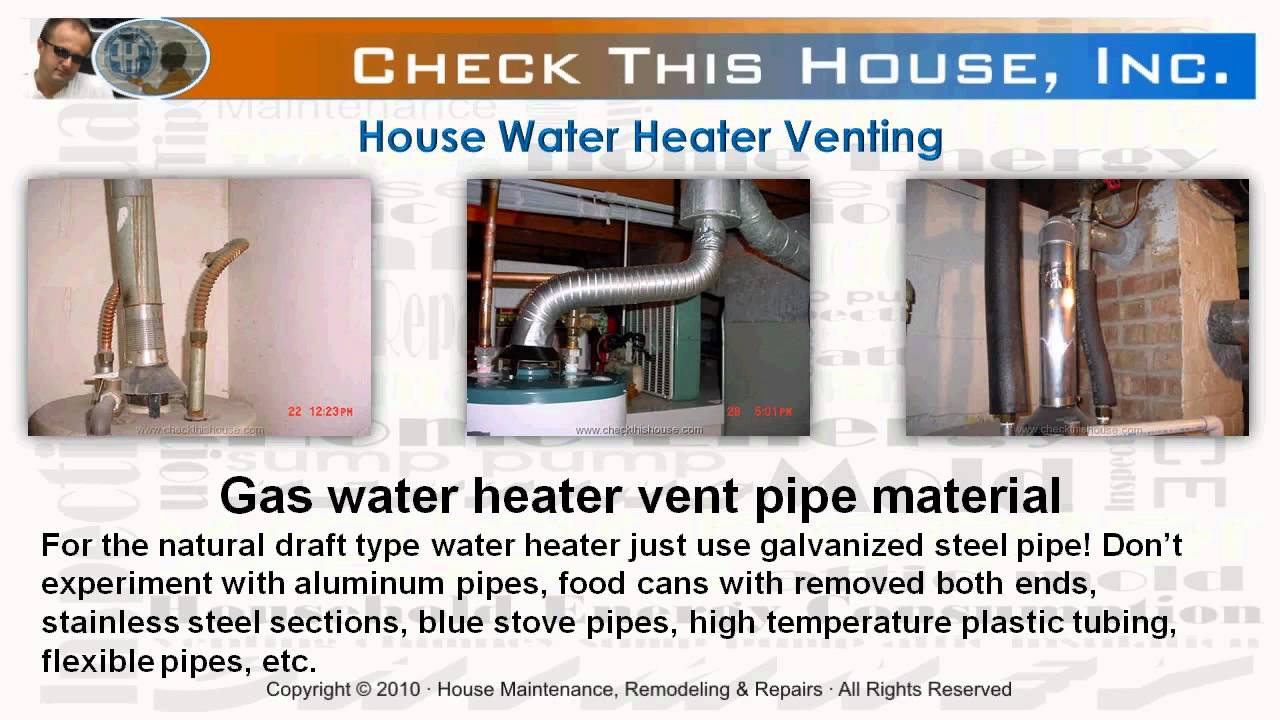
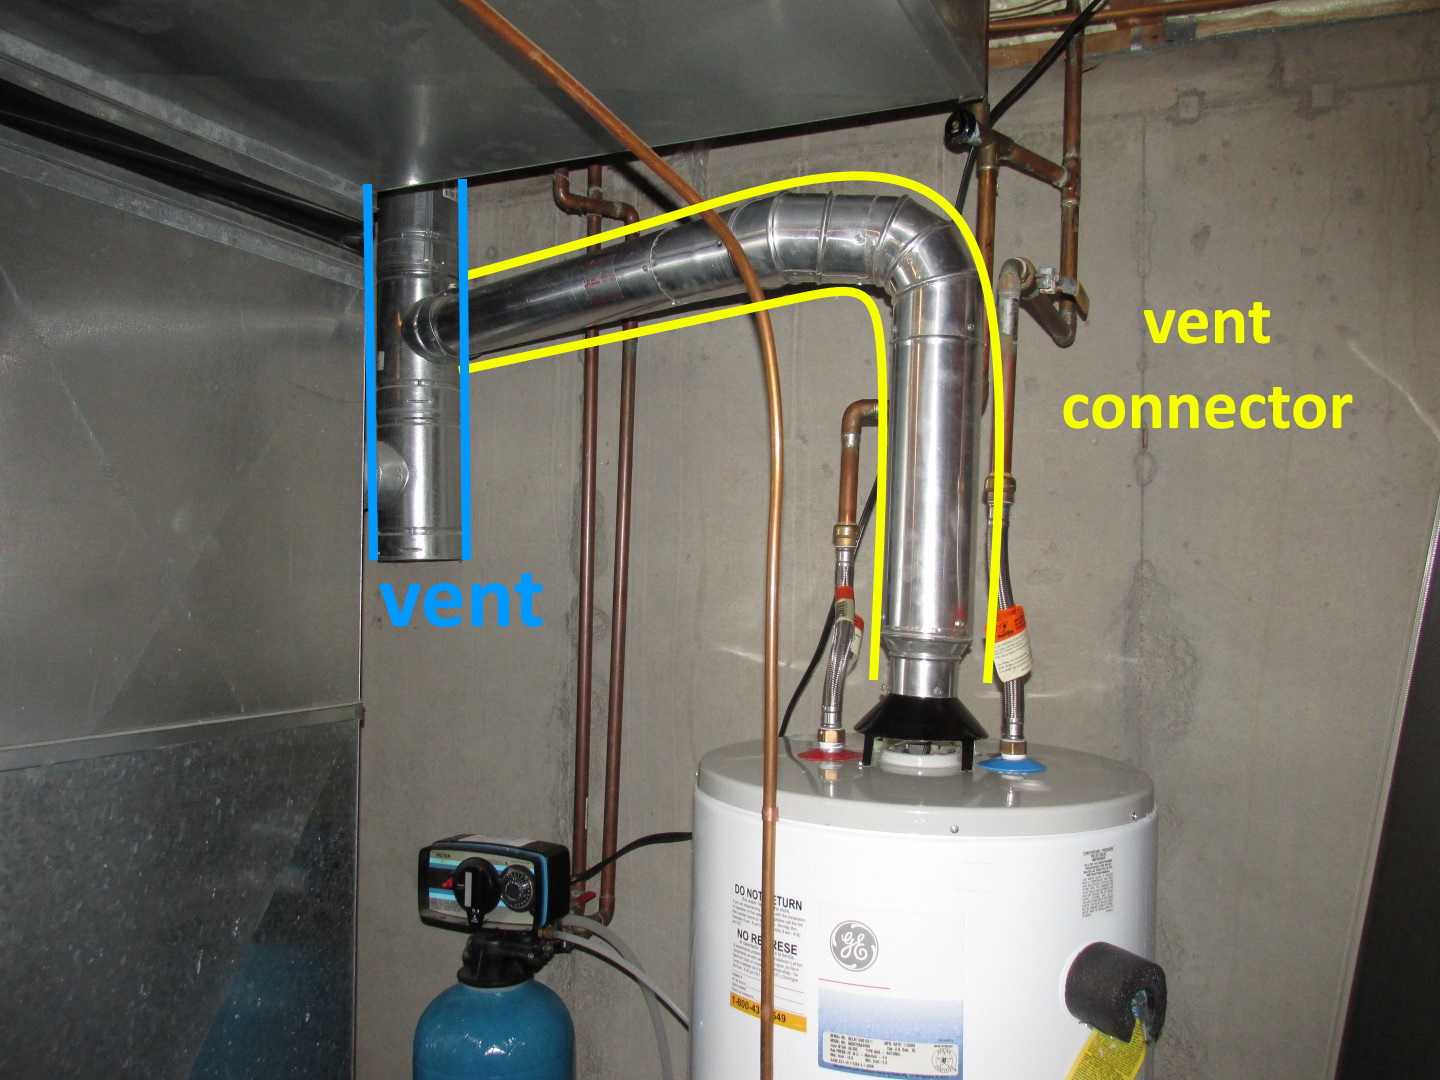
- Vent Pipe: This is the main pipe that carries exhaust gases away from the water heater and out of your home. It's usually made of galvanized steel, aluminum, or stainless steel.
- Draft Diverter: Located at the top of the water heater, the draft diverter helps to ensure proper airflow up the vent pipe and prevents backdrafting.
- Flue: The internal passage within the water heater where combustion gases are collected before entering the draft diverter.
- Vent Cap: Situated at the end of the vent pipe, typically on your roof, the vent cap prevents rain, snow, and debris from entering the venting system.
Diagnosing Venting Problems: A Step-by-Step Guide
Let's start by identifying the symptoms and potential causes of venting issues.
Step 1: Recognizing the Symptoms
Pay attention to these common signs that indicate a potential venting problem:
- Smell of Rotten Eggs: This is a serious warning sign of a carbon monoxide leak. Evacuate your home immediately and call the fire department or your gas company.
- Pilot Light Keeps Going Out: A flickering or constantly extinguishing pilot light can be caused by a lack of oxygen due to improper venting.
- Yellow or Orange Flame: A healthy burner flame should be blue. A yellow or orange flame indicates incomplete combustion and the potential for carbon monoxide production.
- Soot Buildup: Look for black soot around the draft diverter, vent pipe connections, or the top of the water heater. This indicates incomplete combustion and a potential venting obstruction.
- Water Heater is Making Unusual Noises: Gurgling, popping, or rumbling sounds could indicate poor combustion due to insufficient air intake.
- Condensation on Vent Pipe: Excessive condensation can lead to corrosion and vent pipe failure.
- Feeling Unwell: Symptoms like headaches, dizziness, nausea, or flu-like symptoms, especially when near the water heater, could indicate carbon monoxide poisoning.
Step 2: Visual Inspection
Carefully inspect the following components:
- Draft Diverter: Look for any obstructions, such as debris, rust, or damage. Is the diverter securely attached to the water heater?
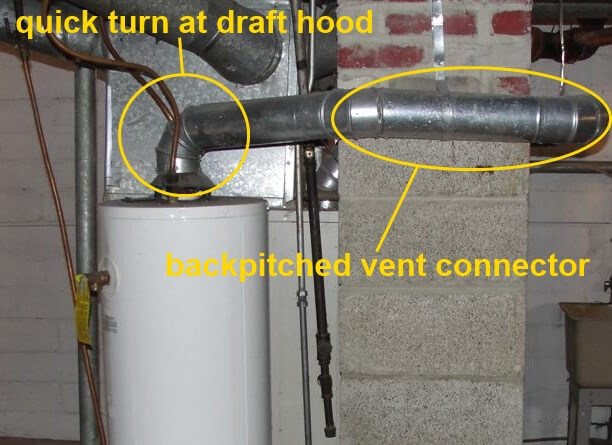
- Vent Pipe: Check for signs of corrosion, rust, holes, or loose connections. Ensure all pipe sections are properly connected and sealed. Make sure the pipe is sloping upwards towards the outside. A downward slope can trap condensation and hinder proper venting.
- Vent Cap: Inspect the vent cap on your roof for obstructions, such as bird nests, leaves, or snow. Use binoculars if you're not comfortable climbing on the roof. Never attempt to clean the vent cap yourself if it requires getting on a steep or icy roof.
- Area Around Water Heater: Ensure there is adequate ventilation in the room where the water heater is located. The water heater needs sufficient fresh air to operate correctly. Are there any obstructions blocking airflow to the water heater?
Step 3: Performing a Draft Test
A draft test helps determine if the venting system is drawing exhaust gases properly. You'll need a lighter or match (use caution!).
- Turn on the Water Heater: Make sure the water heater is running and the burner is lit.
- Light a Match or Lighter: Hold a lit match or lighter near the bottom of the draft diverter.
- Observe the Flame: If the venting is working correctly, the flame should be drawn inward towards the draft diverter and then upward into the vent pipe.
- Backdrafting: If the flame is pushed outward or flickers erratically, this indicates backdrafting, meaning exhaust gases are not being drawn out of the home properly. This is a serious issue that requires immediate attention.
DIY Fixes: Simple Solutions You Can Try
Here are some simple fixes you can attempt after carefully completing the diagnosis steps and ensuring the situation is safe.
1. Cleaning the Draft Diverter
If you found debris or obstructions in the draft diverter during your visual inspection, carefully remove them. Use a brush or vacuum cleaner to clear away any dust, cobwebs, or other materials. Make sure the burner is off and the water heater is cool before attempting this.
2. Checking and Tightening Vent Pipe Connections
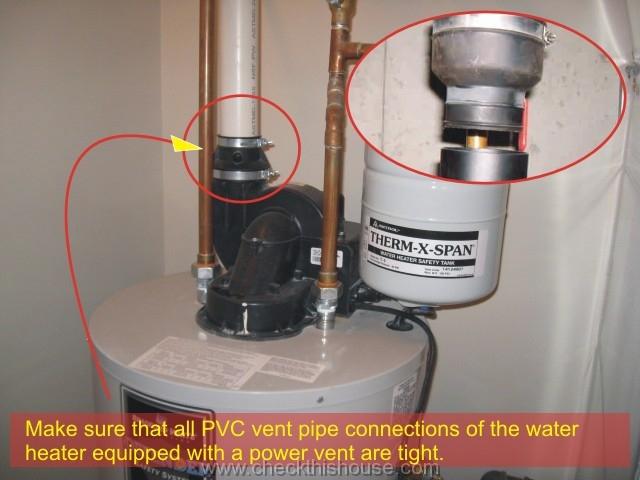
Loose vent pipe connections can allow exhaust gases to leak into your home. Inspect each connection and tighten any loose screws or clamps. If a section of pipe is corroded or damaged, it should be replaced by a qualified professional.
3. Clearing Obstructions from Around the Water Heater
Ensure the area around the water heater is clear of any obstructions that could be blocking airflow. Move any boxes, furniture, or other items that might be restricting ventilation.
4. Replacing a Damaged Vent Cap (with Caution!)
If you can safely access the vent cap and it's damaged or severely corroded, you may be able to replace it yourself. Purchase a new vent cap of the same type and size and carefully install it, following the manufacturer's instructions. Remember, safety first! If you're uncomfortable climbing on the roof, hire a professional.
5. Checking Air Intake
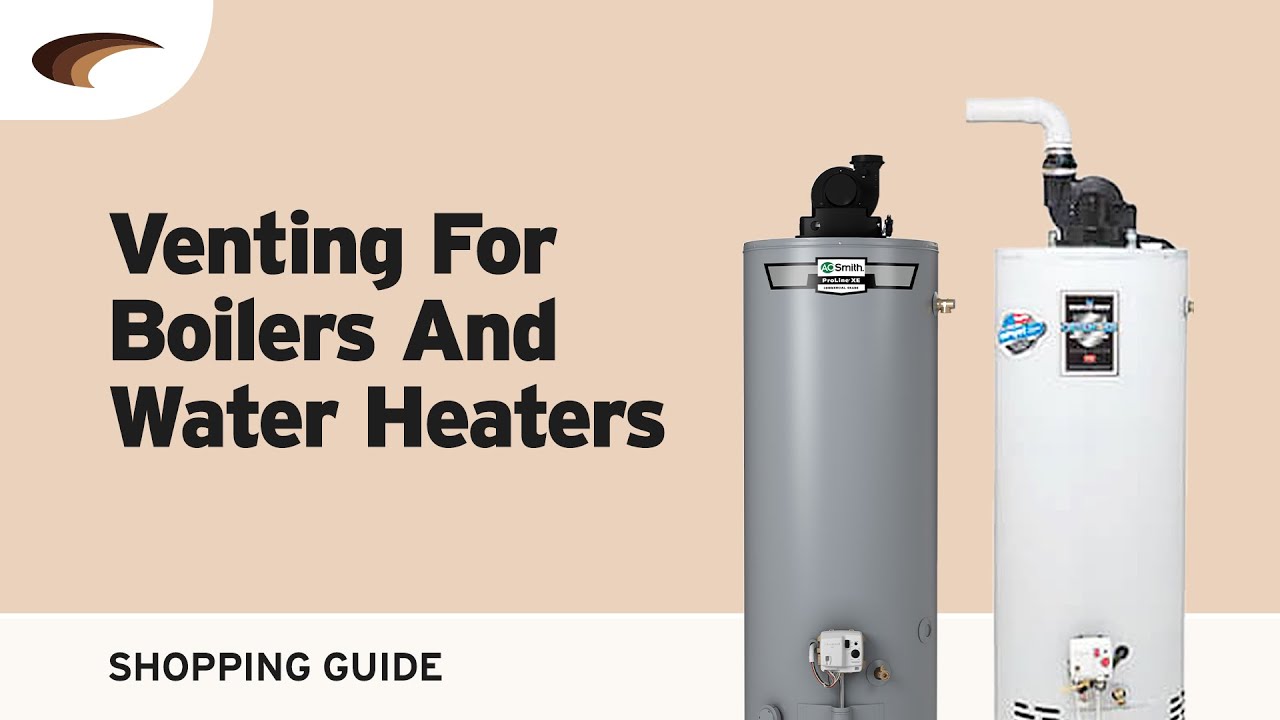
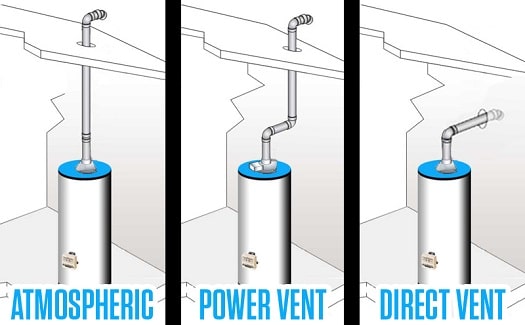
Some newer, high-efficiency water heaters draw combustion air from outside. Check the air intake vent for any obstructions, such as snow, ice, leaves, or bird nests. Clear any blockages to ensure proper airflow.
When to Call a Professional: Recognizing Your Limits
While some venting problems can be addressed with simple DIY fixes, it's crucial to know when to call a qualified professional. Never attempt repairs beyond your skill level.
Call a qualified HVAC technician or plumber immediately if:
- You smell rotten eggs: This indicates a potential gas leak, which is extremely dangerous.
- You detect backdrafting: Backdrafting is a sign of a serious venting problem that can lead to carbon monoxide poisoning.
- You see a yellow or orange flame: This indicates incomplete combustion and the potential for carbon monoxide production.
- The vent pipe is severely corroded or damaged: Replacing damaged vent pipes requires specialized knowledge and tools.
- You're uncomfortable working on the roof: Working at heights can be dangerous.
- You've tried the DIY fixes and the problem persists: This indicates a more complex venting issue that requires professional diagnosis and repair.
- You suspect a carbon monoxide leak: Even if you don't smell rotten eggs, if you're experiencing symptoms of carbon monoxide poisoning, evacuate your home and call the fire department or your gas company. Install carbon monoxide detectors throughout your home and test them regularly.
- Your water heater is under warranty: Attempting DIY repairs may void the warranty.
Preventative Maintenance: Keeping Your Venting System Healthy
Regular maintenance can help prevent venting problems and ensure the safe and efficient operation of your hot water tank.
- Annual Inspection: Have your venting system inspected by a qualified professional at least once a year.
- Clear Obstructions: Regularly check the area around the water heater for any obstructions that could be blocking airflow.
- Inspect Vent Pipe: Periodically inspect the vent pipe for signs of corrosion, rust, or damage.
- Test Carbon Monoxide Detectors: Test your carbon monoxide detectors regularly to ensure they're working properly. Replace the batteries at least once a year.
By following these steps, you can troubleshoot common hot water tank venting problems and perform some simple DIY fixes. Remember, safety is always the top priority. If you're unsure about any step, call a qualified professional. With proper maintenance and prompt attention to potential problems, you can ensure the safe and efficient operation of your hot water tank for years to come.