Humidity In A House What Should It Be At
Maintaining the right humidity level in your home is crucial for both your comfort and the health of your house itself. Too much humidity can lead to mold growth and damage to building materials, while too little can cause dry skin, respiratory issues, and cracked wood. This article will guide you through understanding ideal humidity levels and troubleshooting common issues that arise from imbalances.
Understanding Ideal Humidity Levels
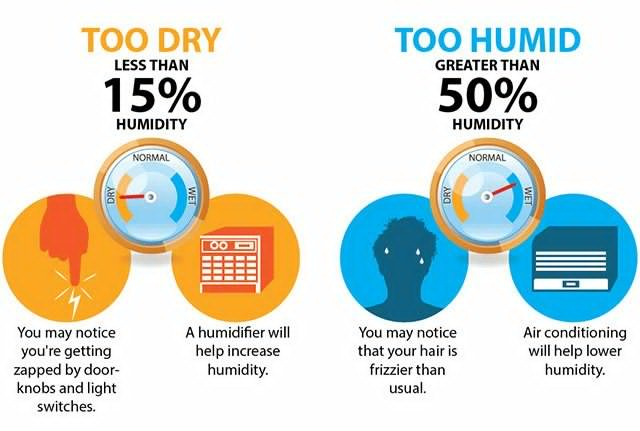
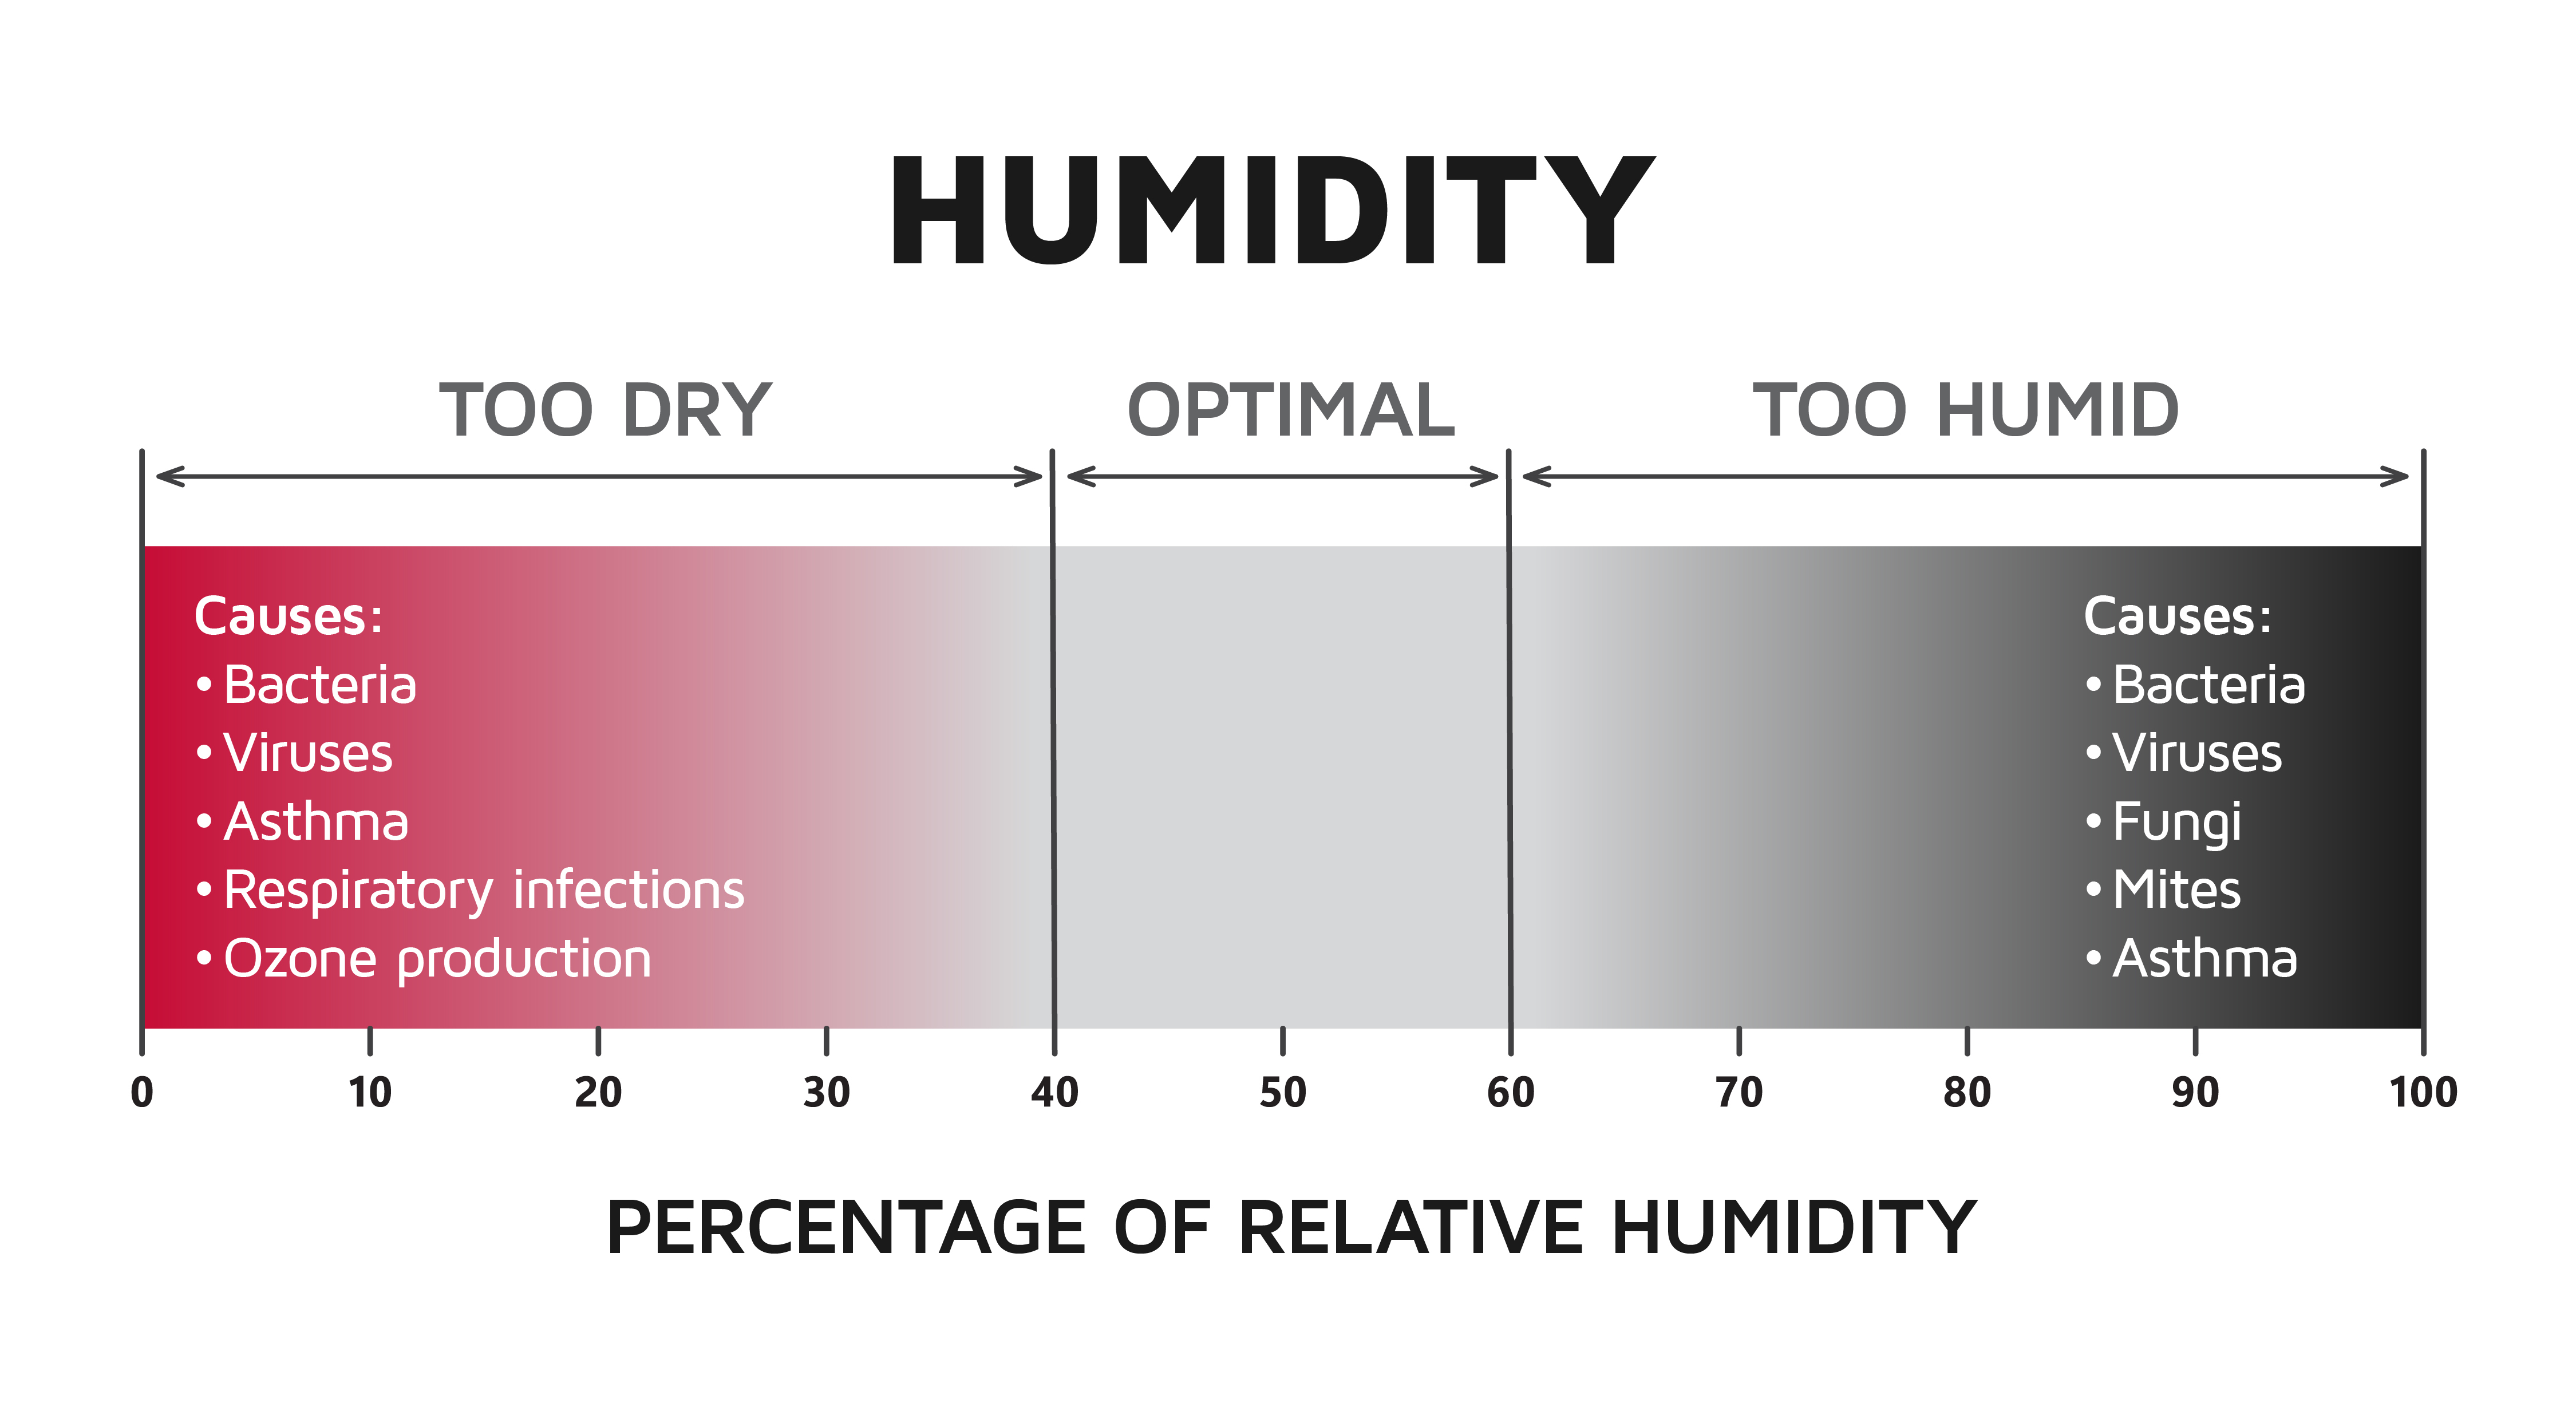
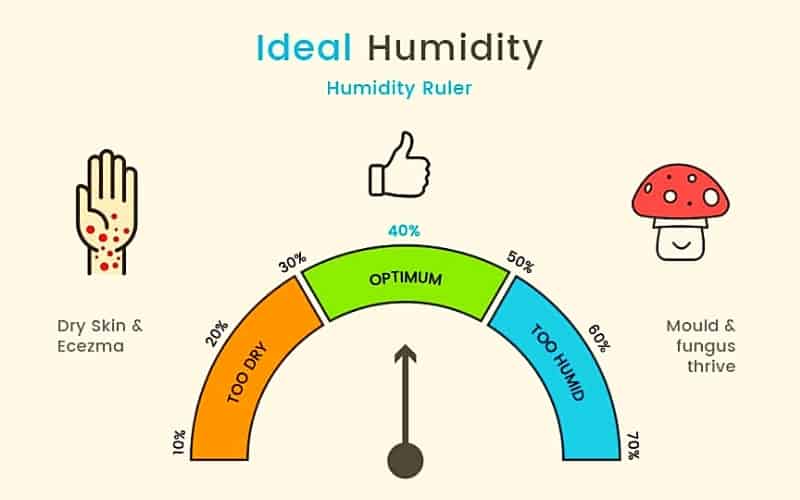
The ideal relative humidity (RH) in a home typically falls between 30% and 50%. This range provides a balance that minimizes the risks associated with both high and low humidity levels. During the winter months, you might aim for the lower end of this range (30-40%) to prevent condensation on windows, which can lead to mold. In the summer, slightly higher levels (40-50%) are generally acceptable.
Why Humidity Levels Matter
- Health: High humidity can exacerbate allergies and asthma by promoting mold and dust mite growth. Low humidity can dry out nasal passages, making you more susceptible to colds and flu.
- Home Structure: Excessive humidity can lead to wood rot, peeling paint, and warped floors. Insufficient humidity can cause wood to crack and shrink.
- Comfort: Proper humidity levels contribute to overall comfort, making your home feel neither too clammy nor too dry.
Common Appliance Failure: The Whole-House Humidifier
A common culprit when humidity levels are off is a malfunctioning whole-house humidifier. These systems are often attached to your furnace and distribute moisture throughout your home via the ductwork. Let's walk through troubleshooting a malfunctioning bypass humidifier, one of the most common types.
Symptoms of a Malfunctioning Humidifier
- Humidity levels consistently too high or too low, regardless of settings.
- Visible water leaks around the humidifier unit.
- Unusual noises coming from the humidifier.
- Furnace running more frequently than usual.
Troubleshooting Your Whole-House Humidifier: A Step-by-Step Guide
Step 1: Safety First!
Before you begin any troubleshooting, always turn off the power to your furnace and humidifier at the circuit breaker. This is crucial to prevent electric shock.
Step 2: Visual Inspection
Carefully examine the humidifier unit for any obvious signs of damage. Look for:
- Water leaks: Check around the water supply line, drain line, and the humidifier housing itself.
- Corrosion: Inspect metal components for rust or corrosion, which can indicate water damage or mineral buildup.
- Physical damage: Look for cracks or breaks in the humidifier housing or any of the connected pipes.
Step 3: Check the Humidistat Setting
The humidistat is the control that regulates the humidity level. Ensure it's set to a reasonable level based on the current outdoor temperature. A setting that's too high can cause the humidifier to run constantly, leading to excessive humidity. Lower the setting and observe if the humidifier cycles on and off properly.
Step 4: Inspect the Water Supply
Verify that the water supply valve to the humidifier is fully open. A partially closed valve can restrict water flow and prevent the humidifier from working correctly.
- Check the water line: Look for any kinks or blockages in the water line leading to the humidifier. Straighten any kinks and clear any visible obstructions.
- Saddle valve problems: Many humidifiers use a saddle valve to tap into the water supply. These valves are prone to corrosion and clogging. If the valve appears corroded, consider having a professional replace it with a more reliable type of valve.
Step 5: Examine the Humidifier Pad (Water Panel)
The humidifier pad, also known as the water panel or evaporator pad, is a porous material that absorbs water and allows it to evaporate into the air stream. Over time, this pad can become clogged with mineral deposits, reducing its efficiency.
- Inspect the pad: Remove the humidifier pad and inspect it for mineral buildup or discoloration. If the pad is heavily soiled or encrusted with minerals, it needs to be replaced.
- Replacing the pad: Replacing the humidifier pad is a relatively simple DIY task. Consult your humidifier's manual for the correct type of replacement pad. Purchase a new pad and follow the manufacturer's instructions for installation.
Step 6: Check the Solenoid Valve
The solenoid valve controls the flow of water into the humidifier. It's an electrically operated valve that opens when the humidistat calls for moisture. If the solenoid valve fails, the humidifier won't receive water.
- Listen for a click: When the humidistat calls for humidity, you should hear a faint click from the solenoid valve. If you don't hear a click, the valve may be faulty.
- Testing with a multimeter: (Warning: This involves working with electricity. If you are not comfortable working with electrical components, consult a qualified HVAC technician.) Disconnect the power to the humidifier and use a multimeter to test the solenoid valve for continuity. If the valve shows no continuity, it needs to be replaced.
- Replacing the solenoid valve: Replacing the solenoid valve involves disconnecting the water lines and electrical connections. Consult your humidifier's manual for instructions on how to properly replace the valve. Ensure the power is off before disconnecting any electrical wires.
Step 7: Inspect the Bypass Damper (if applicable)
Bypass humidifiers have a bypass damper that controls the amount of air flowing through the humidifier. If the damper is stuck in the closed position, the humidifier won't be able to add moisture to the air.
- Locate the damper: The bypass damper is typically located in the ductwork near the humidifier.
- Check the damper's position: Ensure the damper is open. During the heating season, it should be in the open position. Some dampers have a lever or knob that allows you to adjust the airflow.
- Lubricate the damper: If the damper is stuck, try lubricating the moving parts with a silicone-based lubricant.
Step 8: Check the Drain Line
The humidifier's drain line removes excess water from the unit. If the drain line is clogged, water can back up and cause leaks or prevent the humidifier from functioning properly.
- Inspect the drain line: Check the drain line for any kinks or clogs.
- Clear the drain line: Use a wet/dry vacuum or a stiff wire to clear any obstructions in the drain line.
Step 9: Reset the System
After making any adjustments or repairs, restore power to the furnace and humidifier. Monitor the humidity levels in your home to see if the problem has been resolved. It may take some time for the humidifier to reach the desired humidity level.
When to Call a Professional
While many humidifier issues can be resolved with basic troubleshooting, some problems require the expertise of a qualified HVAC technician. It is essential to call a professional if:
- You are uncomfortable working with electricity or gas.
- You suspect a problem with the furnace itself.
- You are unable to diagnose the problem after following the troubleshooting steps.
- The humidifier is under warranty and requires professional service.
- You suspect a gas leak. Evacuate the premises immediately and call your gas company.
Addressing High Humidity Issues
If your home consistently has high humidity, even with a functioning humidifier (or without one running), consider these additional steps:
- Ventilation: Ensure adequate ventilation in your home, especially in bathrooms and kitchens. Use exhaust fans when showering or cooking to remove moisture from the air. Open windows when weather permits to allow fresh air to circulate.
- Dehumidifiers: Consider using a portable dehumidifier in damp areas such as basements or crawl spaces.
- Air Conditioning: Air conditioning removes moisture from the air as it cools, helping to lower humidity levels.
- Fix Leaks: Address any water leaks promptly, as they can contribute to high humidity levels. Check for leaky pipes, faucets, and roofs.
- Proper Drainage: Ensure that your property has proper drainage to prevent water from accumulating around the foundation.
- Check Your Foundation: Inspect your foundation for cracks or signs of moisture intrusion. Seal any cracks to prevent water from seeping into your home.
Addressing Low Humidity Issues
If your home consistently has low humidity, even with a functioning humidifier, consider these steps:
- Seal Air Leaks: Seal any air leaks around windows, doors, and other openings to prevent dry air from entering your home.
- Use Humidifiers Strategically: In addition to a whole-house humidifier, consider using portable humidifiers in specific rooms, such as bedrooms, to increase humidity levels.
- Houseplants: Certain houseplants can help to increase humidity levels in your home.
- Boiling Water: Simmering a pot of water on the stove can temporarily increase humidity. However, be sure to monitor the pot and avoid leaving it unattended.
Preventive Maintenance
Regular maintenance can help to prevent humidifier problems and ensure that your system operates efficiently. Follow these tips:
- Replace the Humidifier Pad Regularly: Replace the humidifier pad at least once a year, or more frequently if it becomes heavily soiled or encrusted with minerals.
- Clean the Humidifier: Clean the humidifier regularly to remove mineral deposits and prevent mold growth. Consult your humidifier's manual for cleaning instructions.
- Inspect the Water Lines: Inspect the water lines for leaks or damage. Replace any damaged lines promptly.
- Check the Humidistat Calibration: Periodically check the calibration of your humidistat to ensure that it's accurately measuring humidity levels.
Conclusion
Maintaining the proper humidity level in your home is essential for your health, comfort, and the longevity of your house. By understanding ideal humidity levels, troubleshooting common humidifier problems, and taking preventive measures, you can create a healthy and comfortable living environment. Remember to prioritize safety and consult a qualified HVAC technician when necessary. With a little knowledge and effort, you can keep your home's humidity levels in the sweet spot!