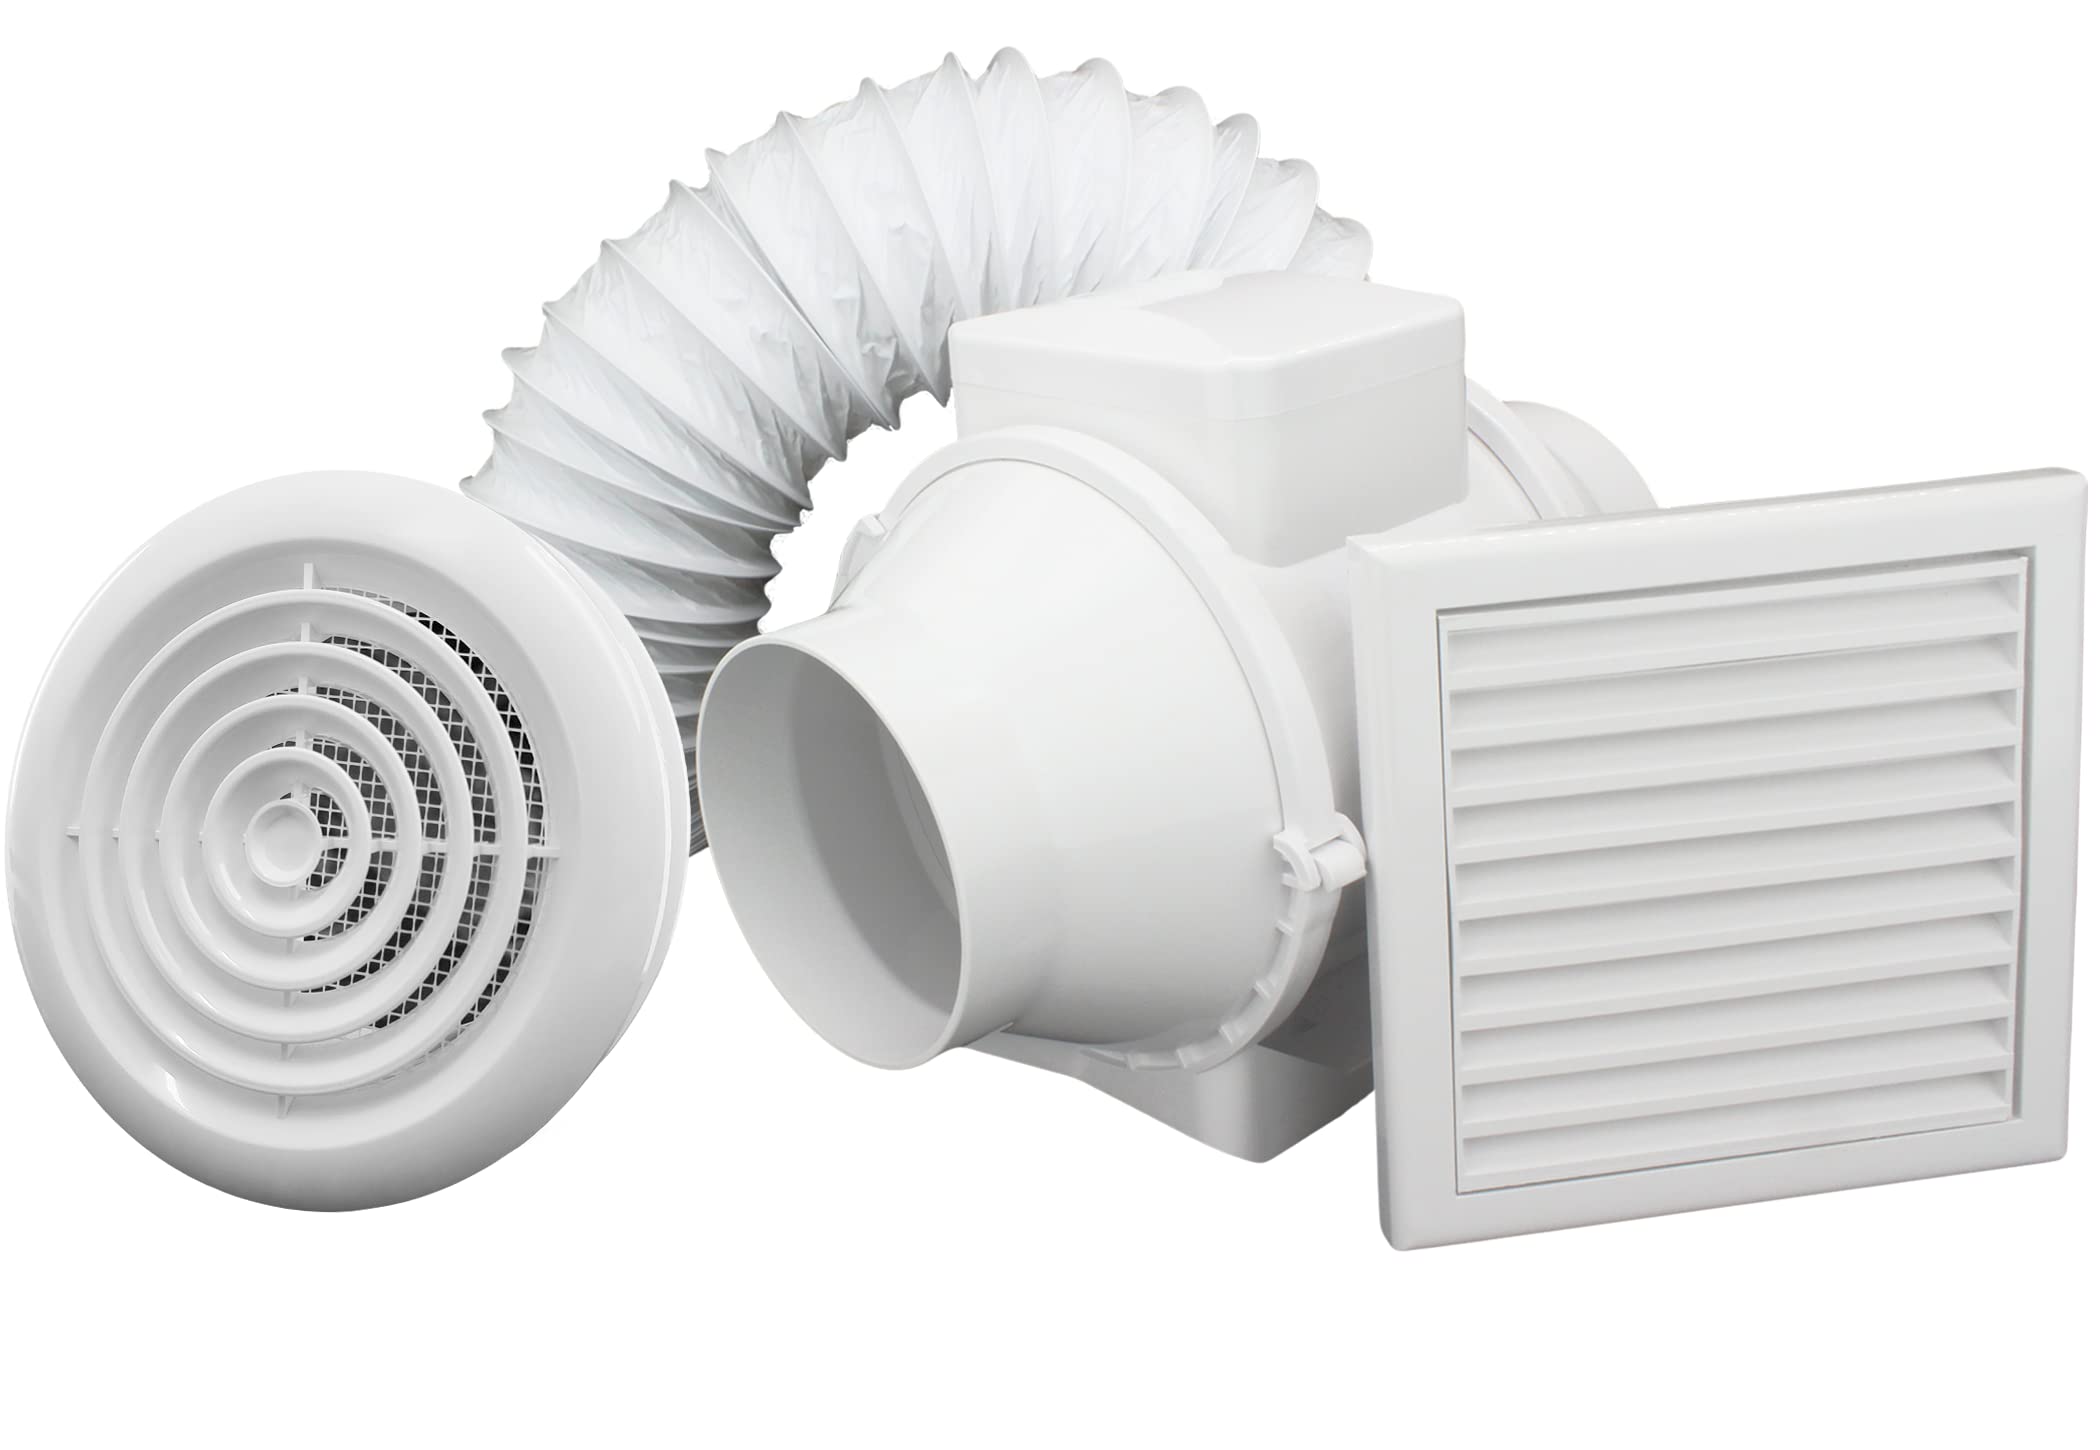
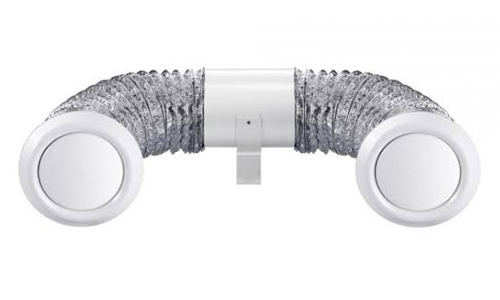
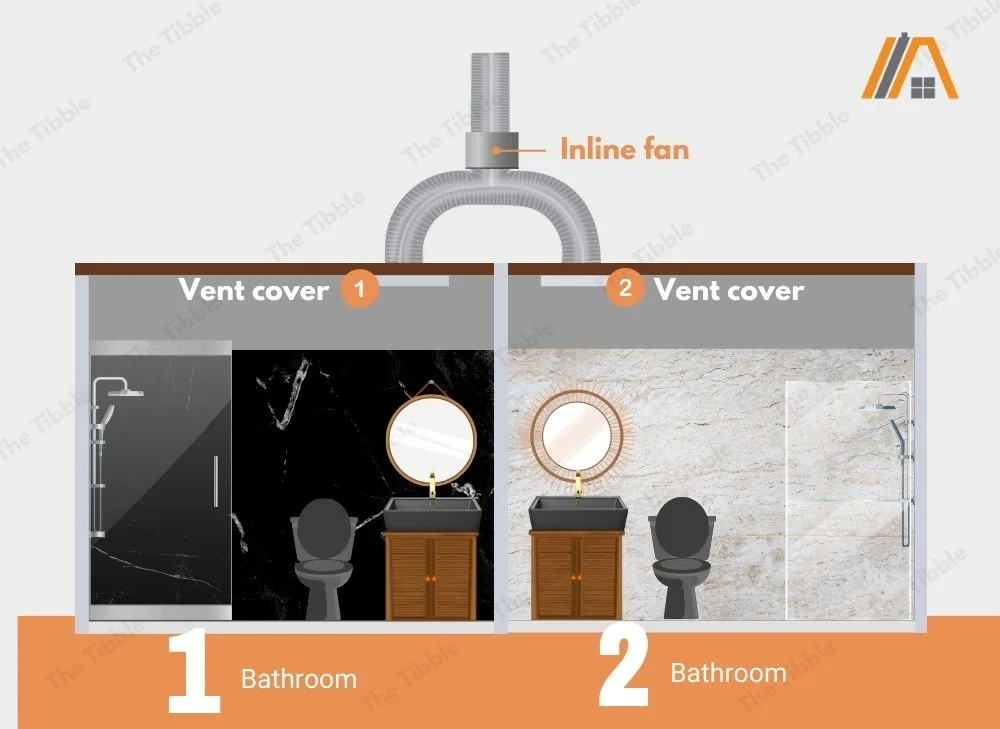
In Line Fan To Vent Two Bathrooms
One of the most common frustrations homeowners face, especially during those sweltering summers or freezing winters, is uneven heating or cooling between bathrooms. You might find one bathroom feeling comfortably warm while the other remains stubbornly cold, or vice versa. Often, this uneven temperature is compounded by excessive moisture build-up in one or both bathrooms, leading to potential mold issues. The usual suspect? A shared in-line fan struggling to adequately ventilate both spaces. This article will guide you through troubleshooting this common issue, offering a step-by-step approach to diagnose and potentially fix the problem yourself.
Step 1: Initial Assessment – No Tools Required
Before reaching for any tools, let's start with a simple assessment. This stage is all about gathering information and identifying obvious issues.
Check the Basics:
- Airflow from each vent: Carefully hold a small piece of tissue paper near each bathroom exhaust vent. Does the tissue paper get sucked up towards the vent, indicating airflow? Note the strength of the airflow in each bathroom. A significant difference suggests a blockage or imbalance.
- Fan activation: When you turn on the fan, can you clearly hear it running? A weak humming or no sound at all indicates a potential motor problem.
- Duct run distance: Roughly estimate the length of the duct run from each bathroom to the in-line fan and then to the outside vent. Longer runs offer more opportunity for airflow restriction.
- Look for obvious blockages: Visually inspect the vent covers in each bathroom for dust, lint, or other debris that might be obstructing airflow.
- Check the exterior vent: Walk outside and check the exterior vent. Is it blocked by leaves, bird nests, or overgrown vegetation? A blocked exterior vent is a common cause of reduced airflow.
Important: Make note of your findings. This information will be invaluable as you progress through the troubleshooting process.
Step 2: Deeper Dive – Basic Tools Required
Now that you've conducted a visual inspection, it's time to get a little more hands-on. You'll need a few basic tools for this stage: a screwdriver (Phillips and flathead), a ladder (if the fan is located in the attic), and a flashlight.
Accessing and Inspecting the In-Line Fan:
- Safety First: Always turn off the power to the in-line fan at the circuit breaker before proceeding. This is crucial to prevent electrical shock.
- Locate the Fan: In-line fans are typically located in the attic, crawl space, or sometimes above a drop ceiling.
- Access the Fan Housing: Most in-line fans have an access panel secured with screws. Carefully remove the panel.
- Inspect the Fan Blades: Use your flashlight to visually inspect the fan blades. Are they clean and free of debris? Dust and lint can significantly reduce the fan's efficiency. Gently clean the blades with a soft brush or cloth.
- Check the Motor: Examine the motor for any signs of damage, such as burnt wires or a broken housing. If you see any damage, do not attempt to repair it yourself. Contact a qualified HVAC technician.
Inspecting the Ductwork:
- Duct Connections: Check all visible duct connections to the fan. Ensure they are securely fastened and properly sealed with foil tape. Loose connections can lead to air leaks and reduced airflow.
- Duct Sagging: If you have flexible ductwork, check for excessive sagging. Sagging ducts can create pockets where air gets trapped, reducing airflow. Support sagging ducts with straps or hangers.
- Duct Kinks and Bends: Look for any sharp bends or kinks in the ductwork. These can significantly restrict airflow. Try to straighten out any kinks or replace sections of damaged ductwork.
- Duct Material: Examine the duct material itself. Is it damaged, torn, or deteriorating? Damaged ductwork needs to be replaced.
Tool Tip: Foil tape is far superior to duct tape for sealing ductwork. Duct tape tends to dry out and crack over time, leading to leaks. Foil tape provides a more durable and airtight seal.
Step 3: Diagnosing Specific Issues
Based on your observations, you should now have a better understanding of the potential issues. Let's break down some common problems and their potential solutions.
Problem: Weak Airflow in One Bathroom
- Possible Cause: Duct blockage in that specific run.
- Solution: Carefully inspect the ductwork leading to that bathroom for kinks, sagging, or debris. You can try using a duct cleaning brush or vacuum with a hose attachment to remove any obstructions.
- Possible Cause: Longer duct run to that bathroom.
- Solution: Longer duct runs naturally experience more friction and resistance. While you can't easily shorten the duct run, you can ensure it's properly insulated to minimize heat loss or gain, which can further reduce airflow.
- Possible Cause: Damper imbalance (if dampers are installed).
- Solution: Some in-line fan systems have dampers that allow you to adjust the airflow to each bathroom. Check the damper settings and adjust them to balance the airflow.
Problem: No Airflow in Either Bathroom
- Possible Cause: Fan motor failure.
- Solution: If the fan motor is completely dead, you'll need to replace the entire in-line fan unit. This is a straightforward DIY project for those comfortable with basic electrical work, but if you're unsure, it's best to call a professional.
- Possible Cause: Blockage in the main duct run or at the exterior vent.
- Solution: Thoroughly inspect the main duct run from the fan to the exterior vent for any obstructions. Clear any debris from the exterior vent.
- Possible Cause: Loose wiring.
- Solution: (After turning off the power at the breaker!) Carefully inspect the wiring connections to the fan motor. Ensure all wires are securely connected. If you find any loose or damaged wires, consult a qualified electrician.
Problem: Fan is Running, but Airflow is Weak in Both Bathrooms
- Possible Cause: Dirty fan blades.
- Solution: Clean the fan blades thoroughly with a soft brush or cloth.
- Possible Cause: Clogged ductwork.
- Solution: Use a duct cleaning brush or vacuum with a hose attachment to clean the ductwork.
- Possible Cause: Underpowered fan.
- Solution: The in-line fan may simply not be powerful enough to adequately ventilate both bathrooms. Consider upgrading to a more powerful fan with a higher CFM (cubic feet per minute) rating. This is best determined by a professional HVAC technician who can assess the volume of both bathrooms and recommend the appropriate fan size.
Step 4: Simple DIY Actions You Can Take
Based on your diagnosis, here are some simple DIY actions you can take to improve the performance of your in-line fan system:
- Clean Vent Covers: Regularly clean the vent covers in each bathroom to remove dust and lint.
- Clean Fan Blades: Periodically clean the fan blades to maintain optimal airflow.
- Seal Duct Connections: Ensure all duct connections are properly sealed with foil tape.
- Support Sagging Ducts: Support sagging ducts with straps or hangers.
- Trim Overhanging Vegetation: Keep the area around the exterior vent clear of vegetation.
- Replace Damaged Ductwork: Replace any damaged or deteriorating sections of ductwork.
When to Call a Professional
While many in-line fan issues can be resolved with simple DIY troubleshooting, there are certain situations where it's best to call a qualified HVAC technician:
- Electrical Issues: If you suspect any electrical problems, such as loose wiring or a damaged motor, do not attempt to repair it yourself. Electrical work can be dangerous, and it's best left to the professionals.
- Fan Motor Replacement: While replacing an in-line fan is a relatively straightforward DIY project, if you're uncomfortable working with electricity, it's best to hire a professional.
- Ductwork Design Issues: If you suspect that the ductwork is improperly designed or sized, consult with an HVAC technician. They can assess the system and recommend solutions to improve airflow.
- Mold Growth: If you discover significant mold growth in your bathrooms, it's essential to address the underlying moisture problem. An HVAC technician can help you identify the source of the moisture and recommend solutions to prevent future mold growth. Also, consult a mold remediation specialist for proper removal of existing mold.
- Upgrading to a More Powerful Fan: Determining the appropriate fan size (CFM rating) for your bathrooms requires careful calculations and consideration of factors such as room size, ceiling height, and the number of fixtures. An HVAC technician can help you select the right fan for your needs.
Safety Reminder: Always prioritize safety when working with electricity or on a ladder. If you're unsure about any step in the troubleshooting process, it's always best to err on the side of caution and call a professional.
By following these steps, you should be well-equipped to troubleshoot and potentially resolve common issues with your in-line fan system. Remember to take your time, be thorough, and prioritize safety. With a little effort, you can restore proper ventilation to your bathrooms and enjoy a more comfortable and healthy home.