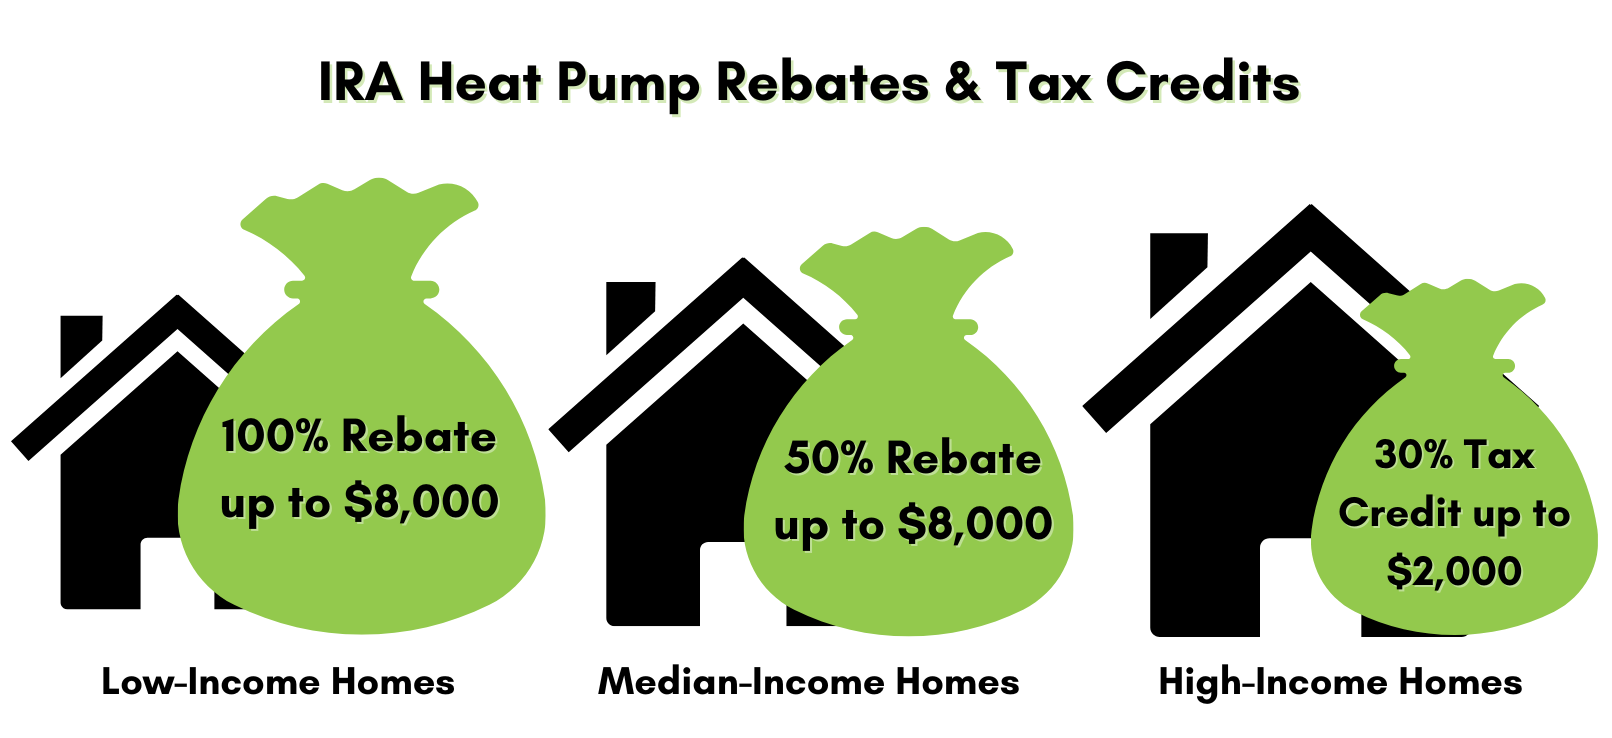
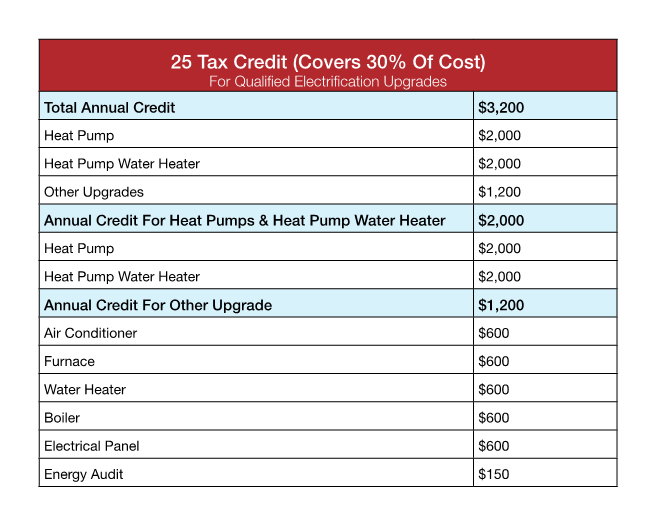
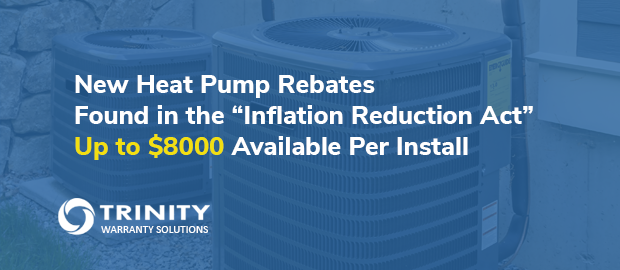
Inflation Reduction Act Heat Pump Credit
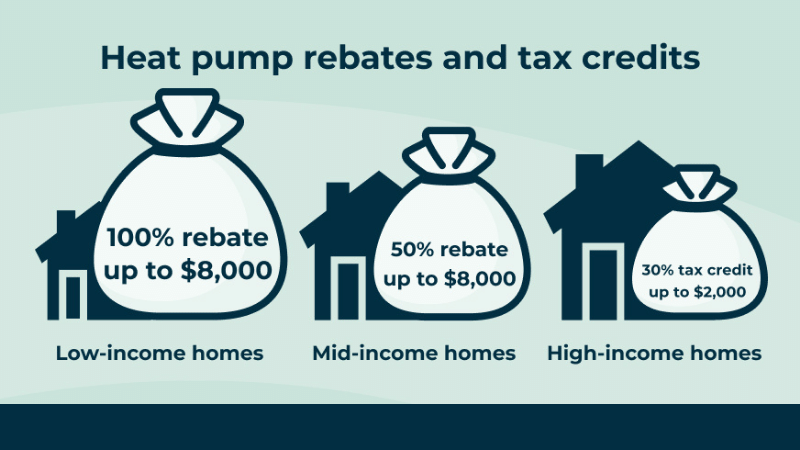
Many homeowners experience a common problem: their heat pump isn't heating or cooling their home effectively. This can range from insufficient warmth on a cold day to weak cooling during the summer. Before you resign yourself to calling a professional, there are several steps you can take to troubleshoot the issue yourself, and potentially even resolve it. Remember, the Inflation Reduction Act offers significant tax credits for upgrading to energy-efficient heat pumps, so keeping your system running smoothly is an investment in the future and potentially higher rebates when the time comes to replace it. This guide provides a methodical approach to diagnosing and addressing common heat pump problems.
Step 1: Basic Checks (No Tools Required)
Start with the simplest checks first. These don't require any tools and can often pinpoint the most obvious culprits.
1.1 Thermostat Settings:
This might seem obvious, but it's the most common mistake. Double-check that your thermostat is set to "Heat" in winter or "Cool" in summer. Also, ensure the set temperature is a few degrees higher (heating) or lower (cooling) than the current room temperature. Sometimes a simple accidental adjustment is all it takes to cause problems.
Beyond "Heat" or "Cool," make sure the thermostat is not set to "Emergency Heat." This setting bypasses the heat pump and relies solely on electric resistance heating, which is much less efficient and will result in higher energy bills. It should only be used in emergencies when the heat pump is demonstrably malfunctioning.
1.2 Airflow Obstructions:
Restricted airflow is a major cause of heat pump inefficiency. Walk around your home and ensure that all supply and return vents are open and unobstructed. Furniture, rugs, and even curtains can block vents, hindering airflow.
Visually inspect the outdoor unit (the condenser). Make sure it's free from debris like leaves, snow, ice, or overgrown vegetation. The unit needs to breathe freely to function correctly. A build-up of debris can significantly reduce its efficiency and potentially damage the system.
1.3 Power Supply:
Check the circuit breaker for both the indoor and outdoor units. Ensure that the breakers haven't tripped. If a breaker is tripped, reset it. If it trips again immediately, there's likely a more serious electrical problem that requires a professional electrician.
Also, visually inspect the disconnect switch near the outdoor unit. Make sure it's in the "On" position. This switch is a safety feature that allows you to cut power to the unit for maintenance or emergencies.
Step 2: Visual Inspection & Simple Maintenance (Minimal Tools)
These checks require minimal tools, typically a screwdriver and potentially a vacuum cleaner or garden hose.
2.1 Air Filter:
A dirty air filter is the single most common cause of heat pump problems. Locate your air filter (usually in the indoor unit or a return vent) and inspect it. If it's visibly dirty (dusty or clogged), replace it immediately with a new filter of the correct size and type. Refer to your heat pump manual for the recommended filter type.
Replacing your air filter regularly (typically every 1-3 months, depending on usage and air quality) is crucial for maintaining optimal heat pump performance and preventing costly repairs. A clogged filter restricts airflow, forcing the unit to work harder, which reduces efficiency and can lead to overheating.
2.2 Outdoor Unit Inspection:
With the power off (using the disconnect switch), visually inspect the outdoor unit. Look for any obvious signs of damage, such as bent fins, loose wires, or refrigerant leaks (you might notice an oily residue or a hissing sound). If you see any of these, do not attempt to repair them yourself; contact a qualified HVAC technician immediately.
If the fins are bent, you can *carefully* straighten them with a fin comb (a specialized tool available at most hardware stores). However, be very gentle; fins are delicate and easily damaged further.
If the outdoor unit is covered in dirt or debris, carefully clean it with a garden hose. Use a gentle spray setting to avoid damaging the fins. Avoid spraying water directly into the electrical components.
2.3 Indoor Unit Inspection:
Visually inspect the indoor unit for any signs of leaks or condensation. If you notice water pooling around the unit, it could indicate a clogged condensate drain. This is a common issue that can often be resolved relatively easily.
To check the condensate drain, locate the drain line (usually a PVC pipe) near the indoor unit. You can try to clear the drain line using a wet/dry vacuum cleaner. Attach the vacuum hose to the end of the drain line and try to suck out any clogs. You can also try pouring a cup of warm water mixed with a tablespoon of bleach into the drain line to help dissolve any buildup. If this doesn't work, you may need to call a professional to clear the drain line.
Step 3: Advanced Troubleshooting (Requires Some Knowledge & Equipment)
These steps require some basic knowledge of HVAC systems and may require specialized equipment. Proceed with caution and only if you feel comfortable doing so. If you are unsure about any of these steps, it's best to consult a qualified HVAC technician.
3.1 Checking Refrigerant Lines:
Caution: Refrigerant is a hazardous substance. Do not attempt to handle refrigerant yourself.
Visually inspect the refrigerant lines (the copper pipes connecting the indoor and outdoor units) for signs of damage or leaks. Look for oily residue or ice buildup on the lines. If you suspect a refrigerant leak, contact a qualified HVAC technician immediately. Do not attempt to repair the leak yourself. Refrigerant leaks require specialized equipment and training to repair safely and effectively.
While you can't directly check the refrigerant level without specialized equipment, you can observe the performance of the system. If the system is running but not providing adequate heating or cooling, and you suspect a refrigerant leak, this is a strong indicator of a problem.
3.2 Checking Electrical Connections:
Caution: Working with electricity can be dangerous. Always turn off the power to the unit at the circuit breaker before working on any electrical components.
Using a multimeter, you can check the voltage at the disconnect switch near the outdoor unit to ensure that the unit is receiving power. If the voltage is significantly lower than the rated voltage for the unit, it could indicate a problem with the electrical supply. This requires experience with multimeters and electrical safety. If you're not comfortable with this, call an electrician.
Visually inspect the wiring connections inside the outdoor unit for any signs of corrosion or loose connections. Tighten any loose connections with a screwdriver. However, be careful not to overtighten them. If you notice any corrosion, clean the connections with a wire brush.
3.3 Monitoring System Performance:
With a thermometer, you can monitor the temperature of the air coming out of the supply vents. Compare the temperature to the thermostat setting. If the air is significantly warmer (heating) or cooler (cooling) than the room temperature, the system is likely functioning correctly. However, if the temperature difference is minimal, it could indicate a problem.
Listen to the sounds the heat pump is making. Unusual noises, such as banging, hissing, or grinding, can indicate mechanical problems. Note when the noises occur (starting, running, stopping) to give your HVAC tech clues about the problem.
When to Call a Professional
While many heat pump problems can be resolved with simple troubleshooting steps, some issues are best left to the professionals. Call a qualified HVAC technician if:
- You suspect a refrigerant leak.
- You are uncomfortable working with electrical components.
- You notice any unusual noises or smells coming from the unit.
- The unit is not providing adequate heating or cooling after you have performed the basic troubleshooting steps.
- The circuit breaker trips repeatedly.
- You are not comfortable performing any of the troubleshooting steps outlined in this guide.
- The unit is under warranty. Attempting to repair it yourself may void the warranty.
Remember that regular maintenance, such as replacing air filters and cleaning the unit, can help prevent many heat pump problems. Consider scheduling an annual checkup with a qualified HVAC technician to ensure that your system is running efficiently and to identify any potential problems before they become major issues. This is especially important as you consider the long-term benefits and tax incentives associated with energy-efficient heat pumps under the Inflation Reduction Act.
By following these troubleshooting steps, you can often identify and resolve common heat pump problems yourself, saving you time and money. However, always prioritize safety and don't hesitate to call a professional when needed. A well-maintained heat pump will provide reliable heating and cooling for years to come, and taking care of it is an investment in your home's comfort and efficiency.