Installing Shingles Over Ridge Vent
:max_bytes(150000):strip_icc()/aluminum-and-shingle-over-ridge-vents-56a804cc5f9b58b7d0f0032f.jpg)
Installing shingles over a ridge vent is a crucial step in ensuring your roof functions correctly and protects your home from the elements. A ridge vent allows hot, moist air to escape from the attic, helping to prevent condensation, ice dams, and premature deterioration of roofing materials. Properly covering the vent with shingles maintains its functionality while providing a clean, aesthetically pleasing appearance. This guide will provide a comprehensive overview of the process, ensuring you understand each step involved.
Understanding Ridge Vents and Shingle Compatibility
Before diving into the installation process, it's essential to understand what a ridge vent is and how it interacts with your shingles. A ridge vent is a long, narrow vent installed along the peak of your roof. It's designed to work in conjunction with soffit vents (vents located under the eaves of your roof) to create a natural airflow, drawing cool air in through the soffits and allowing hot air to escape through the ridge vent.
Think of your attic like a chimney. Heat rises, and the ridge vent acts as the outlet at the top of that chimney, allowing the warm, moist air to escape. This is vital for preventing problems like:
- Moisture buildup: Excessive moisture can lead to mold and mildew growth, damaging insulation and structural components.
- Ice dams: In colder climates, warm air escaping into the attic can melt snow on the roof, which then refreezes at the eaves, forming ice dams that can damage shingles and cause leaks.
- Premature shingle degradation: Excessive heat in the attic can bake shingles from the underside, shortening their lifespan.
Shingle compatibility is also a key consideration. Not all shingles are created equal, and some may be better suited for installation over a ridge vent than others. Generally, thinner, more flexible shingles are easier to work with and conform better to the shape of the vent. Heavier, thicker shingles might require more effort and precision during installation.
Types of Ridge Vents
There are various types of ridge vents available, each with slightly different designs and installation requirements. Some common types include:
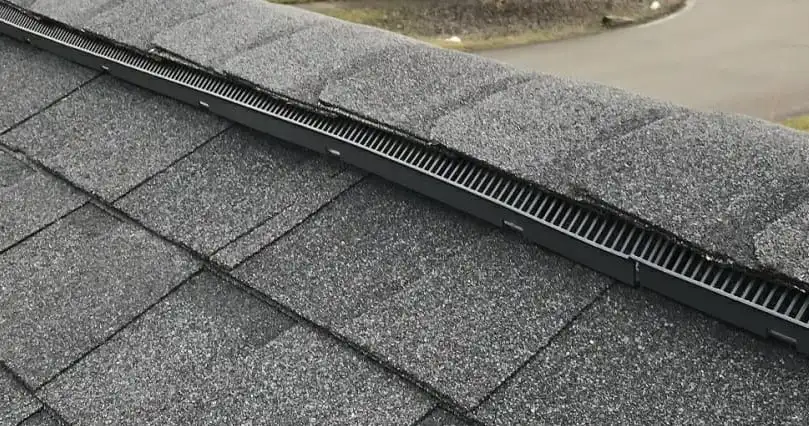
- Standard Ridge Vent: These are the most common type, typically made of plastic or metal and designed to provide adequate ventilation.
- High-Profile Ridge Vent: These vents are taller than standard vents, offering increased airflow capacity.
- Low-Profile Ridge Vent: Designed to be less visible, these vents offer a lower profile while still providing adequate ventilation.
Regardless of the type of ridge vent you choose, it's crucial to follow the manufacturer's instructions carefully during installation. These instructions will provide specific guidelines for shingle overlap, nail placement, and other critical details.
Tools and Materials Required
Before you start the installation process, gather all the necessary tools and materials. This will ensure a smooth and efficient workflow. Here’s a list of what you’ll need:
- Ridge Vent: Select the appropriate ridge vent for your roof and ensure it's the correct length.
- Shingles: Use matching shingles to maintain the aesthetic appeal of your roof. Ensure you have enough to cover the entire ridge vent.
- Roofing Nails: Use nails that are specifically designed for roofing applications. The length should be appropriate for the thickness of your shingles and sheathing.
- Hammer or Nail Gun: Choose a hammer or nail gun that you are comfortable using. A nail gun can speed up the process, but a hammer provides more control.
- Utility Knife or Roofing Knife: You'll need a sharp knife to cut the shingles to the correct size and shape.
- Measuring Tape: Accurate measurements are essential for a professional-looking installation.
- Chalk Line: A chalk line is useful for creating straight lines to guide your shingle placement.
- Safety Glasses: Protect your eyes from debris and flying nails.
- Work Gloves: Protect your hands from cuts and abrasions.
- Roofing Boots: Wear shoes with good traction to prevent slips and falls.
- Ladder: A sturdy ladder is necessary to access the roof safely.
- Pry Bar: You might need a pry bar to remove old shingles or make adjustments.
Safety is paramount when working on a roof. Always wear appropriate safety gear and take precautions to prevent falls. If you're not comfortable working at heights, consider hiring a professional roofing contractor.
Step-by-Step Installation Guide
Now that you have the tools and materials ready, let's walk through the installation process step-by-step:
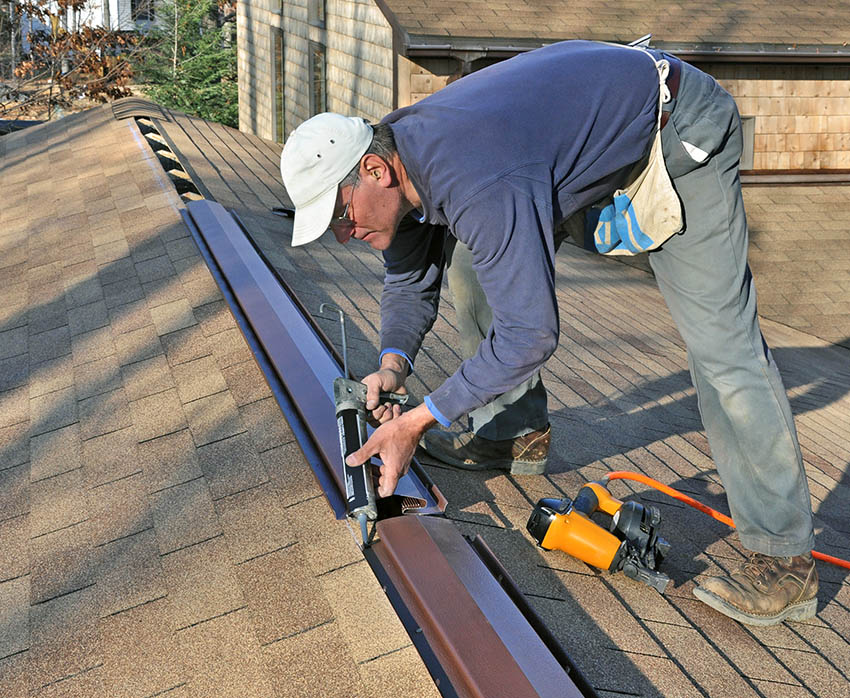
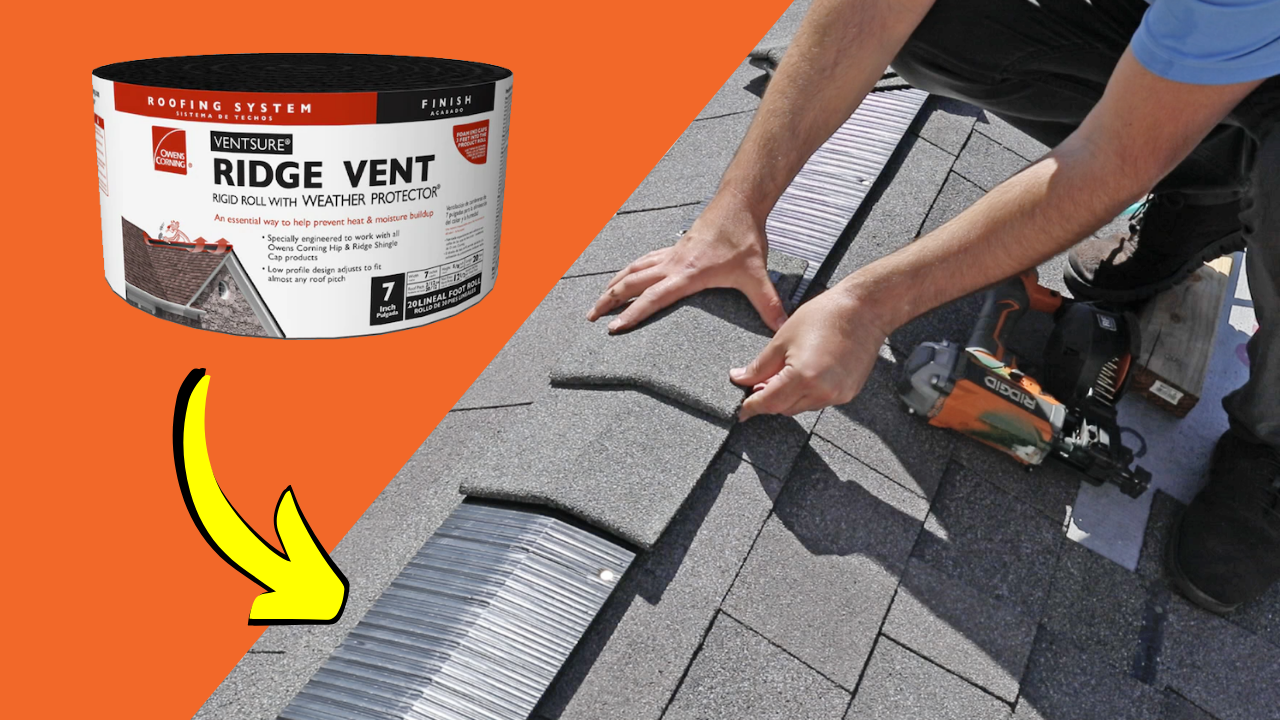
- Prepare the Ridge Vent: Ensure the ridge vent is properly installed according to the manufacturer's instructions. This typically involves nailing or screwing the vent to the roof sheathing along the ridge line.
- Measure and Cut the Shingles: Measure the width of the ridge vent. You'll need to cut the shingles so they overhang the vent by the manufacturer-recommended amount on each side (usually around 6-8 inches). Use a utility knife or roofing knife to make clean, straight cuts. Accuracy is key here, as uneven cuts will result in a less professional appearance.
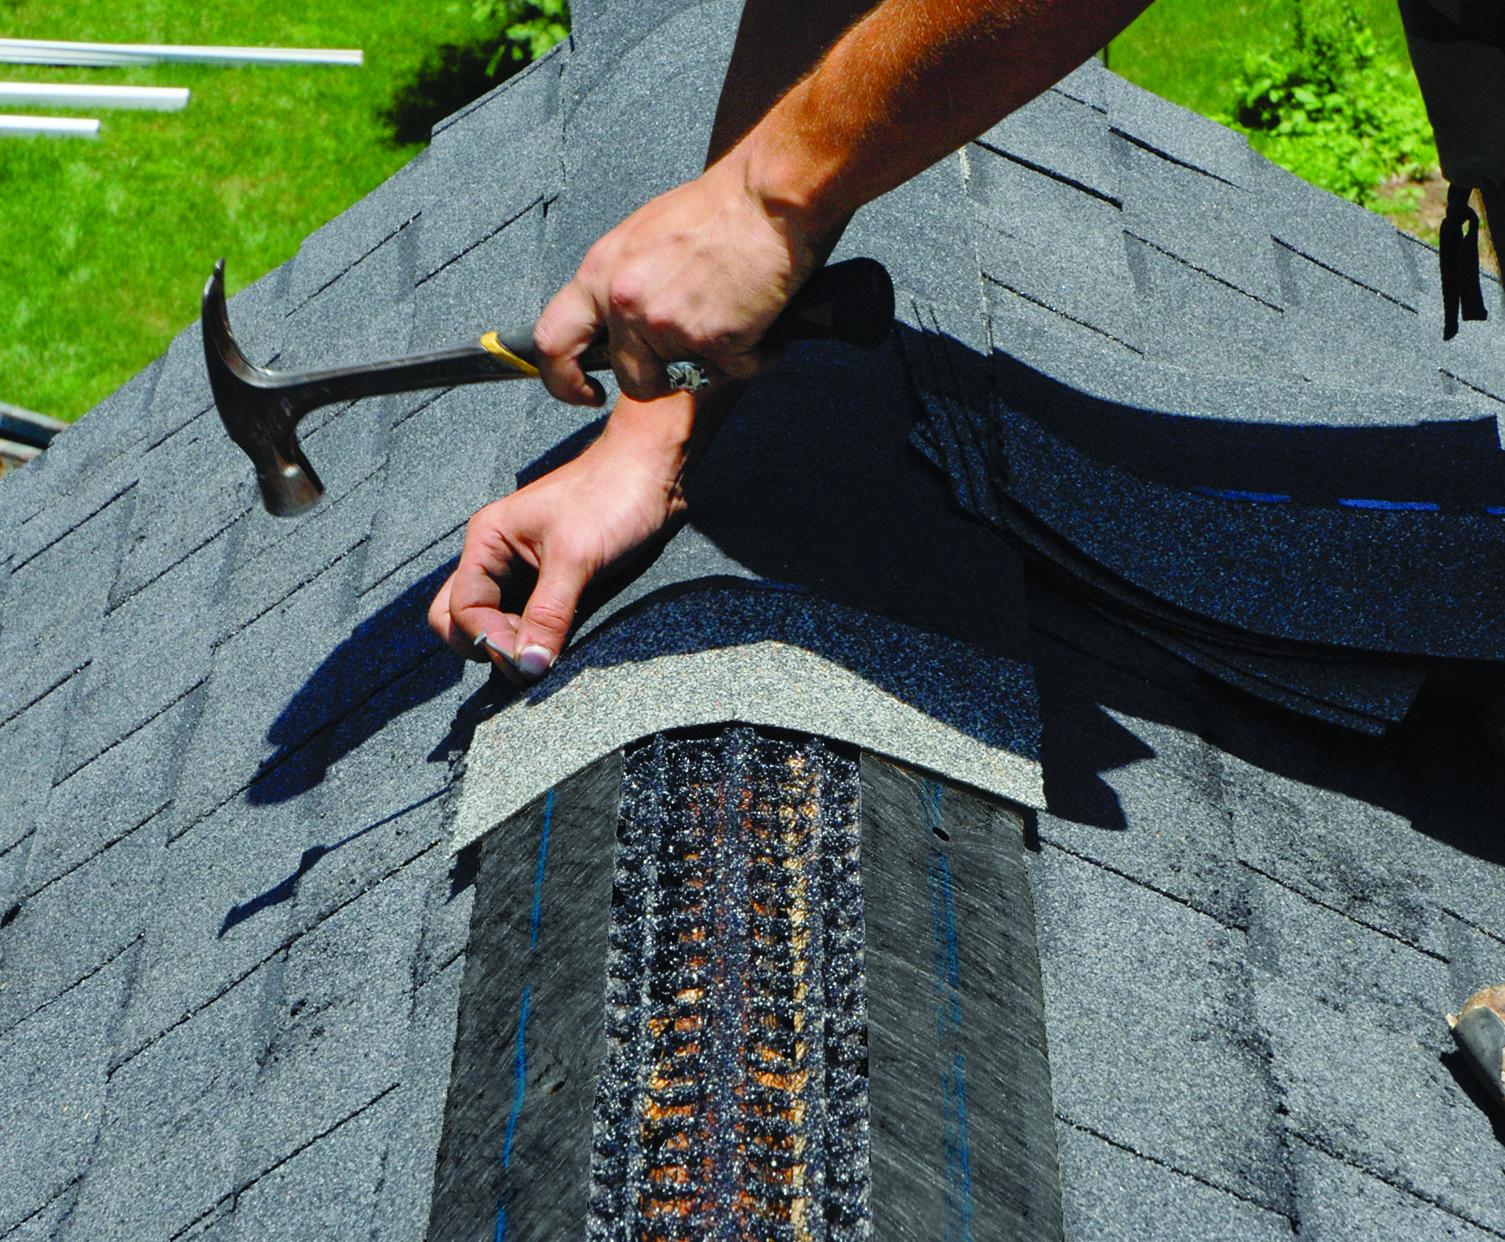
- Apply the First Layer of Shingles: Start at one end of the ridge vent and carefully position the first shingle over the vent. Ensure it's centered and that the overhang is even on both sides. Use roofing nails to secure the shingle in place. Nail placement is crucial. Typically, you'll want to place nails about 1-2 inches from the edge of the shingle, avoiding nailing directly into the vent itself.
- Overlap Subsequent Shingles: Overlap the next shingle over the first, maintaining the manufacturer-recommended exposure. This is the portion of the shingle that is visible. Usually, it will overlap by about half of the previous shingle's length. This creates a watertight seal and ensures that the roof is properly protected. Secure the overlapping shingle with roofing nails, again ensuring proper placement.
- Continue Along the Ridge: Repeat the process of overlapping and nailing shingles until you reach the end of the ridge vent. Maintain consistent overhang and nail placement throughout the installation.
- Finishing the Ends: At the ends of the ridge vent, you may need to trim the shingles to fit neatly. Use a utility knife to make precise cuts, ensuring that the shingles are flush with the edge of the roof.
- Securing the Final Shingles: Pay extra attention to securing the final shingles at each end of the ridge. Use plenty of nails to ensure they are firmly attached and won't be lifted by wind.
- Clean Up: Once the installation is complete, clean up any debris and leftover materials. Check the entire ridge line to ensure that all shingles are properly secured and that there are no gaps or loose edges.
Common Mistakes to Avoid
While the process of installing shingles over a ridge vent is relatively straightforward, there are several common mistakes to avoid:
- Incorrect Shingle Overhang: Not allowing sufficient overhang can leave the ridge vent exposed to the elements. Too much overhang can look sloppy and be vulnerable to wind damage. Always follow the manufacturer's recommendations.
- Improper Nail Placement: Nailing too close to the edge of the shingle or directly into the vent can cause leaks and damage the shingles. Use proper nailing techniques and avoid the vent itself.
- Using the Wrong Type of Nails: Using the wrong type of nails can lead to corrosion and premature shingle failure. Always use roofing nails that are specifically designed for this application.
- Not Maintaining Consistent Overlap: Inconsistent overlap can create weak points in the roof, allowing water to penetrate. Pay close attention to maintaining the proper exposure throughout the installation.
- Ignoring Manufacturer's Instructions: Each ridge vent and shingle product may have slightly different installation requirements. Always read and follow the manufacturer's instructions carefully.
- Poor Ventilation: Ensuring proper ventilation is also important. If soffit vents are blocked, it can negate the positive effect of the ridge vent.
Tips for a Professional-Looking Installation
To achieve a professional-looking installation, consider these tips:
- Use a Chalk Line: Use a chalk line to create straight lines to guide your shingle placement. This will help ensure that the shingles are aligned correctly and that the ridge line is straight.
- Cut Shingles Accurately: Use a sharp utility knife or roofing knife to make clean, precise cuts. This will help ensure that the shingles fit neatly and that there are no gaps or loose edges.
- Maintain Consistent Nail Placement: Use a nail gun or hammer to drive the nails straight and evenly. Avoid over-driving the nails, as this can damage the shingles.
- Blend the Shingles: If you're using shingles from different bundles, blend them together to create a more uniform appearance. This will help prevent noticeable color variations on the roof.
- Take Your Time: Rushing the installation process can lead to mistakes and a less-than-professional result. Take your time and pay attention to detail to ensure that the job is done correctly.
When to Call a Professional
While this guide provides a comprehensive overview of how to install shingles over a ridge vent, there are times when it's best to call a professional roofing contractor. Consider hiring a professional if:
- You're not comfortable working at heights: Roofing work can be dangerous, and falls are a common cause of injury. If you're not comfortable working on a roof, it's best to leave the job to a professional.
- You're not experienced with roofing: Roofing work requires specialized knowledge and skills. If you're not experienced with roofing, you could make mistakes that could damage your roof and lead to costly repairs.
- Your roof is complex or difficult to access: If your roof is steep, has multiple angles, or is difficult to access, it's best to hire a professional who has the experience and equipment to handle the job safely and efficiently.
- You're unsure about any part of the process: If you're unsure about any part of the installation process, it's best to consult with a professional before proceeding. A professional can answer your questions, provide guidance, and ensure that the job is done correctly.
Installing shingles over a ridge vent is a vital part of maintaining a healthy and efficient roof. By following these guidelines and taking your time, you can achieve a professional-looking installation that will protect your home for years to come. However, always prioritize safety, and don't hesitate to seek professional help if you're not comfortable with any aspect of the job.

:max_bytes(150000):strip_icc()/roof-ridge-shingle-56a804cd5f9b58b7d0f00338.jpg)