Intermatic Wall Timer Instructions
Understanding and Troubleshooting Your Intermatic Wall Timer for HVAC Systems
Intermatic wall timers are a common sight in many homes, often used to control lighting, fans, and even HVAC systems. They offer convenience and energy savings by allowing you to schedule when these devices operate. However, like any mechanical or electrical component, they can sometimes malfunction. This guide provides detailed Intermatic wall timer instructions and troubleshooting tips to help you diagnose and fix common issues. Before starting any work, turn off the power at the circuit breaker.
Identifying Your Intermatic Wall Timer Model
Intermatic offers a variety of wall timer models. Locating the model number is crucial for finding the correct Intermatic wall timer instructions and replacement parts. The model number is typically printed on the front or side of the timer, often near the Intermatic logo. Common models include:
- FF Series: Mechanical timers, often used for simple on/off control.
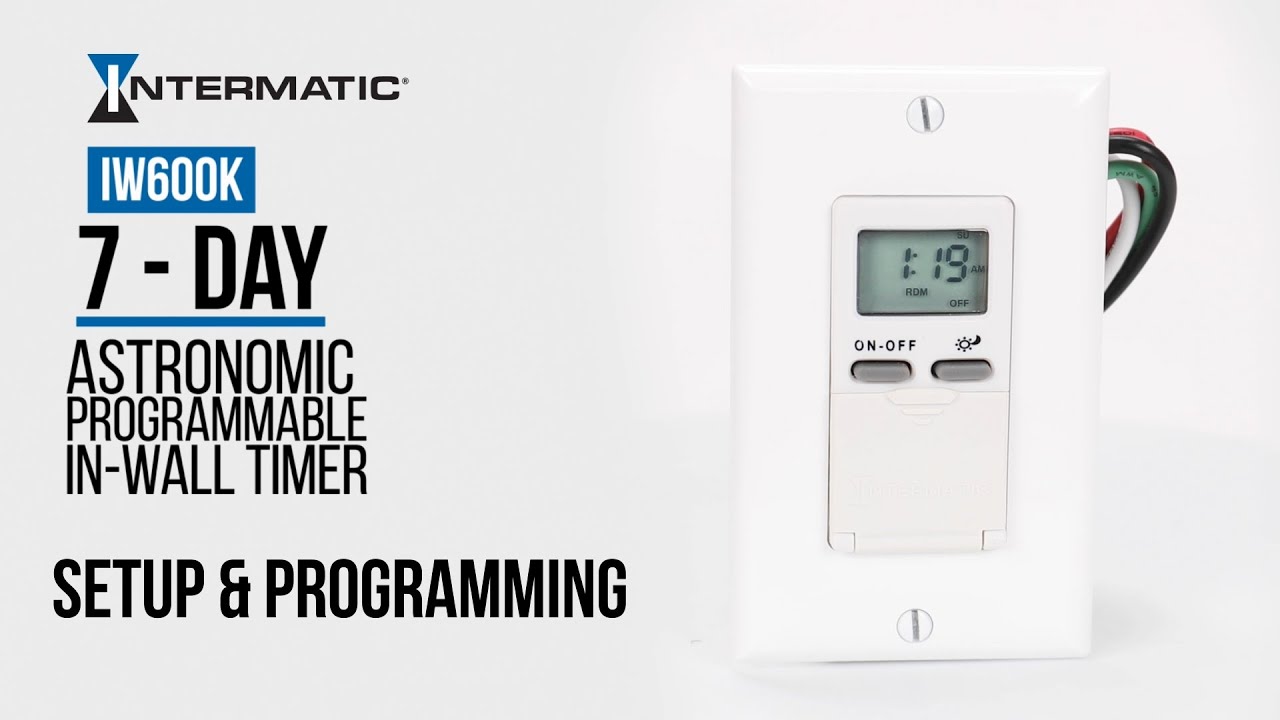
- EI Series: Electronic timers, offering more programming options.
- ST01: A popular mechanical timer model.
- WH21: Another common mechanical timer.
Once you've identified your model, you can find the specific Intermatic wall timer instructions on the Intermatic website or through a general online search.
Basic Operation of Intermatic Wall Timers
Most Intermatic wall timers, especially the mechanical models, operate on a simple principle. A rotating dial or series of pins is used to set the on and off times. For electronic models, programming is done through buttons and a display screen.
Mechanical Timers:
- Setting the Time: Rotate the dial until the current time aligns with the arrow or marker.
- Setting On/Off Times: Push the pins inward for "on" periods and leave them out for "off" periods. Each pin typically represents a 15-minute or 30-minute interval.
- Manual Override: Many mechanical timers have a switch that allows you to bypass the programmed settings and turn the device on or off manually.
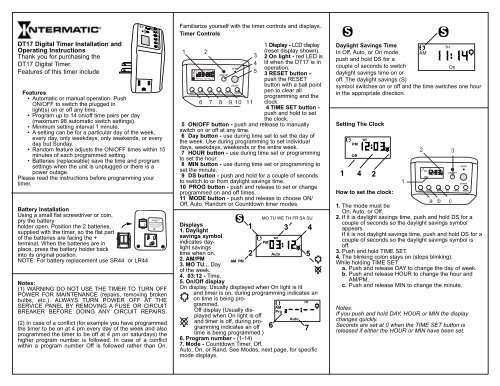
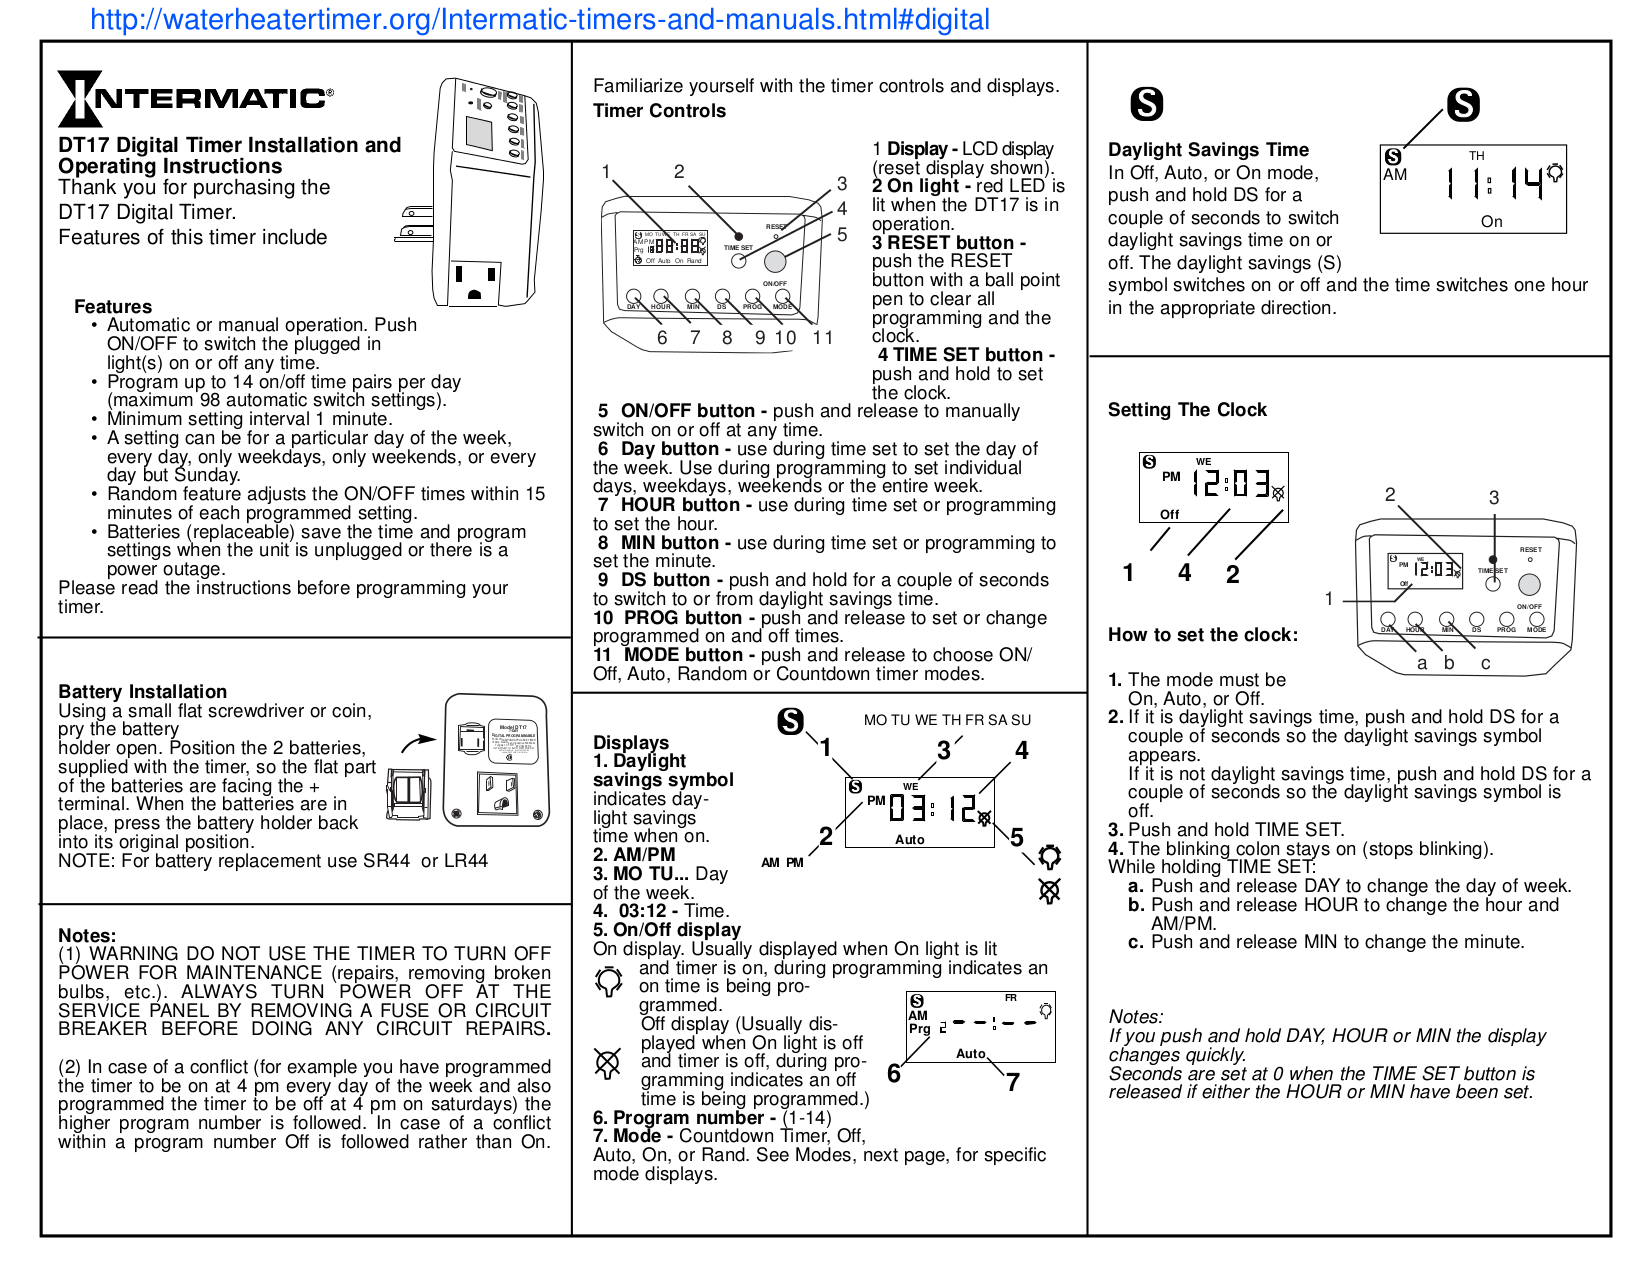
Electronic Timers:
- Programming: Use the buttons to enter the current time and date.
- Setting Schedules: Follow the Intermatic wall timer instructions to set specific on/off times for different days of the week.
- Reviewing Settings: Double-check your programmed settings to ensure accuracy.
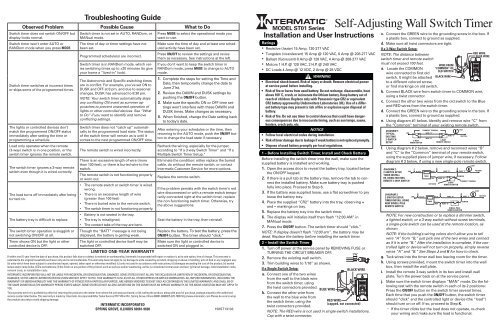
Troubleshooting Common Intermatic Wall Timer Problems
Here are some common issues you might encounter with your Intermatic wall timer and how to troubleshoot them:
1. Timer Not Advancing
Problem: The timer dial is not rotating, and the connected device is not turning on or off according to the schedule.
Possible Causes:
- Power Loss: Ensure the timer is receiving power. Check the circuit breaker.
- Motor Failure: The timer motor might be burned out. Listen closely to the timer; if you don't hear a faint humming sound, the motor might be the issue.
- Mechanical Obstruction: Something might be blocking the dial from rotating freely.
Solutions:
- Check the Breaker: Reset the circuit breaker if it has tripped.
- Replace the Timer: If the motor is faulty, it's usually more cost-effective to replace the entire timer.
- Inspect for Obstructions: Carefully examine the dial and remove any debris or obstructions.
2. Timer Not Turning Device On or Off
Problem: The timer is advancing, but the connected device (e.g., HVAC system) is not turning on or off at the scheduled times.
Possible Causes:
- Incorrect Settings: Double-check the on/off pin settings or programming.
- Wiring Issues: Loose or damaged wiring can prevent the timer from switching the circuit.
- Faulty Switch: The internal switch within the timer might be defective.
- Load Issues: The connected device might be drawing too much power, overloading the timer.
Solutions:
- Verify Settings: Review the Intermatic wall timer instructions and confirm that the on/off times are set correctly.
- Inspect Wiring: Turn off the power at the breaker and carefully examine the wiring connections. Look for loose wires, corroded terminals, or damaged insulation. Tighten any loose connections and replace damaged wires.
- Test the Switch: If you have a multimeter, you can test the switch for continuity. If the switch is not working properly, replace the timer.
- Check Load Compatibility: Ensure that the connected device's power requirements are within the timer's specifications. Using a timer with too low a power rating can damage the timer and create a fire hazard.
3. Timer Running Fast or Slow
Problem: The timer is gaining or losing time, causing the scheduled events to occur at the wrong times.
Possible Causes:
- Power Fluctuations: Inconsistent voltage can affect the timer's accuracy.
- Internal Clock Malfunction: The internal clock mechanism may be faulty, especially in electronic timers.
Solutions:
- Monitor Voltage: Check your home's voltage with a multimeter to see if there are significant fluctuations. Consult an electrician if you suspect voltage problems.
- Replace the Timer: If the internal clock is malfunctioning, replacing the timer is usually the best solution.
4. Electronic Timer Display Issues
Problem: The display is blank, dim, or showing error messages.
Possible Causes:
- Low Battery: Some electronic timers have a backup battery that needs to be replaced periodically.
- Power Loss: The timer might not be receiving power.
- Display Malfunction: The display screen itself might be faulty.
Solutions:
- Replace Battery: Refer to the Intermatic wall timer instructions to locate and replace the backup battery.
- Check Power: Ensure the timer is receiving power from the circuit breaker.
- Replace the Timer: If the display is faulty, replacing the timer is often the only option.
Safety Precautions
Working with electrical components can be dangerous. Follow these safety precautions:
- Turn Off Power: Always turn off the power at the circuit breaker before working on any electrical wiring.
- Use Insulated Tools: Use tools with insulated handles to prevent electric shock.
- Test for Power: Use a non-contact voltage tester to ensure that the circuit is de-energized before touching any wires.
- Wear Safety Glasses: Protect your eyes from debris.
- Follow Instructions: Adhere to the Intermatic wall timer instructions and any local electrical codes.
When to Call a Professional
While many Intermatic wall timer issues can be resolved with basic troubleshooting, some situations require the expertise of a qualified HVAC technician or electrician. Call a professional if:
- You are uncomfortable working with electrical wiring.
- You suspect a more complex electrical problem.
- The timer is part of a larger HVAC system and you are unsure how it interacts with other components.
- You have tried troubleshooting the timer and it is still not working.
- You notice any signs of electrical arcing, burning smells, or sparking.
Estimating Repair Costs
The cost of repairing or replacing an Intermatic wall timer can vary depending on the type of timer, the complexity of the problem, and the hourly rate of the technician. Here's a general estimate:
- Simple Timer Replacement (DIY): $20 - $50 (cost of the timer)
- Electrician Call-Out Fee: $75 - $150 (minimum charge for a service call)
- Timer Replacement (Professional): $150 - $300 (includes the timer and labor)
- Complex Wiring Issues: $200 - $500 (depending on the extent of the wiring repairs)
These are just estimates. Get a quote from a qualified professional for accurate pricing.
Choosing a Replacement Intermatic Wall Timer
If you need to replace your Intermatic wall timer, consider the following factors:
- Type of Timer: Mechanical or electronic? Choose the type that best suits your needs and budget.
- Voltage and Amperage: Ensure that the replacement timer has the correct voltage and amperage ratings for your application.
- Features: Consider features like multiple programs, daylight saving time adjustment, and battery backup.
- User Reviews: Read online reviews to get an idea of the timer's reliability and ease of use.
By understanding how your Intermatic wall timer works, troubleshooting common problems, and following safety precautions, you can keep your HVAC system running efficiently and save money on energy costs. Remember to consult the Intermatic wall timer instructions specific to your model for the most accurate guidance. When in doubt, always call a qualified professional.