International Comfort Products Serial Number Age

Many homeowners experience the frustration of a heating or cooling system that seems to have lost its mojo. It might be blowing lukewarm air when it should be freezing cold, or struggling to maintain a comfortable temperature on even moderately cold days. One crucial piece of information that's often overlooked when troubleshooting is the age of your International Comfort Products (ICP) unit. Knowing its age can help determine if the problem is simply due to normal wear and tear, a component failure due to age, or something else entirely. This article will guide you through finding your ICP unit's serial number, decoding its age, and performing some basic troubleshooting steps.
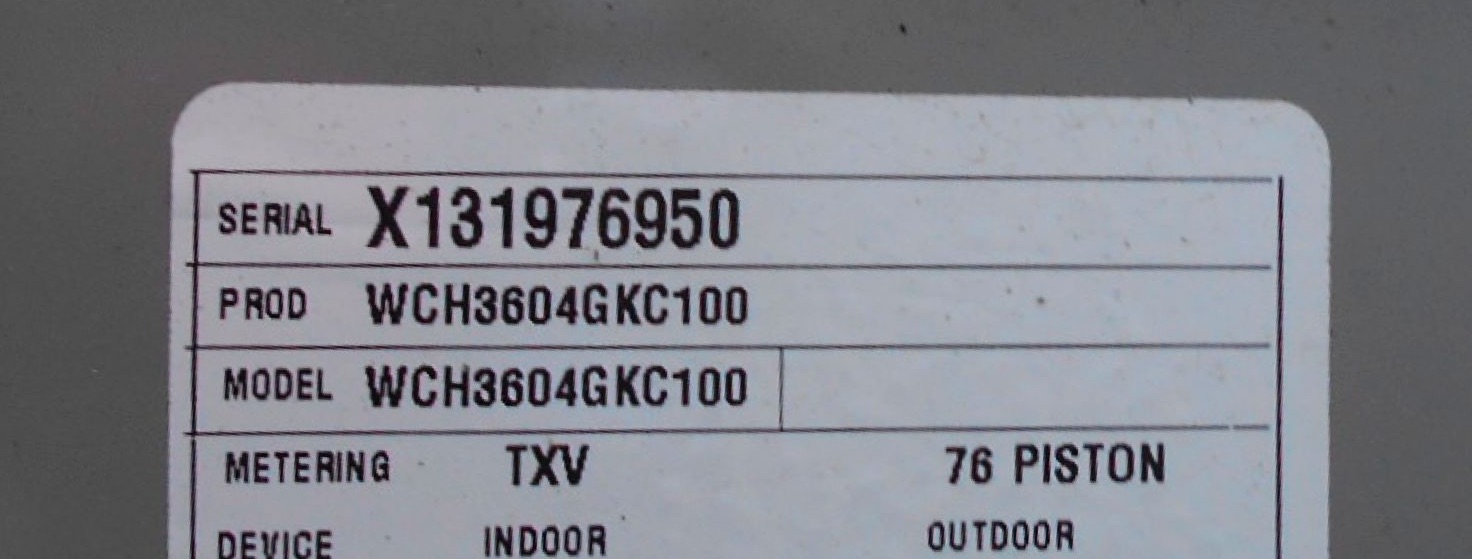
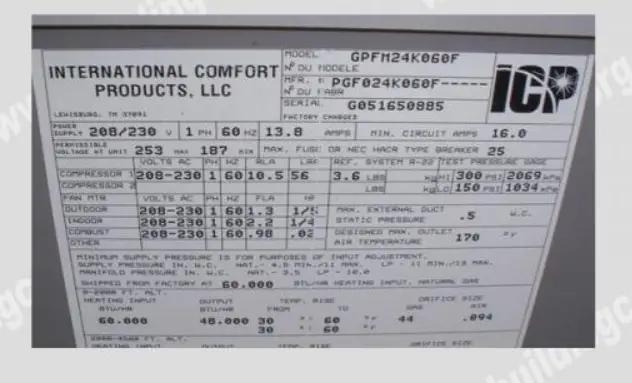
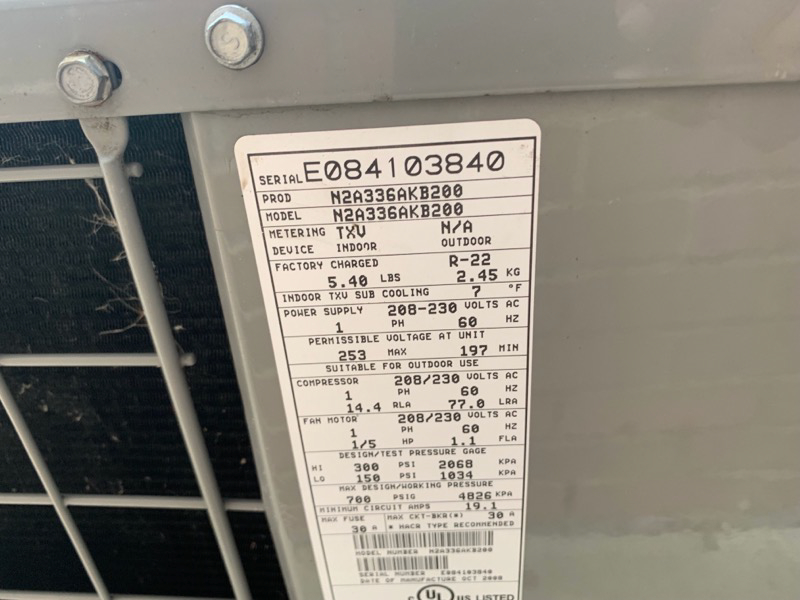
Locating the Serial Number
The first step is finding the serial number. This is usually printed on a nameplate or rating sticker attached to the unit. The location varies depending on whether it's an indoor furnace, an outdoor air conditioner or heat pump, but here's where to look:
- Furnace: Look inside the furnace cabinet, usually on the side wall, near the burner compartment. You may need a flashlight. Always turn off the furnace power at the breaker before opening the access panel.
- Air Conditioner/Heat Pump (Outdoor Unit): Check the exterior side of the unit. It's often on a panel near the access door to the compressor and other components.
The nameplate will display several pieces of information, including the model number, serial number, and possibly the manufacturing date. Write down the serial number – you'll need it for the next step.
Decoding the Serial Number to Determine Age
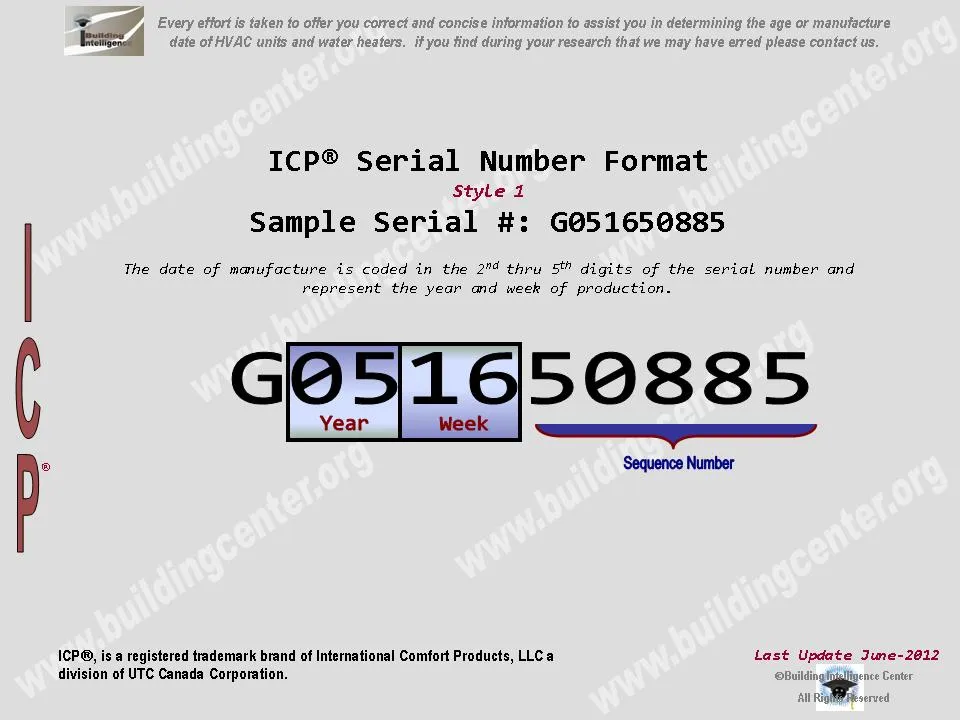
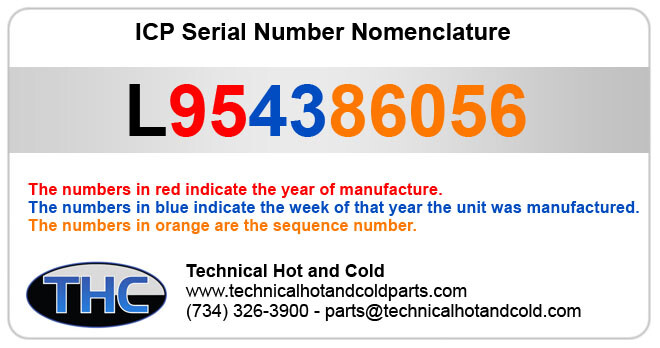
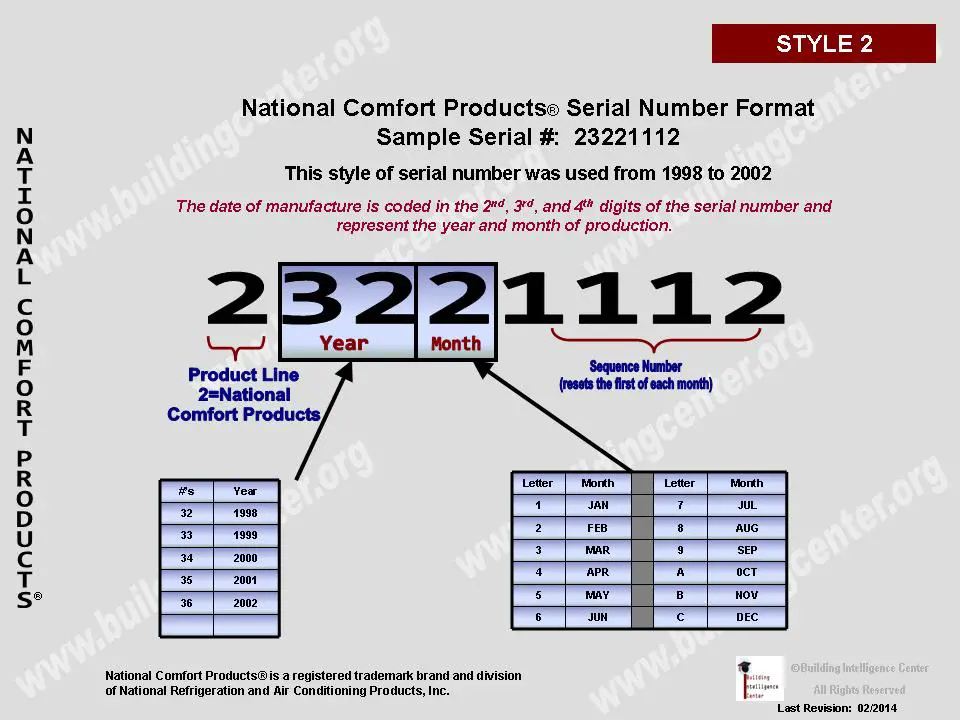
ICP serial numbers typically follow a specific format that allows you to determine the manufacturing date. While specific formats can vary slightly over the years, here are some common methods:
Method 1: The Two-Digit Week/Year Code
This is a very common method. In this format, the first four digits of the serial number often represent the week and year of manufacture. For example:
- 0318xxxxx would indicate the unit was manufactured in the 3rd week of 2018.
- 4807xxxxx would indicate the unit was manufactured in the 48th week of 2007.
The 'xxxxx' represents other identifying numbers specific to the unit.
Method 2: The Month/Year Code with Letter/Number
Some ICP units use a letter for the month and a number for the year. Here's a common structure:
- The first letter represents the month (A=January, B=February, C=March, and so on).
- The next two digits represent the year.
For example:
- C15xxxxx would indicate March 2015.
- L09xxxxx would indicate December 2009.
Method 3: Older ICP Units (Less Common)
Older units may use a slightly different format. If the previous methods don't work, try looking for a date code that might be separate from the serial number but located on the same nameplate. This date code might be in the format MM/YY or MM/DD/YY.
Important Note: If you're unsure about decoding the serial number, try searching online for an "ICP serial number decoder" or "International Comfort Products serial number lookup." Several websites offer free tools or information to help you determine the age of your unit.
Basic Troubleshooting Steps (DIY - Proceed with Caution!)
Once you know the age of your unit, you can start troubleshooting. Remember, safety is paramount. If you're uncomfortable with any of these steps, or if you suspect a more serious problem, call a qualified HVAC technician.
1. Checks You Can Do Without Tools:
These are simple observations that don't require any tools.
- Air Filter: This is the most common culprit for reduced airflow and poor performance. A dirty air filter restricts airflow, making the system work harder and potentially overheat. Check the filter regularly (at least monthly) and replace it if it's dirty. Hold it up to the light; if you can't see through it, it's time for a new one.
- Thermostat Settings: Ensure the thermostat is set to the correct mode (heat or cool) and the desired temperature. Verify that the batteries in the thermostat are good (if applicable). Try setting the thermostat a few degrees higher or lower than the room temperature to see if the system responds.
- Supply Vents: Check that all supply vents (the ones blowing air into the rooms) are open and unobstructed by furniture, rugs, or curtains. Closed vents can restrict airflow and cause the system to work harder.
- Return Vents: Similarly, ensure return vents (the ones drawing air back to the furnace or air handler) are clear and unobstructed. These are often larger than supply vents.
- Outdoor Unit (Air Conditioner/Heat Pump): Visually inspect the outdoor unit. Make sure there are no obstructions around it, such as bushes, debris, or snow. The unit needs adequate airflow to function properly. Also, check for ice buildup on the coils during the cooling season. If you see ice, the unit might have a refrigerant leak or airflow problem.
- Condensate Drain Line (Air Conditioner/Heat Pump): Locate the condensate drain line (usually a PVC pipe near the indoor unit). Check to see if it's clogged. You might see water backing up or dripping from the unit.
2. Checks Requiring Basic Equipment (Proceed with Caution!)
These checks require some basic tools and a degree of caution. Always turn off the power to the unit at the breaker before attempting any of these steps.
- Multimeter: A multimeter can be used to check for voltage at the unit and to test the continuity of fuses. If you're not comfortable using a multimeter, skip this step and call a professional. Ensure the power is OFF before connecting the multimeter.
- Voltage Check: Verify that the unit is receiving power. Use the multimeter to check the voltage at the main power disconnect switch near the unit. If there's no voltage, check the circuit breaker.
- Fuse Check: Some units have fuses located inside the control panel. Use the multimeter to check the continuity of these fuses. A blown fuse will need to be replaced with a fuse of the same amperage rating.
- Clean the Outdoor Unit Coils (Air Conditioner/Heat Pump): Over time, the outdoor unit coils can become covered in dirt, dust, and debris, reducing their ability to transfer heat. Turn off the power to the unit and carefully use a garden hose (with a gentle spray nozzle) to clean the coils. Spray from the inside out to avoid bending the fins. Do not use a pressure washer, as it can damage the coils.
- Condensate Drain Line Cleaning (Air Conditioner/Heat Pump): If you suspect a clogged condensate drain line, you can try to clear it. Turn off the power to the unit. You can use a wet/dry vacuum to suck out any clogs. Attach the vacuum hose to the end of the drain line and seal the connection with duct tape. Run the vacuum for a few minutes to see if you can clear the blockage. You can also try pouring a cup of white vinegar into the drain line to dissolve any buildup.
When to Call a Professional HVAC Technician
While some minor issues can be addressed with DIY troubleshooting, certain problems require the expertise of a qualified HVAC technician. It's always better to err on the side of caution, especially when dealing with electricity, gas, or refrigerant.
Here are some situations that warrant professional help:
- Refrigerant Leaks: Refrigerant is a controlled substance, and handling it requires specialized equipment and training. If you suspect a refrigerant leak (e.g., low cooling, ice buildup on the coils, hissing sound), call a professional immediately.
- Gas Leaks: If you smell gas near the furnace, evacuate the area immediately and call your gas company or 911. Do not attempt to troubleshoot the issue yourself.
- Electrical Problems: If you're uncomfortable working with electricity or if you suspect a major electrical problem (e.g., burnt wires, sparking), call a qualified electrician or HVAC technician.
- Compressor Problems: The compressor is the heart of the air conditioner or heat pump. If it's making unusual noises or not running at all, it likely needs to be replaced by a professional.
- Strange Noises: Loud banging, grinding, or whistling noises coming from the unit can indicate a serious problem that requires professional diagnosis and repair.
- Older Units (15+ Years): If your unit is 15 years or older and experiencing frequent problems, it might be more cost-effective to replace it with a new, energy-efficient model. A technician can assess the condition of your unit and provide recommendations.
- You're Unsure: If you've tried the basic troubleshooting steps and you're still not sure what's wrong, don't hesitate to call a professional. They have the knowledge, experience, and tools to diagnose and repair the problem safely and efficiently.
Preventative Maintenance
The best way to avoid heating and cooling problems is to perform regular preventative maintenance. This includes:
- Changing the air filter regularly.
- Cleaning the outdoor unit coils annually.
- Scheduling annual maintenance checks with a qualified HVAC technician. They can inspect the system, identify potential problems, and perform necessary adjustments to ensure optimal performance and efficiency.
By understanding the age of your ICP unit and performing basic troubleshooting steps, you can often resolve minor issues yourself. However, remember to prioritize safety and don't hesitate to call a professional when needed. Regular maintenance will help extend the life of your system and keep it running efficiently for years to come.