Lennox Warranty Lookup By Serial Number

Understanding Your Lennox Warranty: A Homeowner's Guide
HVAC systems are a significant investment, and understanding your warranty is crucial for protecting that investment. Lennox, a leading manufacturer of heating, ventilation, and air conditioning equipment, offers comprehensive warranties on its products. Knowing how to access and understand your Lennox warranty information, specifically by using the serial number, can save you time, money, and headaches when repairs are needed.
Why Look Up Your Lennox Warranty by Serial Number?
There are several reasons why looking up your Lennox warranty by serial number is essential:
- Accurate Information: The serial number provides the most accurate and specific information about your unit, including its manufacturing date, model number, and original warranty terms.
- Warranty Coverage Verification: Quickly determine if your unit is still under warranty and what specific components are covered.
- Easier Claim Processing: Having the serial number readily available streamlines the warranty claim process with Lennox or your HVAC contractor.
- Ownership Transfer: If you've recently purchased a home with a Lennox system, verifying the warranty and transferring ownership (if applicable) requires the serial number.
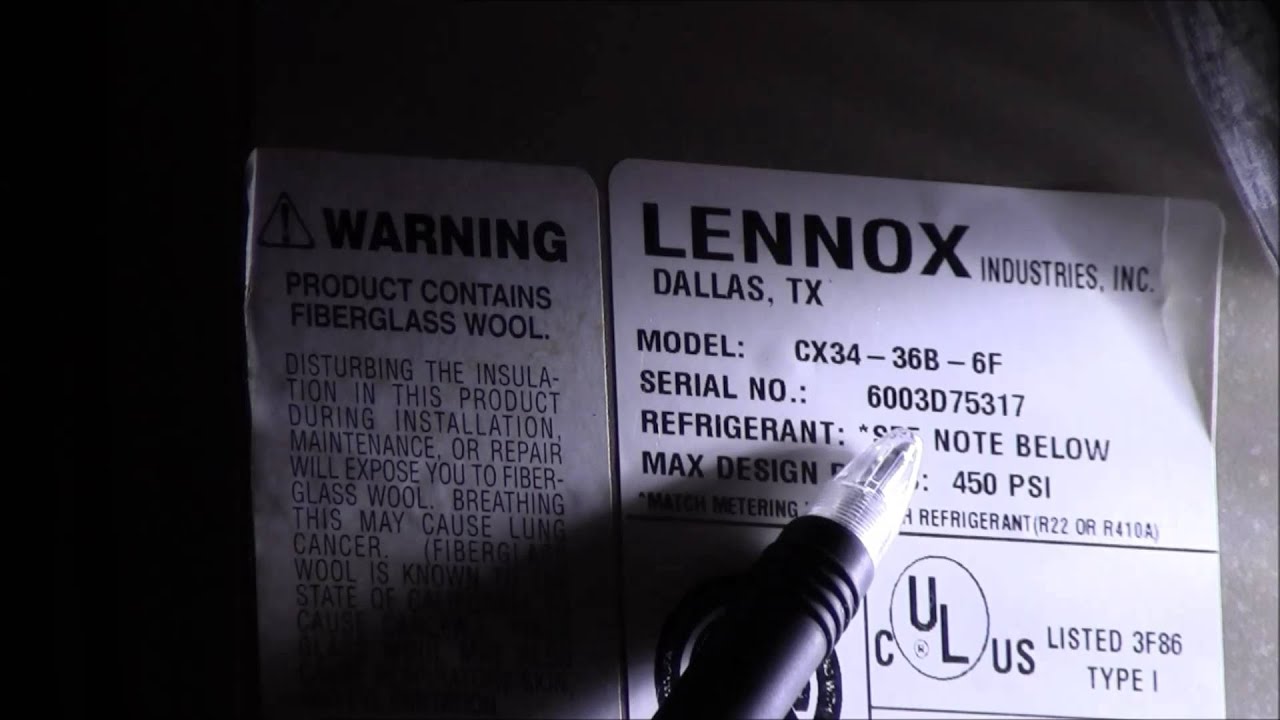
Finding Your Lennox Serial Number
The first step is locating the serial number on your Lennox equipment. The location varies depending on the type of equipment:
- Air Conditioners (Outdoor Units): Look on the exterior of the unit, typically on a rating plate or sticker affixed to the side or back panel.
- Furnaces (Indoor Units): Check inside the furnace cabinet, usually on the blower compartment door or on the interior side panel. Caution: Always turn off the power to the furnace at the breaker before opening the cabinet.
- Heat Pumps (Outdoor Units): Similar to air conditioners, the serial number is typically located on the exterior of the unit.
- Air Handlers (Indoor Units): Find the rating plate on the unit's exterior, often on the front or side panel.
The serial number is usually a string of letters and numbers. Write it down carefully, as accuracy is crucial for warranty verification.
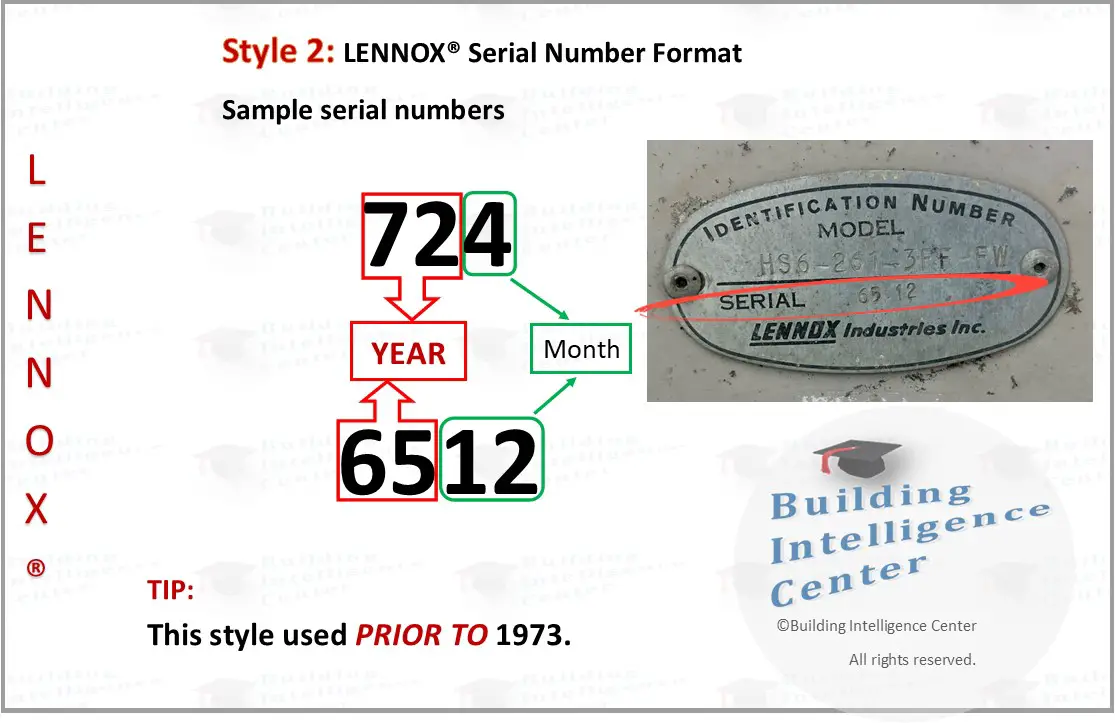
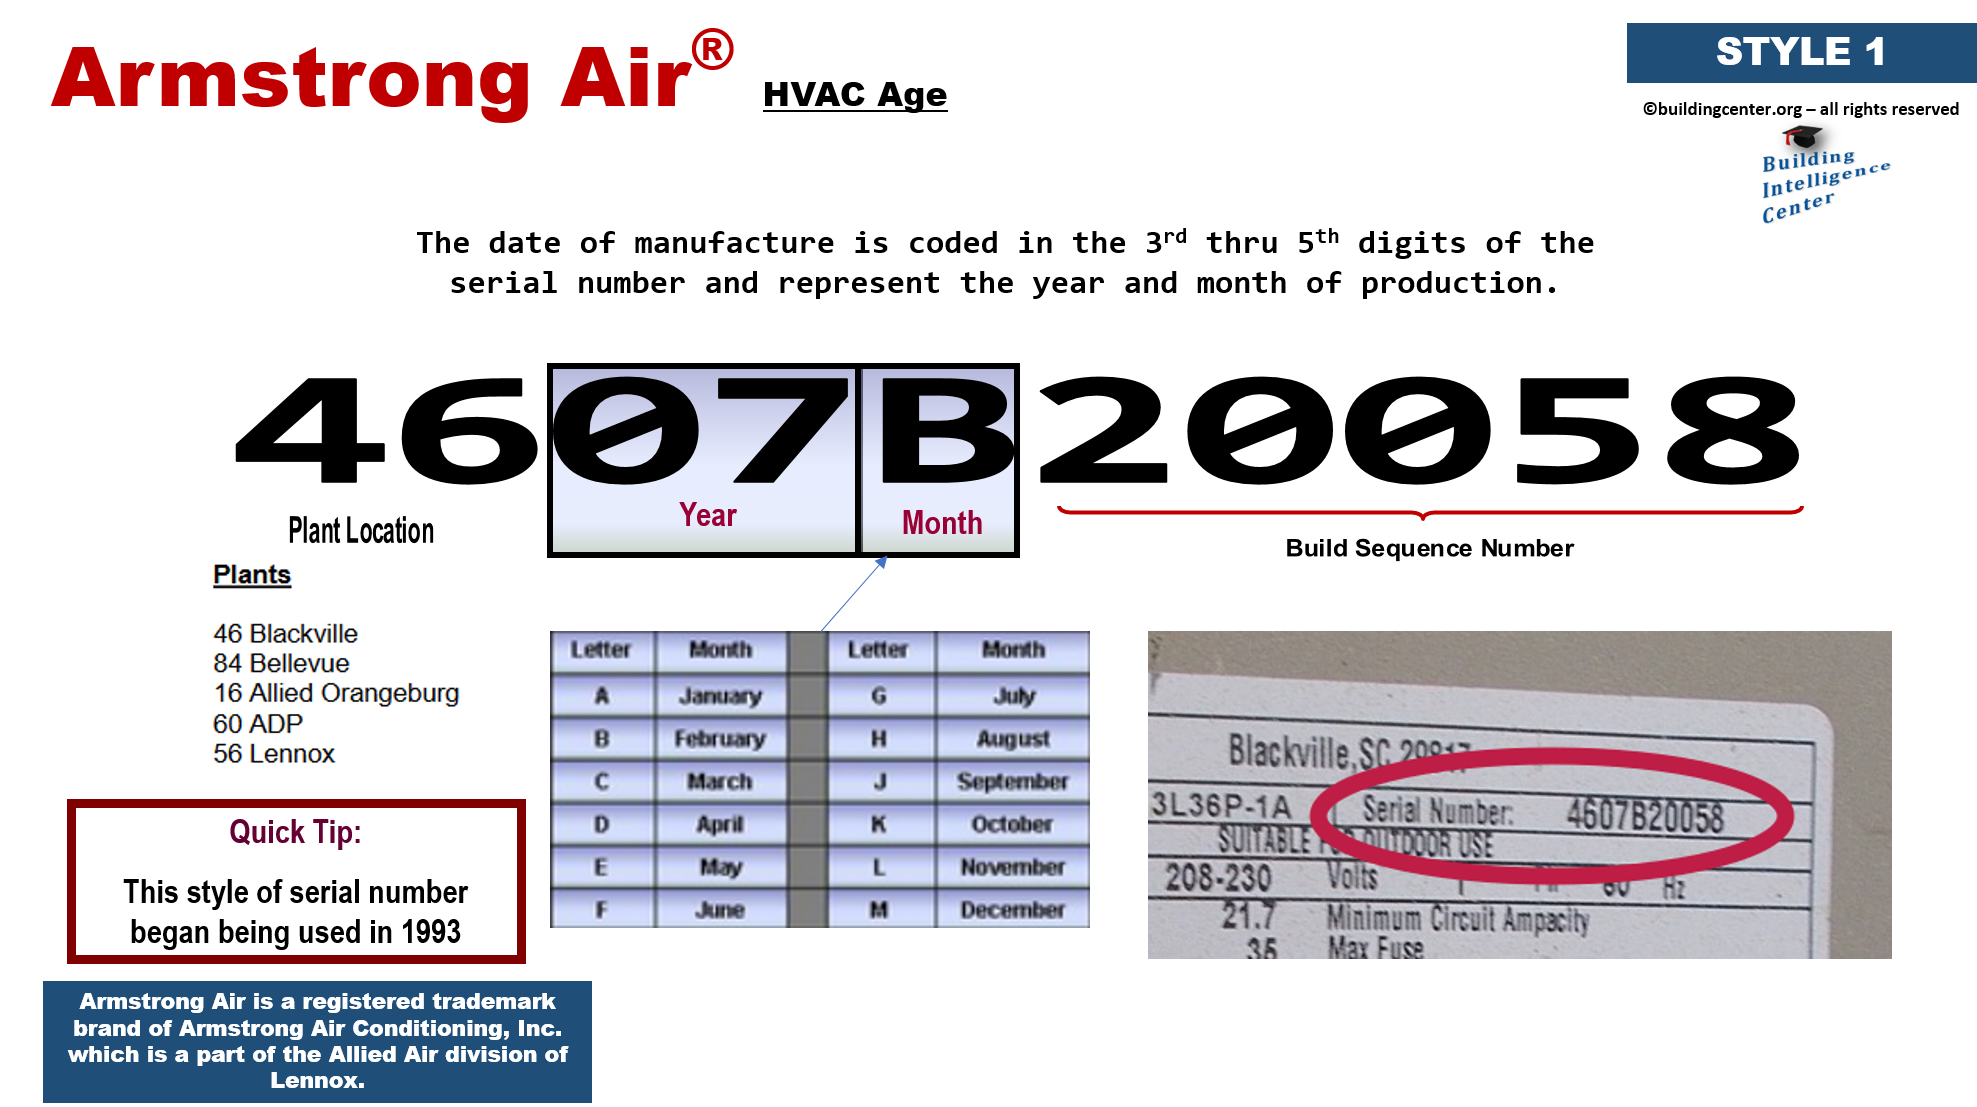
Decoding the Serial Number (General Guidance)
While the exact format can vary slightly depending on the model and year of manufacture, Lennox serial numbers generally follow a pattern. The first few digits often indicate the manufacturing date. Note: Decoding can be complex and is best left to professionals or using Lennox's official resources.
Steps to Perform a Lennox Warranty Lookup
Unfortunately, Lennox does not currently offer a direct online warranty lookup tool for homeowners using the serial number alone. Here's what you can do:
- Contact Your Installing Dealer: The most reliable method is to contact the HVAC company that installed your Lennox system. They should have a record of the installation and the warranty information. They can often look up the warranty for you quickly.
- Contact Lennox Directly: You can contact Lennox customer service directly through their website or by phone. Be prepared to provide the serial number, model number, and proof of purchase (if available).
Important: Having the original installation date or a copy of the invoice will greatly assist Lennox in verifying your warranty.
- Use the LennoxPros Website (for Contractors): If you are an HVAC professional or have access to an HVAC contractor's login, the LennoxPros website offers tools to look up warranty information using the serial number. This option is not generally available to homeowners.
Information You'll Need
Regardless of the method you choose, gather the following information before contacting Lennox or your dealer:
- Serial Number: This is the most crucial piece of information.
- Model Number: Located on the same rating plate as the serial number.
- Installation Date: The date your system was installed. This is extremely helpful in determining warranty coverage.
- Proof of Purchase: The original invoice or receipt from the installation.
- Your Contact Information: Name, address, phone number, and email address.
Understanding Lennox Warranty Terms
Lennox offers various types of warranties, depending on the product and the registration status:
- Base Limited Warranty: This is the standard warranty that comes with most Lennox products. It typically covers parts for a specified period (e.g., 5 years).
- Registered Limited Warranty: If you register your Lennox product within a specific timeframe (usually 60 days of installation), you may be eligible for an extended warranty on certain components, such as the compressor (e.g., 10 years).
- Extended Warranty: Lennox also offers extended warranty plans that provide even longer coverage and may include labor costs. These are typically purchased separately.
Important Warranty Considerations:
- Registration: Always register your Lennox equipment promptly after installation to maximize your warranty benefits.
- Maintenance: Regular maintenance is crucial for maintaining your warranty coverage. Keep records of all maintenance performed on your system.
- Professional Installation: Improper installation can void your warranty. Ensure your system is installed by a qualified HVAC professional.
- Transferability: Some Lennox warranties are transferable to a new homeowner if the property is sold. Check the specific terms of your warranty for details.
Common HVAC Issues and Warranty Coverage
Here's a look at common HVAC issues and whether they are typically covered by a Lennox warranty:
- Compressor Failure: Often covered under an extended or registered limited warranty (check specific terms).
- Fan Motor Failure: Typically covered under the base or registered limited warranty.
- Control Board Issues: Usually covered under the base or registered limited warranty.
- Refrigerant Leaks: Coverage varies depending on the cause of the leak. Manufacturing defects may be covered, but leaks caused by external damage or improper maintenance are typically not.
- Clogged Air Filters: Not covered under warranty. This is a routine maintenance item.
- Dirty Coils: Not covered under warranty. This is a routine maintenance item.
DIY Troubleshooting vs. Calling a Professional
While some HVAC issues can be addressed with basic DIY skills, others require the expertise of a qualified HVAC technician. Here's a guideline:
DIY Troubleshooting (With Caution)
- Replacing Air Filters: This is a simple and essential maintenance task.
- Checking Breakers: Ensure the breaker for your HVAC system hasn't tripped.
- Cleaning Outdoor Unit: Remove debris from around the outdoor unit to ensure proper airflow.
- Checking Thermostat Settings: Make sure your thermostat is set correctly.
When to Call a Professional
- Refrigerant Leaks: Handling refrigerant requires specialized equipment and training.
- Electrical Issues: Working with electricity can be dangerous. Call a professional for any electrical problems.
- Compressor Problems: Compressor repairs are complex and require specialized knowledge.
- Gas Leaks: If you suspect a gas leak, evacuate the premises immediately and call your gas company and an HVAC professional.
- Any repairs requiring opening sealed refrigerant lines: This requires EPA certification and specialized equipment.
Safety First! Always turn off the power to your HVAC system at the breaker before attempting any repairs. If you are unsure about any aspect of the repair, call a qualified HVAC professional.
Estimating Repair Costs
Estimating repair costs without knowing the specific problem and warranty coverage is challenging. However, here are some general cost ranges:
- Minor Repairs (e.g., replacing a capacitor): $100 - $300
- Fan Motor Replacement: $200 - $500
- Control Board Replacement: $300 - $700
- Compressor Replacement: $1,000 - $3,000 (or more)
- Refrigerant Recharge: $200 - $500 (plus leak repair if needed)
These are just estimates. The actual cost will vary depending on the specific issue, the parts required, and the labor rates in your area. Always get multiple quotes from qualified HVAC contractors before proceeding with any repairs.
Preventative Maintenance: The Key to Longevity
The best way to avoid costly repairs and extend the life of your Lennox HVAC system is to invest in regular preventative maintenance. Schedule annual tune-ups with a qualified HVAC technician. These tune-ups typically include:
- Cleaning Coils: Dirty coils reduce efficiency and can lead to overheating.
- Checking Refrigerant Levels: Low refrigerant can damage the compressor.
- Inspecting Electrical Connections: Loose connections can cause problems.
- Lubricating Moving Parts: Reduces wear and tear.
- Checking Airflow: Ensures proper airflow throughout your system.
By understanding your Lennox warranty and performing regular maintenance, you can protect your investment and enjoy reliable heating and cooling for years to come. Remember, when in doubt, always consult with a qualified HVAC professional.