Location Of Carbon Monoxide Detectors In A Homes
Carbon monoxide (CO) is a silent, odorless, and deadly gas. Properly functioning CO detectors are crucial for home safety. However, even the best detectors are useless if not correctly placed. This article guides you on the optimal location of CO detectors and provides troubleshooting tips to ensure they are working effectively.
Understanding the Dangers of Carbon Monoxide
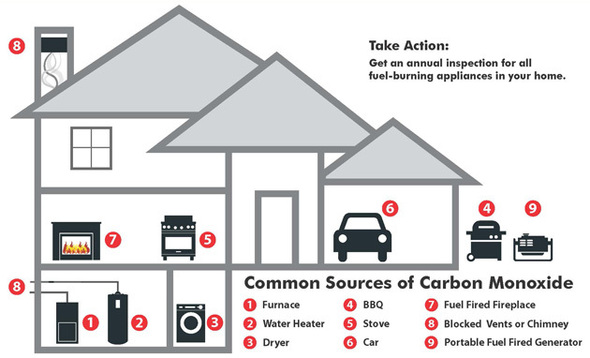
CO is produced by the incomplete burning of fuels like natural gas, propane, oil, wood, and kerosene. Common sources in the home include:
- Furnaces
- Water heaters
- Fireplaces
- Gas stoves
- Generators
- Cars running in attached garages
Symptoms of CO poisoning can mimic the flu, including headache, dizziness, weakness, nausea, vomiting, chest pain, and confusion. High levels can lead to loss of consciousness and death.
Optimal Placement of Carbon Monoxide Detectors
Following these guidelines will maximize your protection against CO poisoning:
General Recommendations
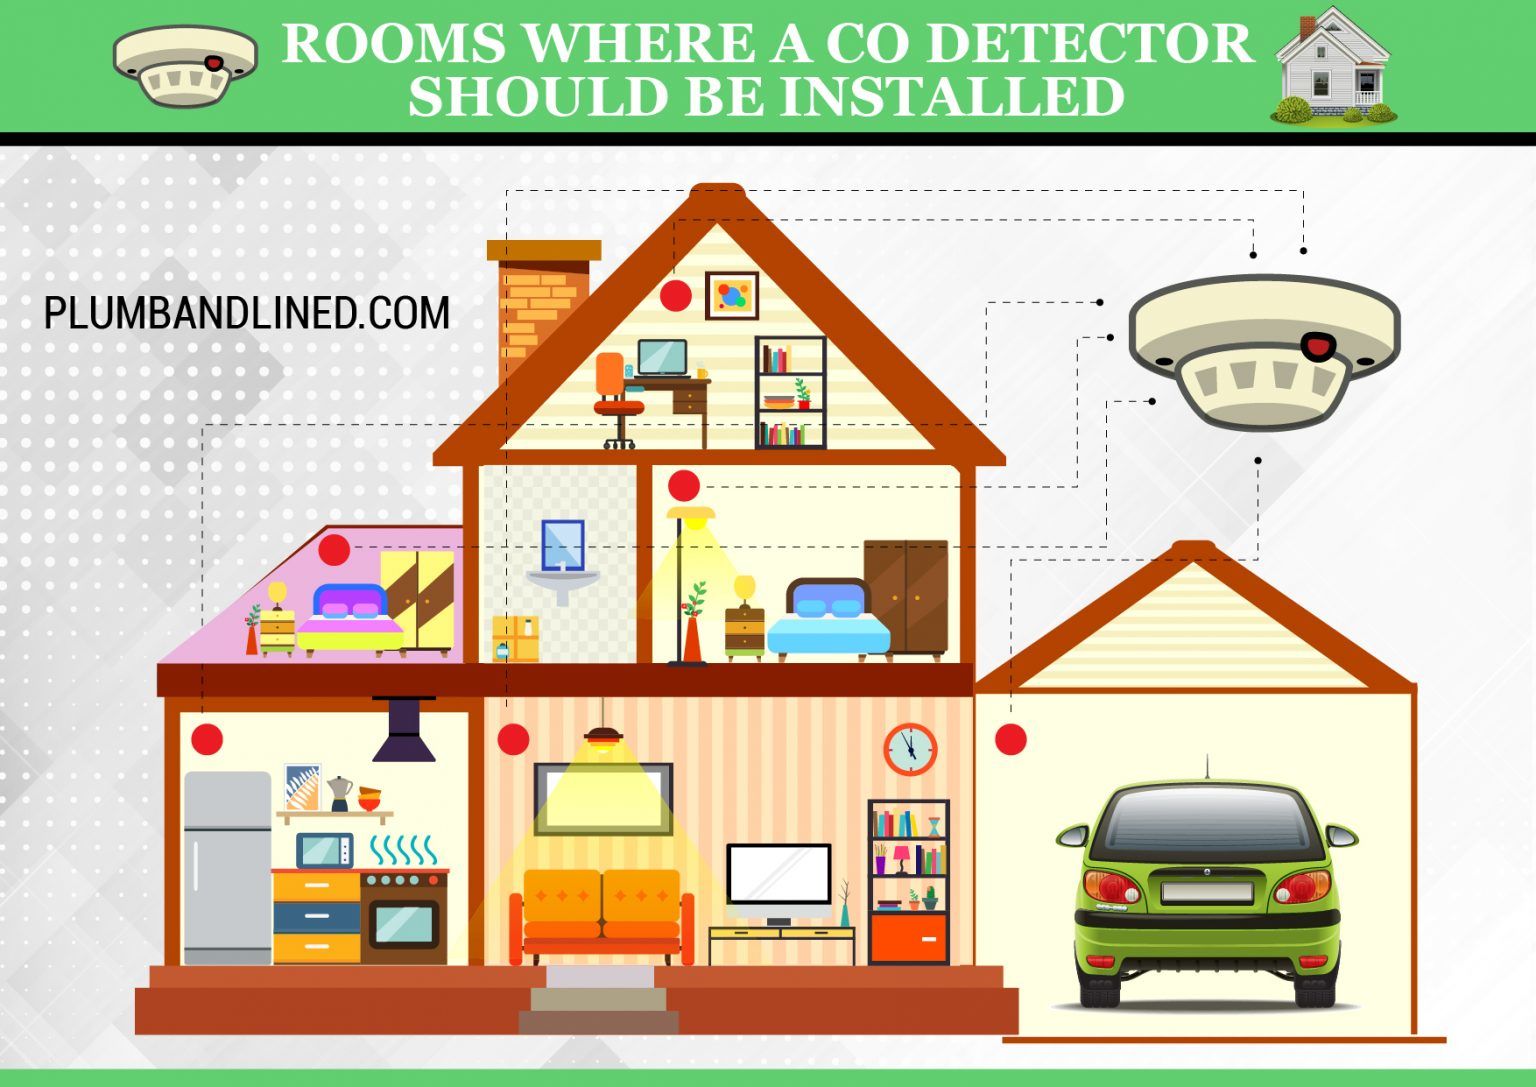
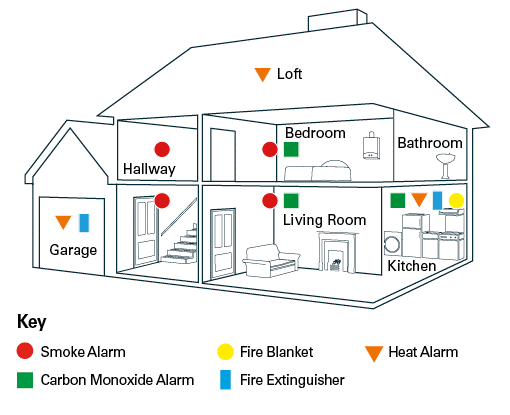
- Install at least one CO detector on every level of your home, including the basement.
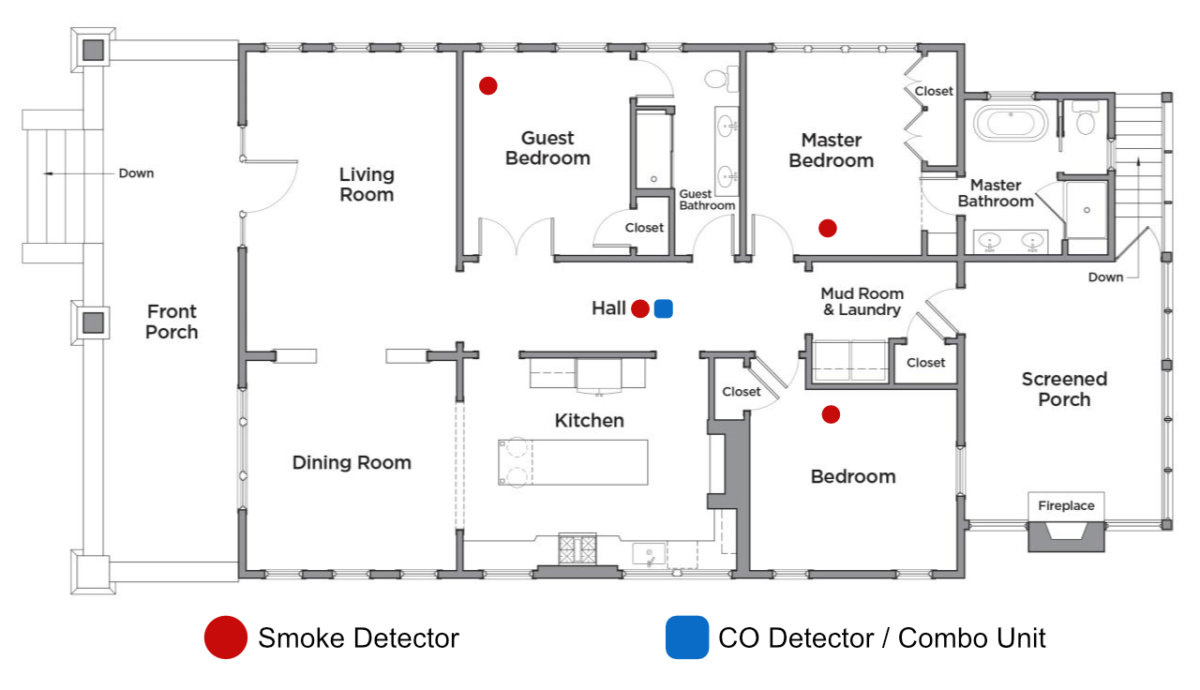
- Place detectors outside each sleeping area. This is crucial because you need to be alerted while you are asleep and most vulnerable.
- Consider installing additional detectors in bedrooms, especially if you sleep with the door closed.
- Follow the manufacturer's instructions for placement, as specific models may have unique requirements.
Specific Placement Considerations
- Wall or Ceiling Mounting: Install CO detectors on the wall about 5 feet from the floor. If mounting on the ceiling, install it at least 4 inches from the wall.
- Distance from Fuel-Burning Appliances: Avoid placing CO detectors directly next to or above fuel-burning appliances. A distance of at least 10 feet is generally recommended to prevent false alarms from brief, localized CO releases during appliance startup.
- Kitchen Placement: In the kitchen, keep the detector away from cooking appliances to minimize false alarms from steam and smoke.
- Garage Placement: If you have an attached garage, never place a CO detector directly in the garage. Exhaust fumes can easily trigger false alarms. Instead, place a detector in the hallway leading from the garage into the house. Ensure the door between the garage and the house is well-sealed.
- Avoid Obstructions: Do not place detectors behind furniture, curtains, or other obstructions that could block airflow and prevent CO from reaching the sensor.
Locations to Avoid
- Near windows or doors: Drafts can dilute CO and prevent the detector from sensing it.
- In damp or humid areas: Excessive moisture can damage the detector. Bathrooms (unless well-ventilated) are often unsuitable.
- Dusty or dirty areas: Dust and dirt can clog the sensor and reduce its effectiveness.
- Direct sunlight: Prolonged exposure to sunlight can damage the detector.
- Near sources of chemicals: Cleaners, paints, and other chemicals can interfere with the sensor.
Troubleshooting Common CO Detector Problems
Even with proper placement, CO detectors can sometimes malfunction. Here's a step-by-step guide to troubleshooting common issues:
1. The Detector is Beeping
A beeping CO detector doesn't always mean there's a CO leak. Here's how to determine the cause:
- Distinguish the Beep Pattern: A true CO alarm typically has a distinct pattern – usually four quick beeps followed by a pause. A single beep every minute is usually a low battery warning. Consult your detector's manual for the specific beep pattern.
- Check the Battery: Low batteries are the most common cause of nuisance beeping. Replace the battery immediately, even if the detector is hardwired. Many hardwired detectors have a battery backup.
- Inspect the Detector for End-of-Life: CO detectors have a limited lifespan, typically 5-10 years. Most detectors have an end-of-life signal (usually a consistent chirping or flashing light) to indicate they need to be replaced. Check the date of manufacture on the detector and replace it if it's past its expiration date.
- Test the Detector: Press the test button on the detector. If it doesn't sound a loud alarm, the detector is faulty and needs to be replaced.
- If the Alarm Sounds (Four Beeps Followed by a Pause):
- Evacuate Immediately: Get everyone out of the house immediately.
- Call Emergency Services: From a safe location, call your local emergency services or the fire department. Do not re-enter the house until it has been cleared by professionals.
- Do Not Try to Find the Source Yourself: Leave that to the professionals.
2. The Detector is Not Working (No Lights or Sounds)
If your CO detector isn't showing any signs of life, try these steps:
- Check the Power Source:
- Battery-Operated Detectors: Ensure the battery is properly installed and not expired. Try replacing it with a brand new battery.
- Hardwired Detectors: Check the circuit breaker for the detector. Ensure it hasn't tripped. If it has, reset it. If it trips again immediately, call a qualified electrician. Check the wiring connection to the detector, making sure it's securely attached. Never work on electrical wiring without turning off the power at the breaker box. If you are uncomfortable working with electricity, call an electrician.
- Test the Detector: Press the test button. If nothing happens, the detector is likely faulty and needs replacement.
3. False Alarms
False alarms can be frustrating. Here's how to minimize them:
- Relocate the Detector: If the detector is frequently triggering false alarms, consider relocating it to a different location, following the guidelines above. Make sure it's not too close to cooking appliances, fireplaces, or other sources of smoke or fumes.
- Clean the Detector: Use a vacuum cleaner with a brush attachment to gently clean the exterior of the detector. This can remove dust and debris that might be interfering with the sensor. Never use water or cleaning solvents on the detector.
- Ventilate the Area: Open windows and doors to ventilate the area if you suspect smoke or fumes are causing the alarm.
- Check for Other Potential Sources: Consider other potential sources of CO, such as a malfunctioning appliance or a car running in an attached garage.
4. Silence Button Issues
Some CO detectors have a silence or hush button. If this isn't working properly:
- Check the Battery: A low battery can sometimes interfere with the silence button function. Replace the battery.
- Refer to the Manual: Review the detector's manual to ensure you are using the silence button correctly. Some models require a specific sequence of presses.
- Replace the Detector: If the silence button still doesn't work, the detector may be faulty and need to be replaced.
Basic DIY Fixes You Can Attempt
Here are some simple fixes you can try yourself:
- Replacing Batteries: This is a straightforward task. Ensure you use the correct type of battery specified in the detector's manual.
- Cleaning the Detector: Gently vacuuming the exterior can remove dust and debris.
- Relocating the Detector: If the placement is clearly incorrect, move the detector to a more appropriate location.
- Testing the Detector: Regularly testing the detector ensures it's functioning correctly.
When to Call a Professional
Certain CO detector issues require the expertise of a professional. Never attempt repairs involving electricity, gas, or complex components unless you are qualified and experienced. Call a professional in the following situations:
- Hardwired Detector Problems: If you suspect electrical wiring issues with a hardwired detector, call a qualified electrician.
- Gas Leaks: If you suspect a gas leak, evacuate the house immediately and call the gas company or fire department.
- Persistent False Alarms with No Apparent Cause: If you cannot identify the source of false alarms, contact a qualified HVAC technician or a CO detection specialist.
- Malfunctioning Appliances: If you suspect a fuel-burning appliance is malfunctioning, contact a qualified appliance repair technician.
- You are Uncomfortable or Uncertain: If you are uncomfortable or uncertain about any aspect of CO detector troubleshooting or repair, it's always best to err on the side of caution and call a professional.
Regular Maintenance is Key
To ensure your CO detectors are working properly, follow these maintenance tips:
- Test your CO detectors monthly by pressing the test button.
- Replace the batteries at least once a year, or according to the manufacturer's instructions. A good practice is to change the batteries when you change your clocks for daylight saving time.
- Replace CO detectors every 5-10 years, or as recommended by the manufacturer.
- Inspect fuel-burning appliances annually by a qualified technician.
- Ensure proper ventilation for all fuel-burning appliances.
- Never ignore a CO alarm. Treat every alarm as a potential emergency.
Conclusion
Proper placement and regular maintenance of carbon monoxide detectors are essential for protecting your family from this silent killer. By understanding the optimal locations, troubleshooting common problems, and knowing when to call a professional, you can ensure your home is safe and secure. Remember, prevention is always the best medicine when it comes to carbon monoxide poisoning.