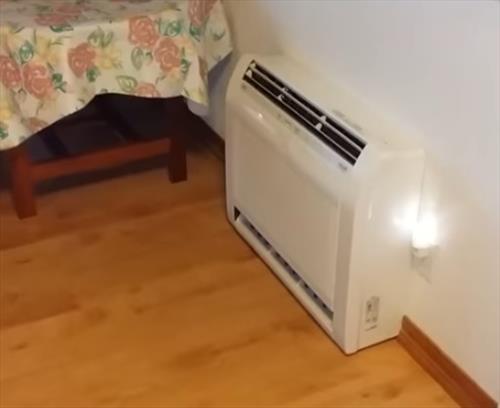
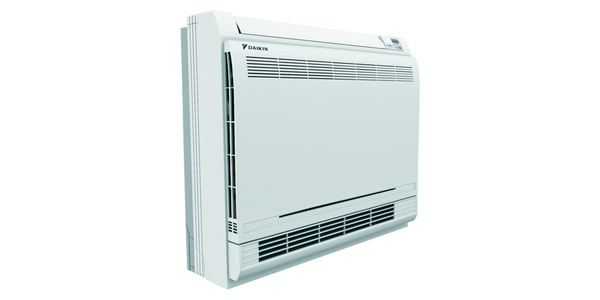
Mini Split Air Conditioner Floor Mounted

Mini-split air conditioners, especially the floor-mounted units, offer a great solution for targeted cooling and heating. However, like any appliance, they can sometimes experience issues. This guide will walk you through common problems and basic troubleshooting steps you can take to potentially resolve them yourself. Remember, your safety is paramount. If you're uncomfortable with any step, or if the issue involves electrical components, gas lines, or complex repairs, immediately call a qualified HVAC technician.
Understanding Common Mini-Split Problems
Before diving into troubleshooting, it's helpful to understand the most frequent complaints with floor-mounted mini-splits:
- Unit isn't turning on: No power, tripped breaker, or remote control issues.
- Weak airflow: Clogged filters, blocked vents, or fan problems.
- Not cooling (or heating) effectively: Refrigerant leaks, compressor issues, or incorrect settings.
- Unusual noises: Rattling, buzzing, or hissing sounds that indicate mechanical problems.
- Water leaks: Clogged drain lines or internal component failures.
- Error codes: Displayed codes that indicate specific problems.
Step-by-Step Troubleshooting Guide
1. Preliminary Checks: The Obvious First Steps
Start with the basics; you'd be surprised how often the solution is simple.
- Power Supply:
- Confirm the unit is plugged in securely to a functioning outlet. Test the outlet with another device to ensure it's working.
- Check the circuit breaker. Locate the breaker that controls the mini-split and ensure it hasn't tripped. If it has, reset it. If it trips again immediately, do not keep resetting it; there's likely a more serious electrical problem that requires a professional.
- Inspect the power cord for any visible damage (cuts, frays, etc.). If you see damage, do not use the unit and have a qualified electrician replace the cord.
- Remote Control:
- Check the batteries in the remote control. Replace them with fresh batteries and ensure they are inserted correctly.
- Point the remote directly at the unit and try turning it on. Sometimes, obstructions can interfere with the signal.
- Check the remote settings. Ensure the remote is set to the correct mode (cool, heat, auto, etc.) and desired temperature. Make sure the fan speed is not set too low.
- If you have a universal remote programmed to work with your mini-split, try reprogramming it or using the original remote if available.
- Unit Settings:
- Check the unit's display panel (if it has one) for any error codes. Refer to your owner's manual to understand the meaning of the code. Many manufacturers provide online troubleshooting guides based on error codes.
- Ensure the unit is set to the correct mode (cooling in summer, heating in winter).
- Verify the temperature settings. A common mistake is setting the temperature too close to the ambient temperature, causing the unit to run inefficiently or not at all.
2. Addressing Airflow Problems
Weak airflow is a common issue often easily resolved.
- Clean or Replace Air Filters:
- Locate the air filters. They are usually behind a removable panel on the front of the unit.
- Remove the filters and inspect them. If they are dirty or clogged with dust and debris, clean them thoroughly with a vacuum cleaner or wash them with mild soap and water. Allow them to dry completely before reinstalling.
- Replace the filters if they are damaged or excessively dirty. Follow the manufacturer's recommendations for filter replacement frequency.
- Cleaning or replacing filters is one of the most important routine maintenance tasks for mini-splits. Clogged filters restrict airflow, causing the unit to work harder, use more energy, and potentially overheat.
- Check for Blockages:
- Inspect the area around the unit for any obstructions that might be blocking airflow. This includes furniture, curtains, or other objects.
- Ensure the vents on the unit are not blocked or covered.
- Check the outdoor unit (if accessible) for any obstructions, such as leaves, snow, or debris.
- Fan Settings:
- Increase the fan speed to improve airflow.
- Ensure the fan blades are not obstructed and are rotating freely. If you notice any damage or debris obstructing the blades, carefully remove it.
- If the fan motor seems weak or is making unusual noises, it may be failing and require professional repair or replacement.
3. Troubleshooting Cooling or Heating Issues
If the unit isn't cooling or heating effectively, the problem may be more complex.
- Check the Temperature Settings:
- Ensure the temperature is set appropriately for the desired cooling or heating effect.
- Give the unit enough time to reach the set temperature. It may take some time, especially in extreme weather conditions.
- Inspect for Refrigerant Leaks (This is generally a professional task):
- Listen for a hissing sound near the unit, which could indicate a refrigerant leak.
- Look for signs of oil around the refrigerant lines or connections.
- If you suspect a refrigerant leak, do not attempt to repair it yourself. Refrigerant leaks are dangerous and require specialized equipment and knowledge to repair properly. Contact a qualified HVAC technician immediately.
- Check the Outdoor Unit (If Accessible and Safe):
- Ensure the outdoor unit is not blocked by debris such as leaves, snow, or ice. Clear away any obstructions to allow for proper airflow.
- Listen to the outdoor unit; if it's making loud or unusual noises, there may be an issue with the compressor or fan motor. This usually requires a professional assessment.
- Check for ice buildup:
- Inspect the indoor unit. Ice buildup on the coils indicates that the system isn't defrosting properly, which can be caused by low refrigerant, a faulty reversing valve, or a malfunctioning defrost system. This is a complex issue that needs a professional to diagnose and repair.
4. Addressing Unusual Noises
Strange noises coming from your mini-split can be alarming and often indicate a mechanical problem.
- Rattling:
- Check for loose panels or screws on the unit. Tighten any loose fasteners.
- Inspect the fan blades for any debris or obstructions that might be causing them to rattle.
- If the rattling persists, it could indicate a more serious internal problem, such as a failing fan motor or compressor. Contact a qualified HVAC technician.
- Buzzing:
- A buzzing sound could indicate a loose electrical connection. Do not attempt to fix electrical issues yourself. Turn off the power to the unit and call a qualified electrician.
- It could also be a sign of a failing capacitor in the motor, which also requires professional repair.
- Hissing:
- As mentioned earlier, a hissing sound could indicate a refrigerant leak. Contact a qualified HVAC technician immediately.
- Grinding:
- A grinding noise coming from the indoor or outdoor unit usually indicates a serious mechanical issue, such as a failing compressor or motor bearing. Turn off the unit immediately and call a professional technician for inspection and repair. Continuing to run the unit with a grinding noise can cause further damage and expensive repairs.
5. Resolving Water Leaks
Water leaks can damage your floors and walls, so it's important to address them promptly.
- Check the Drain Line:
- Locate the drain line for the unit. It's usually a small PVC pipe that exits the unit and drains outside or into a drain.
- Check for clogs in the drain line. You can use a wet/dry vacuum to try to suck out any debris. Be gentle to avoid damaging the line.
- You can also try flushing the drain line with a mixture of warm water and vinegar to dissolve any buildup.
- Ensure the drain line is properly sloped to allow water to drain freely.
- Inspect the Condensate Pan:
- The condensate pan is a tray that collects water that condenses on the cooling coils. Check to see if it is overflowing, cracked, or damaged.
- If the pan is cracked or damaged, it will need to be replaced by a professional.
- Check for Ice Buildup:
- If ice is forming on the coils inside the unit, this can cause the drain pan to overflow when the ice melts. As mentioned before, icing issues need professional attention.
6. Understanding and Addressing Error Codes
Many mini-split units display error codes to indicate specific problems. Always consult your owner's manual for the meaning of these codes.
- Locate the Error Code:
- Note the exact error code displayed on the unit's control panel.
- Consult the Owner's Manual:
- Refer to your owner's manual for a description of the error code and recommended troubleshooting steps.
- Try Simple Solutions:
- Some error codes indicate simple problems, such as a clogged filter or a low battery in the remote. Try the recommended solutions first.
- If the Error Persists:
- If the error code persists after trying the recommended solutions, contact a qualified HVAC technician. The error code may indicate a more serious problem that requires professional diagnosis and repair.
When to Call a Professional
While this guide offers basic troubleshooting steps, some issues are best left to the professionals. Always call a qualified HVAC technician if:
- You are uncomfortable working with electrical components.
- You suspect a refrigerant leak.
- The unit requires specialized tools or equipment to repair.
- You are unsure about the cause of the problem or how to fix it.
- The problem involves the compressor, reversing valve, or other complex internal components.
- The unit is still under warranty.
Safety is always the priority. When in doubt, call a professional to ensure the problem is resolved safely and effectively.


