Mold On Trusses In Attic

Mold On Trusses In Attic: A Homeowner's Guide
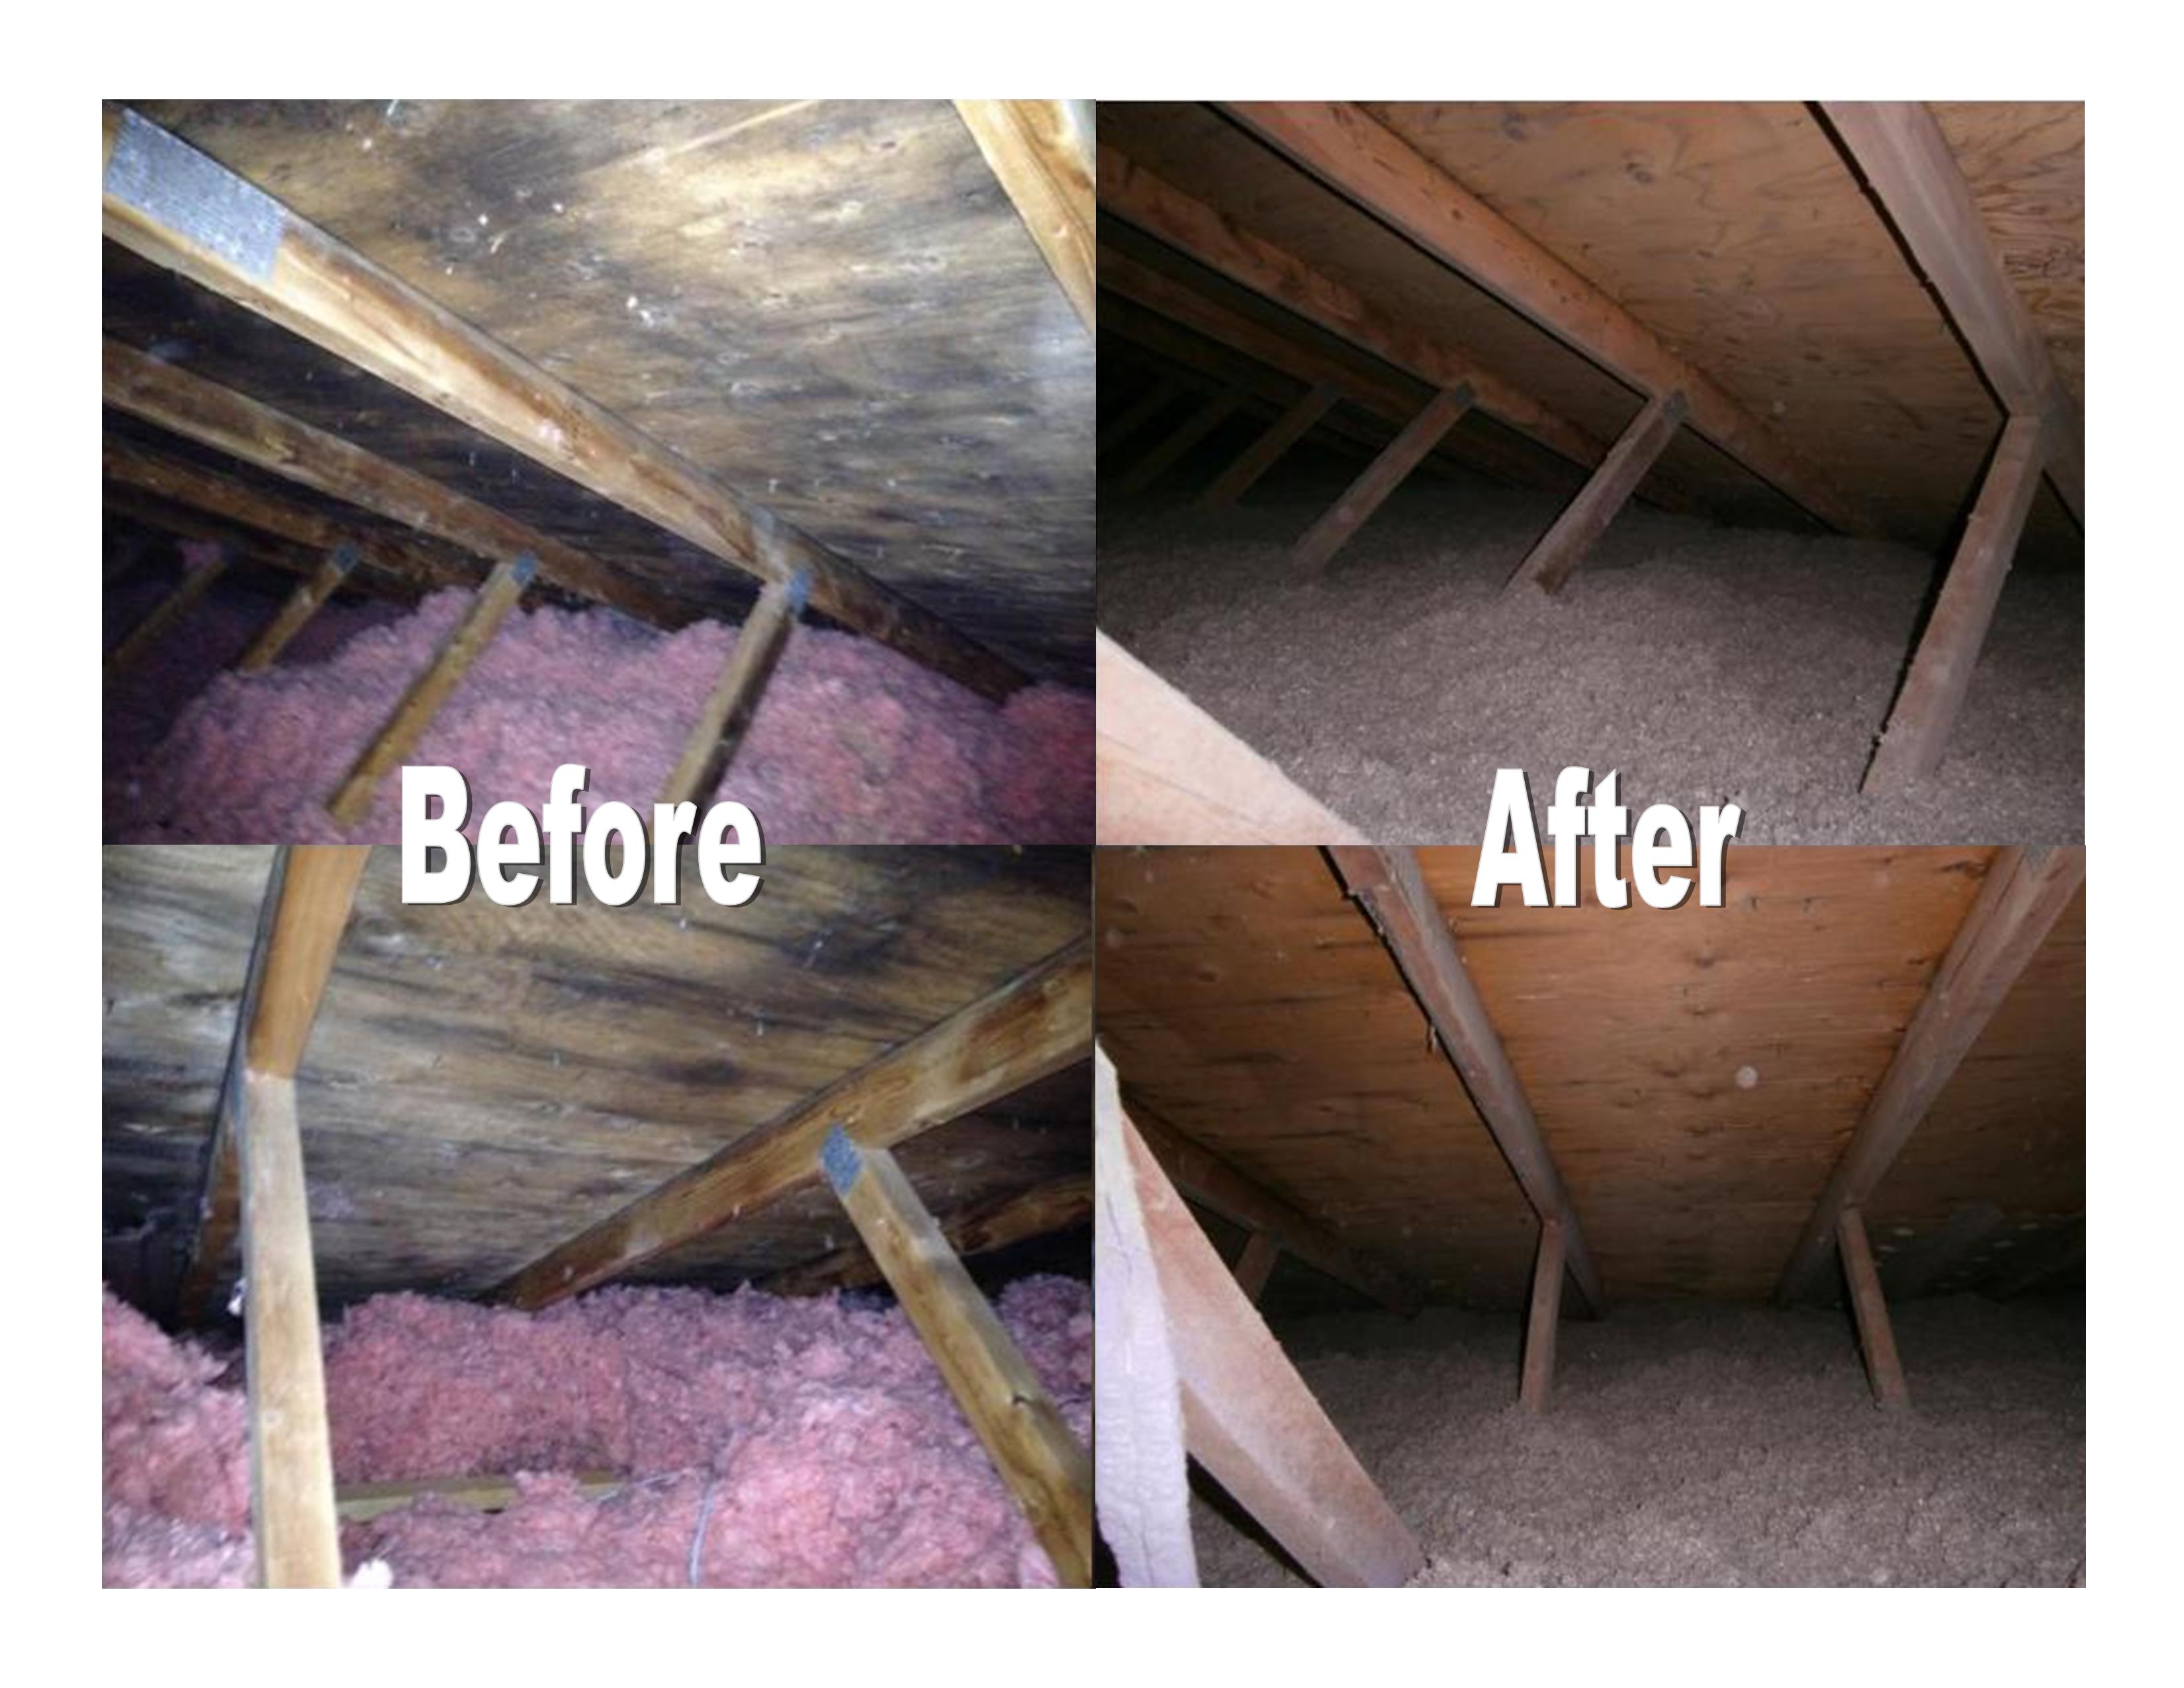
Discovering mold on the trusses in your attic can be alarming. This guide will help you understand the causes, assess the severity, and take appropriate action, whether that involves DIY remediation or calling in a professional.
Understanding the Problem
Mold thrives in damp, dark, and poorly ventilated environments. Attics, unfortunately, often provide the perfect conditions. The good news is that early detection and prompt action can prevent a small mold issue from becoming a major, costly problem.
Causes of Attic Mold
- Roof Leaks: Even a small, slow leak can provide enough moisture for mold to grow. Check around chimneys, vents, and skylights.
- Poor Ventilation: Insufficient attic ventilation traps moisture from the house, leading to condensation on the trusses.
- Bathroom and Kitchen Exhaust Vents: If these vents are improperly routed into the attic instead of outside, they release humid air directly into the attic space.
- Condensation: Temperature differences between the attic and the living space below can cause condensation, especially during colder months.
- Damp Building Materials: Using lumber that wasn't completely dry can also contribute to the problem.
Assessing the Mold Growth
Before you start any remediation, it's crucial to assess the extent of the mold growth. Wear appropriate safety gear, including a respirator, gloves, and eye protection.
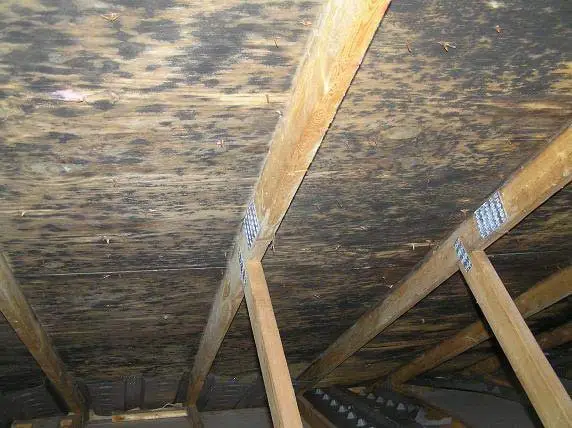
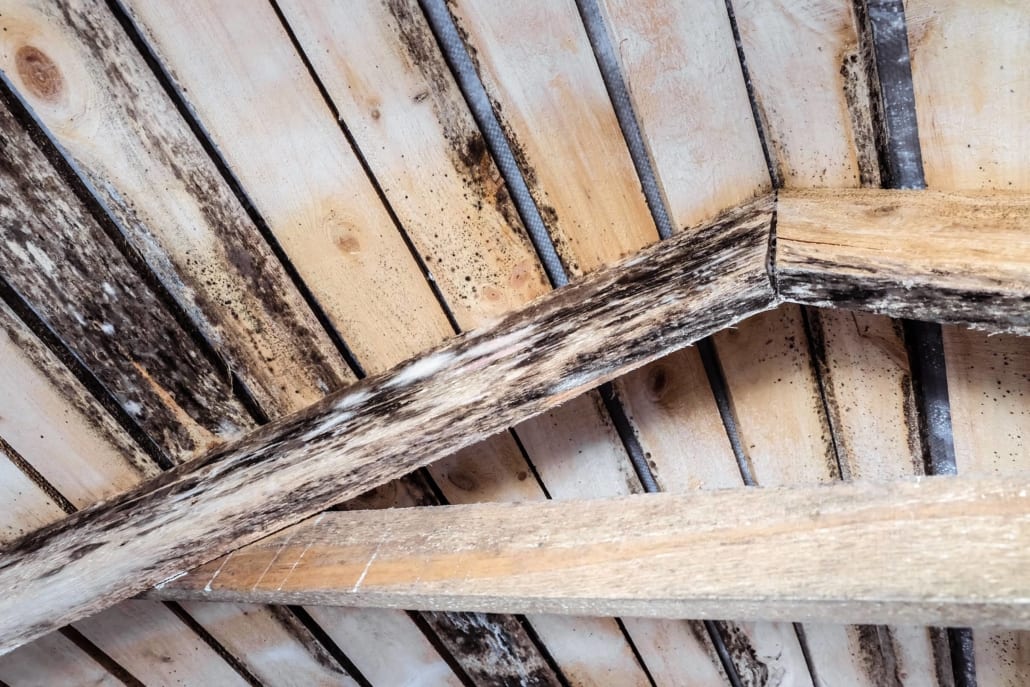
Visual Inspection
- Location: Note the specific areas where you see mold. Is it concentrated in one spot, or is it widespread?
- Color and Texture: Mold can come in various colors (black, green, white, etc.) and textures (fuzzy, slimy, powdery).
- Extent of Growth: Determine the approximate area covered by the mold.
Signs of Moisture
- Water Stains: Look for water stains on the underside of the roof decking and around vents.
- Dampness: Feel the wood for dampness. Use a moisture meter for a more accurate reading.
- Condensation: Check for condensation on the trusses, especially in the morning.
When to Call a Professional
If you answer yes to any of the following questions, it's best to consult a mold remediation professional:
- Is the mold covering a large area (more than 10 square feet)?
- Do you suspect the mold is toxic (e.g., Stachybotrys chartarum, often called black mold)?
- Are you experiencing health problems, such as respiratory issues or allergies?
- Do you have underlying health conditions that could be aggravated by mold exposure?
- Are you unsure about the source of the moisture problem?
DIY Mold Remediation (For Small Areas Only)
If the mold growth is limited to a small area (less than 10 square feet) and you're comfortable with DIY projects, you can attempt to remediate the mold yourself. Remember safety is paramount.
Safety Precautions
- Respirator: Wear an N-95 or higher respirator to protect your lungs from mold spores.
- Gloves: Wear waterproof gloves to protect your skin.
- Eye Protection: Wear goggles or safety glasses to prevent mold spores from getting into your eyes.
- Protective Clothing: Wear old clothes that you can wash immediately after the project or dispose of.
- Ventilation: Ensure adequate ventilation in the attic by opening windows and using fans.
Tools and Materials
- Scrub Brush: A stiff-bristled scrub brush for cleaning the trusses.
- Spray Bottle: For applying the cleaning solution.
- HEPA Vacuum: For removing mold spores and debris.
- Cleaning Solution: Options include:
- Mild Detergent and Water: For light mold growth.
- Bleach Solution (1 part bleach to 10 parts water): For more stubborn mold. Caution: Never mix bleach with ammonia or other cleaners.
- Commercial Mold Remover: Follow the manufacturer's instructions.
- Moisture Meter: To check the moisture content of the wood.
- Plastic Sheeting: To contain the area and prevent the spread of mold spores.
Step-by-Step Remediation Process
- Contain the Area: Seal off the work area with plastic sheeting to prevent mold spores from spreading to other parts of the house.
- Clean the Affected Areas: Spray the affected areas with your chosen cleaning solution. Let it sit for a few minutes to penetrate the mold.
- Scrub the Mold: Use the scrub brush to remove the mold from the trusses.
- Rinse and Dry: Wipe down the cleaned areas with a damp cloth to remove any remaining cleaning solution. Allow the wood to dry completely. Use fans to speed up the drying process.
- HEPA Vacuum: Vacuum the entire area with a HEPA vacuum to remove any remaining mold spores and debris.
- Monitor Moisture Levels: Use a moisture meter to ensure the wood is dry (ideally below 16%).
- Dispose of Materials: Seal all used cleaning materials (rags, sponges, etc.) in a plastic bag and dispose of them properly.
- Address the Source of Moisture: This is the most crucial step. If you don't fix the underlying moisture problem, the mold will likely return.
Preventing Future Mold Growth
Preventing mold growth is essential to maintaining a healthy home.
Improve Ventilation
- Install or Upgrade Attic Vents: Ensure you have adequate soffit vents, ridge vents, and gable vents.
- Keep Vents Clear: Regularly check and clear vents of obstructions like insulation or debris.
- Consider an Attic Fan: An attic fan can help circulate air and reduce moisture.
Control Moisture
- Repair Roof Leaks: Address any roof leaks promptly.
- Insulate Pipes: Insulate cold water pipes to prevent condensation.
- Ensure Proper Venting: Make sure bathroom and kitchen exhaust vents are properly routed outside.
- Use a Dehumidifier: In particularly humid climates, consider using a dehumidifier in the attic.
Regular Inspections
- Annual Inspections: Inspect your attic at least once a year for signs of mold or moisture.
- Check After Heavy Rain: Check your attic after heavy rainstorms for any signs of leaks.
Cost Considerations
The cost of dealing with mold in your attic can vary widely depending on the severity of the problem and whether you choose to DIY or hire a professional.
DIY Costs
- Materials: Cleaning solutions, respirator, gloves, eye protection, plastic sheeting, scrub brush, HEPA vacuum (if you don't already own one). Expect to spend $50-$200.
Professional Mold Remediation Costs
Professional mold remediation can range from a few hundred dollars to several thousand, depending on the size of the affected area, the type of mold, and the extent of the damage.
- Inspection: $100-$500
- Remediation: $500-$5,000+ (or more for severe infestations and structural repairs)
- Roof Repair: Varies depending on the extent of the damage.
- Ventilation Improvements: $200-$1,000+
Important Note: These are just estimates. Get quotes from multiple contractors to get a better understanding of the cost in your area.
Conclusion
Dealing with mold on trusses in your attic requires a careful assessment, proper safety precautions, and a thorough understanding of the underlying causes. By following the steps outlined in this guide, you can effectively address small mold problems and prevent future growth. Remember that when in doubt, it's always best to consult a qualified professional to ensure the safety and health of your home and family.