Most Efficient Way To Use Air Conditioner

Let's face it, a malfunctioning air conditioner in the heat of summer is a household crisis. This article provides a practical, step-by-step guide to troubleshooting common AC issues, helping you identify simple fixes and understand when it's time to call in the pros. We'll focus on central AC units, as they are the most common, but many principles apply to window units as well.
Common AC Problem: The Unit Isn't Cooling
One of the most frequent complaints is that the air conditioner runs, but it doesn't cool the house effectively. This can stem from various causes, ranging from simple user errors to more complex mechanical failures.
Step 1: Check the Thermostat
Before diving into potential mechanical issues, ensure the thermostat is correctly set. This might seem obvious, but it's the most common oversight.
- Verify the setting: Make sure the thermostat is set to "Cool" and not "Heat" or "Off."
- Lower the target temperature: Ensure the target temperature is significantly lower than the current room temperature. Give it time to take effect. Setting it just a degree or two lower may not be enough to trigger cooling.
- Check the batteries: If your thermostat is battery-powered, replace them. Weak batteries can cause inaccurate readings and inconsistent operation.
- Examine the fan setting: Is the fan set to "Auto" or "On"? "Auto" only runs the fan when the AC is actively cooling. "On" runs the fan continuously, which can sometimes *reduce* cooling efficiency, especially in humid climates, as it can pull moisture back into the house. Choose "Auto" for optimal cooling performance.
Step 2: Inspect the Air Filter
A clogged air filter is a prime culprit for reduced cooling performance. It restricts airflow, forcing the AC unit to work harder and less efficiently. It can also lead to the unit overheating and, eventually, failing.
- Locate the air filter: This is typically found in the return air duct, either at the furnace or in a wall or ceiling vent.
- Remove the filter: Note the direction of airflow (indicated by an arrow on the filter) before removing it.
- Inspect the filter: Is it visibly dirty or clogged with dust, pet hair, or debris? If so, it needs replacing.
- Replace or clean the filter: Use a new filter of the same size and type. If you have a reusable filter, wash it thoroughly with water and allow it to dry completely before reinstalling it, ensuring it's facing the correct direction.
- Tip: Change your air filter every 1-3 months, depending on usage and the air quality in your area. More frequent changes are needed if you have pets or allergies.
Step 3: Examine the Outdoor Unit (Condenser)
The outdoor unit, also known as the condenser, is responsible for releasing heat from your home. If it's blocked or malfunctioning, it can significantly impair cooling.
- Clear any obstructions: Remove any plants, leaves, branches, or other debris that might be blocking airflow around the unit. Aim for at least 2-3 feet of clearance on all sides.
- Check the fins: The condenser fins are the thin metal plates surrounding the unit. Over time, they can become bent or damaged, restricting airflow. Gently straighten bent fins using a fin comb (available at most hardware stores). Be careful, as these fins are sharp.
- Listen for unusual noises: Grinding, squealing, or rattling sounds can indicate a mechanical problem. If you hear anything concerning, turn off the unit and call a professional.
- Check the fan: Make sure the fan is spinning freely. If it's obstructed or not spinning at all, turn off the power to the unit at the breaker and inspect it for any visible damage or obstructions. If you're uncomfortable working with electricity, call a professional.
Step 4: Check the Indoor Unit (Evaporator Coil)
The evaporator coil, located inside the indoor unit (often part of your furnace or air handler), absorbs heat from the air. If it's frozen over, it can severely restrict airflow and reduce cooling capacity.
- Look for ice buildup: Open the access panel to the indoor unit and visually inspect the evaporator coil. If you see ice, turn off the AC and set the fan to "On." This will help melt the ice.
- Possible causes of ice buildup:
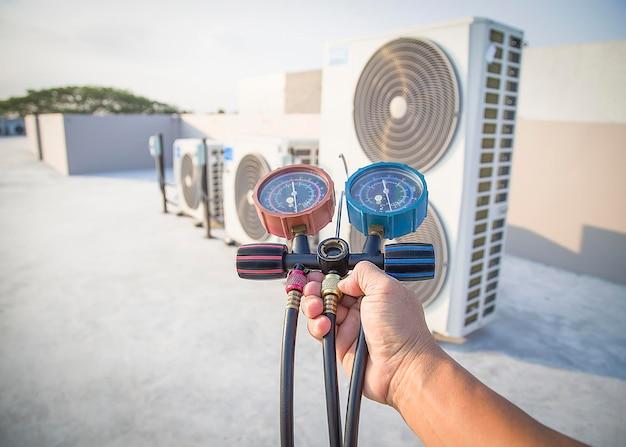
- Low refrigerant: A refrigerant leak can cause the evaporator coil to freeze. This requires professional attention.
- Restricted airflow: A clogged air filter (as mentioned earlier) or blocked vents can also lead to ice buildup.
- Faulty blower motor: A malfunctioning blower motor won't circulate air properly, which can cause the coil to freeze.
- What to do if the coil is frozen: After melting the ice (which can take several hours), address the underlying cause. Replace the air filter, check for blocked vents, and if the problem persists, call a qualified HVAC technician to check the refrigerant levels and blower motor.
Step 5: Inspect the Circuit Breaker
A tripped circuit breaker can cut power to the AC unit. It's a simple check that can save you a service call.
- Locate the circuit breaker panel: This is usually in a utility room, garage, or basement.
- Identify the AC circuit breaker: It's typically labeled.
- Check the breaker: If the breaker is tripped (in the "off" or middle position), flip it fully to the "off" position and then back to the "on" position.
- If the breaker trips again: This could indicate a more serious electrical problem. Do not repeatedly reset the breaker. Call a qualified electrician.
Step 6: Check the Condensate Drain Line
The condensate drain line removes water that condenses during the cooling process. If it's clogged, it can cause water damage and trigger a safety switch that shuts down the AC unit.
- Locate the drain line: This is usually a PVC pipe near the indoor unit.
- Check for clogs: Look for standing water in the drain pan or around the drain line.
- Clear the clog: You can try using a wet/dry vacuum to suck out the clog from the drain line opening. Alternatively, you can use a stiff wire or a plumbing snake to break up the blockage.
- Pour vinegar: Pour a cup of white vinegar down the drain line every few months to prevent future clogs.
When to Call a Professional
While these troubleshooting steps can address many common AC issues, some problems require professional expertise. Never attempt repairs involving refrigerant, electrical components, or gas lines unless you are a qualified technician.
Call a professional HVAC technician if:
- The AC unit is leaking refrigerant: Refrigerant is a hazardous substance, and only certified technicians can handle it safely.
- The compressor is not working: The compressor is a critical component of the AC unit, and repairs are complex and require specialized tools.
- You suspect an electrical problem: If you see sparks, smell burning, or the circuit breaker keeps tripping, call an electrician immediately.
- The unit is making loud or unusual noises: Persistent grinding, squealing, or rattling sounds can indicate a serious mechanical problem.
- You've tried the troubleshooting steps and the AC is still not cooling: This could indicate a more complex issue that requires professional diagnosis and repair.
- You are uncomfortable working with electricity or gas: Safety is paramount. If you're unsure about any aspect of the repair process, it's always best to err on the side of caution and call a professional.
Preventative Maintenance for Efficient Operation
Regular maintenance can help prevent AC problems and ensure efficient operation, saving you money on energy bills and extending the lifespan of your unit.
- Change the air filter regularly: As mentioned earlier, this is one of the most important maintenance tasks.
- Clean the outdoor unit: Periodically remove debris from around the condenser and gently clean the fins.
- Check the condensate drain line: Flush the drain line with vinegar every few months to prevent clogs.
- Schedule annual professional maintenance: A qualified HVAC technician can inspect your AC unit, clean the coils, check the refrigerant levels, and identify any potential problems before they become major issues.
Optimizing AC Usage for Energy Savings
Beyond maintaining your AC unit, you can also optimize its usage to save energy and reduce your cooling costs.
- Use a programmable thermostat: Program the thermostat to automatically adjust the temperature when you're away from home or asleep.
- Close curtains and blinds: During the hottest part of the day, close curtains and blinds to block sunlight and reduce heat gain.
- Use fans: Ceiling fans and portable fans can help circulate air and make you feel cooler, allowing you to set the thermostat a few degrees higher.
- Avoid using heat-generating appliances during the hottest hours: Delay using ovens, dryers, and dishwashers until the evening or cooler parts of the day.
- Seal air leaks: Seal cracks around windows and doors to prevent cool air from escaping and warm air from entering.
- Consider a whole-house fan: In some climates, a whole-house fan can be an energy-efficient way to cool your home during the evening and nighttime hours.
- Proper insulation: Ensure your home has adequate insulation in the attic, walls, and floors to minimize heat transfer.
By following these troubleshooting steps, preventative maintenance tips, and energy-saving strategies, you can keep your AC unit running efficiently and comfortably cool your home throughout the summer. Remember, safety is always the top priority. When in doubt, call a professional.

.jpg)