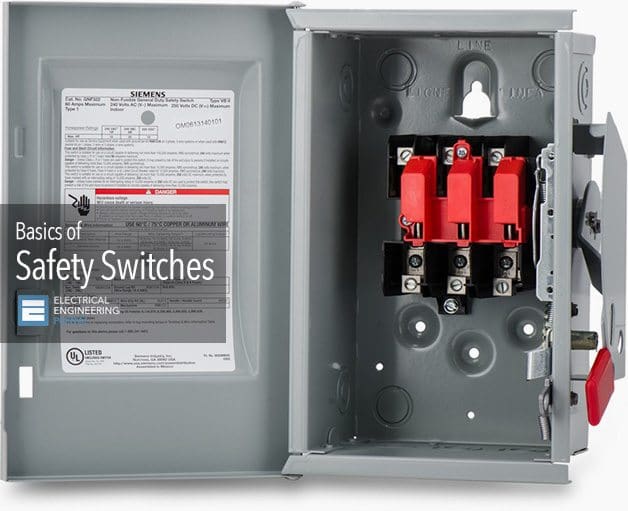
Most Switches Used For Safety Controls In Hvac Circuits

Many homeowners experience frustrating issues with their HVAC systems, often noticing that the system shuts down unexpectedly, refuses to start, or blows only cold air (or no air at all). While complex problems require a professional, a surprisingly large number of these issues stem from malfunctioning safety switches. These switches are designed to protect your HVAC equipment from damage, and understanding how to troubleshoot them can save you time and money.
This article will guide you through the process of diagnosing and resolving common problems with safety switches found in typical HVAC systems. We'll focus on simple, safe DIY fixes, but it's crucial to know when to call in a qualified HVAC technician. Safety first is paramount; always disconnect power before working on any electrical components.
Understanding HVAC Safety Switches
Safety switches are essential components in your HVAC system. They're designed to automatically shut down the system if a potentially damaging condition arises. This could be anything from a clogged condensate drain to excessive pressure or overheating. Common types of safety switches include:
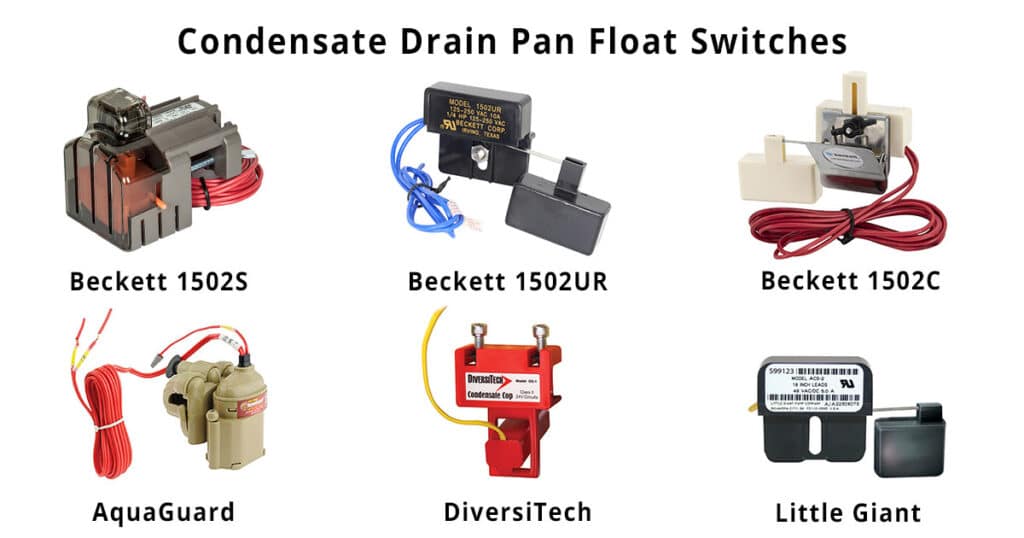
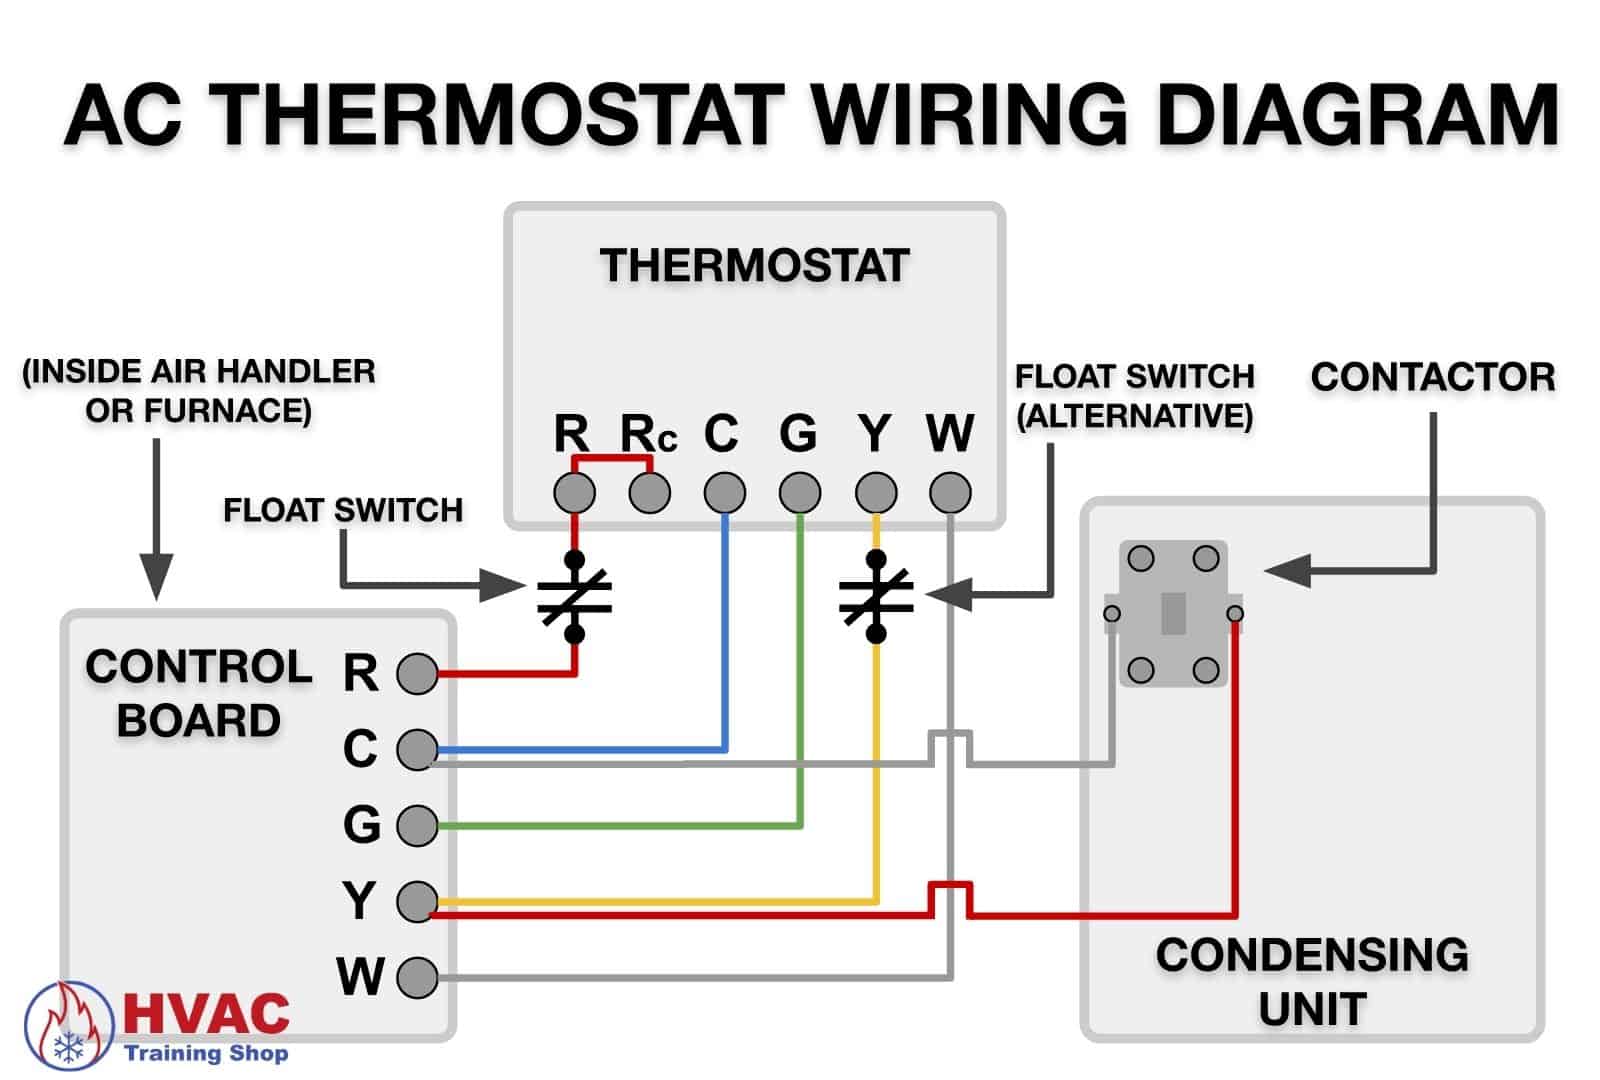
- Float Switches (Condensate Overflow Switches): These detect when the condensate drain pan is full and shut down the system to prevent water damage.
- High-Pressure Switches: These shut down the compressor if the refrigerant pressure gets too high, which could indicate a problem with the compressor or other components.
- Low-Pressure Switches: These protect the compressor from running without sufficient refrigerant, which can cause damage.
- Flame Rollout Switches: Found in gas furnaces, these switches detect if the flame is rolling out of the burner compartment, indicating a dangerous situation.
- Limit Switches: Also in furnaces, these switches prevent the furnace from overheating.
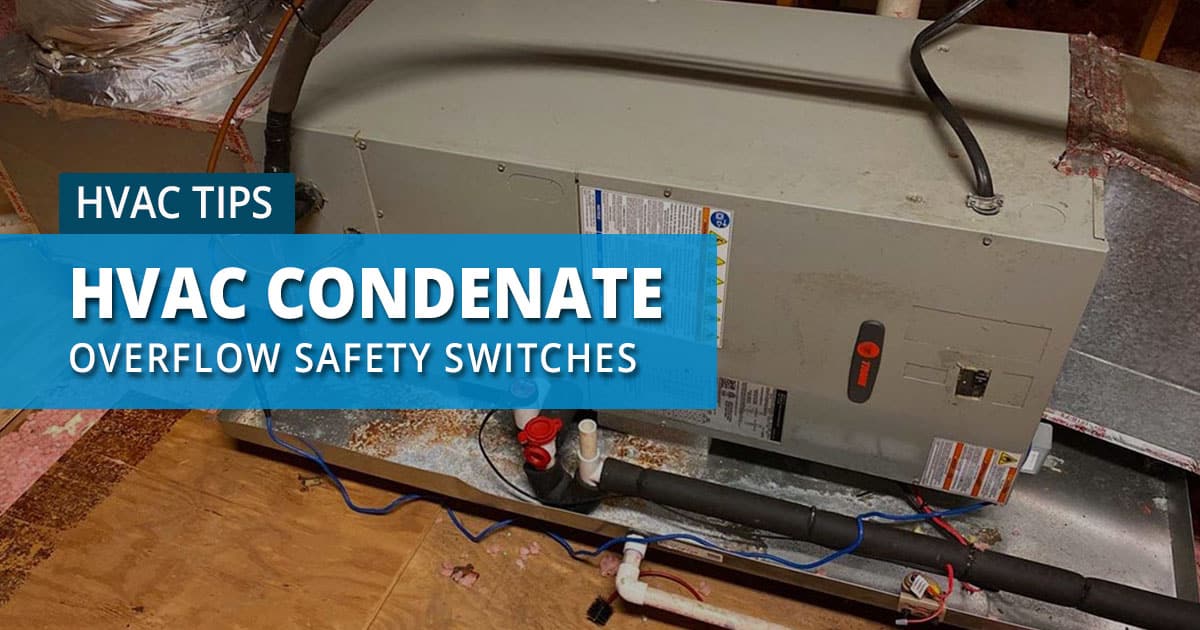
A Common Problem: System Shut-Down Due to a Full Condensate Pan
One of the most frequent issues homeowners face is the HVAC system shutting down because of a full condensate drain pan. This is particularly common during humid months when air conditioners produce a lot of condensation. The culprit is usually a clogged drain line or a malfunctioning float switch.
Step-by-Step Diagnosis and DIY Fixes
Here’s a methodical approach to diagnosing and potentially fixing this issue:
Step 1: Safety First - Disconnect the Power
Before you do anything, locate the breaker that controls your HVAC system at the electrical panel and switch it off. This is absolutely crucial to prevent electrical shock. Double-check that the system is indeed off by trying to turn on the thermostat. If the system doesn't respond, you're good to proceed.
Step 2: Locate the Condensate Drain Pan and Float Switch
Find the indoor unit of your air conditioner or furnace. The condensate drain pan is usually located underneath or next to it. Look for a small plastic pan with a drain line connected to it. The float switch is typically a small device sitting in or attached to the pan. It will have wires connected to it.
Step 3: Inspect the Condensate Drain Pan
Carefully examine the condensate drain pan. Is it full of water? If so, this confirms that the float switch has likely activated to shut down the system.
Step 4: Check for Clogs in the Drain Line
The most common cause of a full drain pan is a clogged drain line. Follow the drain line from the pan to its outlet. It usually exits outside your house, into a floor drain, or a sump pump.
To clear the clog:
- Wet/Dry Vacuum: Use a wet/dry vacuum to suck out any blockage from the drain line. Place the vacuum hose over the drain line opening (where it exits the pan) and create a tight seal with your hand or duct tape. Turn on the vacuum for several minutes. This is often the most effective method.
- Pour Hot Water: If the vacuum doesn't work, try pouring hot (but not boiling) water down the drain line. This can help dissolve clogs.
- Use a Wire or Pipe Cleaner: Carefully insert a flexible wire or pipe cleaner into the drain line to break up any obstructions. Be gentle to avoid damaging the pipe.
- Vinegar Flush: Pour a cup of white vinegar down the drain line. Vinegar can help prevent future clogs. Let it sit for about 30 minutes before flushing with water.
Step 5: Test the Float Switch
Once you've cleared the drain line and the pan is empty, you need to test the float switch to ensure it's working correctly. The float switch is designed to break the electrical circuit when the float rises due to the water level.
Testing Methods (Use multimeter if available):
- Visual Inspection: With the power still off, manually lift the float. It should move freely. If it's stuck or feels gritty, it may need to be cleaned or replaced.
- Multimeter Test (Preferred): With the power still off, disconnect the wires from the float switch. Use a multimeter set to the continuity setting (usually indicated by a sound wave symbol). Touch the probes to the two wires that were connected to the switch. * Float Down (Normal Condition): The multimeter should show continuity (a beep or a reading close to zero ohms). This means the switch is closed and allowing electricity to flow when the water level is low. * Float Up (Alarm Condition): Manually lift the float. The multimeter should show no continuity (an open circuit). This means the switch is opening the circuit and shutting down the system when the water level is high.
- Bypass Test (Use With Caution): Only if you understand electrical circuits and are comfortable with the risks, you can temporarily bypass the float switch by disconnecting the wires from the switch and connecting them directly to each other. Do this only for a very short test period, and *never* leave the system running unattended with the float switch bypassed. If the system runs with the switch bypassed, it confirms the switch is faulty.
Step 6: Reassemble and Restore Power
If the float switch tests good and the drain line is clear, reassemble everything. Reconnect the float switch wires (if you disconnected them for testing). Ensure everything is dry and securely in place. Turn the power back on at the breaker. Turn on your thermostat and see if the system starts normally.
Step 7: Monitor the System
After restoring power, monitor the system for a few hours to ensure the problem is resolved and the condensate drain pan remains empty.
When to Call a Professional
While clearing a clogged drain line and testing a float switch are often straightforward, there are situations where you should always call a qualified HVAC technician:
- You are uncomfortable working with electricity. Never take risks when it comes to electricity.
- You suspect a refrigerant leak. Low refrigerant levels can cause ice buildup on the evaporator coil, leading to water overflow, but it also indicates a bigger problem. Refrigerant leaks require specialized equipment and expertise to repair safely and legally.
- The float switch is damaged or visibly corroded. Replacing a float switch is usually a simple task, but if you're not comfortable doing it yourself, a technician can handle it.
- The system continues to shut down even after clearing the drain line and testing the float switch. This could indicate a more complex problem with the HVAC system, such as a faulty compressor, a problem with the control board, or other safety switch issues.
- You suspect a problem with other safety switches. Troubleshooting high-pressure switches, low-pressure switches, flame rollout switches, or limit switches requires specialized knowledge and equipment. Tampering with these switches can be dangerous and could damage your system.
- Your HVAC system is still under warranty. Attempting DIY repairs could void the warranty.
Troubleshooting Other Common Safety Switch Issues
While a clogged condensate drain is the most common cause, other safety switch malfunctions can occur.
High-Pressure and Low-Pressure Switches
These switches are located in the refrigerant lines and are designed to protect the compressor. Troubleshooting them requires specialized gauges and knowledge of refrigerant systems. *Do not attempt to bypass or adjust these switches yourself.*
Symptoms of a High or Low Pressure Switch Problem:
- The compressor cycles on and off frequently.
- The system blows warm air.
- The compressor doesn't start at all.
These problems often indicate a refrigerant leak, a faulty compressor, or a problem with the metering device. Call a qualified HVAC technician immediately.
Flame Rollout Switches (Gas Furnaces)
Flame rollout switches are safety devices found in gas furnaces. They detect if the flame is rolling out of the burner compartment, which is a very dangerous condition indicating a problem with the venting system or the burner itself.
Symptoms of a Flame Rollout Switch Problem:
- The furnace shuts down shortly after starting.
- You smell gas.
- The furnace repeatedly tries to start but fails.
If you suspect a flame rollout issue:
- Immediately shut off the gas supply to the furnace.
- Do not attempt to restart the furnace.
- Call your gas company and a qualified HVAC technician immediately. Flame rollout is a serious safety hazard.
Limit Switches (Gas Furnaces)
Limit switches are designed to prevent the furnace from overheating. They're usually located near the heat exchanger.
Symptoms of a Limit Switch Problem:
- The furnace shuts down after running for a short period.
- The blower fan continues to run even after the burners shut off.
- The furnace cycles on and off frequently.
Troubleshooting Limit Switches:
- Check the air filter. A dirty air filter is the most common cause of overheating. Replace the filter with a clean one.
- Check the vents. Ensure that all supply and return vents are open and unobstructed.
- Inspect the blower motor. Make sure the blower motor is running properly and that the blower wheel is clean and free of debris.
- Reset the Limit Switch (If Applicable): Some limit switches have a manual reset button. Locate the switch (usually near the burner compartment) and press the reset button. However, only do this *once*. If the switch trips again shortly after, there's an underlying problem that needs to be addressed by a professional.
If the problem persists after checking these items, it's best to call a qualified HVAC technician to diagnose the underlying cause of the overheating. It could be a faulty blower motor, a problem with the heat exchanger, or a malfunctioning limit switch.
Preventative Maintenance
Regular preventative maintenance can help prevent safety switch problems and keep your HVAC system running smoothly. Here are a few tips:
- Change your air filter regularly. This is the single most important thing you can do to maintain your HVAC system.
- Clean the condensate drain line annually. Pour a cup of white vinegar down the drain line every spring to prevent clogs.
- Schedule annual HVAC maintenance. A qualified HVAC technician can inspect your system, clean the components, and identify potential problems before they become major issues.
By understanding the basics of HVAC safety switches and following these troubleshooting steps, you can often resolve common problems yourself. However, always prioritize safety and call a qualified HVAC technician when you're unsure or when the problem is beyond your skill level. A little knowledge and caution can save you time, money, and potential headaches.