Newmac Wood Furnace Door Gasket

Is your Newmac wood furnace struggling to keep your home warm? Are you noticing drafts around the door, or perhaps excessive smoke escaping when you open it? One common culprit behind these issues is a degraded or damaged door gasket. This seemingly small component plays a vital role in maintaining the efficiency and safety of your wood-burning furnace.
Diagnosing a Faulty Door Gasket
Let's walk through a methodical approach to determine if your Newmac wood furnace door gasket is indeed the source of your heating woes.
Step 1: Visual Inspection (No Tools Required)
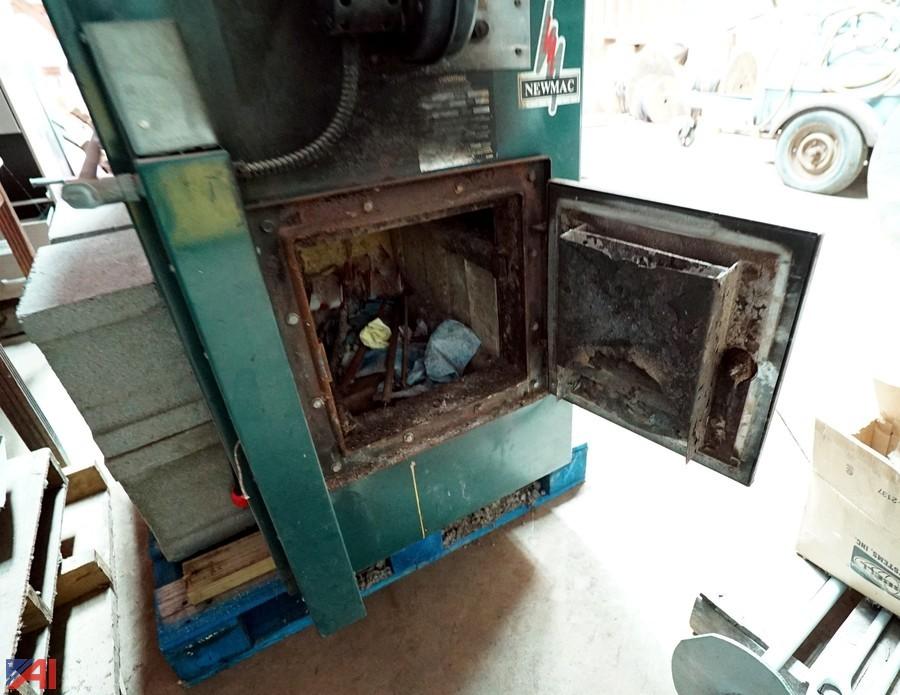
This is the easiest and often most revealing step. Carefully examine the gasket around the entire perimeter of the furnace door. Look for the following:
- Cracks or Tears: Are there any visible cracks, splits, or tears in the gasket material? Even small imperfections can compromise the seal.
- Hardening or Brittleness: Does the gasket feel hard and inflexible to the touch? A healthy gasket should have some give. If it's brittle, it's likely lost its elasticity and sealing ability.
- Missing Sections: Are there any sections of the gasket that are completely missing? This is a clear indication of a problem.
- Deformation or Compression: Is the gasket excessively flattened or misshapen in certain areas? This suggests it's been compressed beyond its capacity and isn't rebounding properly.
- Ash Buildup: While some ash is normal, excessive buildup embedded in the gasket can indicate a poor seal and allow combustion byproducts to escape.
Pay particular attention to areas where the door latch applies pressure, as these are common stress points.
Step 2: The Dollar Bill Test (No Tools Required)
This simple test helps identify areas where the gasket isn't making a tight seal. Here's how to perform it:
- Open the furnace door.
- Place a dollar bill (or any similar piece of paper) between the door and the furnace frame, positioning it so the gasket will close on it.
- Close and latch the door.
- Gently try to pull the dollar bill out.
- Repeat this process at various points around the entire door perimeter, spacing the dollar bill placements a few inches apart.
Interpreting the Results: If you can easily pull the dollar bill out with little resistance, the gasket isn't providing a proper seal at that location. A healthy gasket will grip the bill firmly, making it difficult to remove. Mark any areas where the bill pulls out easily, as these are potential leak points.
Step 3: The Smoke Test (Requires Caution and a Smoke Source)
Safety First! This test involves a small amount of smoke and requires careful monitoring to prevent a fire hazard. Only perform this test if you are comfortable and have a clear understanding of the procedure. Ensure you have a fire extinguisher nearby.
- Cold Furnace Only! Make sure the furnace is completely cold before starting this test.
- Obtain a smoke source. A stick of incense or a tightly rolled piece of paper that can be lit and smoldered safely works well.
- Light your smoke source and hold it near the perimeter of the closed furnace door.
- Observe the smoke. If the gasket is sealing properly, the smoke should not be drawn into the furnace around the door.
- If you see smoke being sucked into the furnace around the door, it indicates a leak in the gasket. Note the location of the leaks.
Important: Do not leave the smoke source unattended. Extinguish it completely after the test.
Step 4: Door Alignment Check (Basic Tools May Be Required)
Sometimes, the problem isn't the gasket itself, but the alignment of the door. A warped or misaligned door can prevent the gasket from making proper contact. Here's how to check:
- Visual Inspection: With the door closed, visually inspect the gap between the door and the furnace frame. Is the gap consistent around the entire perimeter? If not, the door may be warped or not sitting flush.
- Level Check (Requires a Level): Place a level on the top edge of the door. Is it level? If not, the door frame or the furnace itself might be slightly out of level.
- Hinge Inspection: Examine the door hinges. Are they loose, damaged, or showing signs of wear? Loose hinges can cause the door to sag and misalign. You may need a screwdriver or wrench to tighten loose hinges.
Note: Minor adjustments to hinge screws may improve door alignment. However, do not attempt to bend or force the door or frame, as this could cause further damage. If the door is significantly warped or the frame is damaged, professional repair is recommended.
DIY Actions: Replacing the Door Gasket
If your diagnosis points to a faulty door gasket, replacing it is a relatively straightforward DIY project. However, it's crucial to follow the correct procedure and use the appropriate materials.
Tools and Materials You'll Need:
- New Door Gasket: Crucially, obtain the correct replacement gasket specifically designed for your Newmac wood furnace model. Check your furnace's manual or contact a Newmac dealer for the correct part number.
- Gloves: To protect your hands.
- Safety Glasses: To protect your eyes from debris.
- Putty Knife or Scraper: For removing the old gasket.
- Wire Brush: For cleaning the gasket channel.
- High-Temperature Silicone Sealant (Optional): Some installations require a thin bead of high-temperature silicone to help secure the gasket. Check your furnace manual.
- Measuring Tape: To measure the gasket length accurately before cutting.
- Utility Knife or Scissors: For cutting the gasket to the correct length.
Step-by-Step Replacement Procedure:
- Preparation: Ensure the furnace is completely cold. Disconnect any electrical connections (if applicable) to the furnace for added safety.
- Remove the Old Gasket: Carefully use the putty knife or scraper to remove the old gasket from the channel around the door. Work slowly and gently to avoid damaging the channel. You may need to apply some force to break the adhesive bond.
- Clean the Gasket Channel: Thoroughly clean the gasket channel with the wire brush to remove any remaining adhesive, ash, or debris. A clean surface is essential for proper adhesion of the new gasket.
- Measure and Cut the New Gasket: Measure the perimeter of the door (where the gasket will be installed) and cut the new gasket to the correct length. Important: It's better to cut the gasket slightly longer than needed and trim it down later than to cut it too short.
- Install the New Gasket:
- If using Silicone Sealant: Apply a thin, even bead of high-temperature silicone sealant to the gasket channel.
- Press the new gasket firmly into the channel, starting at one corner and working your way around the entire perimeter. Ensure the gasket is seated securely and evenly in the channel.
- If the gasket is a continuous loop, join the ends together carefully, ensuring a tight and seamless connection. Some gaskets have a locking mechanism at the ends.
- Trim if Necessary: If the gasket is slightly too long, carefully trim any excess with the utility knife or scissors.
- Close and Latch the Door: Close and latch the furnace door to compress the new gasket. This will help it conform to the shape of the door and create a tight seal.
- Cure Time: If you used silicone sealant, allow it to cure completely according to the manufacturer's instructions before using the furnace.
When to Call a Professional
While replacing a door gasket is often a DIY-friendly task, there are situations where it's best to call a qualified HVAC technician:
- Damaged Door or Frame: If the furnace door or frame is significantly warped, bent, or damaged, replacing the gasket alone won't solve the problem. Professional repairs or replacement may be necessary.
- Difficult Removal of Old Gasket: If you are struggling to remove the old gasket without damaging the gasket channel, it's best to seek professional assistance.
- Persistent Leaks After Replacement: If you have replaced the gasket and are still experiencing leaks around the door, there may be underlying issues with the door alignment, furnace draft, or other components that require expert diagnosis.
- Unfamiliarity with Furnace Operation: If you are not comfortable working with heating appliances or have any doubts about your ability to safely complete the repair, it's always best to err on the side of caution and call a professional.
- Warranty Concerns: Replacing parts yourself may void the warranty on your furnace. Check your warranty documentation before proceeding with any DIY repairs.
Remember, safety is paramount! Working with heating appliances involves potential risks. If you are unsure about any aspect of the repair process, don't hesitate to seek professional help. A qualified technician can ensure the repair is done correctly and safely, protecting your home and family.
By following these steps, you can effectively diagnose and address a common issue with your Newmac wood furnace, potentially saving you money on heating costs and ensuring a safe and comfortable home.