Packing Washer For Shut Off Valve

Maintaining a tight seal on your HVAC system's shut-off valves is crucial for efficiency and preventing costly leaks. A key component in achieving this seal is the packing washer. While often overlooked, understanding its function, types, and replacement process can save you time, money, and potential headaches. This article will provide a comprehensive overview of packing washers, covering everything from identification to troubleshooting.
What is a Packing Washer and Why is it Important?
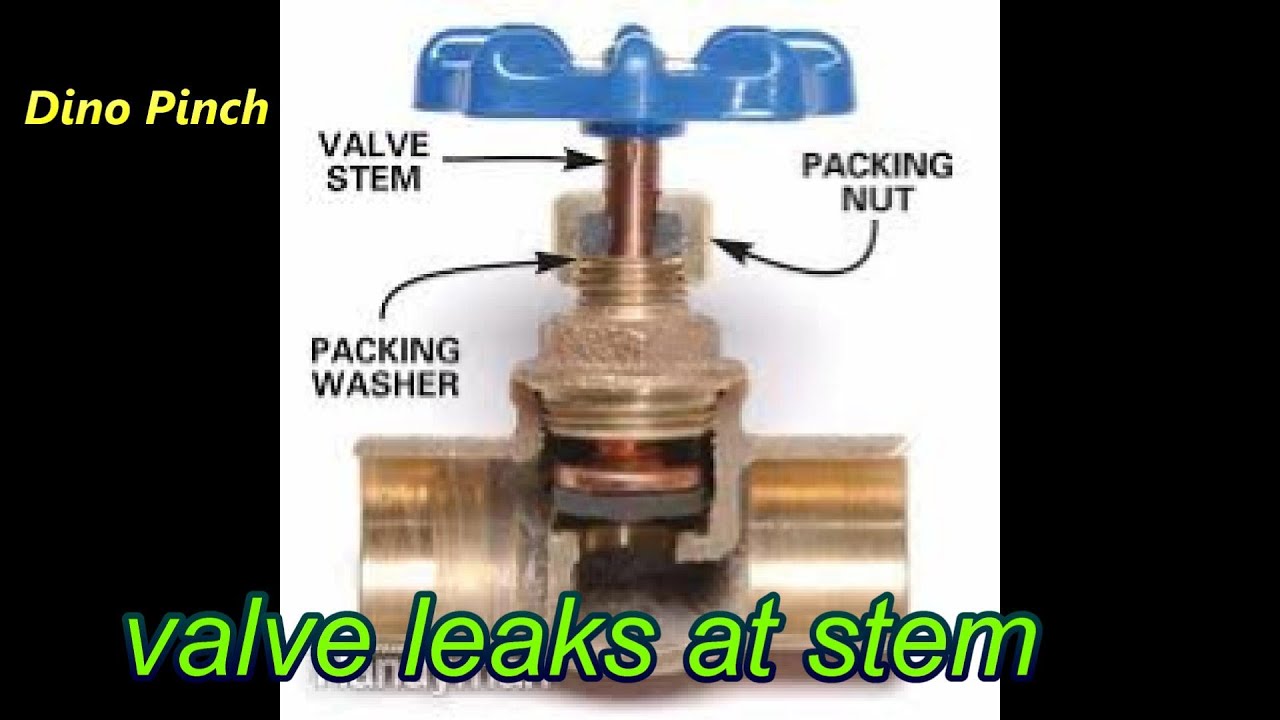
The packing washer, sometimes called packing gland or valve packing, is a pliable material compressed around the stem of a valve to create a watertight or airtight seal. In HVAC systems, these valves are strategically placed to isolate sections of piping for maintenance, repair, or emergencies. Think of them as the gatekeepers of your system, allowing you to control the flow of refrigerant, water, or other fluids.
Over time, packing washers can degrade due to wear and tear, temperature fluctuations, chemical exposure (especially with some refrigerants), and simple aging. A worn-out packing washer leads to leaks. These leaks, even small ones, can have significant consequences:
- Reduced System Efficiency: Leaking refrigerant directly impacts the cooling capacity of your air conditioner or heat pump, forcing the system to work harder and consume more energy. For example, a refrigerant leak of just 10% can decrease cooling efficiency by as much as 20%. Similarly, water leaks in hydronic heating systems reduce efficiency and can lead to corrosion.
- Increased Energy Bills: As your HVAC system struggles to compensate for leaks, your energy consumption increases, resulting in higher utility bills. This is a prime example of how a small, inexpensive component can have a large impact on your wallet.
- Equipment Damage: Leaks can cause corrosion of surrounding components, leading to more extensive and costly repairs. For instance, a water leak near electrical components could cause short circuits and system failures.
- Environmental Concerns: Refrigerant leaks contribute to ozone depletion and global warming. Proper maintenance and repair of valves help minimize your environmental footprint.
- Water Damage: Leaking water can cause significant damage to floors, walls, and ceilings, leading to expensive remediation efforts.
Types of Packing Washers Used in HVAC Systems
Several materials are used to manufacture packing washers, each with its own advantages and disadvantages. Choosing the right material for your specific application is crucial for optimal performance and longevity.
- Graphite: Graphite packing is known for its excellent chemical resistance and high-temperature stability. It's commonly used in steam systems and other high-temperature applications. Graphite packing can withstand temperatures up to 850°F (454°C) in some cases.
- PTFE (Teflon): PTFE packing offers exceptional chemical resistance and a low coefficient of friction. It's often used with corrosive fluids and in applications where low friction is desired. PTFE packing is also suitable for a wide range of temperatures, typically from -400°F to 500°F (-240°C to 260°C).
- Rubber: Rubber packing washers, often made from materials like Buna-N or EPDM, are commonly used in water systems. They provide a good seal and are relatively inexpensive. However, they may not be suitable for high-temperature or chemically aggressive environments.
- Fiber: Fiber packing, often made from materials like flax or cotton, is an older type of packing that is still used in some applications. It's relatively inexpensive but may not be as durable or chemical-resistant as other options.
- Synthetic Fiber: Aramid fibers are often used in modern valve packing, known for high strength and chemical inertness.
- Combination Packings: Some packing sets use a combination of materials to optimize performance. For example, a set might include a graphite ring for high-temperature resistance and a PTFE ring for chemical resistance.
Identifying a Leaking Packing Washer
Detecting a leaking packing washer early can prevent more serious problems. Here are some signs to watch out for:
- Visible Leaks: The most obvious sign is visible water or refrigerant dripping from the valve stem area.
- Wetness or Corrosion: Look for signs of wetness, staining, or corrosion around the valve stem.
- Reduced System Performance: If your HVAC system is not performing as efficiently as it should, a leaking valve could be the culprit.
- Hissing Sound: A hissing sound near a valve can indicate a refrigerant leak.
- Unusual Odors: Some refrigerants have a distinct odor that can be detected near a leak.
Replacing a Packing Washer: A Step-by-Step Guide
Replacing a packing washer is a relatively straightforward task that most homeowners can handle with the right tools and knowledge. However, if you are not comfortable working with plumbing or HVAC systems, it's best to call a qualified technician.
Tools and Materials Needed:
- New packing washer (ensure it is compatible with the fluid and temperature of your system)
- Adjustable wrench
- Packing extractor tool (optional, but helpful)
- Pick or small screwdriver
- Clean rags
- Safety glasses
- Gloves
Procedure:
- Isolate the Valve: The most important first step. Close the shut-off valves upstream and downstream of the valve you are working on. This will isolate the section of pipe and prevent fluid from flowing.
- Relieve Pressure: Carefully relieve any pressure in the isolated section of pipe by opening a drain valve or bleeder valve. This will prevent fluid from spraying out when you remove the packing nut.
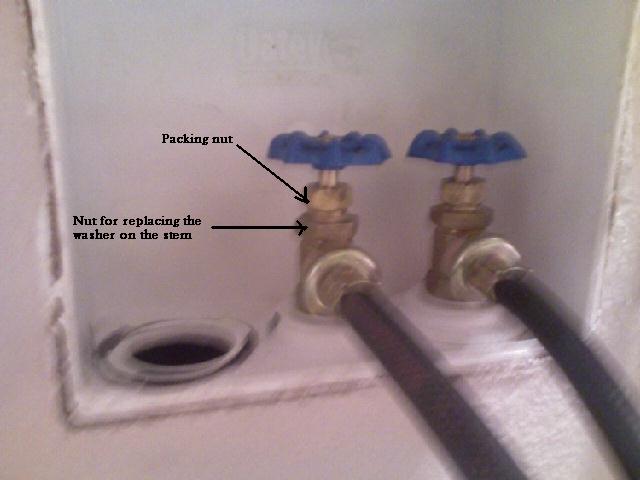
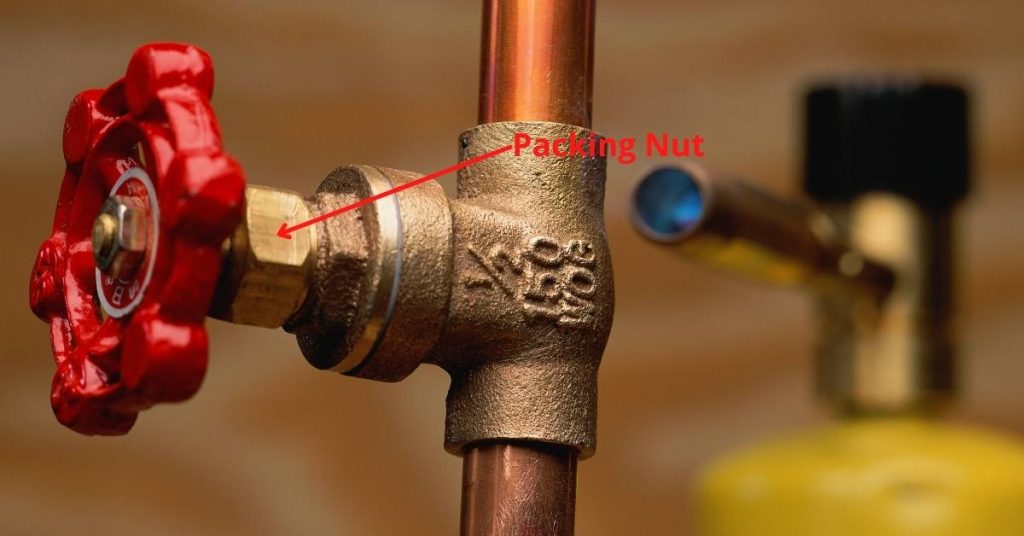
- Loosen the Packing Nut: Using an adjustable wrench, carefully loosen the packing nut (the nut that compresses the packing washer around the valve stem). Do not remove the nut completely at this stage.
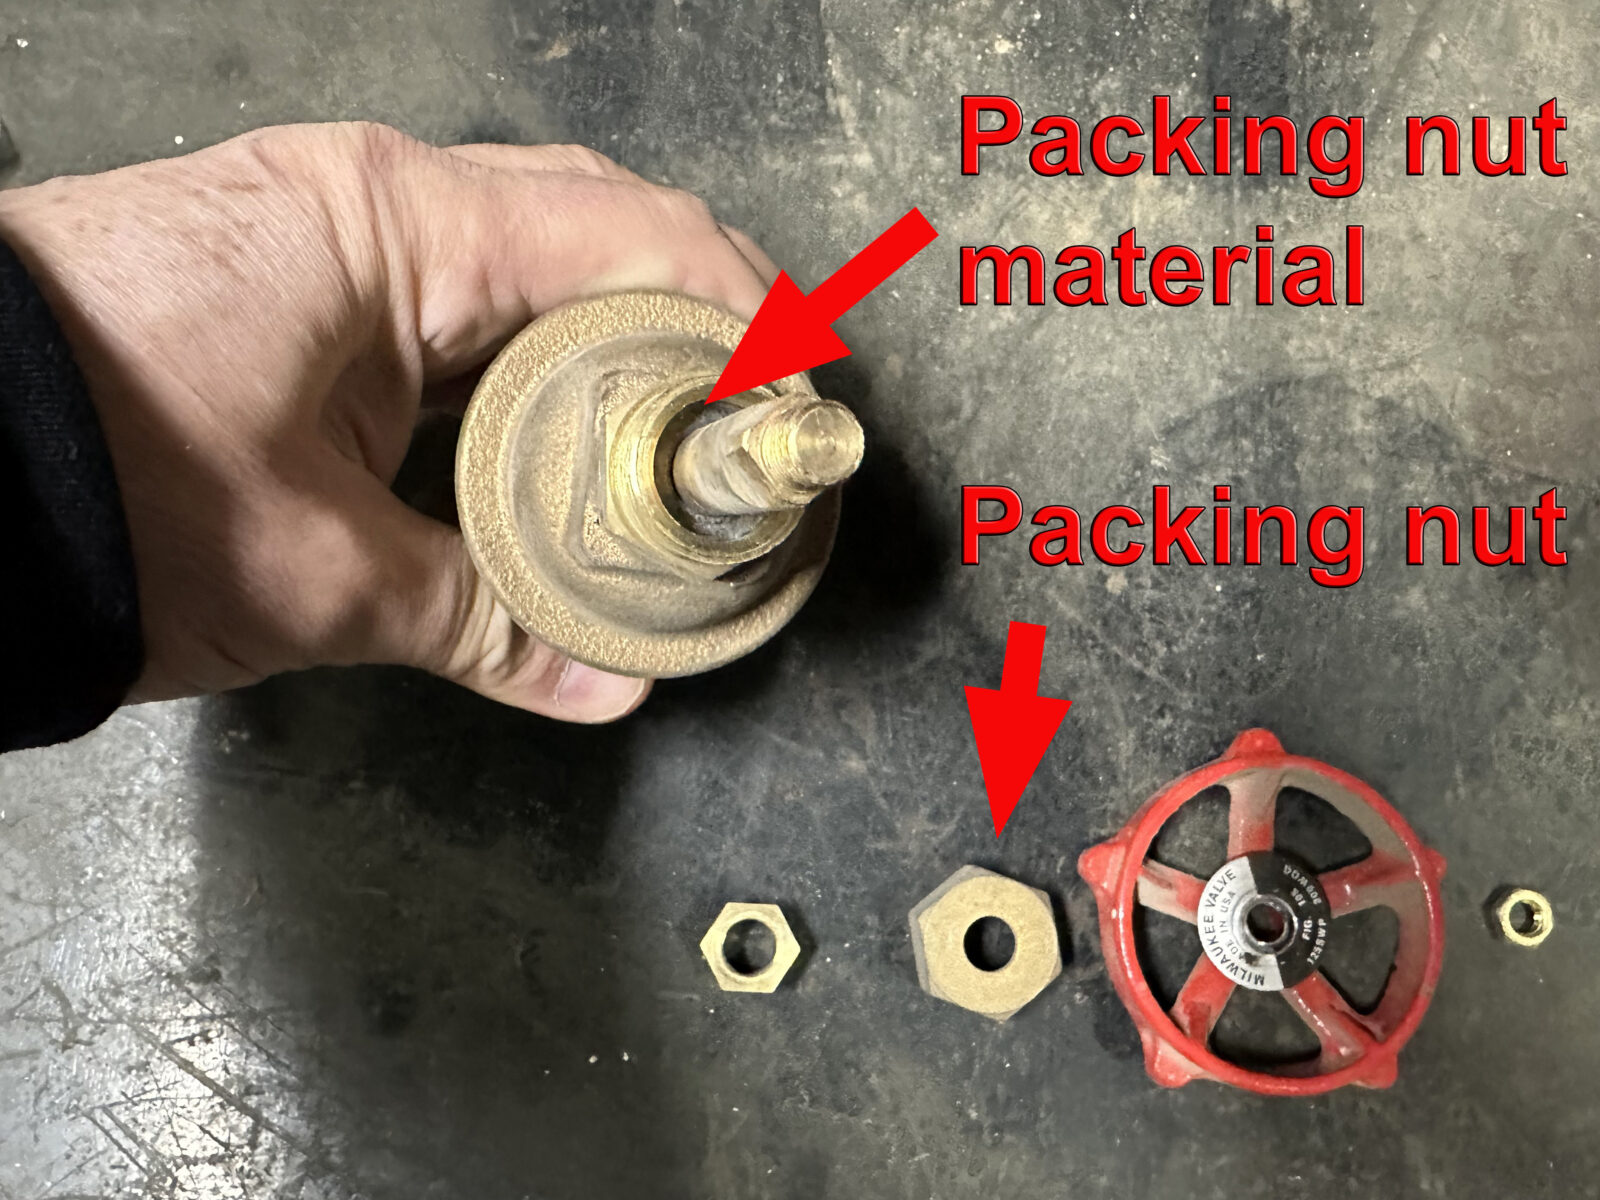
- Remove the Old Packing Washer: Use a packing extractor tool, pick, or small screwdriver to carefully remove the old packing washer. You may need to use a twisting motion to dislodge it. Be careful not to scratch or damage the valve stem. If the old packing is hardened and difficult to remove, you can try soaking it with a penetrating oil for a few minutes.
- Clean the Valve Stem and Packing Area: Use a clean rag to thoroughly clean the valve stem and the area where the packing washer sits. Remove any debris or corrosion.
- Install the New Packing Washer: Place the new packing washer around the valve stem and into the packing area. Ensure it is properly seated. If using multiple packing rings, stagger the joints between each ring by 90 or 120 degrees.
- Tighten the Packing Nut: Carefully tighten the packing nut using an adjustable wrench. Do not overtighten, as this can damage the valve stem or packing washer. Tighten it just enough to compress the packing washer and create a seal.
- Restore Pressure and Check for Leaks: Slowly open the upstream and downstream shut-off valves to restore pressure to the system. Carefully inspect the valve stem area for leaks. If you see any leaks, tighten the packing nut slightly more. Avoid overtightening.
- Monitor the Valve: After replacing the packing washer, monitor the valve for any signs of leaks. It may take a few cycles for the packing to fully seat and seal properly.
Troubleshooting Packing Washer Issues
Even with proper installation, packing washer issues can sometimes occur. Here are some common problems and their solutions:
- Leaking After Replacement: If the valve continues to leak after replacing the packing washer, the packing nut may not be tight enough. Try tightening it slightly more. Ensure the packing washer is the correct size and material for the application.
- Packing Nut Too Tight: Overtightening the packing nut can damage the valve stem or packing washer, leading to leaks. If you overtightened the nut, loosen it slightly and try again.
- Damaged Valve Stem: A scratched or corroded valve stem can prevent the packing washer from sealing properly. In this case, the valve may need to be repaired or replaced.
- Incorrect Packing Material: Using the wrong type of packing washer can lead to premature failure. Ensure you are using a packing washer that is compatible with the fluid and temperature of your system.
Preventative Maintenance for Valve Packing
Regular inspection and maintenance can extend the lifespan of your valve packing and prevent costly leaks. Here are some tips:
- Regular Inspections: Periodically inspect valves for signs of leaks, corrosion, or damage.
- Lubrication: Apply a small amount of lubricant to the valve stem to reduce friction and wear. Use a lubricant that is compatible with the packing material and the fluid in the system.
- Proper Valve Operation: Avoid over-tightening or forcing valves. Operate them smoothly and gently.
- Repack Valves as Needed: Replace packing washers preventatively, especially in critical applications or where valves are frequently used.
When to Call a Professional
While replacing a packing washer is a relatively simple task, there are times when it's best to call a qualified HVAC technician:
- You are not comfortable working with plumbing or HVAC systems.
- You are dealing with a refrigerant leak. Refrigerant leaks require specialized equipment and knowledge to repair safely and effectively.
- The valve is difficult to access or located in a hazardous area.
- You suspect the valve is damaged or corroded.
- You are unsure about the correct type of packing washer to use.
By understanding the function, types, and replacement process of packing washers, you can proactively maintain your HVAC system, prevent costly leaks, and ensure optimal performance. Remember, a small investment in maintenance can save you significant money and headaches in the long run.