Problems With Richmond Water Heaters
A cold shower on a chilly morning is a surefire way to ruin your day. Water heaters, like all appliances, are prone to occasional hiccups. Understanding how to troubleshoot common problems with your Richmond water heater can save you time, money, and the frustration of enduring icy water. This guide provides a step-by-step approach to diagnosing and resolving minor issues, while also emphasizing when to call in a qualified professional.
Safety First!
Before attempting any troubleshooting, prioritize your safety. Always turn off the power supply to the water heater at the circuit breaker before working on any electrical components. If you have a gas water heater, shut off the gas supply valve. Exercise extreme caution when working with hot water and around gas or electricity.
Common Richmond Water Heater Problems & Solutions
1. No Hot Water
This is perhaps the most common and frustrating water heater problem. Here’s how to tackle it:
Step 1: Check the Circuit Breaker (Electric Water Heaters)
The first and easiest step is to check the circuit breaker. A tripped breaker is a common cause of no hot water.
- Action: Locate the circuit breaker dedicated to your water heater in your home's electrical panel.
- Diagnosis: Look for a breaker that is in the "off" or "tripped" position (often halfway between "on" and "off").
- Solution: Flip the breaker to the "off" position completely, and then back to the "on" position.
- Test: Wait 30 minutes to an hour for the water to heat up and check if the problem is resolved.
- Professional Help: If the breaker trips again immediately or shortly after resetting, there may be a short circuit in the water heater's wiring or a faulty heating element. Do not repeatedly reset the breaker. Contact a qualified electrician.
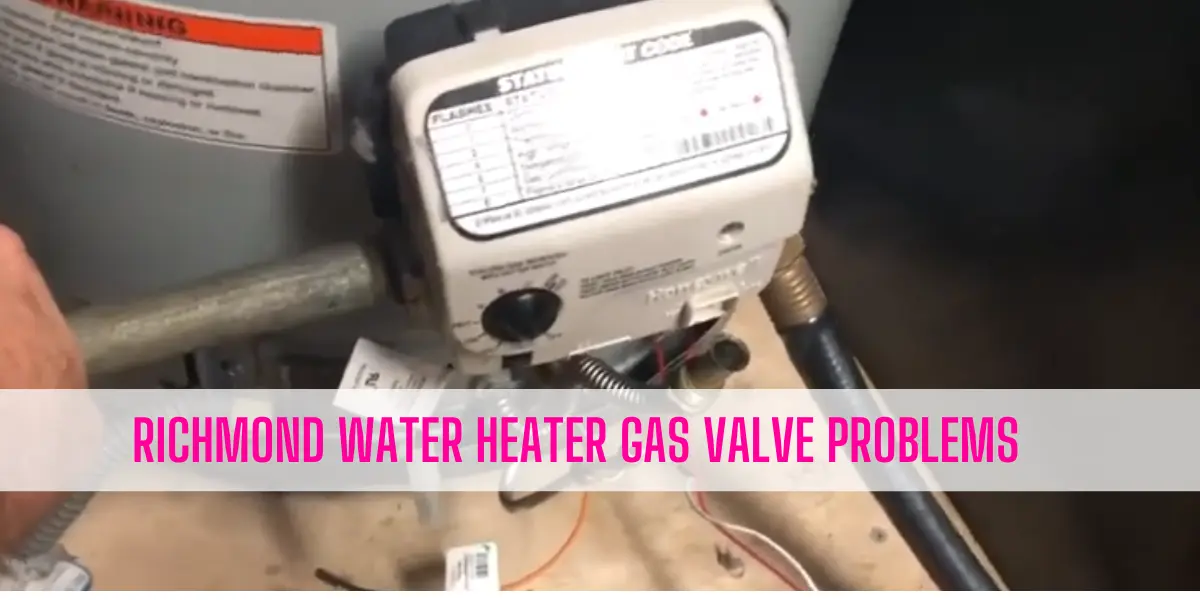
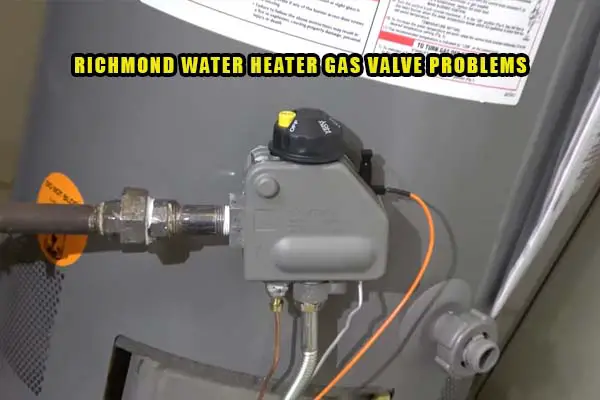
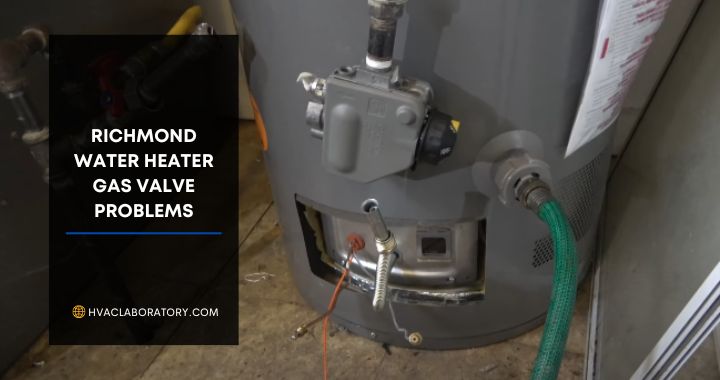
Step 2: Check the Gas Supply (Gas Water Heaters)
For gas water heaters, ensure the gas supply is turned on.
- Action: Locate the gas shut-off valve on the gas supply line leading to the water heater.
- Diagnosis: Ensure the valve is in the "on" position (usually parallel to the gas pipe).
- Solution: If the valve was off, turn it on.
- Relighting the Pilot Light: If the pilot light is out, follow the manufacturer's instructions (usually found on a sticker on the water heater) to relight it. Never attempt to relight the pilot light if you smell gas.
- Professional Help: If you smell gas, leave the area immediately and contact your gas company or a qualified HVAC technician. If the pilot light repeatedly goes out, there may be a problem with the thermocouple or gas valve, requiring professional repair.
Step 3: Check the Thermostat Settings
Verify that the water heater thermostat is set to an appropriate temperature (typically between 120-140°F or 49-60°C). Lower settings may result in insufficient hot water.
- Action: Locate the thermostat(s) on the water heater (usually behind access panels).
- Diagnosis: Ensure the thermostat is set to a reasonable temperature.
- Solution: Adjust the thermostat to your desired temperature.
- Professional Help: If you suspect a faulty thermostat, it's best to have it checked and replaced by a qualified technician. Incorrect thermostat settings can lead to scalding or wasted energy.
Step 4: Heating Element Issues (Electric Water Heaters)
Electric water heaters typically have two heating elements. If one fails, you may experience reduced hot water or no hot water at all.
- Diagnosis: Testing heating elements requires a multimeter and knowledge of electrical safety. This step is best left to a qualified electrician.
- Professional Help: A professional can safely test the heating elements for continuity and resistance. If a heating element is faulty, it will need to be replaced.
2. Leaking Water Heater
A leaking water heater can indicate a serious problem and should be addressed promptly to prevent water damage.
Step 1: Identify the Source of the Leak
Determine where the leak is coming from. Common leak locations include:
- The top of the tank: This could indicate a leaking inlet or outlet pipe connection.
- The bottom of the tank: This often suggests corrosion and tank failure.
- The pressure relief valve: Occasional dripping from the pressure relief valve is normal, but constant leaking indicates a problem.
- The drain valve: A leaky drain valve may simply need tightening.
Step 2: Tighten Connections (Top of Tank)
If the leak is coming from a pipe connection at the top of the tank, try tightening the connections.
- Action: Turn off the water supply to the water heater.
- Solution: Using a wrench, carefully tighten the fittings at the leaking connection. Do not overtighten, as this can damage the pipes.
- Test: Turn the water supply back on and check for leaks. If the leak persists, you may need to replace the pipe fittings or call a plumber.
Step 3: Address Pressure Relief Valve Leaks
The pressure relief valve is designed to release excess pressure in the tank. Occasional drips are normal, especially during heating cycles. However, continuous leaking indicates a problem.
- Possible Cause: Excessive water pressure in your home's plumbing system.
- Solution: Have a plumber check your home's water pressure and install a pressure reducing valve if necessary.
- Possible Cause: Faulty pressure relief valve.
- Action: Carefully lift the lever on the pressure relief valve to flush out any sediment. Be extremely cautious as hot water will be released.
- Professional Help: If the valve continues to leak after flushing, it likely needs to be replaced. This is a relatively simple repair but requires careful handling of plumbing connections. Consider hiring a plumber if you're not comfortable with plumbing work.
Step 4: Drain Valve Leak
A leaky drain valve can often be resolved by tightening it.
- Action: Carefully tighten the drain valve using a wrench.
- Solution: If tightening doesn't stop the leak, you may need to replace the drain valve. This involves draining the water heater and replacing the valve, which can be a messy job.
Step 5: Tank Failure (Bottom of Tank)
If the leak is coming from the bottom of the tank, it's a sign of corrosion and tank failure. Unfortunately, there is no repair for this.
- Action: Turn off the water supply and the power/gas to the water heater.
- Solution: You will need to replace the entire water heater. Contact a plumber for professional installation.
3. Noisy Water Heater
Unusual noises coming from your water heater can be unsettling. Common noises and their potential causes include:
Step 1: Rumbling or Banging Noises
This is usually caused by sediment buildup in the bottom of the tank. As the water heats, the sediment can create steam bubbles that collapse, causing a rumbling or banging sound.
- Solution: Flushing the water heater to remove sediment can often resolve this issue.
- Action: Turn off the power/gas to the water heater and let the water cool down completely.
- Procedure: Connect a garden hose to the drain valve at the bottom of the tank. Run the hose to a safe drainage area (e.g., a floor drain or outside). Open the drain valve and let the water drain until it runs clear. Be cautious of hot water initially.
- Professional Help: If the rumbling persists after flushing, the sediment buildup may be severe, requiring professional cleaning or replacement of the water heater.
Step 2: Whistling Noise
A whistling noise can be caused by a partially closed valve or restriction in the water supply lines.
- Action: Check the inlet and outlet valves on the water heater to ensure they are fully open.
- Solution: Inspect the water supply lines for any kinks or obstructions.
- Professional Help: If the whistling persists, a plumber can diagnose and repair any issues within the plumbing system.
Step 3: Sizzling Noise (Electric Water Heaters)
A sizzling noise from an electric water heater could indicate a heating element that is partially exposed due to sediment buildup or corrosion.
- Professional Help: Turn off the power to the water heater immediately and contact a qualified electrician to inspect and replace the heating element if necessary. This is a dangerous situation and should not be attempted by inexperienced individuals.
4. Smelly Water
Foul-smelling water, often described as a rotten egg odor, is usually caused by bacteria growth in the water heater tank.
Step 1: Flush the Water Heater
Flushing the water heater can help remove some of the bacteria and sediment that contribute to the odor.
- Action: Follow the same flushing procedure as described in the "Rumbling or Banging Noises" section.
Step 2: Chlorinate the Water Heater
Chlorinating the water heater can kill the bacteria causing the odor.
- Caution: This procedure involves using bleach and should be done with care.
- Action: Turn off the power/gas to the water heater and let the water cool down completely.
- Procedure: Mix approximately one cup of bleach per 40 gallons of tank capacity with water. Pour the solution into the water heater tank through the pressure relief valve opening.
- Wait: Let the solution sit in the tank for several hours (ideally overnight).
- Flush: Flush the water heater thoroughly until the bleach odor is gone.
- Professional Help: If the odor persists after chlorination, it may indicate a more serious problem with your water supply or the water heater itself. Consider contacting a water quality specialist or a plumber.
When to Call a Professional
While this guide provides basic troubleshooting steps, certain problems require the expertise of a qualified professional. Never hesitate to call a plumber or electrician if you are uncomfortable or unsure about any repair.
Call a Professional If:
- You are uncomfortable working with electricity or gas.
- The problem involves complex components like the gas valve, thermocouple, or circuit board.
- You suspect a gas leak.
- You are unable to identify the source of the problem.
- The problem persists after attempting the troubleshooting steps outlined in this guide.
- You suspect tank failure.
Preventative Maintenance
Regular maintenance can help prevent many water heater problems and extend the lifespan of your unit.
- Flush the water heater annually to remove sediment buildup.
- Inspect the pressure relief valve periodically to ensure it is functioning correctly.
- Check the anode rod (sacrificial rod) every few years and replace it when necessary. The anode rod protects the tank from corrosion. This job is best left to a professional plumber.
- Maintain a consistent thermostat setting to avoid excessive heating and energy waste.
By following these troubleshooting steps and preventative maintenance tips, you can keep your Richmond water heater running smoothly and enjoy years of reliable hot water.